Host your ASP.NET Application on the Azure VM and Make it publicly accessible

Sathish Nadarajan
 
Solution Architect
July 4, 2017
 
Rate this article
 
Views
3101

In one of the Earlier Article, we saw how to create an Azure Virtual Machine from the Azure Subscription. As a continuation, let us see, how to host a ASP.Net Application on that VM and access it from the Internet.

The basic steps are as follows.

1. Create the VM – Refer the Article

2. Assign a Public IP to it on the Azure Portal.

3. Purchase a Domain Name.

4. Assign the domain Name to the VM which we created.

5. Add the Network Security Group IPs.

6. Configure the IIS

7. Host the APP with HTTPS.

8. Access it from the internet.

Let us see, the above steps in detail.

1. Create the VM – Already we saw this.

2. Assign a Public IP to the VM

a. Login to the Azure Portal

b. As soon as you create a new VM, a set or resource groups will be created.

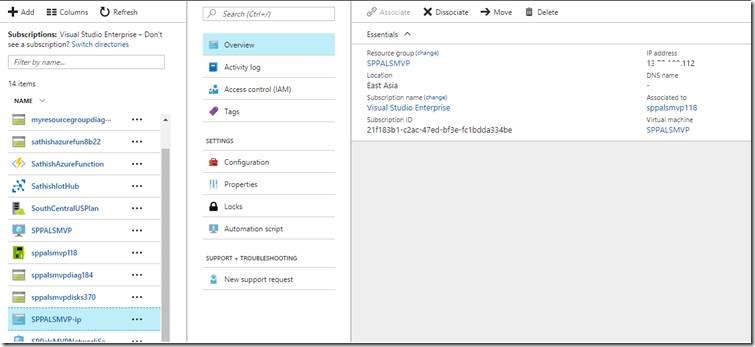
c. Select the Network Interface from the “All Resources”

clip_image002

d. The Properties screen will be as below.

clip_image004

e. Make sure that, the same IP is Associated with the VM.

clip_image006

3. Purchase the domain name.

a. We can purchase the domain from any vendor. In my case, I used namecheap.com.

clip_image008

4. Assign that domain to the VM. This is a separate topic, let us discuss about this in future articles.

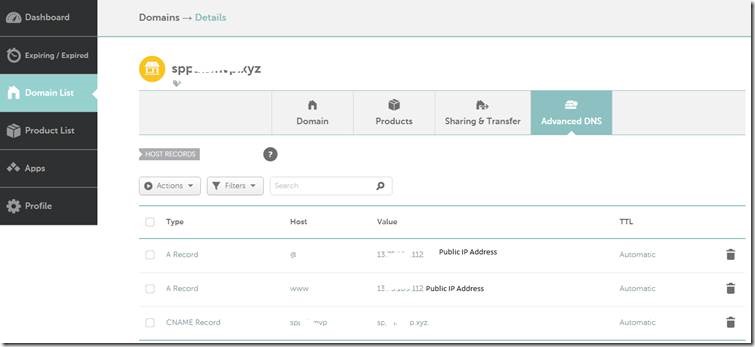
5. In the Namecheap.com, add the IP Address (the public IP, which we mentioned on the above steps) as the DNS Entries.

clip_image010

6. Wait for a day. This DNS entries will not be reflected immediately.

7. Add the Network Security Group – Inbound Security Rules in the Azure VM

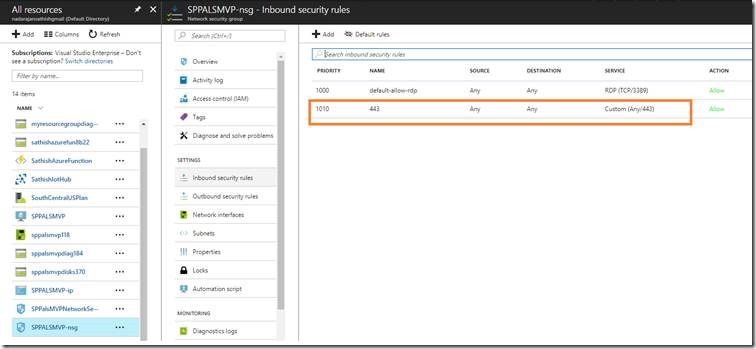
a. By default, the RDP entry will be there. We need to Add one more entry for the 443 port. (In which, we are going to host our ASP.Net web site)

clip_image012

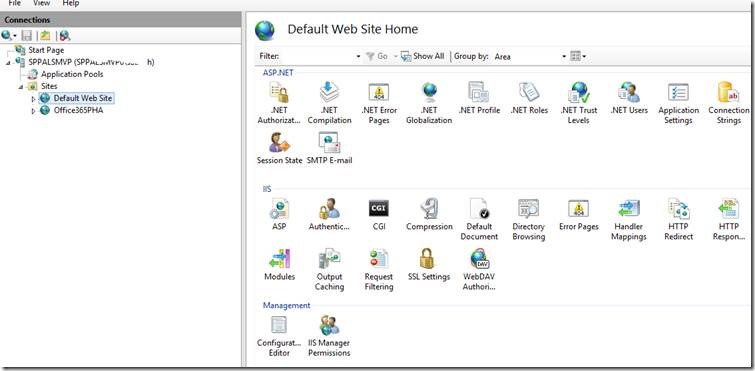
8. Now, on the IIS, let us create a Web Application. It is always better to use the Default Web Site and create the Virtual Directories under that main web site.

clip_image014

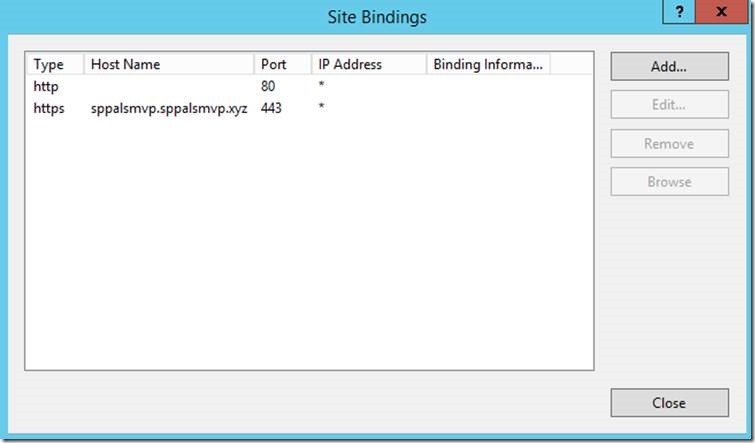
9. Make sure that, we have a proper Certificate and a binding as below.

clip_image016

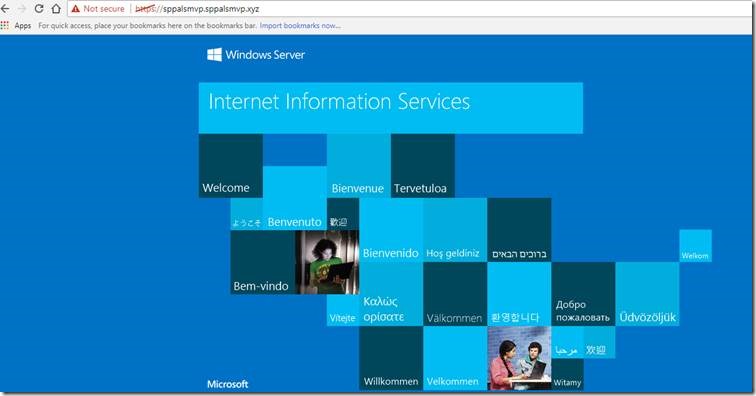
10. Now, try accessing the site using the url https://sppalsmvp.sppalsmvp.xyz.

11. The site loads as below.

clip_image018

Happy Coding,

Sathish Nadarajan.
Author Info

Sathish Nadarajan
 
Solution Architect
 
Rate this article
 
Sathish is a Microsoft MVP for SharePoint (Office Servers and Services) having 15+ years of experience in Microsoft Technologies. He holds a Masters Degree in Computer Aided Design and Business ...read more
 

How to protect Application from Cross Site Request Forgery Attacks in MVC

Tarun Kumar Chatterjee
 
Net – Technology Specialist
May 16, 2016
 
Rate this article
 
Views
6875

All web application platforms are potentially vulnerable to CSRF (Cross-Site Request Forgery) attacks. The best way to prevent this attack in MVC application is to use Anti-Forgery token.

Consider a website "www.test1.com" contains an action method DeleteUser in User Controller. When a web request comes from a client, the controller fetches the user id from session and deletes the user from database. Consider one hacker created a site "www.test2.com" and it contains one button ‘Latest Deals’. The button click event calls the "www.test1.com/User/DeleteAccount". A user is logged in "www.test1.com" and he is visiting "www.test2.com" using the same browser with another tab. When he clicking the ‘Latest Deals’ button, his account will delete from the test1 database. To avoid these types of unwanted requests from other sites, MVC application developers use Anti-Forgery Token.

Anti-Forgery Token is mainly used in form POST actions to verify the source of the POST data. In this method, for each page request, the web server sends a cookie to the client browser. While posting the data or next request time, the web server uses this cookie for client authentication. If the request is coming from an unauthorized site, the cookie will be null or invalid. By adding [ValidateAntiForgeryToken] above the controller and @Html.AntiForgeryToken() in the view page, we can prevent cross site requests forgery.

In the HomeController an action method

 [HttpPost]
         public ActionResult Delete(int id, Employee emp)
         {
             try
             {                
                 db.DeleteEmployee(id);                
                 return RedirectToAction("Index");
             }
             catch
             {
                 return View();
             }
         }
 This is my view code 
 @model EntityFrameworkDemo.Models.Employee
 
 @{
     ViewBag.Title = "Delete";
 }
 
 <h2>Delete</h2>
 <h3>Are you sure you want to delete this?</h3>
 <fieldset>
     <legend>Employee</legend>
 
     <div class="display-label">Name</div>
     <div class="display-field">@Model.Name</div>
 
     <div class="display-label">Address</div>
     <div class="display-field">@Model.Address</div>
 </fieldset>
 @using (Html.BeginForm()) {
     <p>
         <input type="submit" value="Delete" /> |
         @Html.ActionLink("Back to List", "Index")
     </p>
 }
 
 
 Created a test HTML having the following code:  
 <h2>Test Delete HTML</h2>
 <h3>Are you sure you want to delete this?</h3>
 <fieldset>
     <legend>Employee</legend>
 
     <div class="display-label">Name</div>
     <div class="display-field">Tarun4</div>
 
     <div class="display-label">Address</div>
     <div class="display-field">Kolkata4</div>
 </fieldset>
 <form action="http://localhost:56445/home/delete/4" method="post">    <p>
          
         <input type="submit" value="Delete" /> |
         
     </p>
 </form>
 

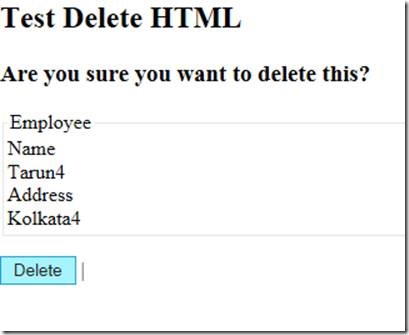
First run the application and then open Test.html, clicking on Delete will call HomeController Delete method and delete the data

clip_image002

To resolve the issue, define [ValidateAntiForgeryToken] on top of controller method

 [HttpPost]
         [ValidateAntiForgeryToken] 
         public ActionResult Delete(int id, Employee emp)
         {
             try
             {                
                 db.DeleteEmployee(id);                
                 return RedirectToAction("Index");
             }
             catch
             {
                 return View();
             }
 
         }


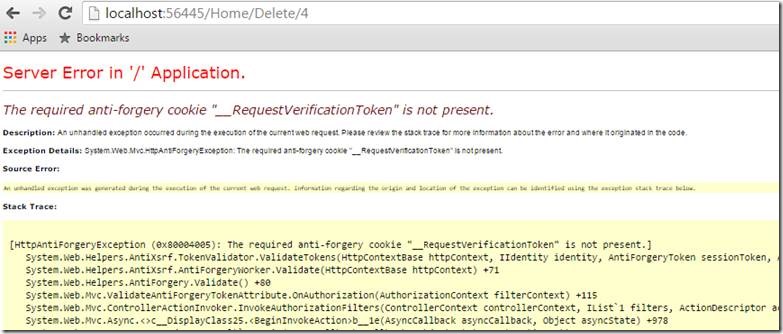
Not defining @Html.AntiForgeryToken()in views it will give you the below error

clip_image004

To resolve the error in the view, we need to change the following:

 @using (Html.BeginForm()) {
     <p>
          @Html.AntiForgeryToken()
         <input type="submit" value="Delete" /> |
         @Html.ActionLink("Back to List", "Index")
     </p>
 }
 

Now rebuild the solution and run

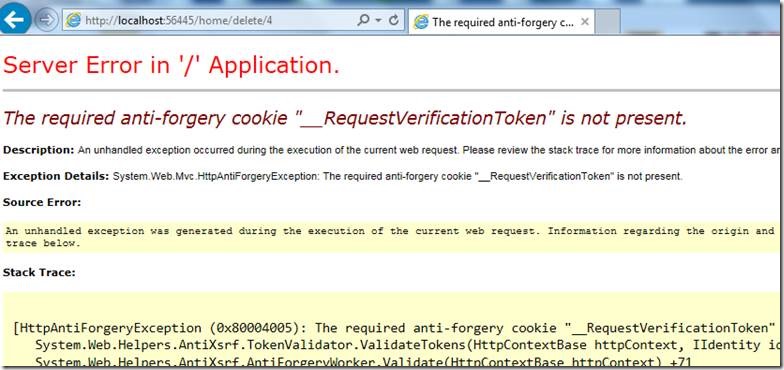
Then run Test.html & click on Delete button it will throw below error

clip_image006

Happy Coding

Tarun Kumar Chatterjee

Category : .Net

Author Info

Tarun Kumar Chatterjee
 
Net – Technology Specialist
 
Rate this article
 
Tarun has been working in IT Industry for over 12+ years. He holds a B-tech degree. He is passionate about learning and sharing the tricks and tips in Azure, .Net ...read more
 

Leave a comment