Step by Step Procedure to Install and Configure SharePoint 2016 in a Dev Box as Single Farm Server

Sathish Nadarajan
 
Solution Architect
February 5, 2018
 
Rate this article
 
Views
2899


I was preparing a Dev Box for the SharePoint 2016 and thought of sharing the same with the community.

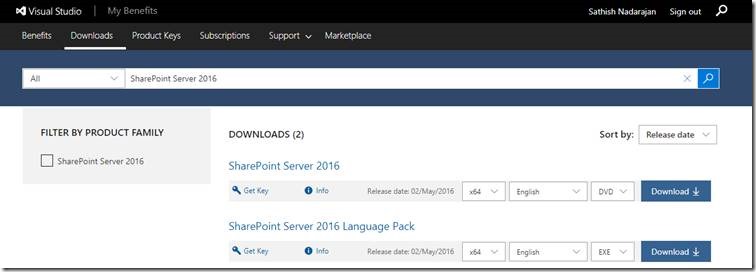
1. We can download and install the SharePoint 2016 from the below link.

https://my.visualstudio.com/Downloads?q=SharePoint%20Server%202016

clip_image002

2. The installer is an EXE/MSI which can be double clicked to start the installation.

3. The installation is straight forward and the required components will be downloaded by the EXE itself. The prerequisites for the SP2016 can be found in the earlier article.

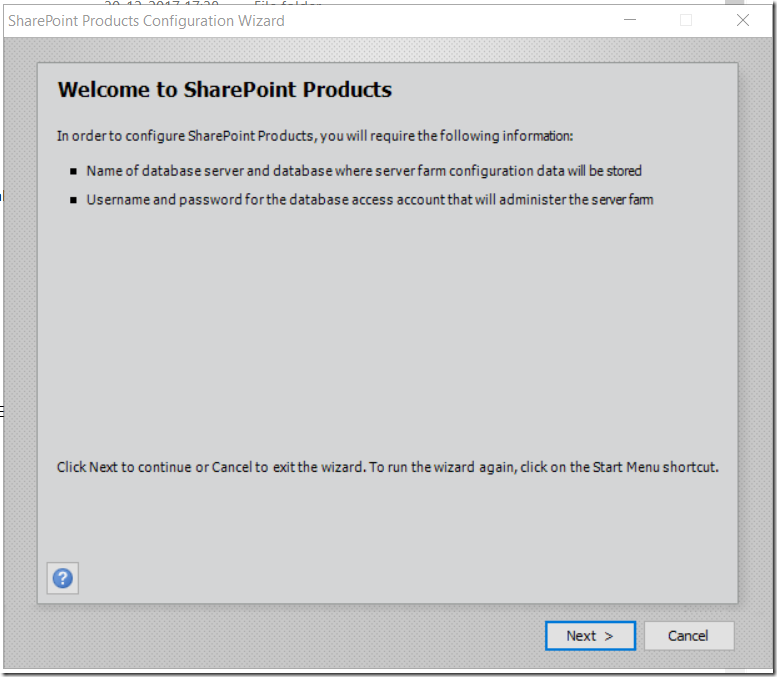
4. Once, the installation completes, start the configuration wizard.

clip_image003

5. Click on Next

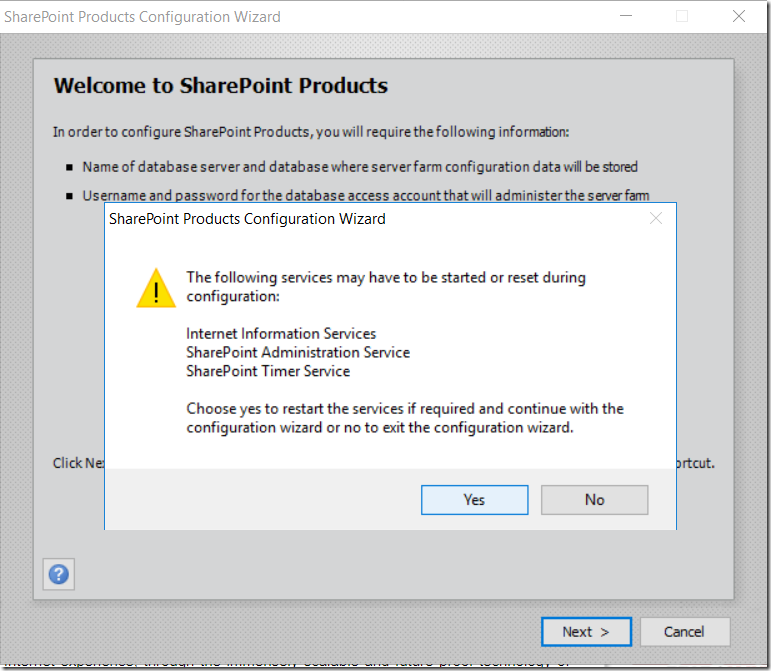
6. Give yes for the required services restart.

clip_image004

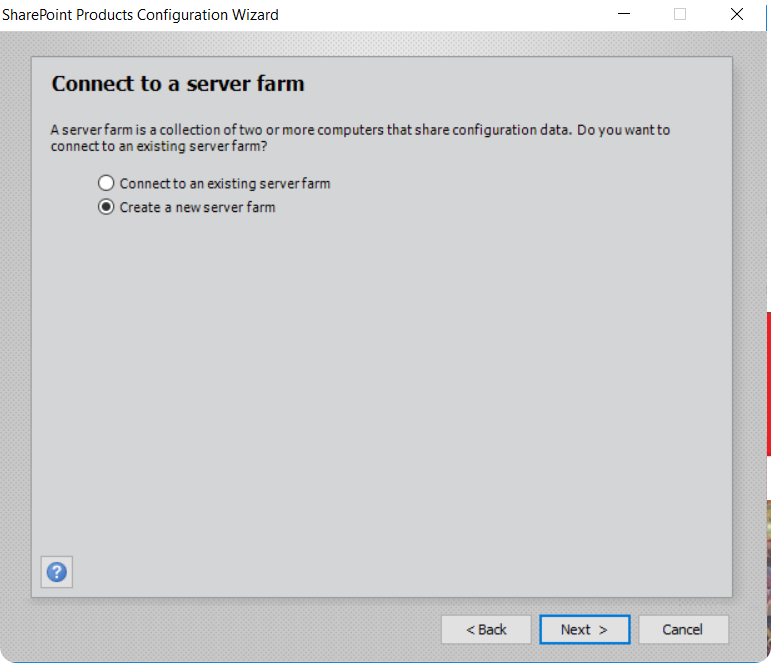
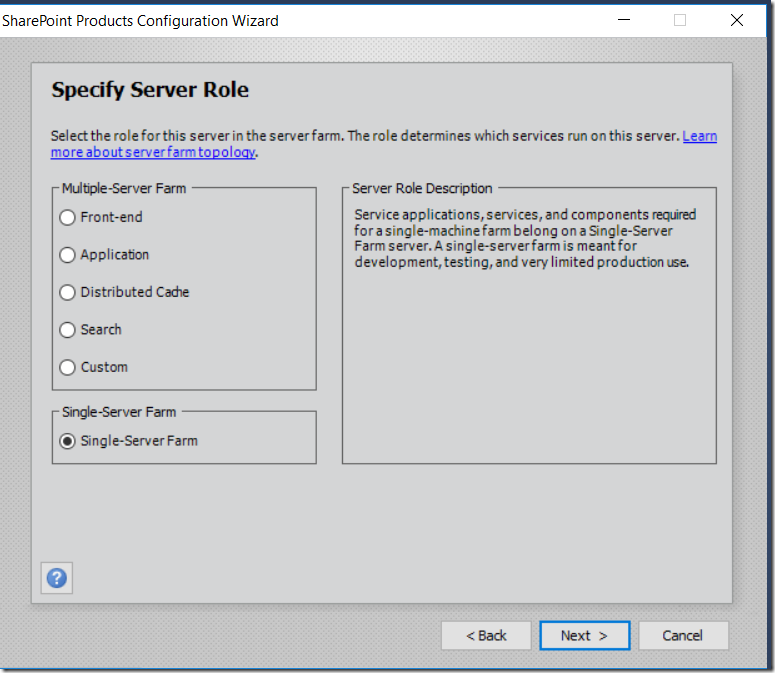
7. Since, I am creating a dev box, let us select the Single Server Farm and click Next.

clip_image005

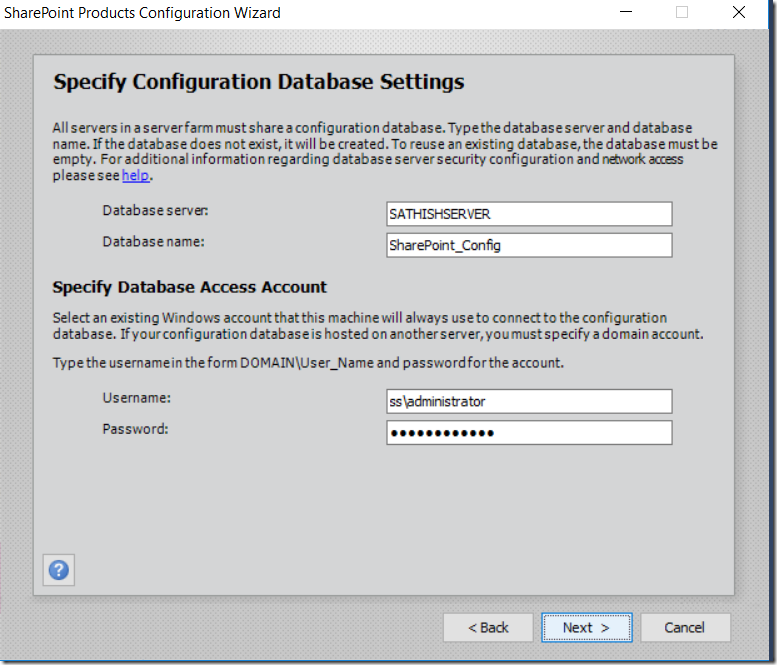
8. Specify the Config Database details.

clip_image006

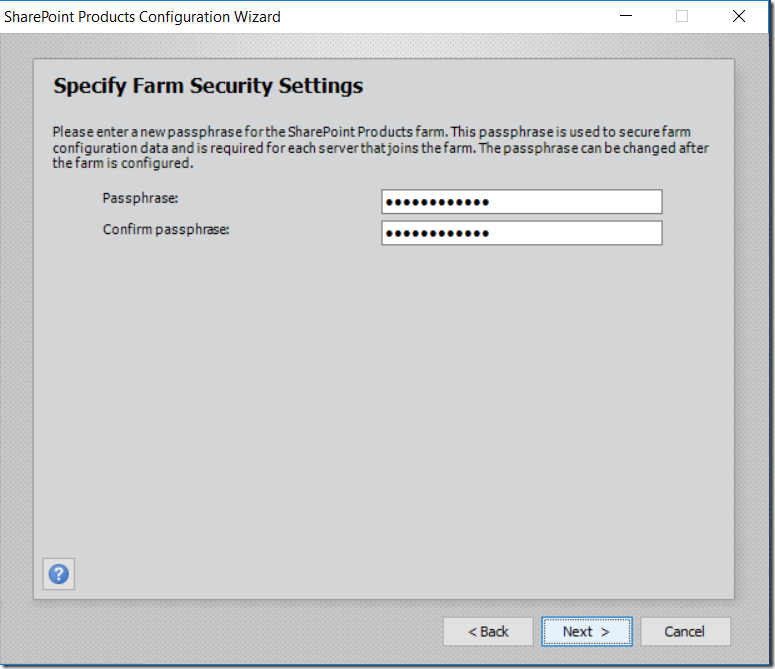
9. Give the Passphrase password.

clip_image007

10. In my case, as it is a single server farm, select it again and click next.

clip_image008

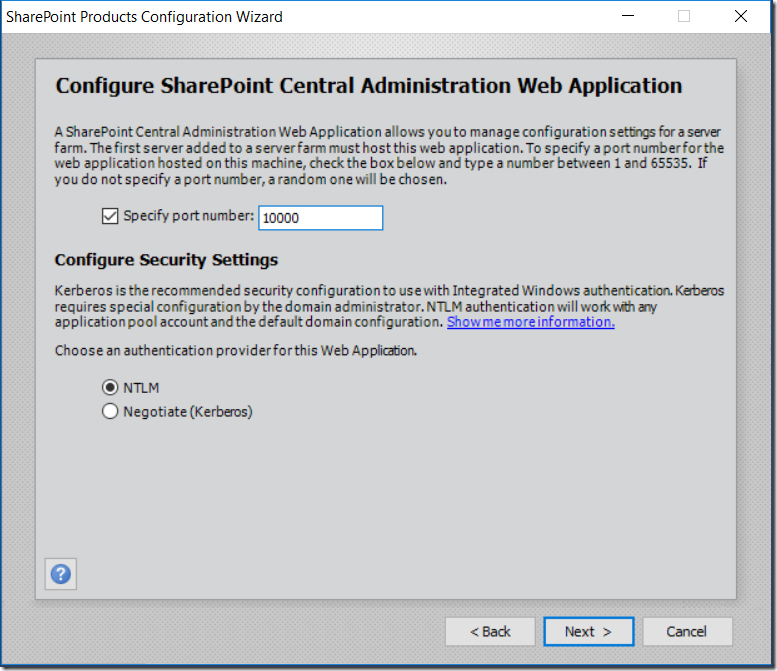
11. Specify the Central Admin Port and Click on Next.

clip_image009

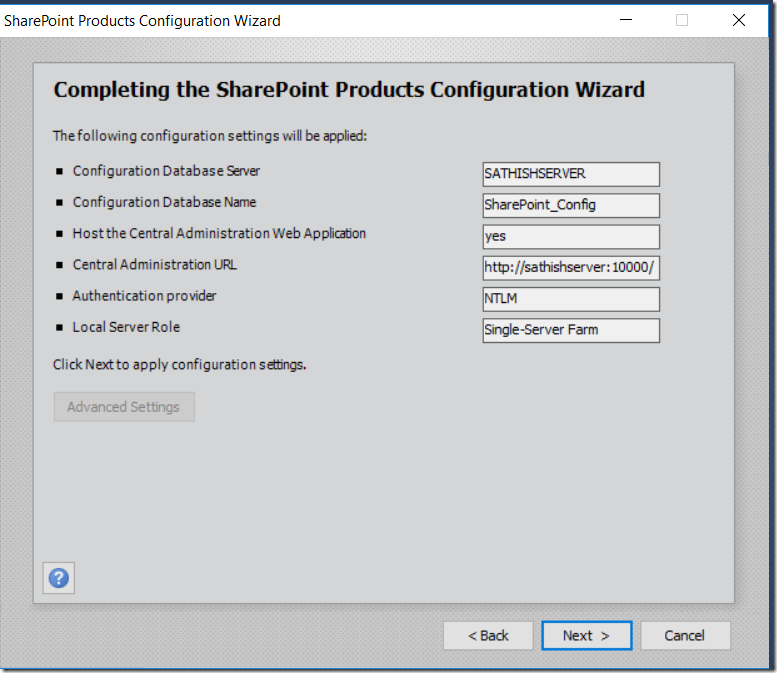
12. Verify the Given information on the below screen.

clip_image010

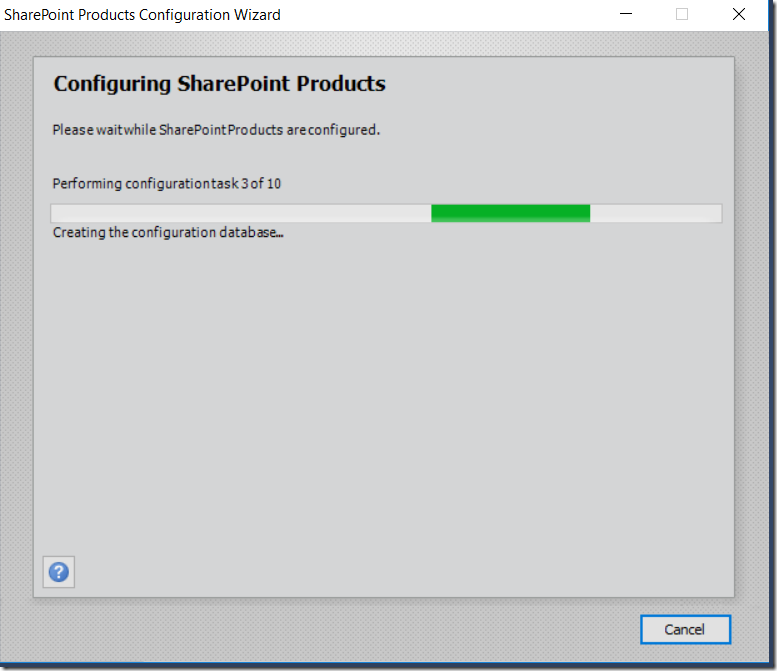
13. Configuration Wizard starts and wait for all the tasks to be completed.

clip_image011

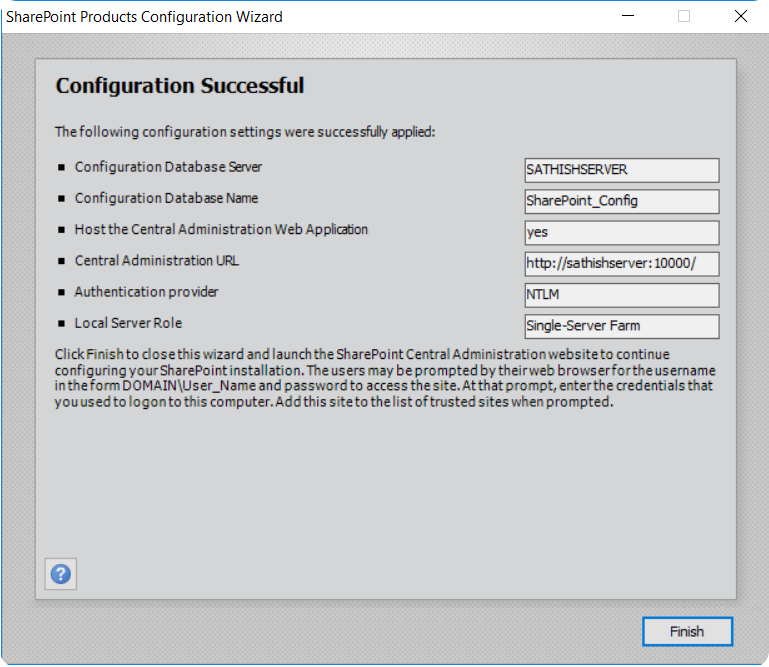
14. Once, the configuration completes, click Finish and launch the Central Admin URL.

clip_image012

Hope this helps. In the upcoming articles, let us see about various service application configurations.

Happy Coding,

Sathish Nadarajan.
Category : SharePoint, Windows

Author Info

Sathish Nadarajan
 
Solution Architect
 
Rate this article
 
Sathish is a Microsoft MVP for SharePoint (Office Servers and Services) having 15+ years of experience in Microsoft Technologies. He holds a Masters Degree in Computer Aided Design and Business ...read more
 

How to debug Windows Service after Installation of Service

Ahamed Fazil Buhari
 
Senior Developer
August 5, 2017
 
Rate this article
 
Views
9188

Hello everyone, in this article we will see how to debug Windows Service after installing that Service. Always debugging a Windows Service Project in Visual Studio is challenging task. Usually most people your logger to keep track on what’s going on inside the service. But still it won’t be that much effective as debugging. In my previous article I explained How to debug Windows Service without installing. Here we can see how to debug after installing. Let’s get started.

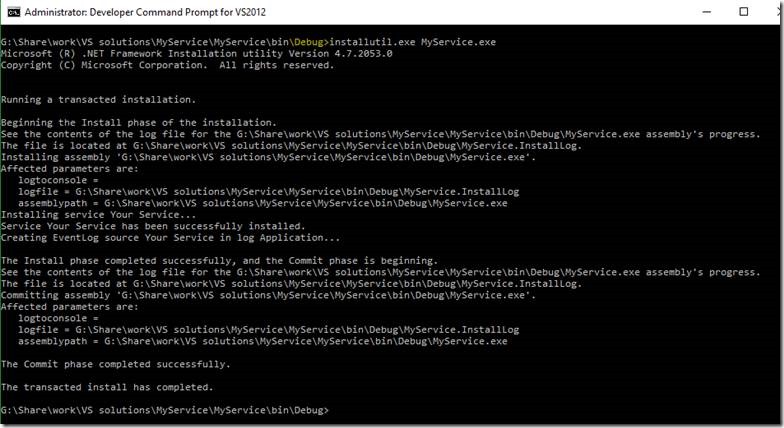
· Install your Windows Service by using below command and make sure you built this solution in Debug mode (not release mode) and install that service. To know more about Windows Service Installation please refer my other article “How to manually install Uninstall Windows Service”

clip_image002

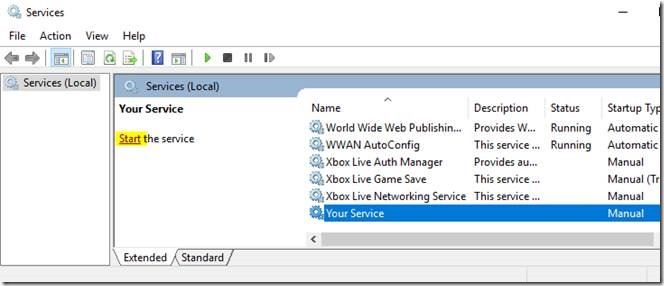
· Once the installation is successful you can find your service in ‘Service Control Manager’ and start your service.

clip_image004

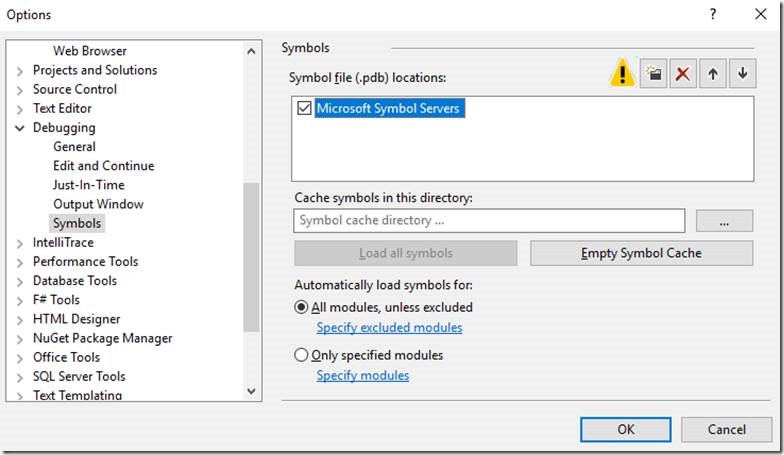
· Open Visual Studio(run as Administrator), then go to Tools -> Options -> Debugging -> Symbols and check Microsoft Symbol Servers (If we are debugging system process and we want to have symbols for system calls then we must add this Microsoft Symbol Servers).

clip_image006

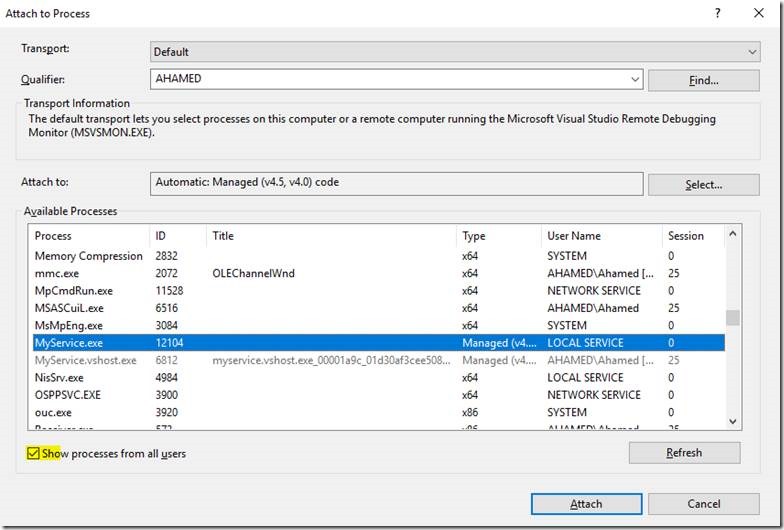
· Click on Ctrl+Alt+P or go to Tools -> Attach to Process… and attach the process (your service name in VS) that you want to debug. Make sure your service is started in Service Control Manager

clip_image008

· Now you are in debug mode. You can debug just like other common visual studio project

clip_image010

Happy Coding

Ahamed

Category : Windows

Author Info

Ahamed Fazil Buhari
 
Senior Developer
 
Rate this article
 
Ahamed is a Senior Developer and he has very good experience in the field of Microsoft Technologies, especially SharePoint, Azure, M365, SPFx, .NET and client side scripting - JavaScript, TypeScript, ...read more
 

Visual Studio Code – The Latest IDE for the Client Side Coding

Sathish Nadarajan
 
Solution Architect
May 8, 2017
 
Rate this article
 
Views
2546

With the Release of SharePoint Framework (SPFX), the Development Pattern itself has been changed. To accommodate the latest development trend, Microsoft has released the light weight version of the Visual Studio called “Visual Studio Code”. It has been released sometime back. But, now with the new client side scripting strategy, this has become the important IDE for the developers. I don’t say that we don’t require Visual Studio anymore. But, for the light weight webparts, Visual Studio Code is fine.

Now, let us see how to install Visual Studio Code.

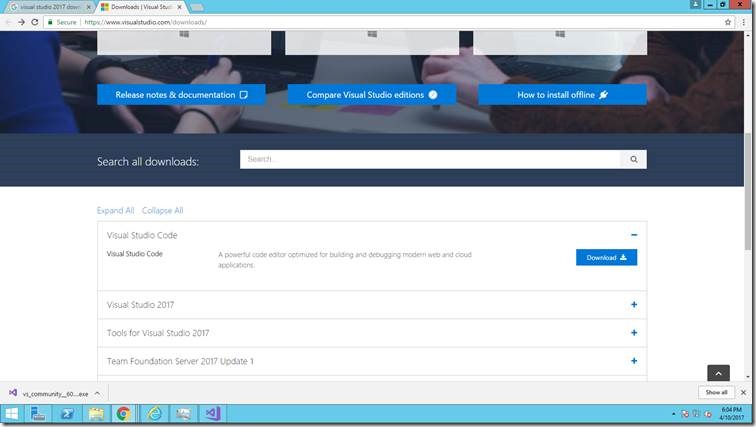
1. Go to the Download Center – https://visualstudio.com/downloads.

clip_image002

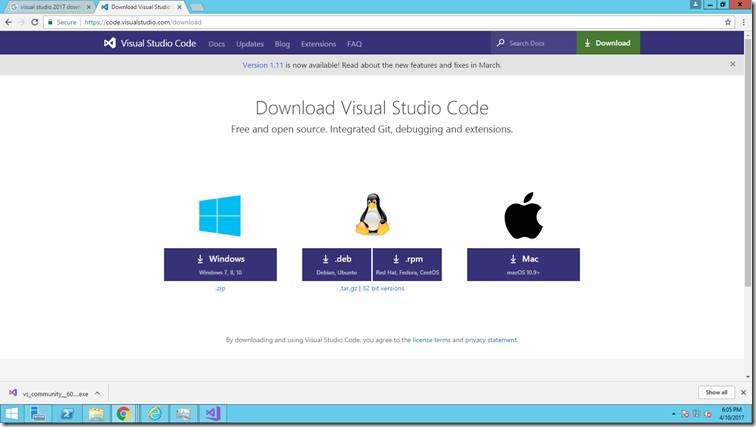
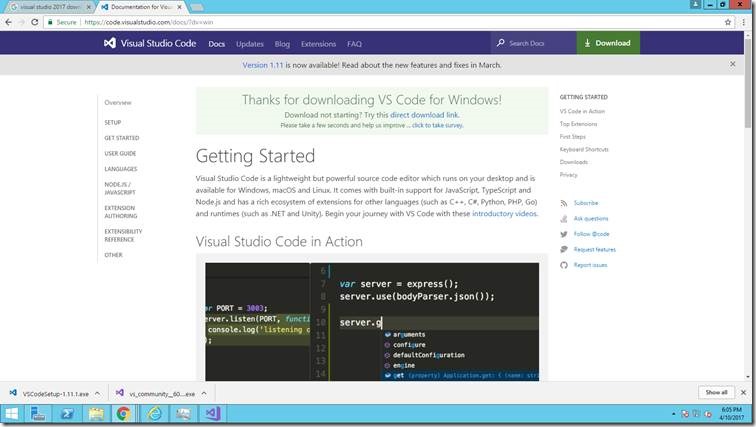
2. Download Visual Studio Code

clip_image004

clip_image006

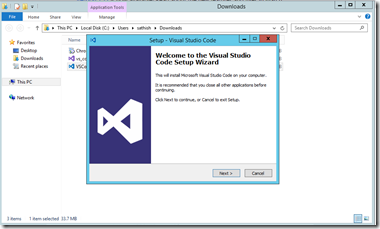
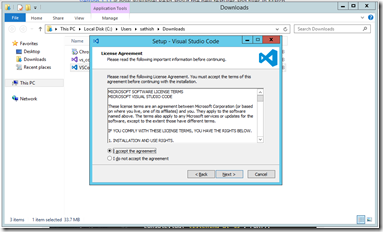
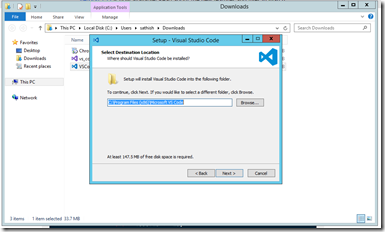
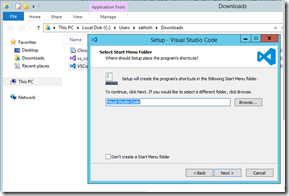
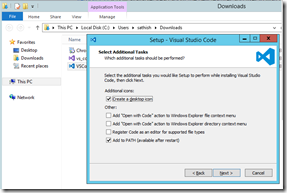
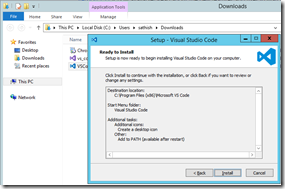
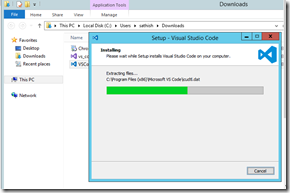
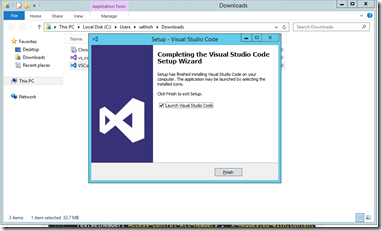
3. Install the MSI file.

clip_image007

clip_image008

clip_image009

clip_image010

clip_image011

clip_image012

clip_image013

clip_image014

In the upcoming articles, let us see how to use the Visual Studio Code.

Happy Coding,

Sathish Nadarajan.
Category : Visual Studio Code

Author Info

Sathish Nadarajan
 
Solution Architect
 
Rate this article
 
Sathish is a Microsoft MVP for SharePoint (Office Servers and Services) having 15+ years of experience in Microsoft Technologies. He holds a Masters Degree in Computer Aided Design and Business ...read more
 

Visual Studio – Happy Birthday And 2017 – Download & Installation

Sathish Nadarajan
 
Solution Architect
 
Rate this article
 
Views
2881

Over these years, Visual Studio was one of the IDE which I have used almost every day. With that, so happy to say “HAPPY BIRTHDAY VISUAL STUDIO”. Yes. Visual Studio Turned 20 this Year. The first version of Visual Studio was released on the year 1997. “VISUAL STUDIO 97”. I have seen that product, but not used. But almost used all the versions of Visual Studios from the early 2000s.

With that birthday party, Microsoft Released the newer version of Visual Studio, i.e., VS 2017 got released by March 7, 2017. Hence, I downloaded and installed on my VM. Thought of sharing the experience to the community.

Now, let us see how to download & install the VS 2017 Community Version, which has all the features which we will be using for our learning purpose.

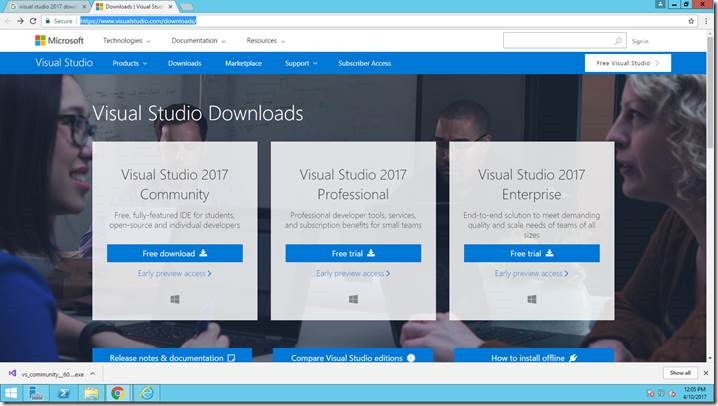
1. Go to the download Centre

https://www.visualstudio.com/downloads/

2. Download the Visual Studio as shown below.

clip_image002

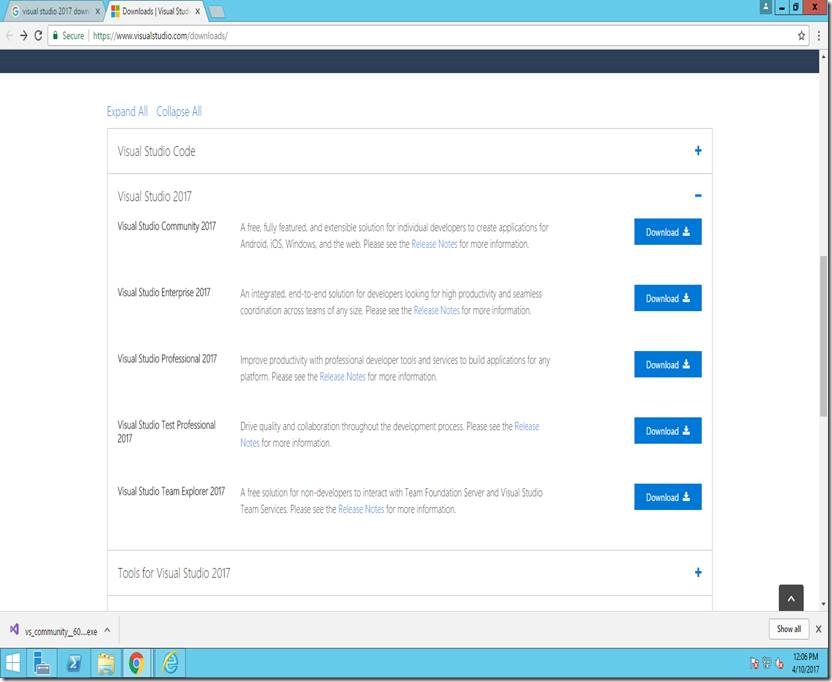
3. Download the Community Version

clip_image004

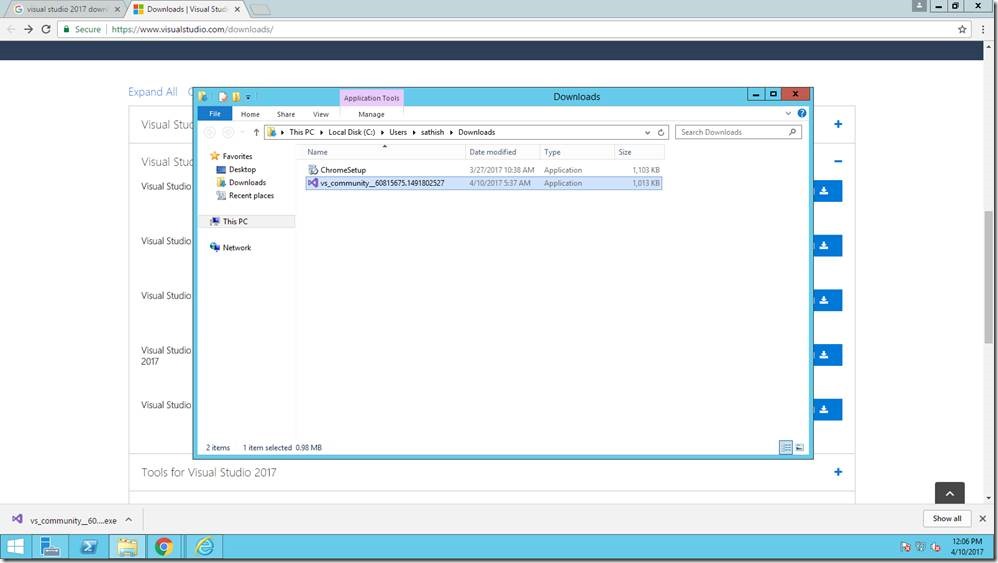
4. The Online Installer is about 1 MB size only.

clip_image006

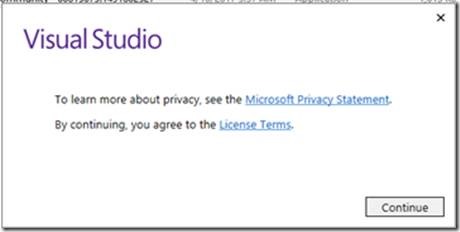
5. Run the Online Installer with a Proper Internet connection

clip_image008

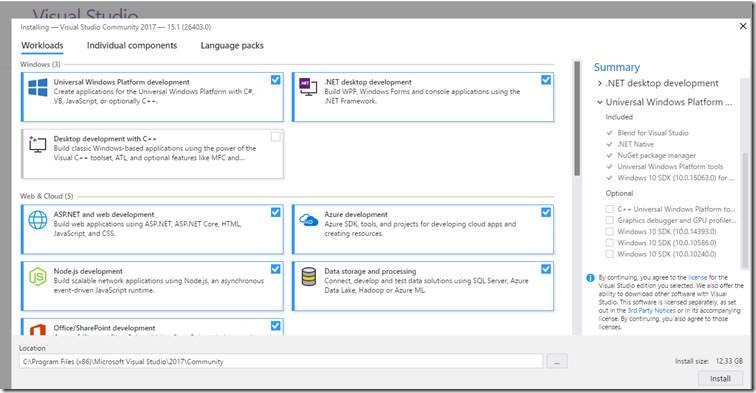
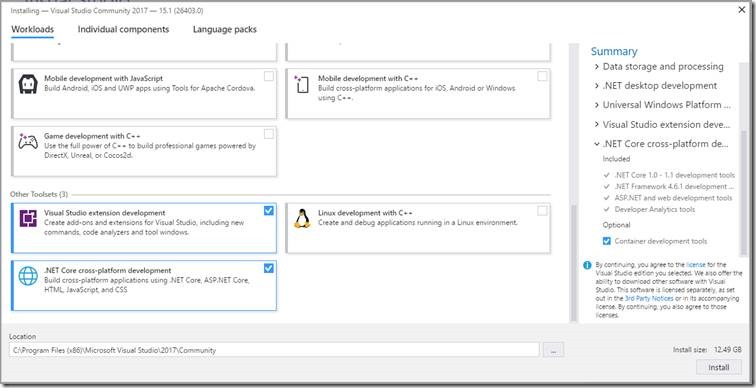
6. Choose the components that needs to be installed along with the VS.

clip_image010

clip_image012

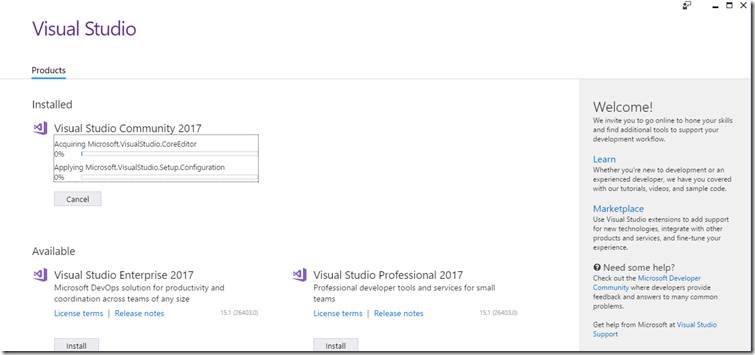
7. Click on Install. That will download the installation files from the CDN.

clip_image014

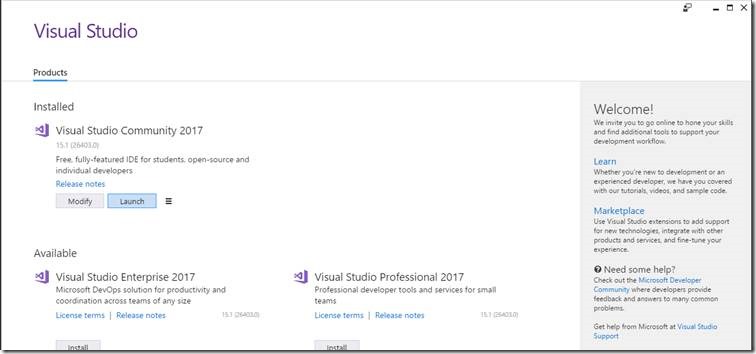
8. Sit back and Relax. The rest of the things VS will take care.

clip_image016

clip_image018

clip_image020

On the upcoming articles, we will see the features of the new Visual Studio 2017.

Happy Coding,

Sathish Nadarajan.
Category : Visual Studio

Author Info

Sathish Nadarajan
 
Solution Architect
 
Rate this article
 
Sathish is a Microsoft MVP for SharePoint (Office Servers and Services) having 15+ years of experience in Microsoft Technologies. He holds a Masters Degree in Computer Aided Design and Business ...read more
 

Leave a comment