Step by Step approach to create a Provider Hosted Application in SharePoint 2013

Sathish Nadarajan
 
Solution Architect
April 8, 2013
 
Rate this article
 
Views
127925

This article on provider hosted application in SharePoint 2013 explains each and every step involved in creation of a Provider hosted App, one of the new App hosting Model available in SharePoint 2013.

Apps in SharePoint

Basically in SharePoint, the application can be hosted by 3 types.

a. SharePoint Hosted Application.

b. Auto Hosted Application.

c. Provider Hosted Application.

Let us concentrate on the Provider Hosted Application. The remaining, I am planning to write a separate article.

Provider Hosted Application

Provider Hosted Application is very useful to re-use the existing .Net application with very minor changes and their hosting environment. The topology of the Provider Hosted Application is as follows.

clip_image002[6]

The user calls the SharePoint server and the SharePoint portal intern calls the .Net Application as a Separate Application. Moreover, there is an option to create an App Part and loads the .Net Application inside the App Part which can be placed on the SharePoint Page.

clip_image004[4]

With this brief introduction about the App Development Model, we can move on to the creation of Basic Provider Hosted Application using Visual Studio 2012.

Steps to Create a Provider Hosted Application:

1. Open the Visual Studio 2012 as Administrator

clip_image005[4]

2. Click New Project.

3. Select the Template App for SharePoint 2013.

clip_image007[4]

4. On the Creation of the Solution, Visual Studio will ask for the Site Collection against which we are going to deploy our app. And on the same screen, we need to choose the type of hosting which we are planning. In our case, it is going to be Provider Hosted Application.

clip_image009[4]

5. On the selection of Provider Hosted, Click Next. The below screen will be asking the Certificate.

clip_image011[4]

6. The Certificate needs to be created on the SharePoint machine and pfx file needs to be exported and shared with the Visual Studio Machine. Creating a certificate on the SharePoint machine can be covered on a separate article. As of now, I am assuming that, we have a certificate created and an Issuer ID has been associated with the certificate.

7. Now, the Solution has been created. The basic solution is as follows.

clip_image013[4]

8. Our solution will comprise of 2 projects.

a. App Project

b. AppWeb Project

9. App Project – This is going to be deployed on the SharePoint.

10. AppWeb Project – This is going to be the .Net Web Application. This application can be hosted on any IIS.

11. Go to the Property of the AppWeb project and make sure that the Target Framework is set to 4.5.

clip_image015[4]

12. Create the virtual directory will be helpful to host our AppWeb on the Local IIS, instead of using the IIS Express, let us host our application on the IIS itself.

clip_image017[4]

13. By Clicking the “Create Virtual Directory” button on the Web Tab, virtual directory will be created on the local IIS. You can confirm this by going to inetmgr.

clip_image019[4]

14. After the property configurations, we are ready with our Provider Hosted Application. Rebuild the solution to make sure everything is fine.

15. Go to the AppManifest.xml in the App project. AppManifest file will be looking like this.

clip_image021[4]

16. Modify the Start Page attribute to point the IIS directly. Please refer the below figure.

clip_image023[4]

17. Go to Permissions Tab. Add the corresponding scope and the permissions as per the requirement. In this demo, I am adding the web as full control. This will give the rights to do CRUD Operations over the list present with in my web.

clip_image025[4]

clip_image027[4]

By doing this, we are sure that our app is having the Full Control Permission through the Web Scope.

18. The AppManifest.xml will be like this.

 <?xml version="1.0" encoding="utf-8" ?>
 <!--Created:cb85b80c-f585-40ff-8bfc-12ff4d0e34a9-->
 <App xmlns="http://schemas.microsoft.com/sharepoint/2012/app/manifest"
      Name="SathishApp"
      ProductID="{1d3effd5-13fc-4551-9e45-9b6ad4ea5a18}"
      Version="1.0.0.0"
      SharePointMinVersion="15.0.0.0">
   <Properties>
     <Title>Sathish.App</Title>
     <StartPage>https://win8x64.dc07.loc/Sathish.AppWeb/Pages/Default.aspx?{StandardTokens}</StartPage>
   </Properties>
 
   <AppPrincipal>
     <RemoteWebApplication ClientId="*" />
   </AppPrincipal>
   
   <AppPermissionRequests>
     <AppPermissionRequest Scope="http://sharepoint/content/sitecollection/web" Right="FullControl" />
   </AppPermissionRequests>
 </App>

19. Now, we came to the final step of our provider hosted application creation. That is, we need to register our clientID with the sharepoint before deploying the app.

20. ClientID is nothing but a GUID. But the only special thing about the ClientID is, it should be small case. i.e., some thing like 24576c92-961f-442b-a866-e612222cad36

21. To generate the GUID, we can’t use the “Create GUID” option in the Visual Studio. Because that will generate the GUID with Upper Case too. But, it will not work for our scenario.

22. Hence, from our sharepoint site itself, go to the AppRegNew.aspx page. The page will present inside the layouts folder. The URL would be something like https://MyServer/sites/MySiteCollection/_layouts/15/Appregnew.aspx.

23. The page will look like

clip_image029[4]

24. By clicking the “Generate Button” of the App ID, ClientID can be generated.

25. Copy the GUID and we need to paste that in 2 places.

a. Web.Config File – App Settings.

<appSettings>
  <add key="ClientId" value="1de402c2-911a-47f5-8b51-fd8b57144c41"/>
  <add key="ClientSecret" value="7Q1y02pvvWMBW7fzlAEnHsSGGATFWra1YEFCIo117sg="/>
  <add key="ClientSigningCertificatePath" value="C:MyCertificate.pfx"/>
  <add key="ClientSigningCertificatePassword" value="****"/>
  <add key="IssuerId" value="xxxxxxxx-xxxx-xxxx-xxxx-xxxxxxxxxxx"/>
</appSettings>

b. AppManifest.xml – AppPrincipal

 <AppPrincipal>
   <RemoteWebApplication ClientId="1de402c2-911a-47f5-8b51-fd8b57144c41" />
 </AppPrincipal>

26. After updating the ClientID, we can build and Deploy the solution. Right click the solution and click Deploy.

clip_image031[4]

27. You will get the following error. Don’t panic about the error. Still we haven’t completed our app development. Still there is one last thing we need to do after getting this error.

clip_image033[4]

28. To rectify this error, we need to register our ClientID on the SharePoint Farm. We can do this by using powershell on the SharePoint Farm.

 // Registering App principal
 cls
 
 Add-PSSnapin "Microsoft.SharePoint.PowerShell"
 
 # set intialization values for new app principal
 
 $appDisplayName = "Sathish.App"
 
 $clientID = "1de402c2-911a-47f5-8b51-fd8b57144c41"
 
 $targetSiteUrl = "https://MyServer/sites/MySiteCollection/" 
 
 $targetSite = Get-SPSite $targetSiteUrl
 
 $realm = Get-SPAuthenticationRealm -ServiceContext $targetSite
 
 $fullAppPrincipalIdentifier = $clientID + '@' + $realm
 
 Write-Host "Registering new app principal"
 
 $registeredAppPrincipal = Register-SPAppPrincipal -NameIdentifier $fullAppPrincipalIdentifier -Site $targetSite.RootWeb -DisplayName $AppDisplayName
 
 $registeredAppPrincipal | select * | Format-List
 
 $registeredAppPrincipal | select * | Format-List | Out-File -FilePath "Output.txt"
 
 Write-Host "Registration Completed"
 
 #Get-SpAppPrincipal -?

29. On the successful registration, we will get the output like,

clip_image035[4]

30. Now, go back to the Visual Studio and do deploy once again. This time, we will not be getting any error message. The site will be opened like below.

clip_image037[4]

31. Click on Trust It. The app will get installed. We can launch the App from our SharePoint Portal.

With this we are now familiar with creating a Provider Hosted Application. Further on the next article, we will have a look at how to convert this into a Claims Aware Application.

Author Info

Sathish Nadarajan
 
Solution Architect
 
Rate this article
 
Sathish is a Microsoft MVP for SharePoint (Office Servers and Services) having 15+ years of experience in Microsoft Technologies. He holds a Masters Degree in Computer Aided Design and Business ...read more
 

How to create an online account in Napa Office 365

Gopal Muthukrishnan
 
SharePoint Developer
January 22, 2013
 
Rate this article
 
Views
12152

This article shows how to create an online Office365 cloud based environment by the help of Napa Cloud. Microsoft latest online technology promised to work where ever you are.

Office 365 is Microsoft’s new Cloud based online environment provided to Office and SharePoint to enhance its stake in the emerging online market. Interestingly you don’t need any hardware compatibility (Ram) as well. Like Visual Studio, Napa Office 365 also has Intellisense, this can be invoked using the shortcut Ctrl + Spacebar. Office 365 does not require Visual studio, the coding can be in JQuery, Java Script, Knockout.js and Type Script from Microsoft. You can able to code your project in work place, home etc. via any browser. There is a possibility to share your project with your colleagues.

Use of 1 license per account in trial for 30 days. The product is named as Napa Cloud. Your user id will be registered in the format as username.company.onmicrosoft.com with your organization name and username.

The code resides in the Cloud server, whereas the address bar shows only _layout/15

Step 1:

Click the link and get registered http://msdn.microsoft.com/library/office/apps/fp179924(v=office.15)

clip_image001

Step 2:

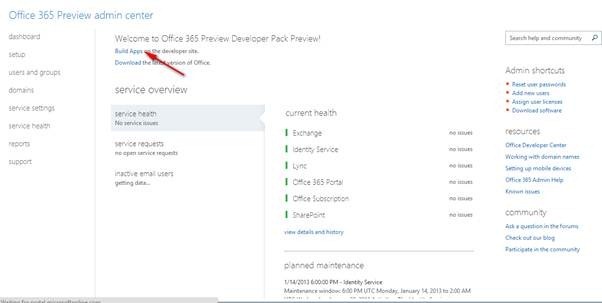
After creating a new account, its check all the health issues over your environment to be provisioned.

clip_image003

Click Build App to go the next.

Step 3:

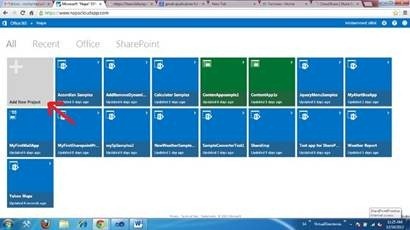
Click to precede for Build an app to create our workspace

clip_image005

Step 4:

A message will pop. Add a language as English to go for next step.

clip_image007

Step 5:

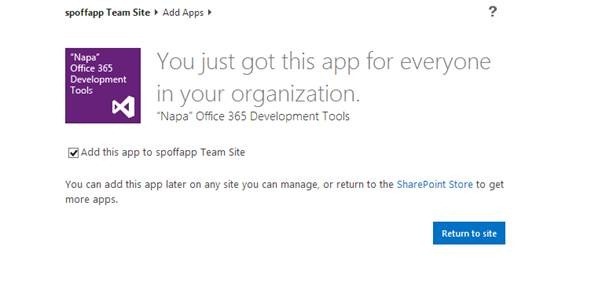
Add the Napa App to install in your working environment

clip_image009

After Add your App, it will be taken to your Microsoft account (Live or Hotmail) page and login using live account and then continue.

Step 6:

After this step Trust it to continue

clip_image011

Step 7:

At last click the Napa Office to finish creating the working environment

clip_image013

Now you can use from your office, work and anywhere you feel.

Category : Office 365, SharePoint

Author Info

Gopal Muthukrishnan
 
SharePoint Developer
 
Rate this article
 
Works as SharePoint Developer in Chennai, India. ...read more
 

Weather App for Office 365 with Yahoo API Web Services

Mohamed Sithik
 
SharePoint Consultant
December 21, 2012
 
Rate this article
 
Views
15563

This is a step by step article on creation of a client web part for Office 365 Napa to display the current weather of a location with Yahoo Web Services.

Follow the bellow steps to create a the weather app

Step :- 1

Click the Get tools to build apps to launch Napa

Choose the Add New Project button

clip_image002

Step :- 2


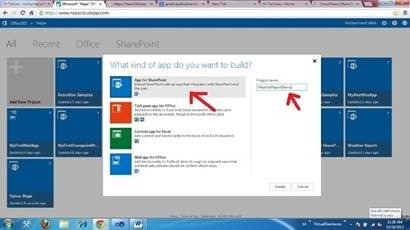
Choose the App for SharePoint tile, name the project “WeatherReportDemo” , and then Click the Create button

clip_image004

Step :-3

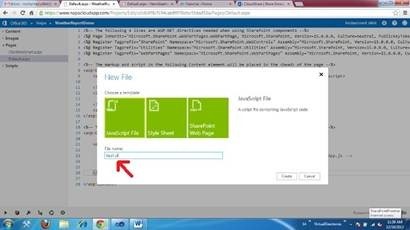
Add a new Java Script File and set the name as “Weather.js”

clip_image006

Step :-4

Paste the below Code inside the Page

 $(function () {    
             WeatherCode();
         });
         $(document).ready(function () {
             $("#SelectCity").change(function () {
                 WeatherCode();
             });
         });
        function WeatherCode()
        {
         var Cit=($('#SelectCity').val());
             $.simpleWeather({
                 location: ''+Cit+', India',
                 unit: 'f',
                 success: function (weather) {
                     html = '<h2>' + weather.city + ', ' + weather.region + ' ' + weather.country + '</h2>';
                     html += '<p><strong>Today's High</strong>: ' + weather.high + '° ' + weather.units.temp + ' - <strong>Today's Low</strong>: ' + weather.low + '° ' + weather.units.temp + '</p>';
                     html += '<p><strong>Current Temp</strong>: ' + weather.temp + '° ' + weather.units.temp + ' (' + weather.tempAlt + '° C)</p>';
                     html += '<p><strong>Condition Code</strong>: ' + weather.code + '</p>';
                     html += '<p><strong>Thumbnail</strong>: <img src="' + weather.thumbnail + '"></p>';
                     html += '<p><strong>Wind</strong>: ' + weather.wind.direction + ' ' + weather.wind.speed + ' ' + weather.units.speed + ' <strong>Wind Chill</strong>: ' + weather.wind.chill + '</p>';
                     html += '<p><strong>Currently</strong>: ' + weather.currently + ' - <strong>Forecast</strong>: ' + weather.forecast + '</p>';
                     html += '<p><img src="' + weather.image + '"></p>';
                     html += '<p><strong>Humidity</strong>: ' + weather.humidity + ' <strong>Pressure</strong>: ' + weather.pressure + ' <strong>Rising</strong>: ' + weather.rising + ' <strong>Visibility</strong>: ' + weather.visibility + '</p>';
                     html += '<p><strong>Heat Index</strong>: ' + weather.heatindex + '</p>';
                     html += '<p><strong>Sunrise</strong>: ' + weather.sunrise + ' - <strong>Sunset</strong>: ' + weather.sunset + '</p>';
                     html += '<p><strong>Tomorrow's Date</strong>: ' + weather.tomorrow.day + ' ' + weather.tomorrow.date + '<br /><strong>Tomorrow's High/Low</strong>: ' + weather.tomorrow.high + '/' + weather.tomorrow.low + '<br /><strong>Tomorrow's Condition Code</strong>: ' + weather.tomorrow.code + '<br /><strong>Tomorrow's Forecast</strong>: ' + weather.tomorrow.forecast + '<br /> <strong>Tomorrow's Image</strong>: ' + weather.tomorrow.image + '</p>';
                     html += '<p><strong>Last updated</strong>: ' + weather.updated + '</p>';
                     html += '<p><a href="' + weather.link + '">View forecast at Yahoo! Weather</a></p>';
                      $("#weather").html(html);
                 },
                 error: function (error) {
                     $("#weather").html('<p>' + error + '</p>');
                 }
             });
             $.simpleWeather({
                 zipcode: '90210',
                 unit: 'f',
                 success: function (weather) {
                     html = '<h2>' + weather.city + ', ' + weather.region + '</h2>';
                     html += '<img style="float:left;" width="125px" src="' + weather.image + '">';
                     html += '<p>' + weather.temp + '° ' + weather.units.temp + '<br /><span>' + weather.currently + '</span></p>';
                     html += '<a href="' + weather.link + '">View Forecast »</a>';
                      $("#weather2").html(html);
                 },
                 error: function (error) {
                     $("#weather2").html('<p>' + error + '</p>');
                 }
             });
        }

Step :-5

And then add one more javascript file  and name it as “jquery.simpleWeather.js”.

Copy Paste the below code into the newly created script file.

 (function($) {
                 "use strict";
                 $.extend({
                                 simpleWeather: function(options){
                                                 options = $.extend({
                                                                 zipcode: '76309',
                                                                 location: '',
                                                                 unit: 'f',
                                                                 success: function(weather){},
                                                                 error: function(message){}
                                                 }, options);
                                                
                                                 var now = new Date();
                                                
                                                 var weatherUrl = 'http://query.yahooapis.com/v1/public/yql?format=json&rnd='+now.getFullYear()+now.getMonth()+now.getDay()+now.getHours()+'&diagnostics=true&callback=?&diagnostics=true&env=store%3A%2F%2Fdatatables.org%2Falltableswithkeys&q=';
                                                 if(options.location !== '') {
                                                                 weatherUrl += 'select * from weather.forecast where location in (select id from weather.search where query="'+options.location+'") and u="'+options.unit+'"';
                                                 } else if(options.zipcode !== '') {
                                                                 weatherUrl += 'select * from weather.forecast where location in ("'+options.zipcode+'") and u="'+options.unit+'"';
                                                 } else {
                                                                 options.error("No location given.");
                                                                 return false;
                                                 }
                                                                                                
                                                 $.getJSON(
                                                                 weatherUrl,
                                                                 function(data) {
                                                                                 if(data !== null && data.query.results !== null) {
                                                                                                 $.each(data.query.results, function(i, result) {
                                                                                                                 if (result.constructor.toString().indexOf("Array") !== -1) {
                                                                                                                                 result = result[0];
                                                                                                                 }
                                                                                                                                                                                                                                
                                                                                                                 var currentDate = new Date();
                                                                                                                 var sunRise = new Date(currentDate.toDateString() +' '+ result.astronomy.sunrise);
                                                                                                                 var sunSet = new Date(currentDate.toDateString() +' '+ result.astronomy.sunset);
                                                                                                                
                                                                                                                 if(currentDate>sunRise && currentDate<sunSet) {
                                                                                                                                 var timeOfDay = 'd';
                                                                                                                 } else {
                                                                                                                                 var timeOfDay = 'n';
                                                                                                                 }
                                                                                                                
                                                                                                                 var compass = ['N', 'NNE', 'NE', 'ENE', 'E', 'ESE', 'SE', 'SSE', 'S', 'SSW', 'SW', 'WSW', 'W', 'WNW', 'NW', 'NNW', 'N'];
                                                                                                                 var windDirection = compass[Math.round(result.wind.direction / 22.5)];
                                                                                                                
                                                                                                                 if(result.item.condition.temp < 80 && result.atmosphere.humidity < 40) {
                                                                                                                                 var heatIndex = -42.379+2.04901523*result.item.condition.temp+10.14333127*result.atmosphere.humidity-0.22475541*result.item.condition.temp*result.atmosphere.humidity-6.83783*(Math.pow(10, -3))*(Math.pow(result.item.condition.temp, 2))-5.481717*(Math.pow(10, -2))*(Math.pow(result.atmosphere.humidity, 2))+1.22874*(Math.pow(10, -3))*(Math.pow(result.item.condition.temp, 2))*result.atmosphere.humidity+8.5282*(Math.pow(10, -4))*result.item.condition.temp*(Math.pow(result.atmosphere.humidity, 2))-1.99*(Math.pow(10, -6))*(Math.pow(result.item.condition.temp, 2))*(Math.pow(result.atmosphere.humidity,2));
                                                                                                                 } else {
                                                                                                                                 var heatIndex = result.item.condition.temp;
                                                                                                                 }
                                                                                                                
                                                                                                                 if(options.unit === "f") {
                                                                                                                                 var tempAlt = Math.round((5.0/9.0)*(result.item.condition.temp-32.0));
                                                                                                                 } else {
                                                                                                                                 var tempAlt = Math.round((9.0/5.0)*result.item.condition.temp+32.0);
                                                                                                                 }
                                                                                                                
                                                                                                                 var weather = {                                                                 
                                                                                                                                 title: result.item.title,
                                                                                                                                 temp: result.item.condition.temp,
                                                                                                                                 tempAlt: tempAlt,
                                                                                                                                 code: result.item.condition.code,
                                                                                                                                 todayCode: result.item.forecast[0].code,
                                                                                                                                 units:{
                                                                                                                                                 temp: result.units.temperature,
                                                                                                                                                 distance: result.units.distance,
                                                                                                                                                 pressure: result.units.pressure,
                                                                                                                                                 speed: result.units.speed
                                                                                                                                 },
                                                                                                                                 currently: result.item.condition.text,
                                                                                                                                 high: result.item.forecast[0].high,
                                                                                                                                 low: result.item.forecast[0].low,
                                                                                                                                 forecast: result.item.forecast[0].text,
                                                                                                                                 wind:{
                                                                                                                                                 chill: result.wind.chill,
                                                                                                                                                 direction: windDirection,
                                                                                                                                                 speed: result.wind.speed
                                                                                                                                 },
                                                                                                                                 humidity: result.atmosphere.humidity,
                                                                                                                                 heatindex: heatIndex,
                                                                                                                                 pressure: result.atmosphere.pressure,
                                                                                                                                 rising: result.atmosphere.rising,
                                                                                                                                 visibility: result.atmosphere.visibility,
                                                                                                                                 sunrise: result.astronomy.sunrise,
                                                                                                                                 sunset: result.astronomy.sunset,
                                                                                                                                 description: result.item.description,
                                                                                                                                 thumbnail: "http://l.yimg.com/a/i/us/nws/weather/gr/"+result.item.condition.code+timeOfDay+"s.png",
                                                                                                                                 image: "http://l.yimg.com/a/i/us/nws/weather/gr/"+result.item.condition.code+timeOfDay+".png",
                                                                                                                                 tomorrow:{
                                                                                                                                                 high: result.item.forecast[1].high,
                                                                                                                                                 low: result.item.forecast[1].low,
                                                                                                                                                 forecast: result.item.forecast[1].text,
                                                                                                                                                 code: result.item.forecast[1].code,
                                                                                                                                                 date: result.item.forecast[1].date,
                                                                                                                                                 day: result.item.forecast[1].day,
                                                                                                                                                 image: "http://l.yimg.com/a/i/us/nws/weather/gr/"+result.item.forecast[1].code+"d.png"
                                                                                                                                 },
                                                                                                                                 city: result.location.city,
                                                                                                                                 country: result.location.country,
                                                                                                                                 region: result.location.region,
                                                                                                                                 updated: result.item.pubDate,
                                                                                                                                 link: result.item.link
                                                                                                                 };
                                                                                                                
                                                                                                                 options.success(weather);
                                                                                                 });
                                                                                 } else {
                                                                                                 if (data.query.results === null) {
                                                                                                                 options.error("Invalid location given.");
                                                                                                 } else {
                                                                                                                 options.error("Weather could not be displayed. Try again.");
                                                                                                 }
                                                                                 }
                                                                 }
                                                 );
                                                 return this;
                                 }                             
                 });
 })(jQuery);

Step :- 6

Go to the Default.aspx  and paste the below code inside the  PlaceHolderAdditionalPageHead

 <!-- Add your CSS styles to the following file -->
 <link rel="Stylesheet" type="text/css" href="../Content/App.css" />
 <style>
     #weather2 {
                     background: #6f9dbe;
                     background: -webkit-gradient(linear, left top, left bottom, from(#adc7db), to(#6f9dbe));
                     background: -moz-linear-gradient(top, #b2bcc8, #adc7db);
                     width: 185px;
                     padding: 5px 10px;
                     overflow: hidden;
                     border: 1px solid #6591b3;
     }
 
     #weather2 h2 {
                     color: #000;
                     text-shadow: rgba(250, 250, 250, 0.6) 2px 2px 0;
     }
 
     #weather2 p {
                     font-size: 25px;
                     margin: 30px 0 0;
     }
 
     #weather2 p span {
                     font-size: 16px;
     }
 
     #weather2 a:link, #weather2 a:active, #weather2 a:visited {
                     display: block;
                     clear: both;
                     text-decoration: none;
                     color: #222;
                     font-size: 12px;
     }
 
     #weather2 a:hover {
                     color: #000;
                     text-decoration: underline;
     }
 </style>
 <!-- Add your JavaScript to the following file -->
 <script src="http://ajax.googleapis.com/ajax/libs/jquery/1.7/jquery.min.js" charset="utf-8"></script>
 <script type="text/javascript" src="../Scripts/jquery.simpleWeather.js" > </script>
 <script type="text/javascript" src="../Scripts/Weather.js"> </script>

Step :- 7


Add the below code inside the  PlaceHolderMain

 <select id="SelectCity">
     <option>Chennai</option>
     <option>Allahabad</option>
     <option>Alleppey</option>
     <option>Pune</option>
     <option>hyderabad</option>
     <option>Delhi</option>
 </select>
 <div id="weather2"></div>
 <p> </p>
 <div id="weather"></div>

Step :- 8

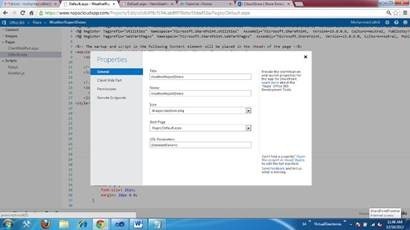
Click the properties  Icon inside the browser which pops out a window link the one shown below.

clip_image008

Step :- 9

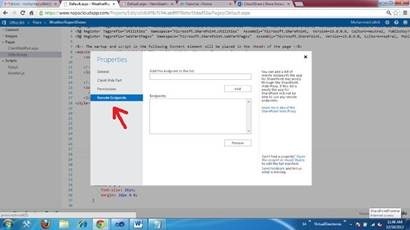
Click the Remote Endpoint

clip_image010

Step :- 10

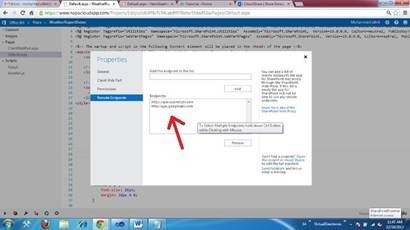
Add the below urls inside the textbox one by one

http://ajax.googleapis.com

https://ajax.aspnetcdn.com

clip_image012

Step :- 11

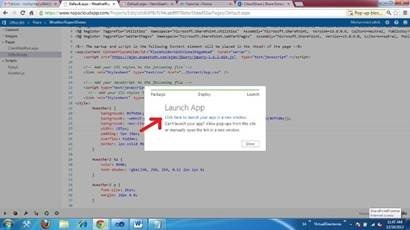
Run your project  you will see an image like below

Then click the “Click here to launch your app in a new windows” Link button

clip_image014

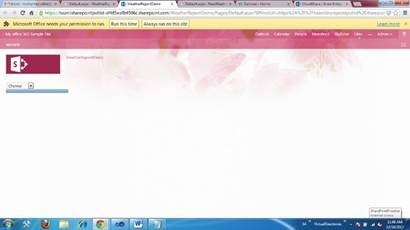
Step :- 12

clip_image016

Step :-13

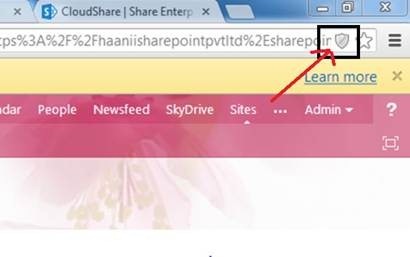
Enable the security option shown in the right most corner of browser’s address bar by clicking it.(I am using chrome )

clip_image018

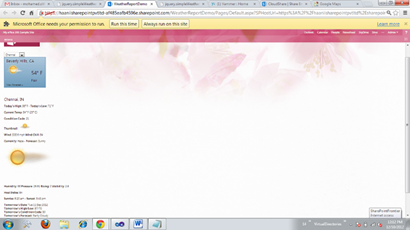
After that  you will see the output like the one shown below. Just select the city in the dropdown box ,you will see the weather report information about the particular city

Final Output Screen

clip_image020

Category : Office 365, SharePoint

Author Info

Mohamed Sithik
 
SharePoint Consultant
 
Rate this article
 
SharePoint Consultant based out Chennai, India. ...read more
 

Currency Convertor Napa App for SharePoint 2013 Office 365

Anne Jes Medon
 
SharePoint Developer
 
Rate this article
 
Views
14918

This post help you to how to convert the existing available services to Office 365 Napa App. In this post I am using geoplugin currency convertor in a Napa App to covert currency from one format to another.

Follow the below steps to create a Currency Convertor App

Step: 1

Create a new site in Office 365. If you don’t have an account , register for a new account here . Then click the Napa tile to add the Napa app from the page created. Then create a new app using the wizard.

Step: 2

Add New Project in Napa by using the Build app tile

clip_image001


Step: 3

Select App for SharePoint and give Project name as Currency. As of now we can build following apps in SharePoint

1. App for SharePoint

2. Task pane app for Office,

3. Content app for Excel,

4. Mail app for Office

clip_image003

Step: 4

Finally it will take you  to the coding part of the Napa online. In the left top corner there are four properties

1. Content menu which holds the CSS part of the Napa Office365

2. Images menu we can store the image for the project

3. Pages, the important part of Napa to write code in ClientWebPart and Default pages

4. Scripts, all those parameters where passed and executed through here

Step: 5

Normally we can use the default page to code, but in this example ClientWebPart is used for coding.

In ClientWebPart page add script of the web service provider geoplugin

<scriptsrc="http://www.geoplugin.net/ajax_currency_converter.gp" type="text/javascript"></script>

Then inside the <asp:Content>tag add the following code

<input type=’text’ id=’gp_amount’ size=’4′ />

<select id="gp_from"></select> to <select id="gp_to"></select>

<p><input type=’button’ onClick=’gp_convertIt()’ value = ‘Convert It’ /></p>

<div id="gp_converted"></div>

<Script>gp_currencySymbols()</script>

Step: 6

Add call.js as a new item in script menu to call the web services or use the below CDN of geoplugin

<script type="text/javascript" src="http://www.geoplugin.net/ajax_currency_converter.gp"></script>

google.load("jquery", "1.2.6");function gp_currencySymbols() { $.getJSON("http://www.geoplugin.net/currency_symbols.gp?format=json&jsoncallback=?", function(data){ var currencyCode = geoplugin_currencyCode(); var fromCurr = ”; var toCurr = ”; $.each(data, function(i,item){ if ( currencyCode == i ) { fromCurr = fromCurr + ""; } else { fromCurr = fromCurr + ""; } }); $.each(data, function(i,item){ if ( currencyCode == ‘USD’ && i == ‘EUR’ ) { toCurr = toCurr + ""; } else { toCurr = toCurr + ""; //{condition)? iftrue : iffalse } }); $(fromCurr).appendTo("#gp_from"); $(toCurr).appendTo("#gp_to"); }); }; function gp_convertIt() { if (!document.getElementById(‘gp_amount’).value){ return false; } else { var gp_from = document.getElementById(‘gp_from’).value; var gp_to = document.getElementById(‘gp_to’).value; var gp_amount = document.getElementById(‘gp_amount’).value; $.getJSON( "http://www.geoplugin.net/currency_converter.gp?jsoncallback=?", { from:gp_from, to:gp_to, amount:gp_amount }, function(output){ $("#gp_converted").html("

"+output.from.symbol+output.from.amount+" = "+output.to.symbol+output.to.amount+"
Get your own convertor

"); }); } }

The Scripts and JSON make a request to the webservices and render the value

Step: 7

clip_image005

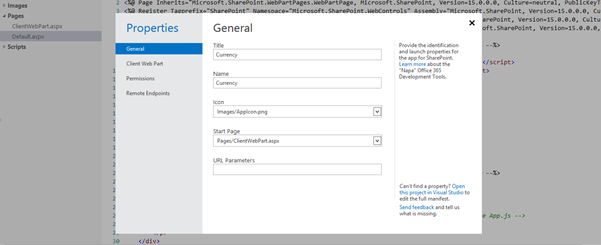
    • Then click the properties window and set the following values
    • In General tab- click the Start page and select ClientWebPart , moreover can give the default page also when we coded in Default.aspx
    • Set the Width and height in ClientWeb Part tab
    • In Remote End points tab give the web service providers domain name  (In this case ,http://www.geoplugin.net)
    • Close the window it automatically save the values and Run

Step: 8

Finally we got the value of the Indian Currency against US Dollar

clip_image007

Step: 9

Then go to the team site and click the content-Add Page

Then click the web part and save the page

Category : SharePoint

Author Info

Anne Jes Medon
 
SharePoint Developer
 
Rate this article
 
Works as SharePoint Developer in Chennai, India. ...read more
 

Leave a comment