Implementing Tab Order In Custom NewForm And EditForm In SharePoint Office 365 – TabIndex Will Not Work

Sathish Nadarajan
 
Solution Architect
December 18, 2018
 
Rate this article
 
Views
2861

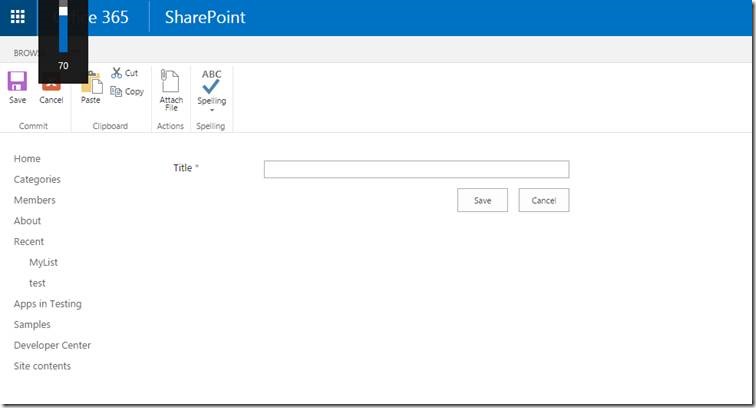
Recently I created a Custom NewForm and EditForm for a List in Office 365 and the default tab order was implemented as a ROW wise. But, in my case, I wanted the tab order to be on the Column Wise. Hence, tried to edit the page on the Designer, from which I created those pages, and added the TabIndex Values. But, it was not working. The workaround is, to implement the TabIndex after the pageload on the JavaScript.

The sample code is as below.

 ST.Util.FindControlFieldByInternalName("SIClientIDLookup").attr('tabindex', 1).focus();

The FindControl method will be something like,

 ST.Util.FindControlField = function ($td) {
 
         var $control = $();
 
         switch (ST.Util.FindFieldType($td)) {
             case "SPFieldText":
             case "SPFieldDateTime":
                 {
                     $control = $td.find("input[type=text]");
                     break;
                 }
             case "SPFieldNumber":
             case "SPFieldCurrency":
                 {
                     $control = $td.find("input[type=text]");
                     break;
                 }
             case "SPFieldLookup":
             
             case "SPFieldChoice":
                 {
                     $control = $td.find("select");
                     break;
                 }
             case "SPFieldNote":
                 {
                     $control = $td.find("textarea");
                     break;
                 }
         }
 
         return $control;
     };
 

The above piece of method is very simple and easy way to implement the TabOrder in the custom forms. Hope this helps !!

Happy Coding,

Sathish Nadarajan.

Category : Office 365, SharePoint

Author Info

Sathish Nadarajan
 
Solution Architect
 
Rate this article
 
Sathish is a Microsoft MVP for SharePoint (Office Servers and Services) having 15+ years of experience in Microsoft Technologies. He holds a Masters Degree in Computer Aided Design and Business ...read more
 

How to Implement People Picker on the Custom Forms in SharePoint 2013 Lists NewForm and Edit Form

Sriram
 
Technology Specialist
August 6, 2018
 
Rate this article
 
Views
9718


The default NewForm and EditForm for lists/libraries have a different people picker column than when you create a custom New or Edit form using SP Designer. When using the default list forms and they include a people picker field, the dropdown list of options as you type to search for people works as expected.

If you create a new custom list form in SP Designer, the same people picker field does’t have the dropdown list of options as you type. The custom form people picker looks closer to the SP 2010 version.

Here is the custom form people picker control.

clip_image002

Default form people picker:

clip_image004

Lets see how to change the custom form people picker to default people picker.

Note: In this article we will hide the default control and add new custom people picker control. When values selected in the custom people picker control, we will bind that selected user value into the hidden user people picker field.

Steps:

  1. Open SharePoint designer à open the List à Create a form (New/Edit).
  2. Open the newly created form in Advanced mode.
  3. Hide the default peoplepicker field in the view using CSS.
   <div style="display:none" id="hiddenpeoplepicker">                                    
 	  <SharePoint:FormField runat="server"  id="ff5{$Pos}" ControlMode="New" FieldName="Requestor_x0020_Details" 
 	  __designer:bind="{ddwrt:DataBind('i',concat('ff5',$Pos),'Value','ValueChanged','ID',ddwrt:EscapeDelims(string(@ID)),'@Requestor_x0020_Details')}"/>
 	  <SharePoint:FieldDescription runat="server" id="ff5description{$Pos}" FieldName="Requestor_x0020_Details" ControlMode="New"/>
 	</div>
 

4. Add below lines on top of the hidden control to display the default people picker.

 <SharePoint:ClientPeoplePicker AllowEmailAddresses="true" Required="true" ValidationEnabled="true" ID="peoplePicker"runat="server" VisibleSuggestions="5" Rows="1" PrincipalAccountType="User,DL,SecGroup,SPGroup" AllowMultipleEntities="false" CssClass="ms-long ms-spellcheck-true" Height="85px" />

5. Below is the entire <tr> tag for the specific people picker field.

 <tr>
    <td width="190px" valign="top" class="ms-formlabel">
       <H3 class="ms-standardheader">
 	<nobr>Requestor<span class="ms-formvalidation"> *</span>
 	</nobr>
       </H3>
    </td>
    <td width="400px" id="peoplePickerTD" valign="top" class="ms-formbody">
       <SharePoint:ClientPeoplePicker AllowEmailAddresses="true" Required="true" ValidationEnabled="true" ID="peoplePicker" 
 	runat="server" VisibleSuggestions="5" Rows="1" PrincipalAccountType="User,DL,SecGroup,SPGroup" AllowMultipleEntities="false" 
 	CssClass="ms-long ms-spellcheck-true" Height="85px"/>
 	<div style="display:none" id="hiddenpeoplepicker">                                    
 	  <SharePoint:FormField runat="server"  id="ff5{$Pos}" ControlMode="New" FieldName="Requestor_x0020_Details" 
 	  __designer:bind="{ddwrt:DataBind('i',concat('ff5',$Pos),'Value','ValueChanged','ID',ddwrt:EscapeDelims(string(@ID)),'@Requestor_x0020_Details')}"/>
 	  <SharePoint:FieldDescription runat="server" id="ff5description{$Pos}" FieldName="Requestor_x0020_Details" ControlMode="New"/>
 	</div>
    </td>
 </tr>
 

6. Now write a Javascript in a script file and add the script in the display form. Below script is to trigger on change event whenever new user is selected in the default form.

 $("#peoplePickerTD").on('blur','.sp-peoplepicker-topLevel input',function () {
                 var username=JSON.parse($('.sp-peoplepicker-topLevel input').val());
  
                 $('div[name="upLevelDiv"]').text(username[0].Key);
                 $("img[Title='Check Names']").trigger("click");
                 });
 

It will get the user value from the newly added people picker and add that value in hidden people picker textbox and will trigger to resole the user.

Category : SharePoint

Author Info

Sriram
 
Technology Specialist
 
Rate this article
 
Sriram T has been working in IT industry for over 6 years He holds Bachelor's degree in Computer Science Engineering. Sriram write articles and blogs related to SharePoint 2013, SharePoint ...read more
 

How to Add a JS Link Reference to the NewForm.aspx and EditForm.aspx Programmatically using CSOM PNP in SharePoint Office 365

Sathish Nadarajan
 
Solution Architect
October 20, 2016
 
Rate this article
 
Views
11221

Recently I met with a requirement that on the default OOTB list, while creating or editing the list item, we need to do some custom action in SharePoint Office 365. To achieve that, we thought of writing a separate JS file and on that JS file, we can do our functionality.

Now, the challenge comes like, we cannot edit the NewForm.aspx and EditForm.aspx and insert a Script Editor Webpart in the Production Environment. They wanted a small utility (EXE) which will be inserting the JS file to the NewForm and EditForm.

For this, PNP helped us a lot and thought of sharing to the community.

To show a demo,

1. Create a List

2. In the Site Assets, upload a JS file.

3. In my case, I have a JS file with only an Alert Message.

4. Go to the New Item Page of the List.

clip_image002

5. If we search in the developer tool, no JS file will be found.

Now, execute the below code.

 namespace Console.Office365
 {
     using Microsoft.SharePoint.Client;
     using Newtonsoft.Json.Linq;
     using System;
     using System.Collections.Generic;
     using System.IO;
     using System.Linq;
 
     class Program
     {
         static void Main(string[] args)
         {
             AddJSLinkReferencce();
         }
 
         public static void AddJSLinkReferencce()
         {
             OfficeDevPnP.Core.AuthenticationManager authMgr = new OfficeDevPnP.Core.AuthenticationManager();
 
             string siteUrl = "https://*****.sharepoint.com/sites/CommunitySite/";
             string userName = "Sathish@*****.onmicrosoft.com";
             string password = "*********";
 
             using (var ctx = authMgr.GetSharePointOnlineAuthenticatedContextTenant(siteUrl, userName, password))
             {
                 Web web = ctx.Web;
                 ctx.Load(web);
                 ctx.ExecuteQueryRetry();
 
                 List list = web.Lists.GetByTitle("MyList");
                 ctx.Load(list);
                 ctx.ExecuteQueryRetry();
 
                 list.SetJSLinkCustomizations(PageType.NewForm, "https://*********.sharepoint.com/sites/CommunitySite/SiteAssets/JS/TempJS.js");
 
                 list.Update();
                 ctx.ExecuteQueryRetry();
             }
         }


     }
 
 }
 

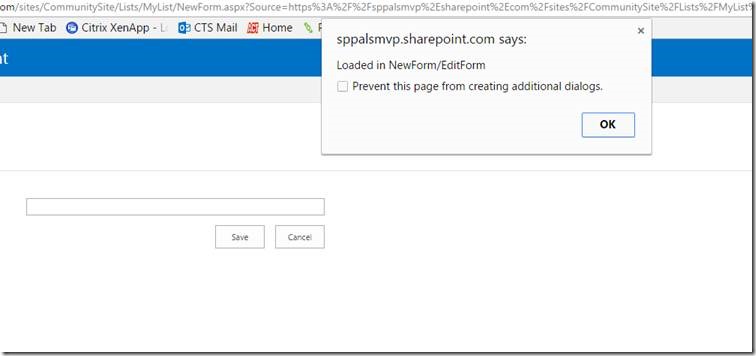
6. Go back and Refresh the NewForm, we will get the popup as below.

clip_image004

7. PageType is an Enum, which has the below options.

Invalid = -1,

DefaultView = 0,

NormalView = 1,

DialogView = 2,

View = 3,

DisplayForm = 4,

DisplayFormDialog = 5,

EditForm = 6,

EditFormDialog = 7,

NewForm = 8,

NewFormDialog = 9,

SolutionForm = 10,

PAGE_MAXITEMS = 11

With the above forms, the method is straight forward.

Happy Coding,

Sathish Nadarajan.

Author Info

Sathish Nadarajan
 
Solution Architect
 
Rate this article
 
Sathish is a Microsoft MVP for SharePoint (Office Servers and Services) having 15+ years of experience in Microsoft Technologies. He holds a Masters Degree in Computer Aided Design and Business ...read more
 

Leave a comment