SharePoint Modern Site – Using Multiple Languages and Translate Page Programmatically using CSOM C# and PNP Core Context

Sathish Nadarajan
 
Solution Architect
November 22, 2021
 
Rate this article
 
Views
1361

I was trying to translate the pages created in one Site Collection to other languages and there is a simplest way of doing this using the PNP Core Context.  This is not available in the PNP Framework Context I hope.  (again, this is my opinion as I couldn’t find a way).

Basically, we need to enable the languages and even this can be done through programmatically while provisioning the sites.  But in my case, I have the site already.  Hence, I was about to do this manually through the site settings itself.

Go to the Site Settings and Language settings.  Select the Additional Languages and Click on Save.


Let me create a new page.

Created a page

Click on the Translation of the page.

On Click of the button, a new page will get created inside the es folder.


When we wanted to do this for a migrated site, which may have few thousands of pages, doing this is impossible and the migration tools will also not be able to do this.  In that case, writing a small utility to create the translation pages is very useful and effective.

As part of the earlier article, create the context.

Then, the below code will do the translation.

using (var scope = host.Services.CreateScope())

            {

                var pnpContextFactory = scope.ServiceProvider.GetRequiredService<IPnPContextFactory>();

                using (var context = await pnpContextFactory.CreateAsync("DemoSite"))

                {

                    var page = (await context.Web.GetPagesAsync("DemoPage")).FirstOrDefault();

                    await page.TranslatePagesAsync();

                }

            }

The above piece will do the same which we did manually earlier.  Hope this is simple and a good use case.


Happy Coding

Sathish Nadarajan

Author Info

Sathish Nadarajan
 
Solution Architect
 
Rate this article
 
Sathish is a Microsoft MVP for SharePoint (Office Servers and Services) having 15+ years of experience in Microsoft Technologies. He holds a Masters Degree in Computer Aided Design and Business ...read more
 

How to use a single PageLayout for View and Edit Mode in SharePoint 2013

Sathish Nadarajan
 
Solution Architect
April 1, 2015
 
Rate this article
 
Views
14283

In one of the older Article, we saw how to create a PageLayout using Visual Studio. A small add-on to that article is the one which we are going to see now.

I request the readers to read that article first and then reading this one is a worth. Moreover, here we are not going to discuss elaborately. Just a continuity of the older one as recently I met with this kind of requirement.

Basically a Layout which should be used for both the View and Edit Mode. The user will be editing the PublishingPageContent from this layout. As soon as they save the page, then the PublishingPageContent should be rendered on the same page.

For that, there is nothing much deviation from the older one. But the only thing is EditModePanel.

The aspx file would be something as below.

 <%@ Page Language="C#" Inherits="Microsoft.SharePoint.Publishing.PublishingLayoutPage,Microsoft.SharePoint.Publishing,Version=15.0.0.0,Culture=neutral,PublicKeyToken=71e9bce111e9429c" %>
 
 <%@ Register TagPrefix="SharePointWebControls" Namespace="Microsoft.SharePoint.WebControls" Assembly="Microsoft.SharePoint, Version=15.0.0.0, Culture=neutral, PublicKeyToken=71e9bce111e9429c" %>
 <%@ Register TagPrefix="WebPartPages" Namespace="Microsoft.SharePoint.WebPartPages" Assembly="Microsoft.SharePoint, Version=15.0.0.0, Culture=neutral, PublicKeyToken=71e9bce111e9429c" %>
 <%@ Register TagPrefix="PublishingWebControls" Namespace="Microsoft.SharePoint.Publishing.WebControls" Assembly="Microsoft.SharePoint.Publishing, Version=15.0.0.0, Culture=neutral, PublicKeyToken=71e9bce111e9429c" %>
 <%@ Register TagPrefix="PublishingNavigation" Namespace="Microsoft.SharePoint.Publishing.Navigation" Assembly="Microsoft.SharePoint.Publishing, Version=15.0.0.0, Culture=neutral, PublicKeyToken=71e9bce111e9429c" %>
 <asp:content contentplaceholderid="PlaceHolderAdditionalPageHead" runat="server">
 	<SharePointWebControls:CssRegistration name="<% $SPUrl:~sitecollection/Style Library/~language/Themable/Core Styles/pagelayouts15.css %>" runat="server"/>
 	<PublishingWebControls:EditModePanel runat="server">
 		<!-- Styles for edit mode only-->
 		<SharePointWebControls:CssRegistration name="<% $SPUrl:~sitecollection/Style Library/~language/Themable/Core Styles/editmode15.css %>"
 			After="<% $SPUrl:~sitecollection/Style Library/~language/Themable/Core Styles/pagelayouts15.css %>" runat="server"/>
 	</PublishingWebControls:EditModePanel>
 	<SharePointWebControls:FieldValue id="PageStylesField" FieldName="HeaderStyleDefinitions" runat="server"/>
 </asp:content>
 <asp:Content ContentPlaceHolderId="PlaceHolderPageTitle" runat="server">
 	<SharePointWebControls:FieldValue id="PageTitle" FieldName="Title" runat="server"/>
 </asp:Content>
 <asp:Content ContentPlaceHolderId="PlaceHolderPageTitleInTitleArea" runat="server">
 	<SharePointWebControls:FieldValue FieldName="Title" runat="server"/>
 </asp:Content>
 <asp:Content ContentPlaceHolderId="PlaceHolderTitleBreadcrumb" runat="server"> 
     <SharePointWebControls:ListSiteMapPath runat="server" SiteMapProviders="CurrentNavigationSwitchableProvider" RenderCurrentNodeAsLink="false" PathSeparator="" CssClass="s4-breadcrumb" NodeStyle-CssClass="s4-breadcrumbNode" CurrentNodeStyle-CssClass="s4-breadcrumbCurrentNode" RootNodeStyle-CssClass="s4-breadcrumbRootNode" NodeImageOffsetX=0 NodeImageOffsetY=289 NodeImageWidth=16 NodeImageHeight=16 NodeImageUrl="/_layouts/15/images/fgimg.png?rev=23" HideInteriorRootNodes="true" SkipLinkText="" />
 </asp:Content>
 <asp:Content ContentPlaceHolderId="PlaceHolderMain" runat="server">
 	<div class="article article-body">
 		<PublishingWebControls:EditModePanel runat="server" CssClass="edit-mode-panel title-edit">
 			<SharePointWebControls:TextField runat="server" FieldName="Title"/>
 		</PublishingWebControls:EditModePanel>
 		<div class="article-content">
 			<PublishingWebControls:RichHtmlField FieldName="PublishingPageContent" HasInitialFocus="True" MinimumEditHeight="400px" runat="server"/>
 		</div>
 		
 	</div>   
 	 
 </asp:Content>
 

Happy Coding.

Sathish Nadarajan.

Author Info

Sathish Nadarajan
 
Solution Architect
 
Rate this article
 
Sathish is a Microsoft MVP for SharePoint (Office Servers and Services) having 15+ years of experience in Microsoft Technologies. He holds a Masters Degree in Computer Aided Design and Business ...read more
 

Cross Site Publishing – Content Type Creation Creation – Part 4

Sathish Nadarajan
 
Solution Architect
March 2, 2015
 
Rate this article
 
Views
13861

Content Type Hub – Creation.

In this section, we will see how to create a Content Type Hub and make the content type available to the other site collections. Hope we remember, our CTHUB site is http://c4968397007:3000/sites/CTHUB

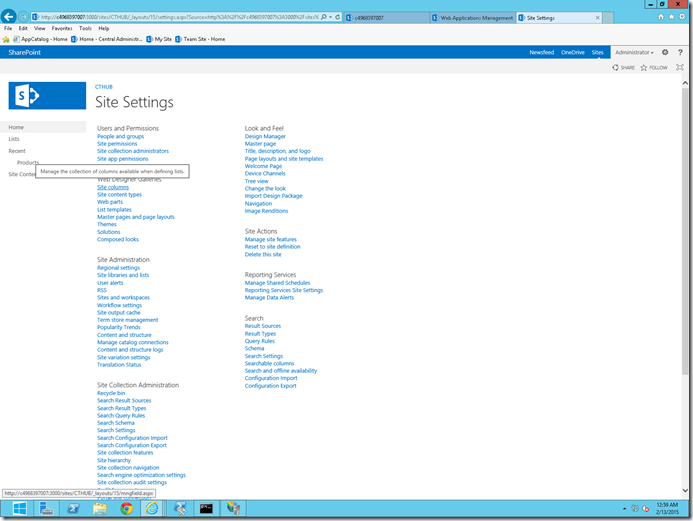
1. Login to the CTHUB Site. Navigate to Site Settings.
image

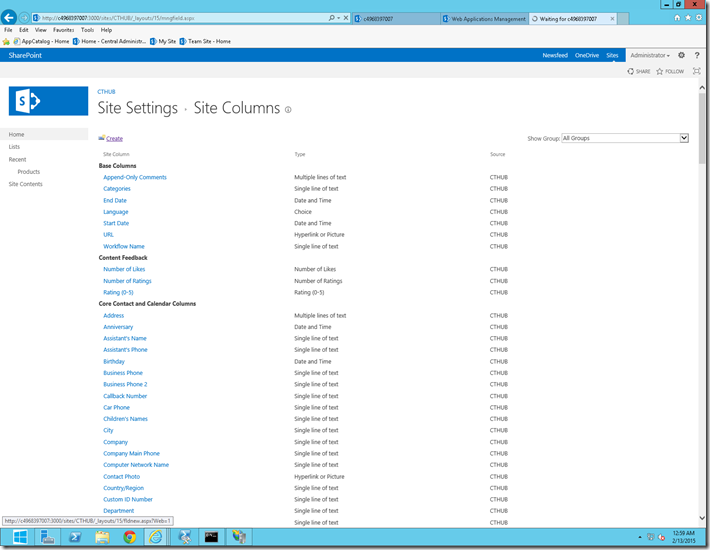
2. On the Site Columns, Create a Managed Metadata Column which is going to be our Navigation Term.
image

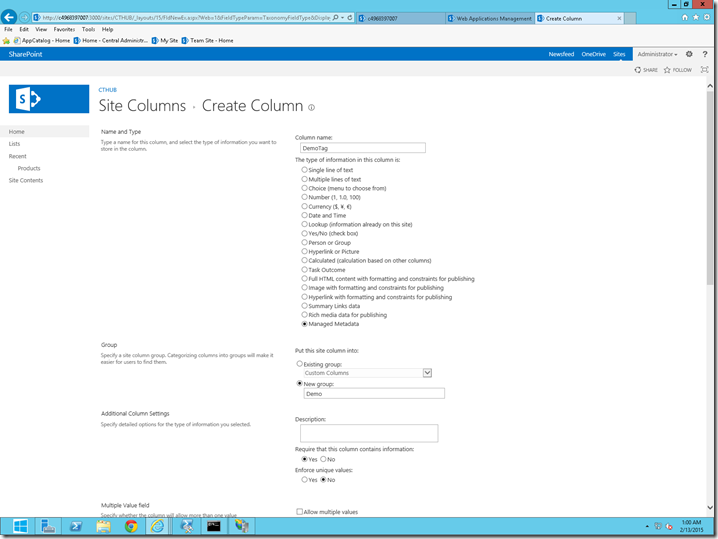
3. Let me name the Column as “DemoTag”
image

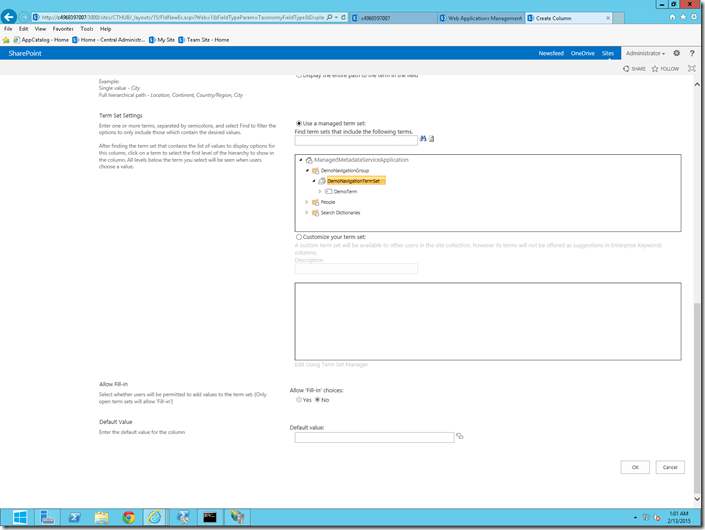
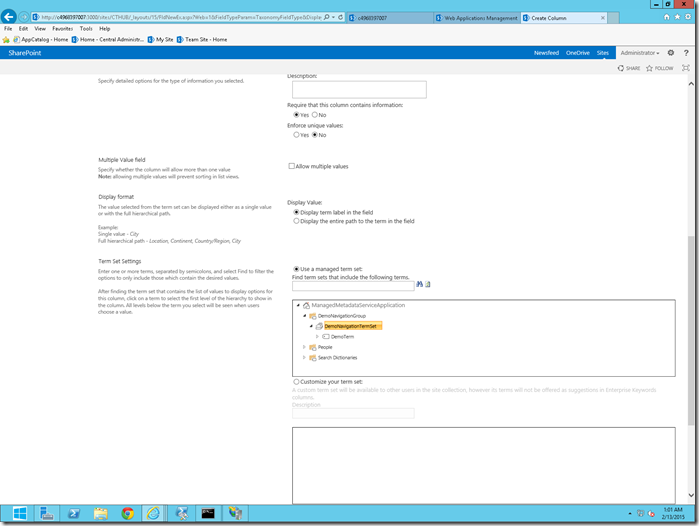
4. Select the Newly Created TermSet for that Column.
image

image 

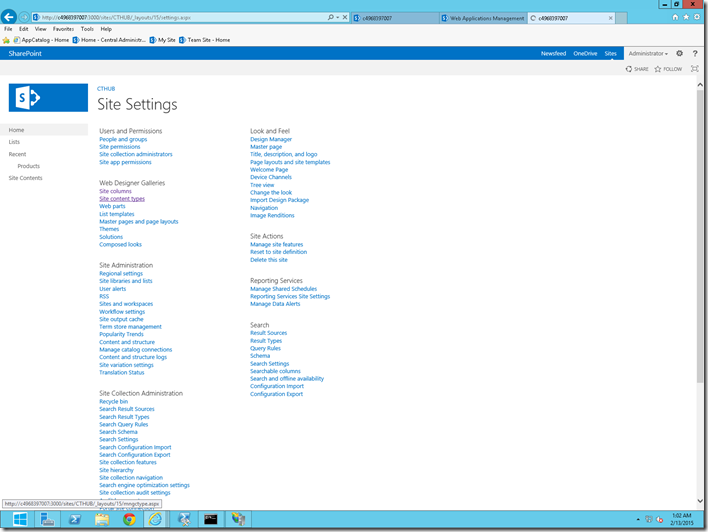
5. In the same manner, let me create a Content Type as well.
image

image


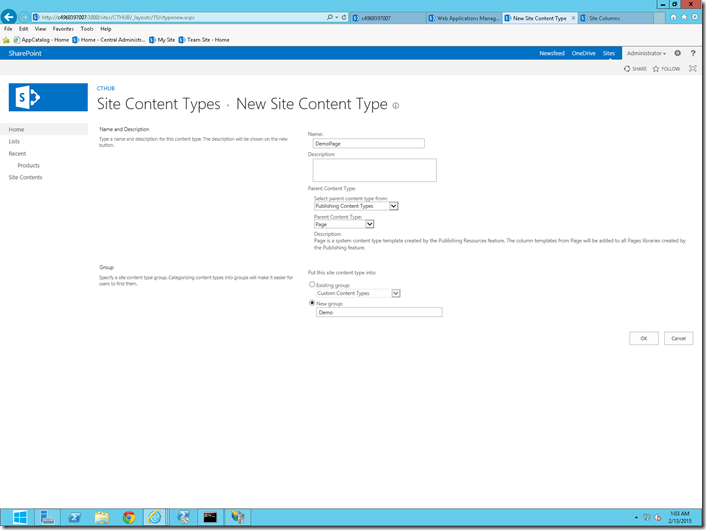
6. Let me name that as “DemoPage” and the Parent Content Type is “Pages” under the Publishing Content Type Category. I am doing this, because we are going to attach this content type to the “Pages” document Library on the Authoring Site Collection. We will see that later.
image

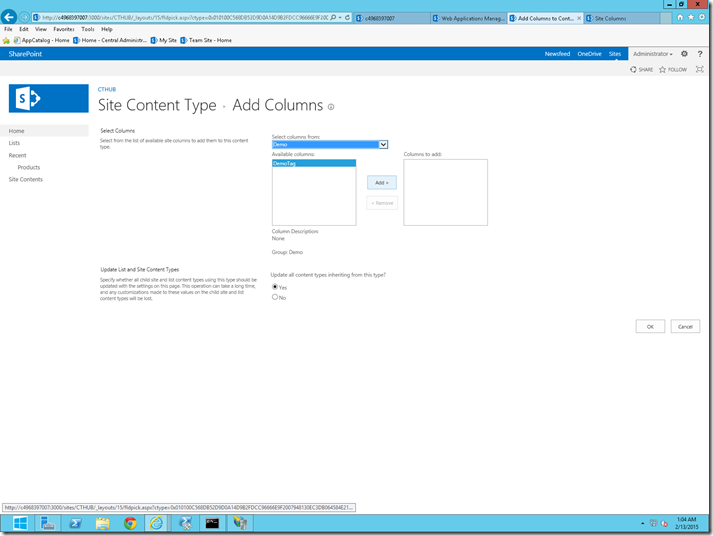
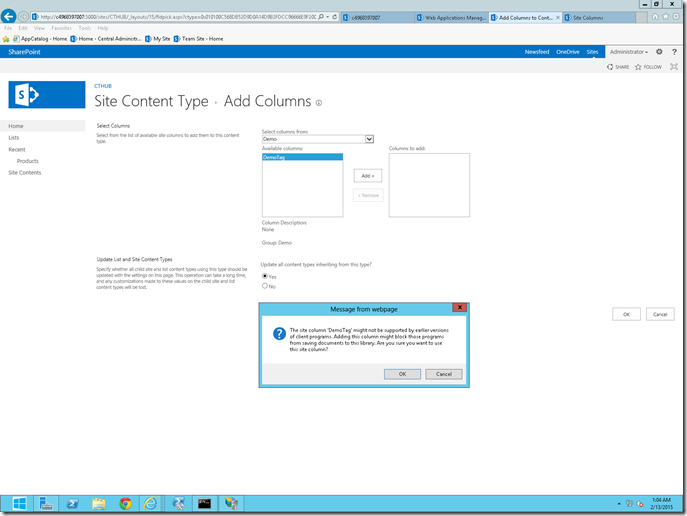
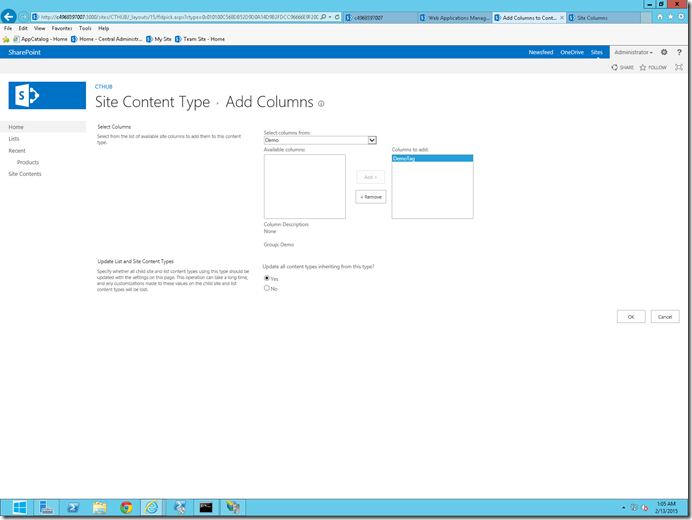
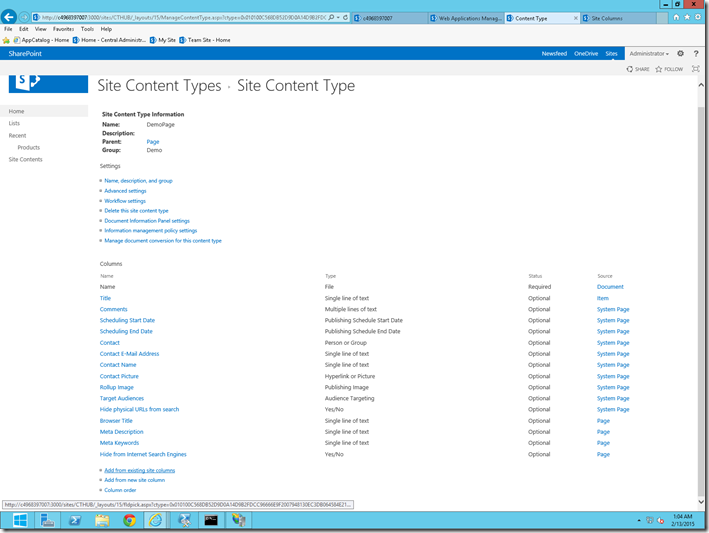
7. Once, the content type got created, add the newly created column to this content type.
image

image


image


image

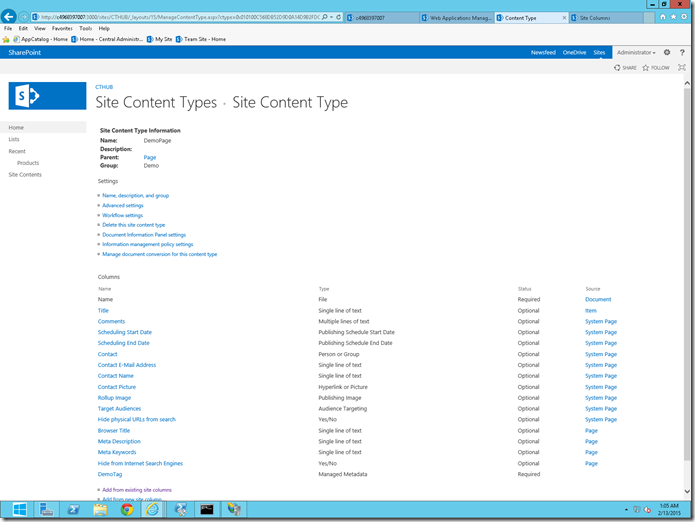
8. Now, the Content Type and the Site Column is ready.
image

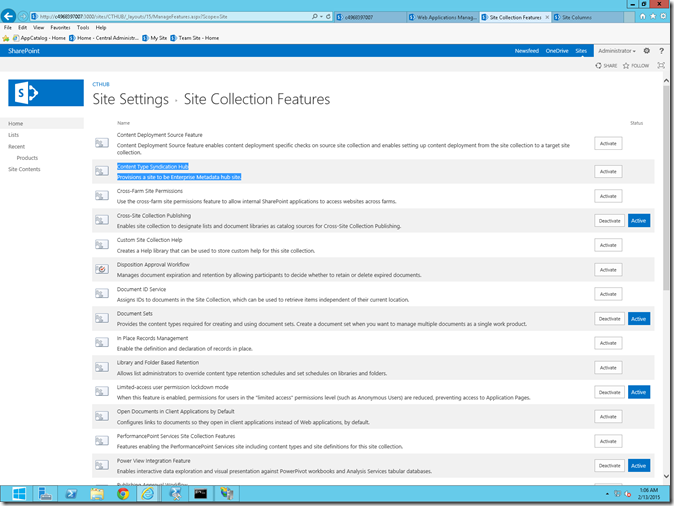
9. Go to the Site Settings -> Manage Site Collection Features of the CTHUB Site Collection. Activate the feature “Content Type Syndication Hub”.
image

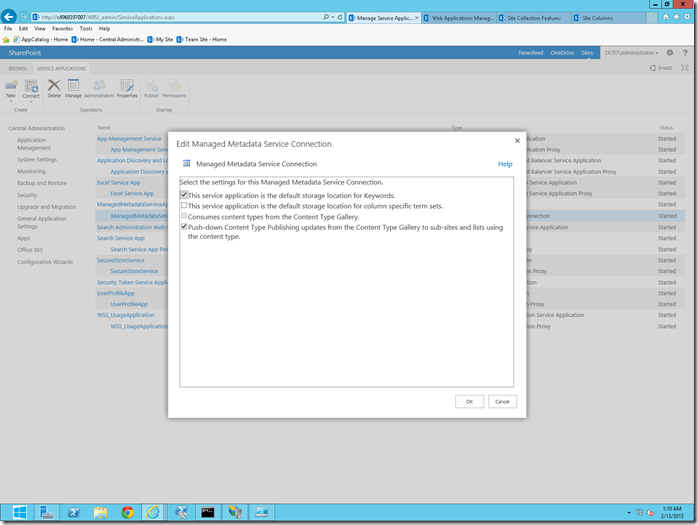
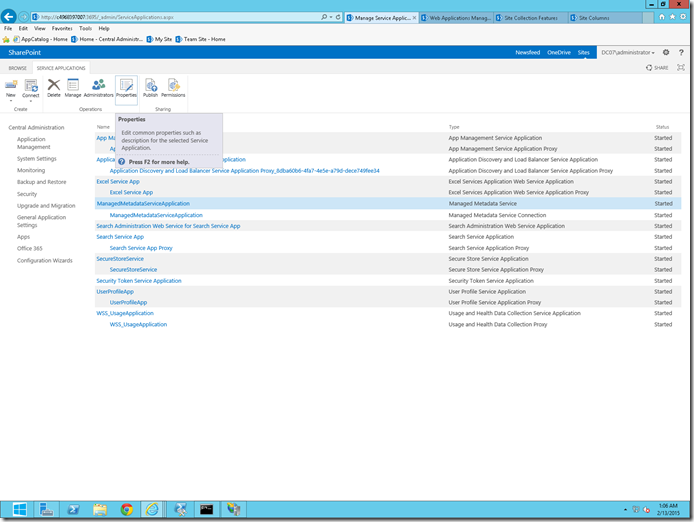
10. After that, we need to inform the Managed Metadata Service Application, that this is the Site, which we are going to Use as a Content Type Hub throughout this Farm. An important thing to be noticed here is, at any point of time, only one site collection can be treated as a Content Type Hub for one Farm.

11. To verify that, go to the Property of the “Managed Metadata Service Application” as well as the Proxy. Both of them will be as below.
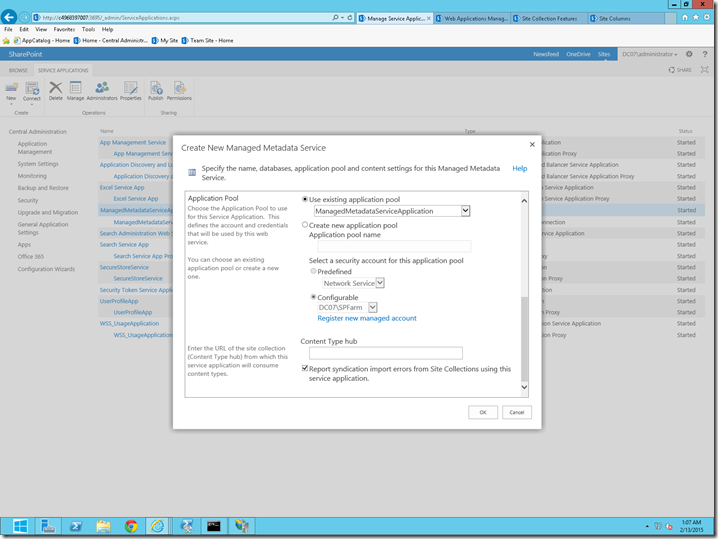
image

image

image  

12. Now, open the Powershell IDE and execute the below script.

Add-PSSnapin "Microsoft.SharePoint.PowerShell"

$mms = Get-SPServiceApplication -Name "ManagedMetadataServiceApplication"

Set-SPMetadataServiceApplication -Identity $mms -HubUri "http://c4968397007:3000/sites/CTHUB/"

Write-Host "Done" -ForegroundColor Green

$mmsp = Get-SPServiceApplicationProxy | ? {$_.DisplayName -eq "ManagedMetadataServiceApplication"}

Set-SPMetadataServiceApplicationProxy -Identity $mmsp -ContentTypeSyndicationEnabled -ContentTypePushdownEnabled -Confirm:$false

Write-Host "Done" -ForegroundColor Green

13. After the successful execution of the script, let us come back and again see the properties. It should be as below. i.e., the “Content Type Hub” URL will be added. Again an important thing here is, if you added once, then this property cannot be modified using the User Interface. We need to use the above script to update the “Content Type Hub” property of the Managed Metadata Service Application. There is no other option using the browser.
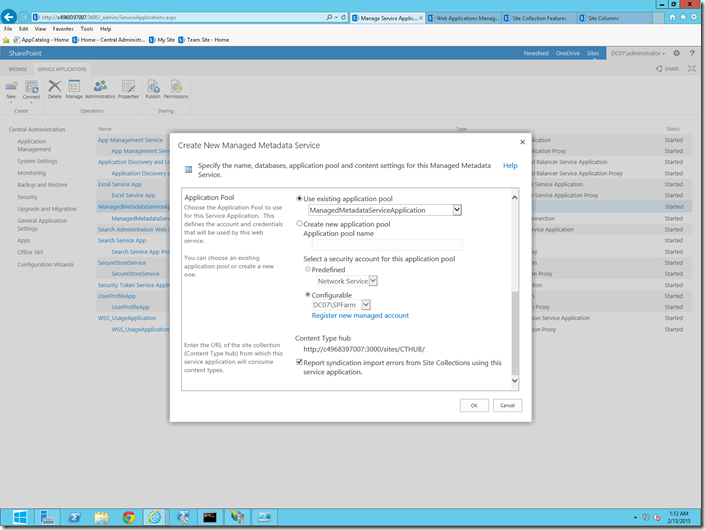
image

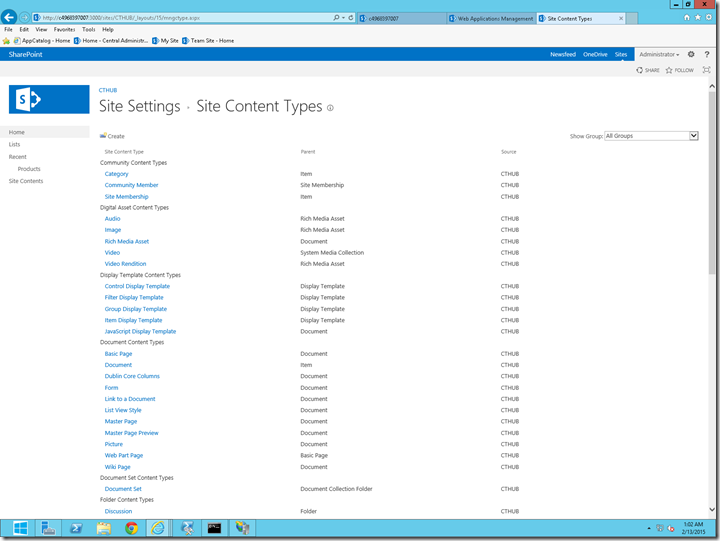
14. Now, coming to the CTHUB -> Site Content Types, Select the newly created “DemoPage” Content Type.

15. Click on the “Manage Publishing for this Content Type” link.
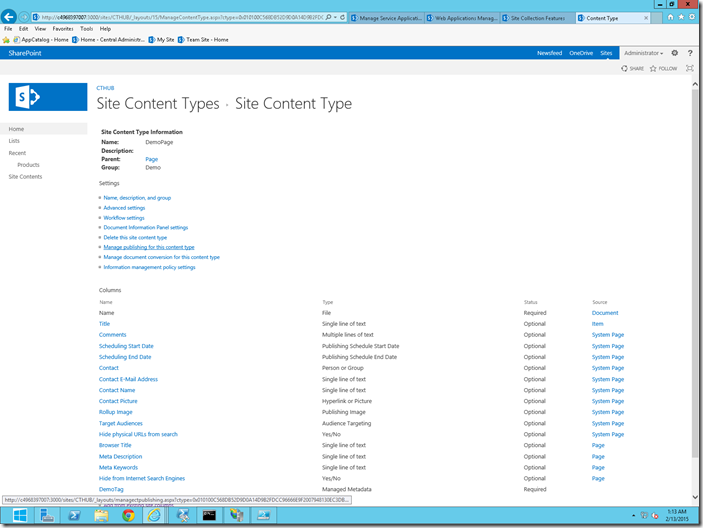
image

16. Select Publish and click OK. In case, if you have already published, then select “RePublish” and click OK.
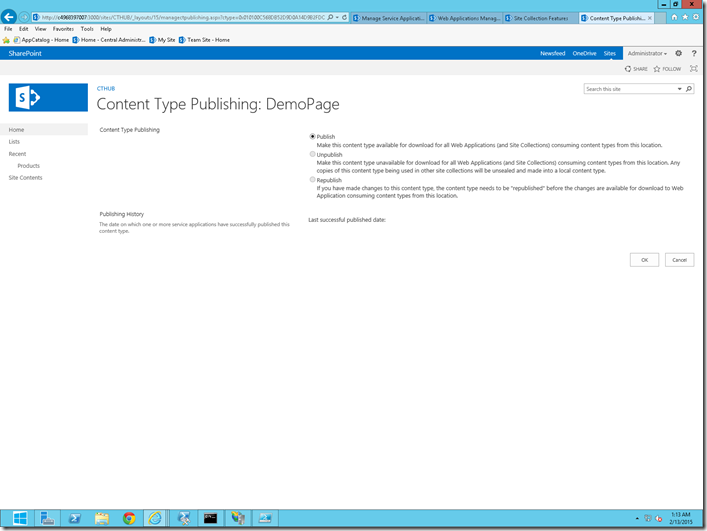
image

17. Now, let us see how to make use of this content type from the “Authoring” Site Collection.

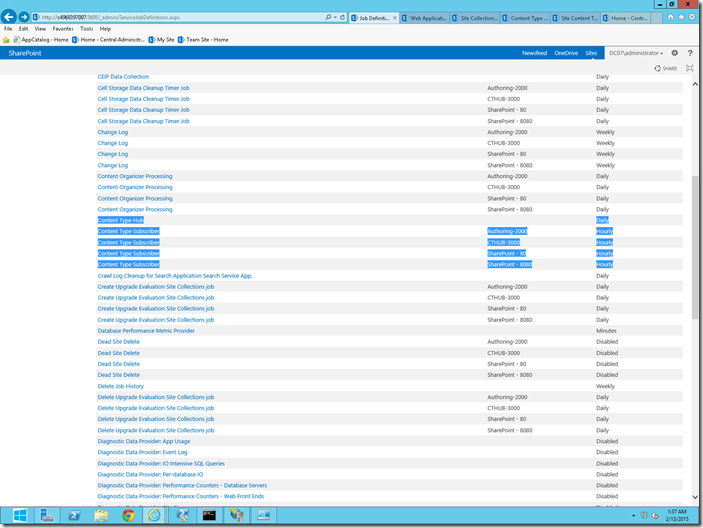
18. To see that immediately, we need to execute 2 timer Jobs from the Central Administration.
image

19. Make sure those timer jobs were executed without any issues.

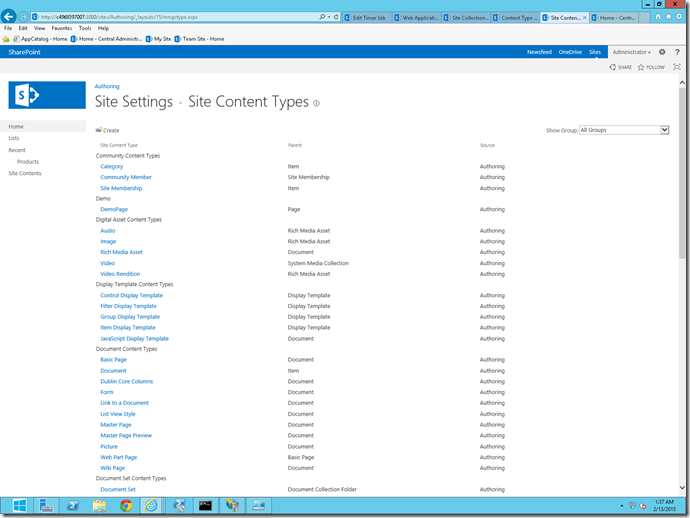
20. Now, on the Authoring Site Content Types, we will be able to see the Content Type which we created on the CTHUB Site.
image

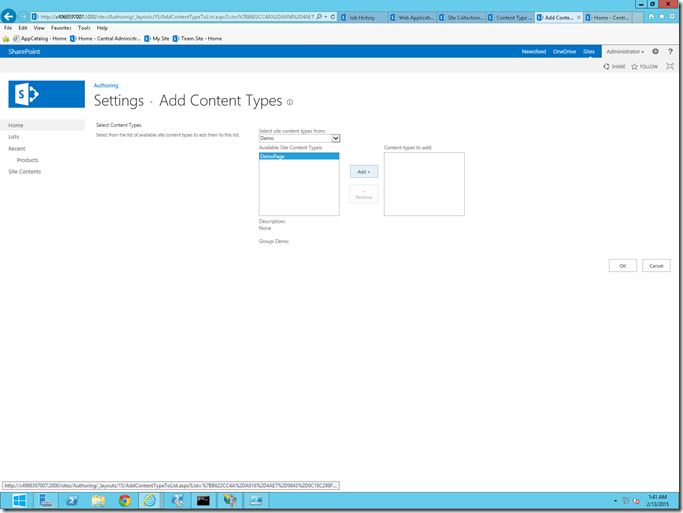
21. Let us add this “DemoPage” Content Type to the “Pages” Document Library.
image

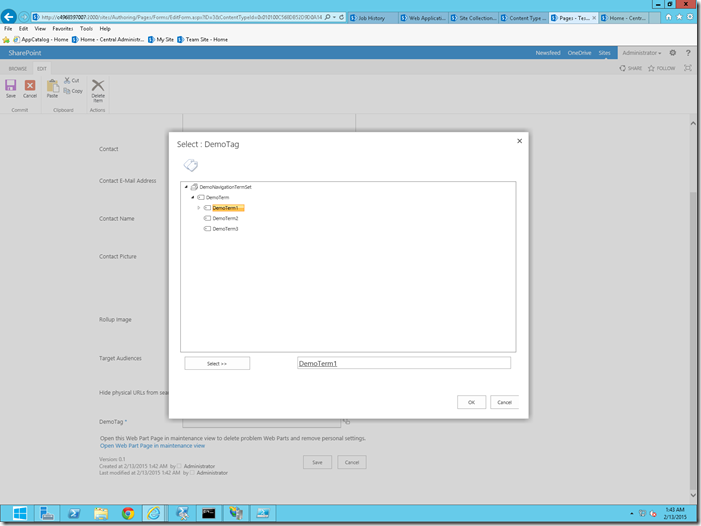
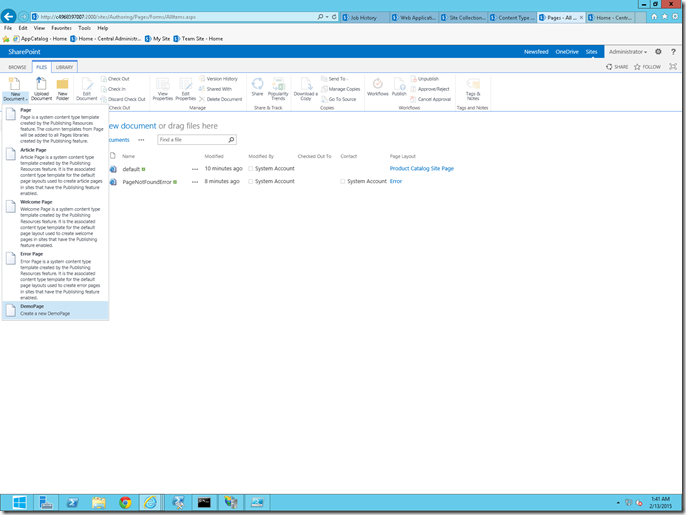
22. Make sure that you are able to create a Page using this newly added Content Type on the Authoring Site Collection.
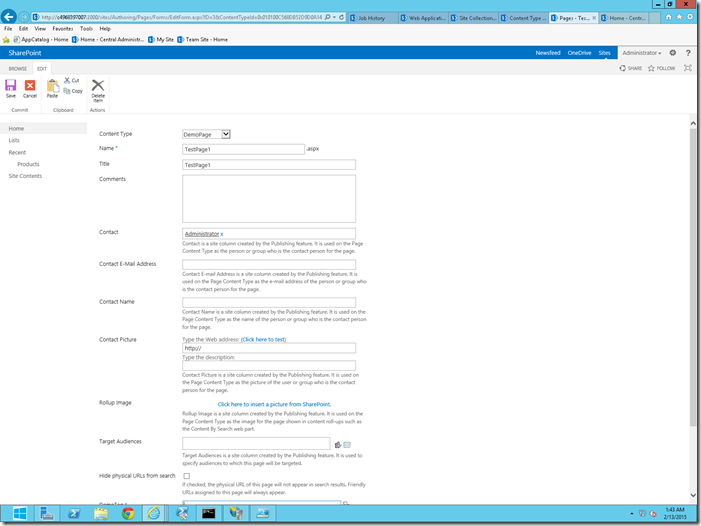
image

image

image  

23. Yes, now I am able to successfully create Page and able to checkin, publish.
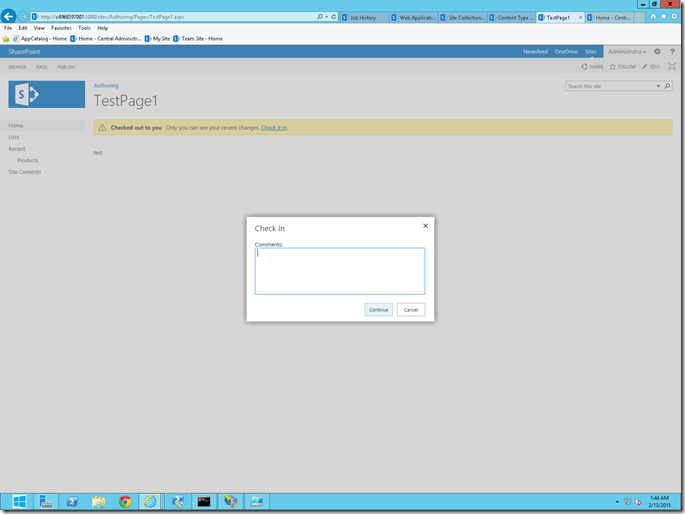
image


24. Do a Full Crawl.

Let us see about the Managed and Crawled Properties in Part5

Happy Coding.

Sathish Nadarajan.

Author Info

Sathish Nadarajan
 
Solution Architect
 
Rate this article
 
Sathish is a Microsoft MVP for SharePoint (Office Servers and Services) having 15+ years of experience in Microsoft Technologies. He holds a Masters Degree in Computer Aided Design and Business ...read more
 

How to Create Page layout using design manager

Santhosh Babu
 
Technology Specialist
January 5, 2014
 
Rate this article
 
Views
16649

In this post I am going to create a page layout using design manager.

Step 1:

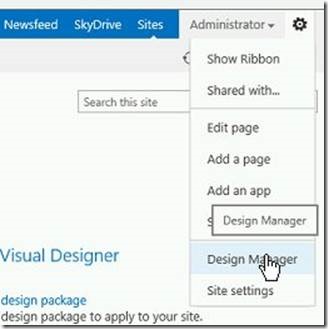
Open the site then click design manager link from right top corner "Settings" menu.

clip_image002

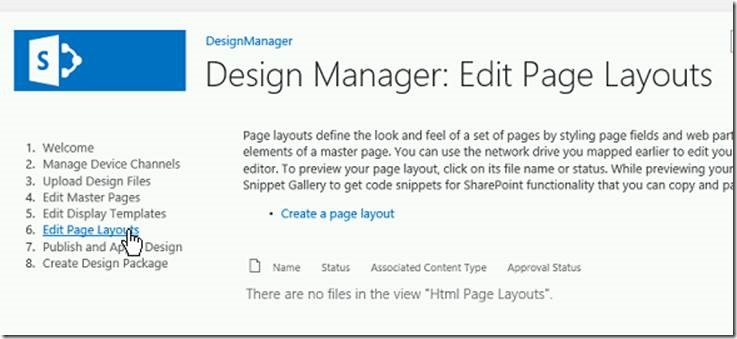
Step 2: Click “Edit Page Layouts” link


clip_image004


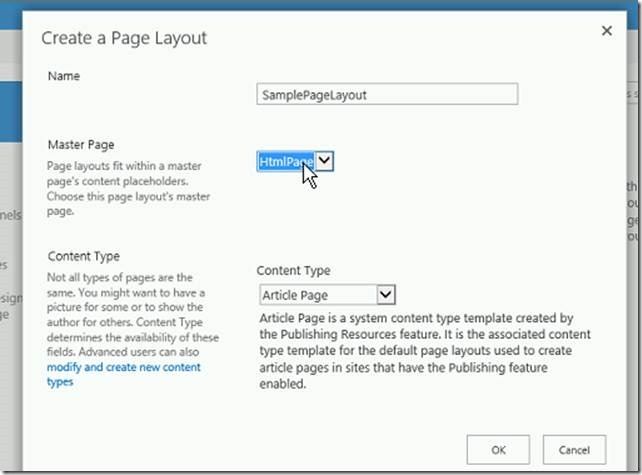
Step 3: Click “Create a page layout” link. It will open a popup window and select Master page (which we have created in earlier post) for this scenario we need to select “HTMLPage” then click ok button.
clip_image006


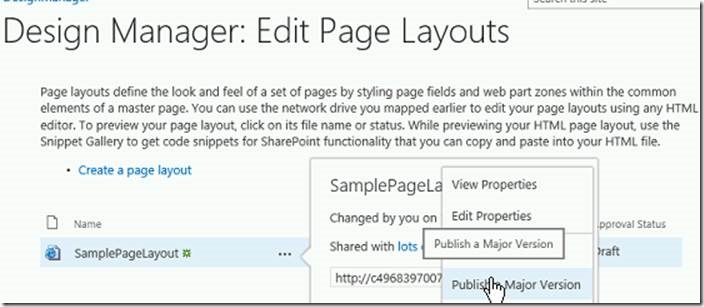
Step 4: Once the page layout created then publish the same.
clip_image008


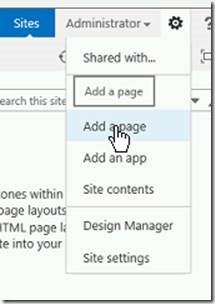
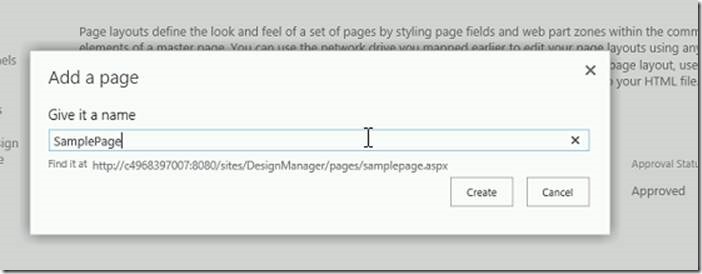
Step 5: After publish the page layout click the “Settings” icon then click Add a Page. It will open a popup window and provide the page name and click create button.

clip_image010

clip_image012


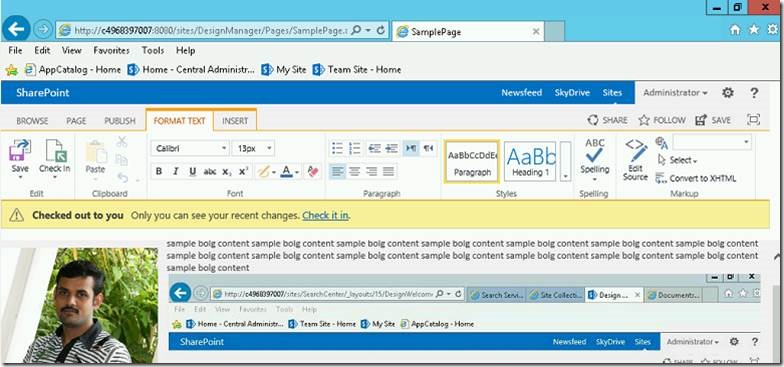
Step 6: After created page automatically redirect to the new page.

clip_image014


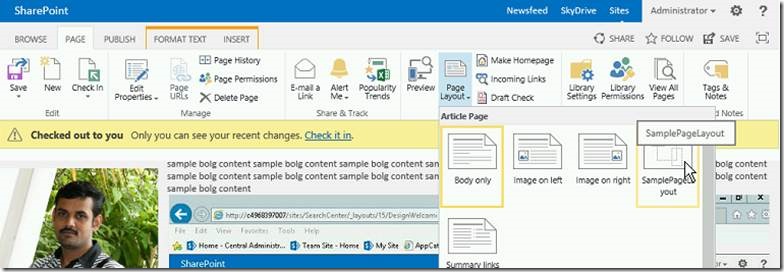
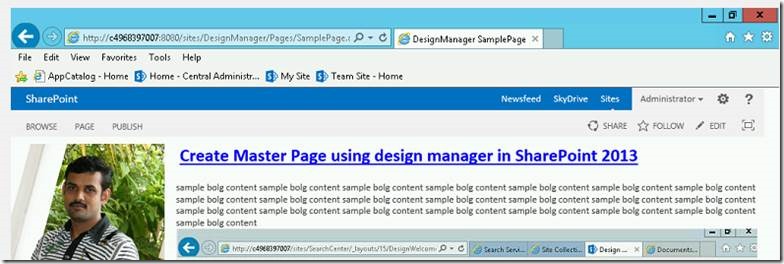
Step 7: Select the PAGE tab and open Page Layout menu then select “SamplePageLayout”. It will change the page layout. After then check-in and publish the page.


clip_image016


clip_image018


Next Blog I will explain about how to add code snippet in page layout.

Happy Coding.

SanthoshBabu ManickaMohan

Author Info

Santhosh Babu
 
Technology Specialist
 
Rate this article
 
Working as a Technology Specialist in SharePoint ~ Cognizant ...read more
 

Leave a comment