PowerShell : Change the Layout of the SharePoint Page

Sathish Nadarajan
 
Solution Architect
July 9, 2021
 
Rate this article
 
Views
2149

In SharePoint Online, when we create a new modern page, by default, the header of the page is coming as below. Sometimes, we don’t want that to be displayed. To hide the title bar, we can change the layout of the page itself.


#Connect to SharePoint Online site
$SiteURL = "https://sppalsmvp.sharepoint.com/sites/ReactRepository/"
Connect-PnPOnline $SiteURL -Credential (Get-Credential)

#Get the ID of the Page
Get-PnPListItem -List SitePages

#Change Page layout from "Article" to "Home"
Set-PnPListItem -List SitePages –Identity "13" -Values @{"PageLayoutType"="Home"}

Then, the title bar will not appear on this layout.

Happy Coding
Sathish Nadarajan

Author Info

Sathish Nadarajan
 
Solution Architect
 
Rate this article
 
Sathish is a Microsoft MVP for SharePoint (Office Servers and Services) having 15+ years of experience in Microsoft Technologies. He holds a Masters Degree in Computer Aided Design and Business ...read more
 

PowerShell Warning : The file is not digitally signed. You cannot run this script on the current system.

Sathish Nadarajan
 
Solution Architect
July 8, 2021
 
Rate this article
 
Views
1981

Warning : The file is not digitally signed. You cannot run this script on the current system. For more information about running scripts and setting execution policy, see about_Execution_Policies.

Solution :

Set-ExecutionPolicy -Scope Process -ExecutionPolicy Bypass

Happy Coding
Sathish Nadarajan

Category : PowerShell, SharePoint

Author Info

Sathish Nadarajan
 
Solution Architect
 
Rate this article
 
Sathish is a Microsoft MVP for SharePoint (Office Servers and Services) having 15+ years of experience in Microsoft Technologies. He holds a Masters Degree in Computer Aided Design and Business ...read more
 

CSOM – PowerShell Script – Import Nintex Workflows in SharePoint

Sathish Nadarajan
 
Solution Architect
February 10, 2021
 
Rate this article
 
Views
1006

In this article, let us see how to Import Nintex Workflows in SharePoint using CSOM PowerShell Script.
The code is self-explanatory.

01.ImprotNintexForms

function Import-NintexWorkflow {
<# .SYNOPSIS Imports a Nintex workflow .nwf file to a list. .DESCRIPTION Imports a Nintex workflow .nwf file to a list. #>
[CmdletBinding()]
param(
[string]$WebUrl = $(throw "Required parameter -WebUrl missing"),
[string]$listName = $(throw "Required parameter -ListName missing"),
[string[]]$workflowNames = $(throw "Required parameter -workflowNames missing"),
[string]$WorkflowFolderPath = $(throw "Required parameter -WorkflowFolderPath missing"),
[bool]$OverwriteExistingVersion = $false
)
begin {
if(!(Get-PnPConnection)) {
throw "There is no PnPConnection"
}
Write-Host "---- Importing Nintex workflow to '$($listName)' ----" -ForegroundColor Yellow
}
process {
$List = Get-PnPList -Identity $listName
$ListID = $List.Id.ToString()
$ListName = $List.Title
$webServiceUrl = "$WebUrl/_vti_bin/NintexWorkflow/Workflow.asmx"
$webServiceProxy = New-WebServiceProxy -Uri $webServiceUrl -UseDefaultCredential
$webServiceProxy.URL = $webServiceUrl

for ($i=0;$i -lt $workflowNames.Length; $i++) {
$WorkflowName = $workflowNames[$i] + "_6"
$WorkflowFilePath = $WorkflowFolderPath + "" + $workflowNames[$i] + ".nwf"

$nwfContent = Get-Content "$WorkflowFilePath"
$utf8 = New-Object System.Text.UTF8Encoding
[byte[]] $byteData = $utf8.GetBytes($nwfContent.ToString())
$hasWorkflowPublished = $webServiceProxy.WorkflowExists($WorkflowName,$ListID,"List")
Write-Host "Workflow exists status: '$hasWorkflowPublished'" -ForegroundColor Cyan
if($hasWorkflowPublished -eq "NameUsedInOtherList" -or $hasWorkflowPublished -eq "NameUsedInThisList") {
#May be delete it
Write-Host "Workflow already exists '$hasWorkflowPublished', if status is 'NameUsedInOtherList' no changes can be made. Please delete it." -ForegroundColor Cyan
}
if($hasWorkflowPublished -eq "NameNotUsed" -or ($hasWorkflowPublished -eq "NameUsedInThisList" -and $OverwriteExistingVersion -eq $true)){
$IsPublished = $webServiceProxy.PublishFromNWF($byteData, $ListName, $WorkflowName, $true)
if($IsPublished) {
Write-Host "Nintex Workflow '$WorkflowName' successfully published to list '$ListName'" -ForegroundColor Green
} else {
Write-Host "Nintex Workflow '$WorkflowName' could not be published to list '$ListName'" -ForegroundColor Yellow
}
}
}
}
end { }
}

Run.ps1

#=========================================== Description Start ========================================= #
# Deploy from a List

# Author : Sathish Nadarajan
# Date : 03-Feb-2021
#=========================================== Description End====================================== #

# ============================================ PreRequisites Start ================================= #

#Get-Module -Name *pnp*
#Pre Req - SharePoint PnP PowerShell Version 2.25.1804.1

#=============================================PreRequisites End =============================== #

#============================================= Initial Setup Start =============================== #

cls

$Host.UI.RawUI.WindowTitle = "-- Deploy Assets --"

$StartDate = Get-Date
Write-Host -ForegroundColor White "------------------------------------"
Write-Host -ForegroundColor White "| Deploy Assets |"
Write-Host -ForegroundColor White "| Started on: $StartDate |"
Write-Host -ForegroundColor White "------------------------------------"

#Add-PSSnapin Microsoft.SharePoint.PowerShell

$LogTime = Get-Date -Format yyyy-MM-dd_hh-mm-ss

$scriptBase = split-path $SCRIPT:MyInvocation.MyCommand.Path -parent
Set-Location $scriptBase

# Create Log File Folder3
if(!(TEST-PATH ".Logs-$LogTime")){
NEW-ITEM ".Logs-$LogTime" -type Directory
}

# Assign the Log and Progress Files
$TranscriptFile = ".Logs-$LogTimeDeploy.Transcript.rtf"
try{
stop-transcript|out-null
}
catch [System.InvalidOperationException]{}
start-transcript $TranscriptFile

#============================================= Initial Setup End =============================== #

# ============================================ Setup Input Paths Start ================================= #

#connect to the SharePoint list
$sourceWebUrl = 'http://andytest-sp:555/sites/newsite/'
$sourceListname = "AssetRegisterV2"

$outputFolderPath = ".Logs-$LogTime"

$targetWebUrl = 'http://andytest-sp:555/sites/newsite/'
$targetListname = "AssetRegister_Test"
$workflowNames = @('Send Notification When Child is Promoted as Parent','Send Notification When Asset is deleted')

# ============================================ Setup Input Paths End ================================= #

Import-Module ".4.ImportNintexWorkflows.ps1"

Write-Host "Begin to Execute.." -ForeGroundColor Yellow
"Begin to Execute..." | Out-File -FilePath $TranscriptFile -Append

Connect-PnPOnline -Url $sourceWebUrl -CurrentCredentials -ErrorAction Inquire

Import-NintexWorkflow $targetWebUrl $targetListname $workflowNames $outputFolderPath $true
Disconnect-PnPOnline

Write-Host "Update Completed.. Press Enter to Exit" -ForeGroundColor Green

try{
stop-transcript|out-null
}
catch [System.InvalidOperationException]{}


Happy Coding
Sathish Nadarajan

Author Info

Sathish Nadarajan
 
Solution Architect
 
Rate this article
 
Sathish is a Microsoft MVP for SharePoint (Office Servers and Services) having 15+ years of experience in Microsoft Technologies. He holds a Masters Degree in Computer Aided Design and Business ...read more
 

CSOM – PowerShell Script – Export Nintex Workflows in SharePoint

Sathish Nadarajan
 
Solution Architect
February 9, 2021
 
Rate this article
 
Views
1780

During the time of deployment, we may in a need to export and import the workflows from our DEV environment to the higher environment. In this article, let us see how to Export Nintex Workflows in SharePoint using CSOM PowerShell Script.

The code is self-explanatory.

01.ExportNintexForms


function Export-NintexWorkflow {
<# .SYNOPSIS Export a Nintex workflow .nwf file to a local directory .DESCRIPTION Export a Nintex workflow .nwf file to a local directory #>
[CmdletBinding()]
param(
[string]$WebUrl = $(throw "Required parameter -WebUrl missing"),
[string]$listName = $(throw "Required parameter -ListName missing"),
[string[]]$workflowNames = $(throw "Required parameter -WorkflowNames missing"),
[string]$FilePath = $(throw "Required parameter -FilePath missing")
)
begin {
if(!(Get-PnPConnection)) {
throw "There is no PnPConnection"
}
Write-Host "---- Exporting Nintex workflow for '$($List.Title)' ----" -ForegroundColor Yellow
}
process {
$List = Get-PnPList -Identity $listName
$timeStampString = [DateTime]::Now.ToString("yyyyMMdd-HHmmss")
# Get XML New File path
$xmlFilePath = "$FilePath$($List.Title)-$timeStampString.nwf"

$webServiceUrl = "$WebUrl/_vti_bin/NintexWorkflow/Workflow.asmx"
$webServiceProxy = New-WebServiceProxy -Uri $webServiceUrl -UseDefaultCredential
$webServiceProxy.URL = $webServiceUrl
$ctx=Get-PnPContext

$ctx.load($List.WorkflowAssociations)
$ctx.ExecuteQuery()

#Get all workflows that are associated with the current list
foreach($listassociation in $List.WorkflowAssociations) {
if($workflowNames.Contains($listassociation.Name)){
$WorkflowName = $listassociation.Name
$workflowContent = $webServiceProxy.ExportWorkflow($WorkflowName, $List.Title, "list")
$xmlFilePath = "$FilePath$WorkflowName.nwf"
#Save XML File to Disk
$workflowContent | Out-File $xmlFilePath
Write-Host "Nintex workflow '$WorkflowName' exported successfully to '$xmlFilePath'" -ForegroundColor Green
}
}
}
end { }
}


Run.ps1

#=========================================== Description Start ========================================= #
# Deploy from a List

# Author : Sathish Nadarajan
# Date : 03-Feb-2021
#=========================================== Description End====================================== #

# ============================================ PreRequisites Start ================================= #

#Get-Module -Name *pnp*
#Pre Req - SharePoint PnP PowerShell Version 2.25.1804.1

#=============================================PreRequisites End =============================== #

#============================================= Initial Setup Start =============================== #

cls

$Host.UI.RawUI.WindowTitle = "-- Deploy Assets --"

$StartDate = Get-Date
Write-Host -ForegroundColor White "------------------------------------"
Write-Host -ForegroundColor White "| Deploy Assets |"
Write-Host -ForegroundColor White "| Started on: $StartDate |"
Write-Host -ForegroundColor White "------------------------------------"

#Add-PSSnapin Microsoft.SharePoint.PowerShell

$LogTime = Get-Date -Format yyyy-MM-dd_hh-mm-ss

$scriptBase = split-path $SCRIPT:MyInvocation.MyCommand.Path -parent
Set-Location $scriptBase

# Create Log File Folder3
if(!(TEST-PATH ".Logs-$LogTime")){
NEW-ITEM ".Logs-$LogTime" -type Directory
}

# Assign the Log and Progress Files
$TranscriptFile = ".Logs-$LogTimeDeploy.Transcript.rtf"
try{
stop-transcript|out-null
}
catch [System.InvalidOperationException]{}
start-transcript $TranscriptFile

#============================================= Initial Setup End =============================== #

# ============================================ Setup Input Paths Start ================================= #

#connect to the SharePoint list
$sourceWebUrl = 'http://SourceSiteURL/sites/newsite/'
$sourceListname = "AssetRegisterV2"

$outputFolderPath = ".Logs-$LogTime"

$targetWebUrl = 'http://TargetSiteURL/sites/newsite/'
$targetListname = "AssetRegister_Test"
$workflowNames = @('Send Notification When Child is Promoted as Parent','Send Notification When Asset is deleted')

# ============================================ Setup Input Paths End ================================= #

Import-Module ".3.ExportNintexWorkflows.ps1"

Write-Host "Begin to Execute.." -ForeGroundColor Yellow
"Begin to Execute..." | Out-File -FilePath $TranscriptFile -Append

Connect-PnPOnline -Url $sourceWebUrl -CurrentCredentials -ErrorAction Inquire

Export-NintexWorkflow $sourceWebUrl $sourceListname $workflowNames $outputFolderPath

Disconnect-PnPOnline

Write-Host "Update Completed.. Press Enter to Exit" -ForeGroundColor Green

try{
stop-transcript|out-null
}
catch [System.InvalidOperationException]{}

Happy Coding
Sathish Nadarajan

Author Info

Sathish Nadarajan
 
Solution Architect
 
Rate this article
 
Sathish is a Microsoft MVP for SharePoint (Office Servers and Services) having 15+ years of experience in Microsoft Technologies. He holds a Masters Degree in Computer Aided Design and Business ...read more
 

CSOM – PowerShell Script – Export and Import Nintex Forms in SharePoint

Sathish Nadarajan
 
Solution Architect
February 8, 2021
 
Rate this article
 
Views
1907

In this article, let us see how to Export and Import Nintex Forms in SharePoint using CSOM PowerShell Script.
The code is self-explanatory.

01.ExportNintexForms.ps1

function Export-NintexForm {
<# .SYNOPSIS Exports a Nintex form XML to a local directory. .DESCRIPTION Exports a Nintex form XML to a local directory. #>
[CmdletBinding()]
[OutputType([string])]
param(
[string]$WebUrl = $(throw "Required parameter -WebUrl missing"),
[string]$ListName = $(throw "Required parameter -ListName missing"),
[string]$FilePath = $(throw "Required parameter -FilePath missing")
)
begin {
if(!(Get-PnPConnection)) {
throw "There is no PnPConnection"
}
Write-Host "---- Exporting Nintex form for '$ListName' ----" -ForegroundColor Yellow
}
process {
$xmlFilePath ="";
$list = Get-PnPList -Identity $ListName

$addressUrl = "$WebUrl/_vti_bin/NintexFormsServices/NfRestService.svc/GetFormXml"
$addressUri = New-Object System.Uri($addressUrl)

# Create the web request
[System.Net.HttpWebRequest] $request = [System.Net.WebRequest]::Create($addressUri)

# Add authentication to request
$request.Credentials = [System.Net.CredentialCache]::DefaultNetworkCredentials

# Set type to POST
$request.Method = "POST";
$request.ContentType = "application/json; charset=utf-8";
$request.Accept = "application/json, text/javascript, */*; q=0.01"
$request.Headers.Add("X-Requested-With", "XMLHttpRequest")

# Create the data we want to send
$id = "{$($list.ID)}"
$contentTypeID = "{0x01000***********}" #Give the content Type ID
$data = "{`"contentTypeId`": `"$contentTypeID`", `"listId`": `"$id`" }"

# Create a byte array of the data we want to send
$utf8 = New-Object System.Text.UTF8Encoding
[byte[]] $byteData = $utf8.GetBytes($data.ToString())

# Set the content length in the request headers
$request.ContentLength = $byteData.Length;

# Write data
try {
$postStream = $request.GetRequestStream()
$postStream.Write($byteData, 0, $byteData.Length);
}
catch [Exception]{
Write-Host -f red $_.Exception.ToString()
}
finally {
if($postStream) { $postStream.Dispose() }
}

# Get response
try {
[System.Net.HttpWebResponse] $response = [System.Net.HttpWebResponse] $request.GetResponse()
# Get the response stream
[System.IO.StreamReader] $reader = New-Object System.IO.StreamReader($response.GetResponseStream())

try {
$strResult = $reader.ReadToEnd()
$xml = [System.Web.HttpUtility]:: HtmlDecode($strResult)

#Once Deserialized XML will get generated with below string tag, insted of going for XML manupulation I have removed the string tag from the xml
$xmlExcludedStringTag = $xml -replace "" , "";
$xmlExcludedStringTag = $xmlExcludedStringTag -replace "" , "";

$timeStampString = [DateTime]::Now.ToString("yyyyMMdd-HHmmss")
# Get XML New File path
$xmlFilePath = "$FilePath$($ListName)Form-$timeStampString.xml";

#Save XML File to Disk
#$xmlExcludedStringTag | Out-File $xmlFilePath
$enc = [system.Text.Encoding]::Unicode
$encodedData = $enc.GetBytes($xmlExcludedStringTag)
$encodedData | Set-Content $xmlFilePath -Encoding Byte
Write-Host "Nintex form exported successfully to '$xmlFilePath'" -ForegroundColor Green
return $xmlFilePath
}
catch [Exception] {
Write-Host -f red $_.Exception.ToString()
}
}
catch [Exception] {
Write-Host -f red $_.Exception.ToString()
}
finally {
if($response) { $response.Dispose() }
}
$xmlFilePath
}
end { }
}

02.ImportNintexForms.ps1

function Read-FileBytes($Filename)
{
try {
[system.io.stream] $stream = [system.io.File]::OpenRead($Filename)
try {
[byte[]] $filebytes = New-Object byte[] $stream.length
[void] $stream.Read($filebytes, 0, $stream.Length)

return $filebytes
}
finally {
$stream.Close()
}
}
catch {

return
}
return $true;
}

function Get-FormDigest($webUrl )
{
[System.Reflection.Assembly]::LoadWithPartialName("System.IO") >> $null

#$formDigestRequest = [Microsoft.SharePoint.Utilities.SPUtility]::ConcatUrls($webUrl, "_api/contextinfo")
$formDigestRequest = $webUrl + "/_api/contextinfo"
$formDigestUri = New-Object System.Uri($formDigestRequest)
$credCache = New-Object System.Net.CredentialCache
$credCache.Add($formDigestUri, "NTLM", [System.Net.CredentialCache]::DefaultNetworkCredentials)
$spRequest = [System.Net.HttpWebRequest] [System.Net.HttpWebRequest]::Create($formDigestRequest)
$spRequest.Credentials = $credCache
$spRequest.Method = "POST"
$spRequest.Accept = "application/json;odata=verbose"
$spRequest.ContentLength = 0

[System.Net.HttpWebResponse] $endpointResponse = [System.Net.HttpWebResponse] $spRequest.GetResponse()
[System.IO.Stream]$postStream = $endpointResponse.GetResponseStream()
[System.IO.StreamReader] $postReader = New-Object System.IO.StreamReader($postStream)
$results = $postReader.ReadToEnd()

$postReader.Close()
$postStream.Close()

#Get the FormDigest Value
$startTag = "FormDigestValue"
$endTag = "LibraryVersion"
$startTagIndex = $results.IndexOf($startTag) + 1
$endTagIndex = $results.IndexOf($endTag, $startTagIndex)
[string] $newFormDigest = $null
if (($startTagIndex -ge 0) -and ($endTagIndex -gt $startTagIndex))
{
$newFormDigest = $results.Substring($startTagIndex + $startTag.Length + 2, $endTagIndex - $startTagIndex - $startTag.Length - 5)
}

return $newFormDigest
}

function Nintex-GetJsonFormFromXml($FileName)
{

[System.Reflection.Assembly]::LoadWithPartialName("Nintex.Forms.SharePoint") >> $null
[System.Reflection.Assembly]::LoadWithPartialName("Nintex.Forms") >> $null

[byte[]] $fileBytes = Read-FileBytes -FileName $FileName
try
{
$form = [Nintex.Forms.FormsHelper]::XmlToObject([Nintex.Forms.NFUtilities]::ConvertByteArrayToString($fileBytes))
}
catch [Exception]
{
$form = [Nintex.Forms.FormsHelper]::XmlToObject([Nintex.Forms.NFUtilities]::ConvertByteArrayToString($fileBytes, [System.Text.Encoding]::UTF8))
}

$form.LiveSettings.Url = ""
$form.LiveSettings.ShortUrl = ""
$form.RefreshLayoutDisplayNames()
$form.Id = [guid]::NewGuid()

$json = [Nintex.Forms.FormsHelper]::ObjectToJson($form);
return $json;
}

function Import-NintexForm {
<# .SYNOPSIS Imports a Nintex form XML to a local directory. .DESCRIPTION Imports a Nintex form XML to a local directory. #>
[CmdletBinding()]
[OutputType([string])]
param(
[string]$webUrl = $(throw "Required parameter -WebUrl missing"),
[string]$listName = $(throw "Required parameter -ListName missing"),
[string]$filePath = $(throw "Required parameter -FilePath missing")
)
begin {
if(!(Get-PnPConnection)) {
throw "There is no PnPConnection"
}
Write-Host "---- Importing Nintex form for '$listName' ----" -ForegroundColor Yellow
}
process {
$list = Get-PnPList -Identity $listName

$formDigest = Get-FormDigest $webUrl
$addressUrl = $webUrl + "/_vti_bin/NintexFormsServices/NfRestService.svc/PublishForm"
$addressUri = New-Object System.Uri($addressUrl)

# Create the web request
[System.Net.HttpWebRequest] $request = [System.Net.WebRequest]::Create($addressUri)

# Add authentication to request
$request.Credentials = [System.Net.CredentialCache]::DefaultNetworkCredentials

# Set type to POST
$request.Method = "POST";
$request.ContentType = "application/json; charset=utf-8";
$request.Accept = "application/json, text/javascript, */*; q=0.01"
$request.Headers.Add("X-RequestDigest", $formDigest);
$request.Headers.Add("X-Requested-With", "XMLHttpRequest")

$form = Nintex-GetJsonFormFromXml -FileName $filePath

# Create the data we want to send
$id = "{$($list.ID)}"
$data = "{`"contentTypeId`": `"`", `"listId`": `"$id`", `"form`": $form }"

# Create a byte array of the data we want to send
$utf8 = New-Object System.Text.UTF8Encoding
[byte[]] $byteData = $utf8.GetBytes($data.ToString())

# Set the content length in the request headers
$request.ContentLength = $byteData.Length;

# Write data
try {
$postStream = $request.GetRequestStream()
$postStream.Write($byteData, 0, $byteData.Length);
}
catch [Exception]{
write-host -f red $_.Exception.ToString()
}
finally {
if($postStream) { $postStream.Dispose() }
}

# Get response
try {
[System.Net.HttpWebResponse] $response = [System.Net.HttpWebResponse] $request.GetResponse()

# Get the response stream
[System.IO.StreamReader] $reader = New-Object System.IO.StreamReader($response.GetResponseStream())

try {
$strResult = $reader.ReadToEnd()
$jsonResult = ConvertFrom-Json $strResult
$jsonResult

$jsonResult.PublishFormResult.Url
$jsonResult.PublishFormResult.Version

}
catch [Exception] {
write-host -f red $_.Exception.ToString()
}
}
catch [Exception] {
write-host -f red $_.Exception.ToString()
}
finally {
if($response) { $response.Dispose() }
}
}
end{}
}


Run.ps1

#=========================================== Description Start ========================================= #
# Deploy from a List

# Author : Sathish Nadarajan
# Date : 03-Feb-2021
#=========================================== Description End====================================== #

# ============================================ PreRequisites Start ================================= #

#Get-Module -Name *pnp*
#Pre Req - SharePoint PnP PowerShell Version 2.25.1804.1

#=============================================PreRequisites End =============================== #

#============================================= Initial Setup Start =============================== #

cls

$Host.UI.RawUI.WindowTitle = "-- Deploy Assets --"

$StartDate = Get-Date
Write-Host -ForegroundColor White "------------------------------------"
Write-Host -ForegroundColor White "| Deploy Assets |"
Write-Host -ForegroundColor White "| Started on: $StartDate |"
Write-Host -ForegroundColor White "------------------------------------"

#Add-PSSnapin Microsoft.SharePoint.PowerShell

$LogTime = Get-Date -Format yyyy-MM-dd_hh-mm-ss

$scriptBase = split-path $SCRIPT:MyInvocation.MyCommand.Path -parent
Set-Location $scriptBase

# Create Log File Folder3
if(!(TEST-PATH ".Logs-$LogTime")){
NEW-ITEM ".Logs-$LogTime" -type Directory
}

# Assign the Log and Progress Files
$TranscriptFile = ".Logs-$LogTimeDeploy.Transcript.rtf"
try{
stop-transcript|out-null
}
catch [System.InvalidOperationException]{}
start-transcript $TranscriptFile

#============================================= Initial Setup End =============================== #

# ============================================ Setup Input Paths Start ================================= #

#connect to the SharePoint list
$sourceWebUrl = 'http://SiteCollectionURL/sites/newsite/'
$sourceListname = "MyList"

$outputFolderPath = ".Logs-$LogTime"

$targetWebUrl = 'http://TargetSiteCollectionURL/sites/newsite/'
$targetListname = "TargetMyList"

# ============================================ Setup Input Paths End ================================= #

Import-Module ".1.ExportNintexForms.ps1"
Import-Module ".2.ImportNintexForms.ps1"

Write-Host "Begin to Execute.." -ForeGroundColor Yellow
"Begin to Execute..." | Out-File -FilePath $TranscriptFile -Append

Connect-PnPOnline -Url $sourceWebUrl -CurrentCredentials -ErrorAction Inquire

$nintexFormXMLPath = Export-NintexForm $sourceWebUrl $sourceListname $outputFolderPath

Import-NintexForm $targetWebUrl $targetListname $nintexFormXMLPath

Disconnect-PnPOnline

Write-Host "Update Completed.. Press Enter to Exit" -ForeGroundColor Green

try{
stop-transcript|out-null
}
catch [System.InvalidOperationException]{}

Happy Coding
Sathish Nadarajan

Author Info

Sathish Nadarajan
 
Solution Architect
 
Rate this article
 
Sathish is a Microsoft MVP for SharePoint (Office Servers and Services) having 15+ years of experience in Microsoft Technologies. He holds a Masters Degree in Computer Aided Design and Business ...read more
 

SharePoint Tip :- Hide the Title Area on SharePoint Modern Page

Sathish Nadarajan
 
Solution Architect
July 18, 2020
 
Rate this article
 
Views
9374

In this article, let us see a Simple SharePoint tip to hide the Title Area of an Article Page in SharePoint Online. Usually when I create a page in the Modern Site, the title area will be shown as below. Even, If I delete the title, the section will be shown as below.

But, my requirement is, to hide them and there are possibilities through CSS. But a permanent solution will be, creating the Page using the layout “Home” instead of “Article”. By default, we were not able to create a layout with a defined layout in modern page. Hence, after creating, using the below PowerShell script, we can convert the layout and the Title Area will be automatically hided.

$SiteURL = "https://MYSite.sharepoint.com/sites/MySiteCollection/"
Connect-PnPOnline $SiteURL -Credential (Get-Credential)

Get-PnPListItem -List SitePages

Set-PnPListItem -List SitePages –Identity "5" -Values @{"PageLayoutType"="Home"}

After converting the page looks as below.

A small tip which will help to convert the page layout.

Happy Coding
Sathish Nadarajan

Author Info

Sathish Nadarajan
 
Solution Architect
 
Rate this article
 
Sathish is a Microsoft MVP for SharePoint (Office Servers and Services) having 15+ years of experience in Microsoft Technologies. He holds a Masters Degree in Computer Aided Design and Business ...read more
 

MS Teams: Exception While Executing PowerShell – The specified module ‘SkypeOnlineConnector’ was not loaded because no valid module file was found in any module directory.

Sathish Nadarajan
 
Solution Architect
June 18, 2020
 
Rate this article
 
Views
10957

In the last article, we saw about executing the PowerShell Script to update the Meeting Policy.
But, when actually executing, we will face few issues. We are going to discuss about those issues.

the term ‘set-csteamsmeetingpolicy’ is not recognized as the name of a cmdlet
The specified module ‘SkypeOnlineConnector’ was not loaded because no valid module file was found in any module directory.

The below are the steps to clear those exceptions.

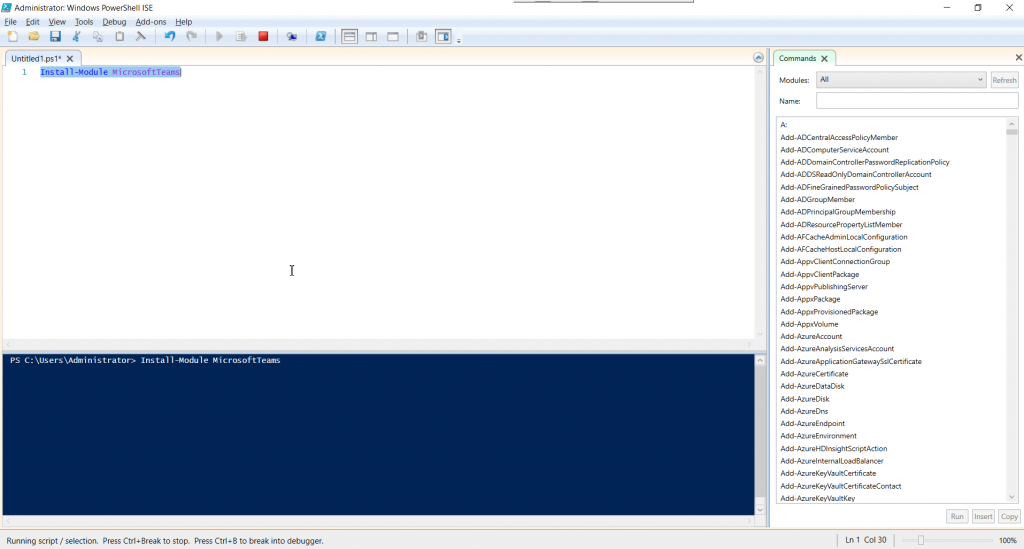
1. We need to install the Module MicrosoftTeams
Install-Module MicrosoftTeams

2. Click Yes to All or Yes.

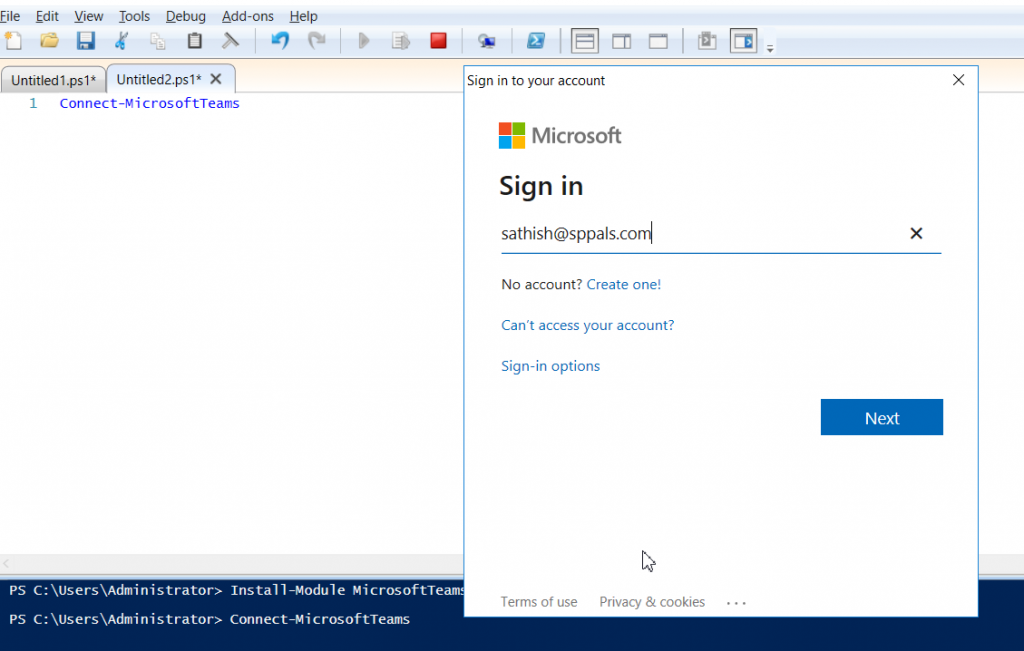
3. Now, connect with the Teams using
Connect-MicrosoftTeams

This will populate the credentials window and key in the credentials.

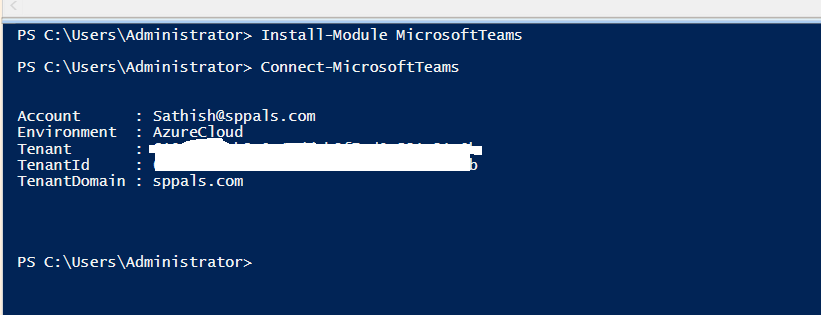
4. Once, successfully connected, the screen will looks as below.

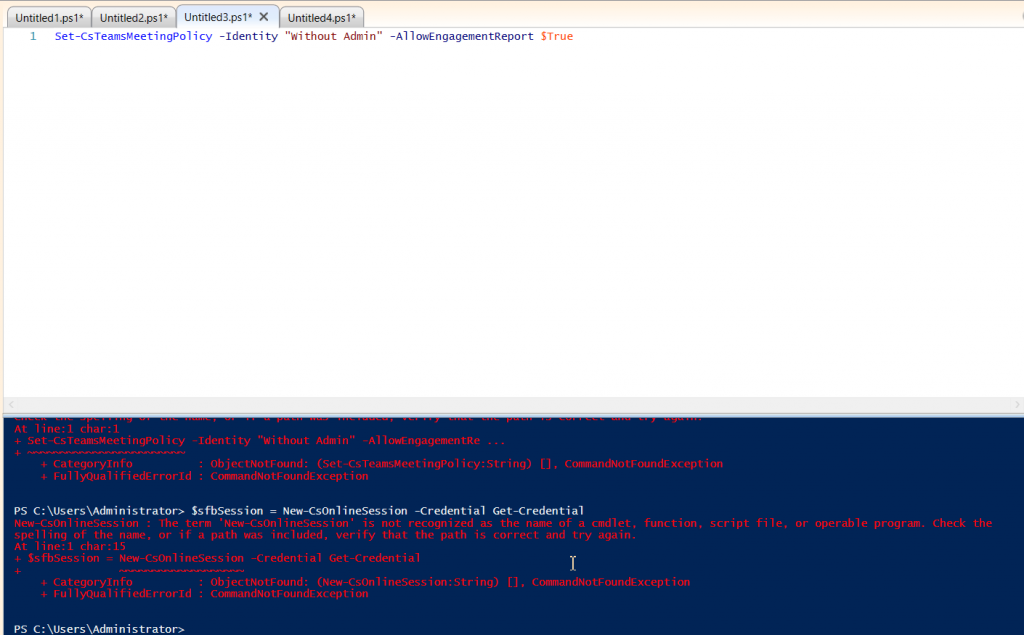
5. Then, when we try to update the meeting policy using the command

Set-CsTeamsMeetingPolicy -Identity “Without Admin” -AllowEngagementReport $True

We will get the below exception.

ObjectNotFound: (Set-CsTeamsMeetingPolicy)

6. To resolve that, we need to install the Skype for Business Online Windows PowerShell Module. We can download it from the below link.
https://www.microsoft.com/en-us/download/details.aspx?id=39366

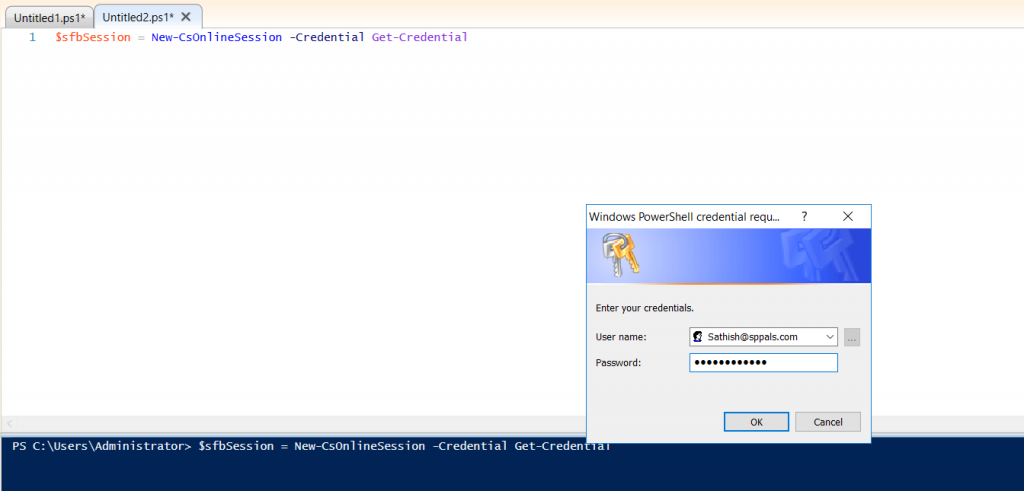
7. Once the Skype for Business Online PowerShell Module has been installed, then create a new online session

$sfbSession = New-CsOnlineSession -Credential Get-Credential

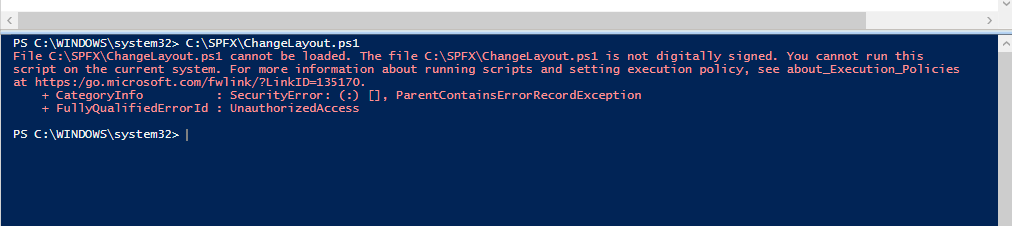
8. While doing that, I was getting the below exception.
The specified module ‘SkypeOnlineConnector’ was not loaded because no valid module file was found in any module directory.

9. Hence, we need to import the SkypeOnlineConnector

Import-Module “C:\Program Files\Common Files\Skype for Business Online\Modules\SkypeOnlineConnector\SkypeOnlineConnector.psd1”

10. After importing Create a new Online session

$sfbSession = New-CsOnlineSession -Credential Get-Credential

11. Import the Session

Import-PSSession $sfbSession

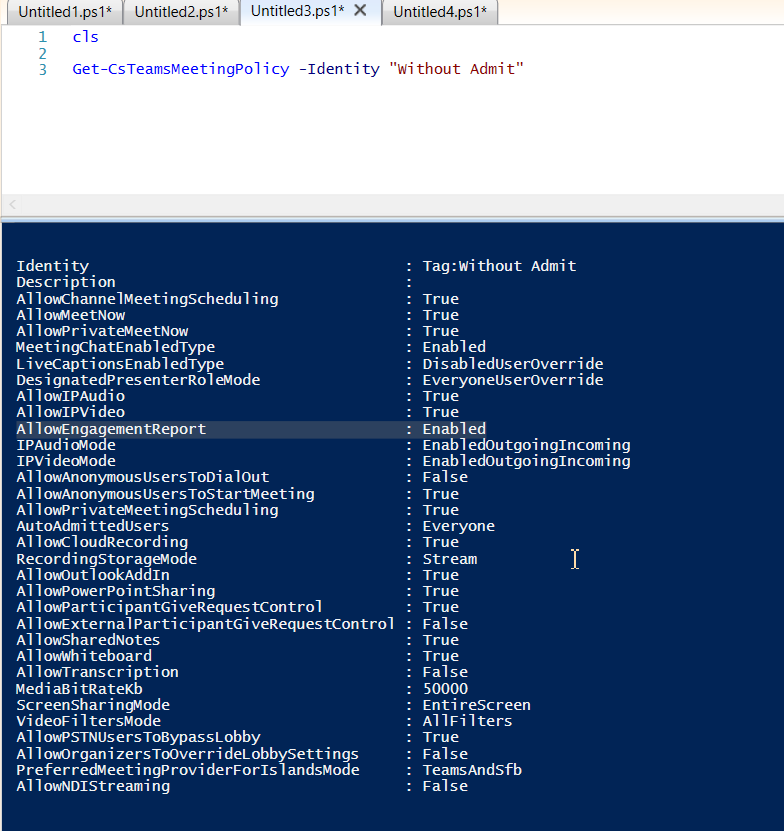
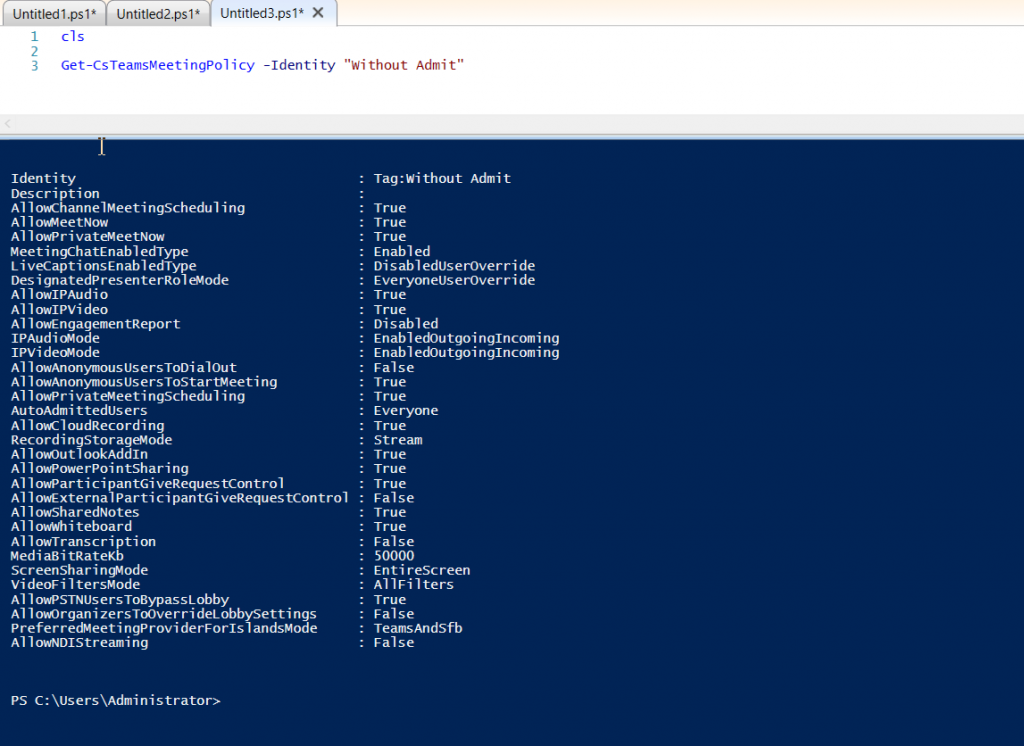
12. Then, we can access the commands which starts as Cs (Get-CsTeamsMeetingPolicy, Set-CsTeamsMeetingPolicy)

Get-CsTeamsMeetingPolicy -Identity “Without Admit”


Happy Coding
Sathish Nadarajan

Author Info

Sathish Nadarajan
 
Solution Architect
 
Rate this article
 
Sathish is a Microsoft MVP for SharePoint (Office Servers and Services) having 15+ years of experience in Microsoft Technologies. He holds a Masters Degree in Computer Aided Design and Business ...read more
 

MS Teams: Manage Attendance in Meetings – How to enable AllowEngagementReport Property

Sathish Nadarajan
 
Solution Architect
June 15, 2020
 
Rate this article
 
Views
5265

Now a days, all the classes/trainings were happening in the online meeting platforms. But the challenge is, for the teachers, they were not able to track the attendance properly. Teams came up with an option to track the attendance easily by downloading the attendance CSV in which the Organizer can see who joined when and left when etc.,
By default, the option for the download attendance will not be available.

We were able to see only the Permissions and the Close Icon.
This needs to be enabled by your Teams Tenant Administrator. And this cannot be done by the UI. This can be enabled through PowerShell only.

Set-CsTeamsMeetingPolicy -Identity "Without Admit" -AllowEngagementReport Enabled

After enabling it, we can verify the property by Get that meeting policy.

In detail, we need to update the meeting policy assigned to the User. Let us discuss in detail with an example.
1. Only the Organizers of the meeting can download the attendance sheet.
2. For that, the Tenant Admin should provide the rights to the organizer.
a. This can be done by assigning appropriate meeting policy for that user.
b. Either we can create a new meeting policy and assign to the users.
c. Or we can update the existing meeting policy.
3. In both the cases, the property “AllowEngagementReport” should be enabled.
After updating the property, when the organizer joins the meeting, there is one more icon on the meeting attendee’s panel.

When we click on the download attendance, the CSV file will be downloaded on our “Downloads” folder. The CSV file will looks as below.

Happy Coding
Sathish Nadarajan

Author Info

Sathish Nadarajan
 
Solution Architect
 
Rate this article
 
Sathish is a Microsoft MVP for SharePoint (Office Servers and Services) having 15+ years of experience in Microsoft Technologies. He holds a Masters Degree in Computer Aided Design and Business ...read more
 

Tip – Difference between Add-PnPFieldFromXml and Add-PnPField While Creating Calculated Fields Using PnP PowerShell

Sathish Nadarajan
 
Solution Architect
April 17, 2020
 
Rate this article
 
Views
2152

In this article, let me try to explain my experience with Add-PnPField and Add-PnPFieldFromXml methods in PnP PowerShell. Usually both the methods were used to create the fields and then, we can add those site columns to the content types and the lists will get refreshed.

But, when I was expecting the same thing while creating a Calculated Field using Add-PnPField method, the content type was getting updated, but the lists were not refreshed/updated with the newly created calculated field. The code which I used to create the Calculated Field is,

Add-PnPField -DisplayName ‘MyCalculatedField' -InternalName ' MyCalculatedField' -Type Calculated -Group ‘MyGroup’ –Formula ‘=MyOtherColumnInternalName*7.5’

Add-PnPFieldToContentType -ContentType ‘MyContentType’ -Field 'MyCalculatedField'

The above lines, were working without any exception. The field got created and added with the Content Type as well. But, when I expect this field on the List, it was not there. Later found that, there is a parameter called ResultType which is mandatory to add the calculated field to the List. Hence, we cannot use Add-PnPField to create a Calculated field. Instead, we have to use Add-PnpFieldFromXML.

The piece of code as below.

$webUrl = 'http://MySiteCollection/sites/EuroStat/'
$fieldGroupName = 'MyGroup'

Connect-PnPOnline -Url $webUrl -CurrentCredentials -ErrorAction Inquire 

$currentContext = Get-PnPContext 


$fieldXML = "<Field Type='Calculated' Group='MyGroup'  ID='{519e9eda-b137-4308-bfbd-d99cbbf66213}' StaticName='MyCalculatedField' Name=' MyCalculatedField' DisplayName= MyCalculatedField' LCID='1033' ResultType='Number' ReadOnly='TRUE'>
              <Formula>=MyOtherColumn*7.5</Formula>
              <FieldRefs>
                <FieldRef Name='MyOtherColumn' />
              </FieldRefs>
            </Field>"

Add-PnPFieldFromXml -FieldXml $fieldXML
 
$ctype =  Get-PnPContentType 'MyContentType'

$currentContext.Load($ctype.Fields)
$currentContext.ExecuteQuery()
$timeSheetHoursField =  $ctype.Fields | Where-Object InternalName -eq 'MyCalculatedField'
if(-not  $timeSheetHoursField){
    
    Add-PnPFieldToContentType -Field ‘MyCalculatedField' -ContentType $ctype
    $ctype.Update($true)
}


Disconnect-PnPOnline

The above piece of code will create a calculated field, add to the content type and the Lists inheriting this content type will also be populated with the field. A small tip, which will help someone with similar issue.

Happy Coding,
Sathish Nadarajan.

Author Info

Sathish Nadarajan
 
Solution Architect
 
Rate this article
 
Sathish is a Microsoft MVP for SharePoint (Office Servers and Services) having 15+ years of experience in Microsoft Technologies. He holds a Masters Degree in Computer Aided Design and Business ...read more
 

How to get number of version in SharePoint list/library item using PNP powershell

Ahamed Fazil Buhari
 
Senior Developer
April 16, 2020
 
Rate this article
 
Views
3504

Getting insights on total number of version available for each SharePoint list/library item gives you an idea how often an item is getting updated and also helps to know how much space it took (because each version make new stroage space, example item with 4 MB attachment have 5 version then total size that item occupies is 5*4=20MB).

Here we provided site name and list/library names in a CSV file. list names are separated by #

sitelibcsv

The output will generate a CSV file with File path to SharePoint item and Version count.

function Get-VersionCount() {
    try {
        $fileLabel = Get-Date -format "yyyyMMdd-HHmm-ss"
        $fileLabel += "_VersionCount"
        $sitesLibs = Import-Csv -Path $PSScriptRootsiteLib.csv
        Add-Content -Path $PSScriptRoot$fileLabel.csv  -Value '"FilePath","VersionCount"'
        Write-Host $sitesLibs

        $sitesLibs | 
        ForEach-Object {
            $siteURL = $_.siteurl
            Write-Host "PNP Connection to " $siteURL -ForegroundColor Green

            Connect-PnPOnline -Url $siteURL -AppId $env:SPO_AppID -AppSecret $env:SPO_AppSecret
            Write-Host "`n"
            Write-Host "Executing for " $siteURL -ForegroundColor green "`n `n"

            # Loop through Libraries
            $libraryArray = $_.libraries.Split("#")

            $libraryArray | ForEach-Object {
                $verCountObj = @()
                $libraryName = $_                

                Write-Host "Checking Library - " $libraryName "`n" -ForegroundColor Green
                $query = "<View Scope='RecursiveAll'><RowLimit>5000</RowLimit></View>" 
                $listItems = Get-PnPListItem -List $libraryName -Query $query</pre>
                $ctx = Get-PnPContext
                foreach ($item in $listItems) {
                    $versionColl = $item.Versions
                    $ctx.Load($item)
                    $ctx.Load($versionColl)
                    $ctx.ExecuteQuery()

                    $versionsCount = $versionColl.Count
                    $filePath = $item["FileRef"]
                    Write-Host "File Name - $($filePath) "
                    Write-Host "File Path - " $filePath "Version Count - " $versionsCount -ForegroundColor Green
                    $verCountObj += "$filePath,$versionsCount"
                }

                $verCountObj += ""
                $verCountObj | ForEach-Object { Add-Content -Path $PSScriptRoot$fileLabel.csv -Value $_ }
            }
            Disconnect-PnPOnline
        }
    }
    catch {
        Disconnect-PnPOnline
        Write-Host "Exception Type: $($_.Exception.GetType().FullName)"
        Write-Host "Exception Message: $($_.Exception.Message)"
    }
}

Get-VersionCount

Happy Coding
Fazil

Category : PNP, PowerShell, SharePoint

Author Info

Ahamed Fazil Buhari
 
Senior Developer
 
Rate this article
 
Ahamed is a Senior Developer and he has very good experience in the field of Microsoft Technologies, especially SharePoint, Azure, M365, SPFx, .NET and client side scripting - JavaScript, TypeScript, ...read more
 

Leave a comment