SharePoint Modern Site – Using Multiple Languages and Translate Page Programmatically using CSOM C# and PNP Core Context

Sathish Nadarajan
 
Solution Architect
November 22, 2021
 
Rate this article
 
Views
1361

I was trying to translate the pages created in one Site Collection to other languages and there is a simplest way of doing this using the PNP Core Context.  This is not available in the PNP Framework Context I hope.  (again, this is my opinion as I couldn’t find a way).

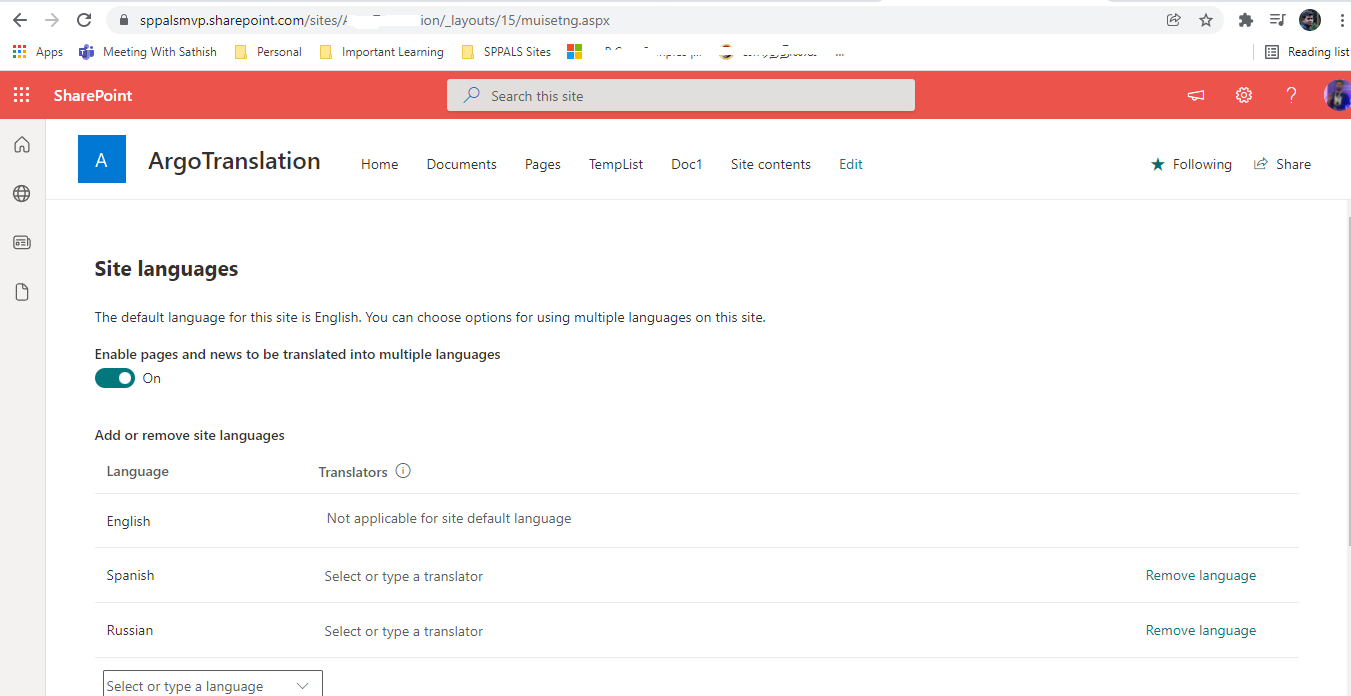
Basically, we need to enable the languages and even this can be done through programmatically while provisioning the sites.  But in my case, I have the site already.  Hence, I was about to do this manually through the site settings itself.

Go to the Site Settings and Language settings.  Select the Additional Languages and Click on Save.


Let me create a new page.
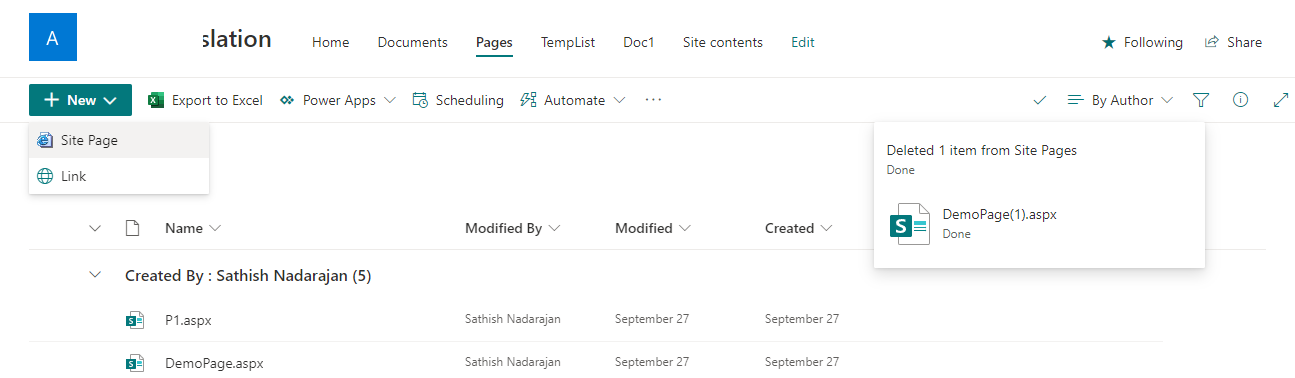
Created a page

Click on the Translation of the page.

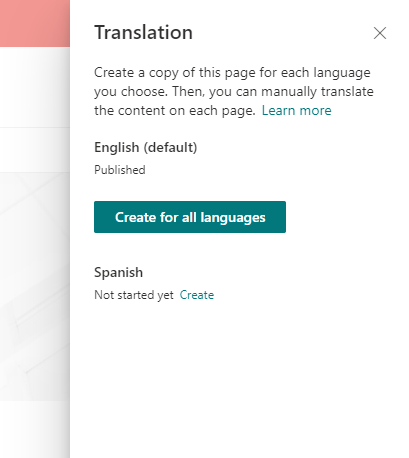
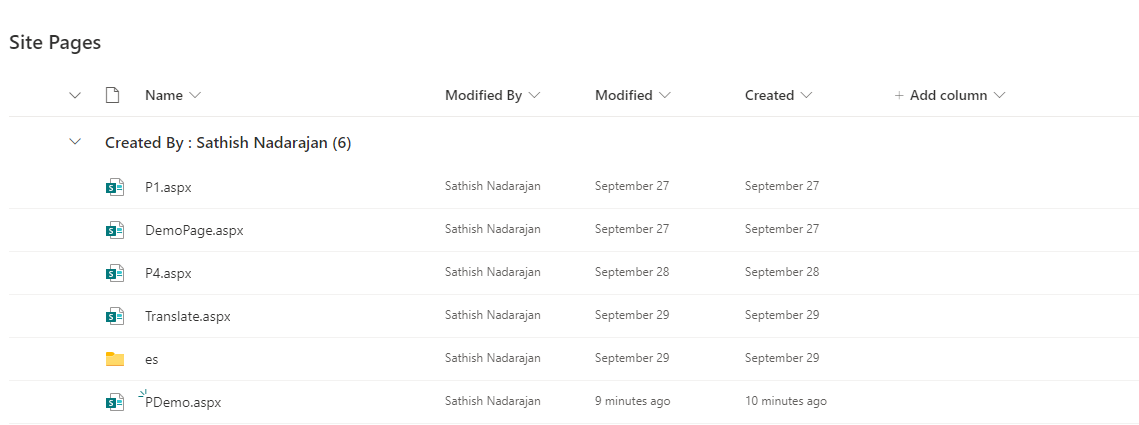
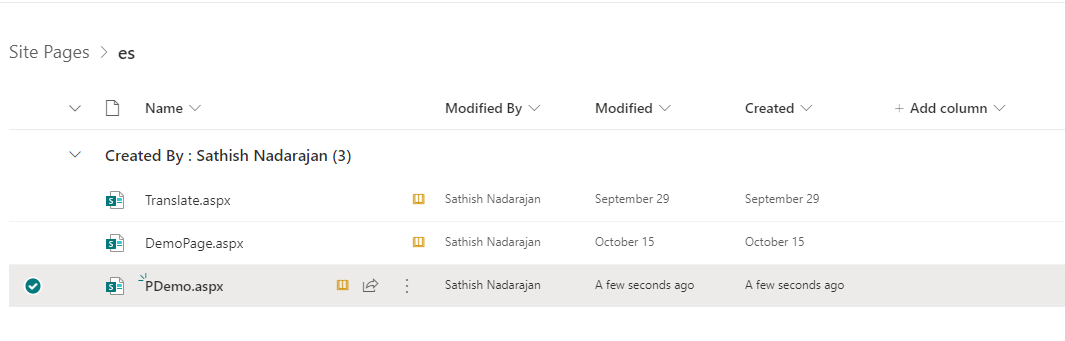
On Click of the button, a new page will get created inside the es folder.


When we wanted to do this for a migrated site, which may have few thousands of pages, doing this is impossible and the migration tools will also not be able to do this.  In that case, writing a small utility to create the translation pages is very useful and effective.

As part of the earlier article, create the context.

Then, the below code will do the translation.

using (var scope = host.Services.CreateScope())

            {

                var pnpContextFactory = scope.ServiceProvider.GetRequiredService<IPnPContextFactory>();

                using (var context = await pnpContextFactory.CreateAsync("DemoSite"))

                {

                    var page = (await context.Web.GetPagesAsync("DemoPage")).FirstOrDefault();

                    await page.TranslatePagesAsync();

                }

            }

The above piece will do the same which we did manually earlier.  Hope this is simple and a good use case.


Happy Coding

Sathish Nadarajan

Author Info

Sathish Nadarajan
 
Solution Architect
 
Rate this article
 
Sathish is a Microsoft MVP for SharePoint (Office Servers and Services) having 15+ years of experience in Microsoft Technologies. He holds a Masters Degree in Computer Aided Design and Business ...read more
 

CSOM – Get the Pages modified after a time stamp by C# CSOM – SharePoint Online

Sathish Nadarajan
 
Solution Architect
October 7, 2021
 
Rate this article
 
Views
1305

In one of the requirements, got to retrieve the files which are modified after a specific time stamp. As part of that, created a CAML Query and thought of sharing with the community with the usecase.

One thing, just wanted to highlight is, the below code uses pnpFramework to get the context. As the earlier PNPCoreOnline is deprecated. Please search for pnpframework on the Nuget Manager.

public static void GetPagesByTimeStamp()
        {
            System.IO.File.AppendAllText(logFilePath, "Started.." + Environment.NewLine + Environment.NewLine);

            string siteUrl = ConfigurationManager.AppSettings["siteUrl"];
            string userName = ConfigurationManager.AppSettings["userName"];
            string password = ConfigurationManager.AppSettings["password"];
            string timestamp = ConfigurationManager.AppSettings["timestamp"];

            try
            {
                using (var ctx = new PnPClientContext(siteUrl))
                {
                    ctx.Credentials = new SharePointOnlineCredentials(userName, password.ToSecureString());
                    //Get the web from the current context
                    Web web = ctx.Web;
                    ctx.Load(web);
                    ctx.Load(web.Lists);
                    ctx.ExecuteQueryRetry();

                    //Get the Pages Library
                    var pages = ctx.Web.Lists.GetByTitle("Site Pages");
                    ctx.Load(pages);

                    //
                    
                    string datetime = Convert.ToDateTime(timestamp).ToString("yyyy-MM-ddTHH:mm:ssZ");
                    //Get all Items inside the Pages Library
                    CamlQuery camlQuery = new CamlQuery();
                    camlQuery.ViewXml = @"<View Scope='Recursive'>
                                             <Query>
                                                <Where>
                                                    <Gt>
                                                        <FieldRef Name='Modified'/>
                                                        <Value IncludeTimeValue='TRUE' Type='DateTime'>" + datetime + "</Value>" + 
                                                    @"</Gt>
                                                </Where>
                                                <OrderBy>
                                                    <FieldRef Name='Modified' Ascending = 'true' />
                                                </OrderBy>
                                            </Query>
                                         </View>";
                    ListItemCollection listItems = pages.GetItems(camlQuery);
                    ctx.Load(listItems);
                    ctx.ExecuteQuery();

                    List<Page> lstPages = new List<Page>();

                    foreach (var listItem in listItems)
                    {
                        System.Console.WriteLine(listItem["Title"]);
                        Page p = new Page();
                        p.Id = Convert.ToInt32(listItem["ID"]);
                        p.Name = Convert.ToString(listItem["Title"]);

                        lstPages.Add(p);


                    }


                    TextWriter txtWriter = new StreamWriter(ConfigurationManager.AppSettings["LogFilePath"] + "Pages.csv");

                    using (CsvWriter writer = new CsvWriter(txtWriter, new CsvHelper.Configuration.CsvConfiguration(System.Globalization.CultureInfo.InvariantCulture)))
                    {
                        writer.WriteRecords(lstPages);

                        writer.Flush();

                    }


                }
            }
            catch (Exception ex)
            {
                System.Console.WriteLine("Exception occurred : " + ex.Message);
                System.Console.ReadLine();
            }
        }

The above code is self explanatory and doesn’t require much explanation I guess.


Happy Coding
Sathish Nadarajan

Author Info

Sathish Nadarajan
 
Solution Architect
 
Rate this article
 
Sathish is a Microsoft MVP for SharePoint (Office Servers and Services) having 15+ years of experience in Microsoft Technologies. He holds a Masters Degree in Computer Aided Design and Business ...read more
 

CSOM – PowerShell Script – Import Nintex Workflows in SharePoint

Sathish Nadarajan
 
Solution Architect
February 10, 2021
 
Rate this article
 
Views
1006

In this article, let us see how to Import Nintex Workflows in SharePoint using CSOM PowerShell Script.
The code is self-explanatory.

01.ImprotNintexForms

function Import-NintexWorkflow {
<# .SYNOPSIS Imports a Nintex workflow .nwf file to a list. .DESCRIPTION Imports a Nintex workflow .nwf file to a list. #>
[CmdletBinding()]
param(
[string]$WebUrl = $(throw "Required parameter -WebUrl missing"),
[string]$listName = $(throw "Required parameter -ListName missing"),
[string[]]$workflowNames = $(throw "Required parameter -workflowNames missing"),
[string]$WorkflowFolderPath = $(throw "Required parameter -WorkflowFolderPath missing"),
[bool]$OverwriteExistingVersion = $false
)
begin {
if(!(Get-PnPConnection)) {
throw "There is no PnPConnection"
}
Write-Host "---- Importing Nintex workflow to '$($listName)' ----" -ForegroundColor Yellow
}
process {
$List = Get-PnPList -Identity $listName
$ListID = $List.Id.ToString()
$ListName = $List.Title
$webServiceUrl = "$WebUrl/_vti_bin/NintexWorkflow/Workflow.asmx"
$webServiceProxy = New-WebServiceProxy -Uri $webServiceUrl -UseDefaultCredential
$webServiceProxy.URL = $webServiceUrl

for ($i=0;$i -lt $workflowNames.Length; $i++) {
$WorkflowName = $workflowNames[$i] + "_6"
$WorkflowFilePath = $WorkflowFolderPath + "" + $workflowNames[$i] + ".nwf"

$nwfContent = Get-Content "$WorkflowFilePath"
$utf8 = New-Object System.Text.UTF8Encoding
[byte[]] $byteData = $utf8.GetBytes($nwfContent.ToString())
$hasWorkflowPublished = $webServiceProxy.WorkflowExists($WorkflowName,$ListID,"List")
Write-Host "Workflow exists status: '$hasWorkflowPublished'" -ForegroundColor Cyan
if($hasWorkflowPublished -eq "NameUsedInOtherList" -or $hasWorkflowPublished -eq "NameUsedInThisList") {
#May be delete it
Write-Host "Workflow already exists '$hasWorkflowPublished', if status is 'NameUsedInOtherList' no changes can be made. Please delete it." -ForegroundColor Cyan
}
if($hasWorkflowPublished -eq "NameNotUsed" -or ($hasWorkflowPublished -eq "NameUsedInThisList" -and $OverwriteExistingVersion -eq $true)){
$IsPublished = $webServiceProxy.PublishFromNWF($byteData, $ListName, $WorkflowName, $true)
if($IsPublished) {
Write-Host "Nintex Workflow '$WorkflowName' successfully published to list '$ListName'" -ForegroundColor Green
} else {
Write-Host "Nintex Workflow '$WorkflowName' could not be published to list '$ListName'" -ForegroundColor Yellow
}
}
}
}
end { }
}

Run.ps1

#=========================================== Description Start ========================================= #
# Deploy from a List

# Author : Sathish Nadarajan
# Date : 03-Feb-2021
#=========================================== Description End====================================== #

# ============================================ PreRequisites Start ================================= #

#Get-Module -Name *pnp*
#Pre Req - SharePoint PnP PowerShell Version 2.25.1804.1

#=============================================PreRequisites End =============================== #

#============================================= Initial Setup Start =============================== #

cls

$Host.UI.RawUI.WindowTitle = "-- Deploy Assets --"

$StartDate = Get-Date
Write-Host -ForegroundColor White "------------------------------------"
Write-Host -ForegroundColor White "| Deploy Assets |"
Write-Host -ForegroundColor White "| Started on: $StartDate |"
Write-Host -ForegroundColor White "------------------------------------"

#Add-PSSnapin Microsoft.SharePoint.PowerShell

$LogTime = Get-Date -Format yyyy-MM-dd_hh-mm-ss

$scriptBase = split-path $SCRIPT:MyInvocation.MyCommand.Path -parent
Set-Location $scriptBase

# Create Log File Folder3
if(!(TEST-PATH ".Logs-$LogTime")){
NEW-ITEM ".Logs-$LogTime" -type Directory
}

# Assign the Log and Progress Files
$TranscriptFile = ".Logs-$LogTimeDeploy.Transcript.rtf"
try{
stop-transcript|out-null
}
catch [System.InvalidOperationException]{}
start-transcript $TranscriptFile

#============================================= Initial Setup End =============================== #

# ============================================ Setup Input Paths Start ================================= #

#connect to the SharePoint list
$sourceWebUrl = 'http://andytest-sp:555/sites/newsite/'
$sourceListname = "AssetRegisterV2"

$outputFolderPath = ".Logs-$LogTime"

$targetWebUrl = 'http://andytest-sp:555/sites/newsite/'
$targetListname = "AssetRegister_Test"
$workflowNames = @('Send Notification When Child is Promoted as Parent','Send Notification When Asset is deleted')

# ============================================ Setup Input Paths End ================================= #

Import-Module ".4.ImportNintexWorkflows.ps1"

Write-Host "Begin to Execute.." -ForeGroundColor Yellow
"Begin to Execute..." | Out-File -FilePath $TranscriptFile -Append

Connect-PnPOnline -Url $sourceWebUrl -CurrentCredentials -ErrorAction Inquire

Import-NintexWorkflow $targetWebUrl $targetListname $workflowNames $outputFolderPath $true
Disconnect-PnPOnline

Write-Host "Update Completed.. Press Enter to Exit" -ForeGroundColor Green

try{
stop-transcript|out-null
}
catch [System.InvalidOperationException]{}


Happy Coding
Sathish Nadarajan

Author Info

Sathish Nadarajan
 
Solution Architect
 
Rate this article
 
Sathish is a Microsoft MVP for SharePoint (Office Servers and Services) having 15+ years of experience in Microsoft Technologies. He holds a Masters Degree in Computer Aided Design and Business ...read more
 

CSOM – PowerShell Script – Export Nintex Workflows in SharePoint

Sathish Nadarajan
 
Solution Architect
February 9, 2021
 
Rate this article
 
Views
1780

During the time of deployment, we may in a need to export and import the workflows from our DEV environment to the higher environment. In this article, let us see how to Export Nintex Workflows in SharePoint using CSOM PowerShell Script.

The code is self-explanatory.

01.ExportNintexForms


function Export-NintexWorkflow {
<# .SYNOPSIS Export a Nintex workflow .nwf file to a local directory .DESCRIPTION Export a Nintex workflow .nwf file to a local directory #>
[CmdletBinding()]
param(
[string]$WebUrl = $(throw "Required parameter -WebUrl missing"),
[string]$listName = $(throw "Required parameter -ListName missing"),
[string[]]$workflowNames = $(throw "Required parameter -WorkflowNames missing"),
[string]$FilePath = $(throw "Required parameter -FilePath missing")
)
begin {
if(!(Get-PnPConnection)) {
throw "There is no PnPConnection"
}
Write-Host "---- Exporting Nintex workflow for '$($List.Title)' ----" -ForegroundColor Yellow
}
process {
$List = Get-PnPList -Identity $listName
$timeStampString = [DateTime]::Now.ToString("yyyyMMdd-HHmmss")
# Get XML New File path
$xmlFilePath = "$FilePath$($List.Title)-$timeStampString.nwf"

$webServiceUrl = "$WebUrl/_vti_bin/NintexWorkflow/Workflow.asmx"
$webServiceProxy = New-WebServiceProxy -Uri $webServiceUrl -UseDefaultCredential
$webServiceProxy.URL = $webServiceUrl
$ctx=Get-PnPContext

$ctx.load($List.WorkflowAssociations)
$ctx.ExecuteQuery()

#Get all workflows that are associated with the current list
foreach($listassociation in $List.WorkflowAssociations) {
if($workflowNames.Contains($listassociation.Name)){
$WorkflowName = $listassociation.Name
$workflowContent = $webServiceProxy.ExportWorkflow($WorkflowName, $List.Title, "list")
$xmlFilePath = "$FilePath$WorkflowName.nwf"
#Save XML File to Disk
$workflowContent | Out-File $xmlFilePath
Write-Host "Nintex workflow '$WorkflowName' exported successfully to '$xmlFilePath'" -ForegroundColor Green
}
}
}
end { }
}


Run.ps1

#=========================================== Description Start ========================================= #
# Deploy from a List

# Author : Sathish Nadarajan
# Date : 03-Feb-2021
#=========================================== Description End====================================== #

# ============================================ PreRequisites Start ================================= #

#Get-Module -Name *pnp*
#Pre Req - SharePoint PnP PowerShell Version 2.25.1804.1

#=============================================PreRequisites End =============================== #

#============================================= Initial Setup Start =============================== #

cls

$Host.UI.RawUI.WindowTitle = "-- Deploy Assets --"

$StartDate = Get-Date
Write-Host -ForegroundColor White "------------------------------------"
Write-Host -ForegroundColor White "| Deploy Assets |"
Write-Host -ForegroundColor White "| Started on: $StartDate |"
Write-Host -ForegroundColor White "------------------------------------"

#Add-PSSnapin Microsoft.SharePoint.PowerShell

$LogTime = Get-Date -Format yyyy-MM-dd_hh-mm-ss

$scriptBase = split-path $SCRIPT:MyInvocation.MyCommand.Path -parent
Set-Location $scriptBase

# Create Log File Folder3
if(!(TEST-PATH ".Logs-$LogTime")){
NEW-ITEM ".Logs-$LogTime" -type Directory
}

# Assign the Log and Progress Files
$TranscriptFile = ".Logs-$LogTimeDeploy.Transcript.rtf"
try{
stop-transcript|out-null
}
catch [System.InvalidOperationException]{}
start-transcript $TranscriptFile

#============================================= Initial Setup End =============================== #

# ============================================ Setup Input Paths Start ================================= #

#connect to the SharePoint list
$sourceWebUrl = 'http://SourceSiteURL/sites/newsite/'
$sourceListname = "AssetRegisterV2"

$outputFolderPath = ".Logs-$LogTime"

$targetWebUrl = 'http://TargetSiteURL/sites/newsite/'
$targetListname = "AssetRegister_Test"
$workflowNames = @('Send Notification When Child is Promoted as Parent','Send Notification When Asset is deleted')

# ============================================ Setup Input Paths End ================================= #

Import-Module ".3.ExportNintexWorkflows.ps1"

Write-Host "Begin to Execute.." -ForeGroundColor Yellow
"Begin to Execute..." | Out-File -FilePath $TranscriptFile -Append

Connect-PnPOnline -Url $sourceWebUrl -CurrentCredentials -ErrorAction Inquire

Export-NintexWorkflow $sourceWebUrl $sourceListname $workflowNames $outputFolderPath

Disconnect-PnPOnline

Write-Host "Update Completed.. Press Enter to Exit" -ForeGroundColor Green

try{
stop-transcript|out-null
}
catch [System.InvalidOperationException]{}

Happy Coding
Sathish Nadarajan

Author Info

Sathish Nadarajan
 
Solution Architect
 
Rate this article
 
Sathish is a Microsoft MVP for SharePoint (Office Servers and Services) having 15+ years of experience in Microsoft Technologies. He holds a Masters Degree in Computer Aided Design and Business ...read more
 

SharePoint Tip :- Hide the Title Area on SharePoint Modern Page

Sathish Nadarajan
 
Solution Architect
July 18, 2020
 
Rate this article
 
Views
9374

In this article, let us see a Simple SharePoint tip to hide the Title Area of an Article Page in SharePoint Online. Usually when I create a page in the Modern Site, the title area will be shown as below. Even, If I delete the title, the section will be shown as below.

But, my requirement is, to hide them and there are possibilities through CSS. But a permanent solution will be, creating the Page using the layout “Home” instead of “Article”. By default, we were not able to create a layout with a defined layout in modern page. Hence, after creating, using the below PowerShell script, we can convert the layout and the Title Area will be automatically hided.

$SiteURL = "https://MYSite.sharepoint.com/sites/MySiteCollection/"
Connect-PnPOnline $SiteURL -Credential (Get-Credential)

Get-PnPListItem -List SitePages

Set-PnPListItem -List SitePages –Identity "5" -Values @{"PageLayoutType"="Home"}

After converting the page looks as below.

A small tip which will help to convert the page layout.

Happy Coding
Sathish Nadarajan

Author Info

Sathish Nadarajan
 
Solution Architect
 
Rate this article
 
Sathish is a Microsoft MVP for SharePoint (Office Servers and Services) having 15+ years of experience in Microsoft Technologies. He holds a Masters Degree in Computer Aided Design and Business ...read more
 

SharePoint Office 365 – Global Navigation & Current Navigation Provisioning using PNP Template and C#

Sathish Nadarajan
 
Solution Architect
May 23, 2019
 
Rate this article
 
Views
1950

In this article, let us provision the Global Navigation & Current Navigation using PNP Provisioning Template by using C#.  The Provisioning Template is as below.

 <?xml version="1.0"?>
 <pnp:Provisioning xmlns:pnp="http://schemas.dev.office.com/PnP/2018/01/ProvisioningSchema">
   <pnp:Preferences Generator="OfficeDevPnP.Core, Version=4.0.30319, Culture=neutral, PublicKeyToken=5e633289e95c321a" />
   <pnp:Templates>
     <pnp:ProvisioningTemplate ID="SPPALS.ProvisioningTemplate.Navigation" Version="1" Scope="RootSite">
       <pnp:Navigation AddNewPagesToNavigation="false" CreateFriendlyUrlsForNewPages="false">
         <pnp:GlobalNavigation NavigationType="Structural">
           <pnp:StructuralNavigation RemoveExistingNodes="true">
             <pnp:NavigationNode Title="Node.1" Url="{sitecollection}/Pages/CORB.aspx" IsExternal="true" IsVisible="true" >
               <pnp:NavigationNode Title="Node.1.1" Url="{sitecollection}/Pages/Page2.aspx" IsExternal="true" IsVisible="true"/>
               <pnp:NavigationNode Title="Node.1.2" Url="https://sharepointpals.com" IsExternal="true" IsVisible="true"/>
             </pnp:NavigationNode>
           </pnp:StructuralNavigation>
         </pnp:GlobalNavigation>
         <pnp:CurrentNavigation NavigationType="Structural">
           <pnp:StructuralNavigation RemoveExistingNodes="true">
             <pnp:NavigationNode Title="Node.1" Url="{sitecollection}/Pages/CORB.aspx" IsExternal="true" IsVisible="true" >
               <pnp:NavigationNode Title="Node.1.1" Url="{sitecollection}/Pages/Page2.aspx" IsExternal="true" IsVisible="true"/>
               <pnp:NavigationNode Title="Node.1.2" Url="https://sharepointpals.com" IsExternal="true" IsVisible="true"/>
             </pnp:NavigationNode>
           </pnp:StructuralNavigation>
         </pnp:CurrentNavigation>
       </pnp:Navigation>
     </pnp:ProvisioningTemplate>
   </pnp:Templates>
 </pnp:Provisioning>


And the C# code is straight forward.  It is as below.


 static void Main(string[] args)
         {
             ProvisionTaxonomyPNP();
         }
 
         public static void ProvisionTaxonomyPNP()
         {
             OfficeDevPnP.Core.AuthenticationManager authMgr = new OfficeDevPnP.Core.AuthenticationManager();
 
             string siteUrl = "https://sppalsmvp.sharepoint.com/sites/TeamSite/";
             string userName = "sathish@sppals.com";
             string password = "*****";
 
             using (var clientContext = authMgr.GetSharePointOnlineAuthenticatedContextTenant(siteUrl, userName, password))
             {
                 Web web = clientContext.Web;
                 clientContext.Load(web);
                 clientContext.Load(web.Lists);
                 clientContext.ExecuteQuery();
 
                 var templateLocation = "D:\PRACTICE SOURCE CODE\SPPALS.Console\SPPALS.Console\ProvisioningTemplate";
                 var provisioningProvider = new XMLFileSystemTemplateProvider(templateLocation, string.Empty);
 
                 var organizationSiteProvisioningTemplate = provisioningProvider.GetTemplate("SPPals.ProvisioningTemplate.Navigation.xml");
                 organizationSiteProvisioningTemplate.Connector.Parameters[FileConnectorBase.CONNECTIONSTRING] = templateLocation;
                 clientContext.Web.ApplyProvisioningTemplate(organizationSiteProvisioningTemplate);
             }
         }


The terms will be provisioned as below.  We can see that on the AreaNavigationSettings.aspx


And on the Screen, the Nodes will be like,


Happy Coding,

Sathish Nadarajan.


Author Info

Sathish Nadarajan
 
Solution Architect
 
Rate this article
 
Sathish is a Microsoft MVP for SharePoint (Office Servers and Services) having 15+ years of experience in Microsoft Technologies. He holds a Masters Degree in Computer Aided Design and Business ...read more
 

SharePoint Tip – App.Config – More Secured Way to Have the config values

Sathish Nadarajan
 
Solution Architect
May 10, 2019
 
Rate this article
 
Views
1857

In most of the scenarios today we need to write some sort of Patch EXEs which nothing is but a console application.  In those console applications, obviously we need to have the app.config in which we will be writing the UserName and passwords.  When we do a Checkin of this code, the credentials got inserted in the git/tfs which is very dangerous.  And moreover, if we have more than one developer, all of them might be using their own usernames and passwords.  And if we have a version history on the git of the app.config, almost, I could get all the developers usernames and passwords.  The sample piece of code in app.config is as below.

 <appSettings>
     <add key="WebUrl" value="" />
     <add key="UserName" value="" />
     <add key="Password" value="" />
     <add key="Domain" value="" />
   </appSettings>
 

We will be consuming this from our C# code as below.

 var webUrl = ConfigurationManager.AppSettings["WebUrl"];
                 var userName = ConfigurationManager.AppSettings["UserName"];
                 var password = ConfigurationManager.AppSettings["Password"];
                 var domain = ConfigurationManager.AppSettings["Domain"];


To avoid this situation, we have an option.  On the appsettings tag, there is one more attribute called file as below.

 <appSettings file="c:myCredentialsApp.secrets.config">
     <add key="WebUrl" value="" />
     <add key="UserName" value="" />
     <add key="Password" value="" />
     <add key="Domain" value="" />
   </appSettings>


Now, we can create a file called “App.Secrets.Config” in the specified path and on that file, the tags are very simple and straight forward.

 <appSettings >
   <add key="WebUrl" value="https://google.com" />
   <add key="UserName" value="Sathish" />
   <add key="Password" value="Password" />
   <add key="Domain" value="sppals.com" />
 </appSettings>


Happy Coding,

Sathish Nadarajan.


Author Info

Sathish Nadarajan
 
Solution Architect
 
Rate this article
 
Sathish is a Microsoft MVP for SharePoint (Office Servers and Services) having 15+ years of experience in Microsoft Technologies. He holds a Masters Degree in Computer Aided Design and Business ...read more
 

Azure Search Service – Create an Azure Search Index programmatically – C# Programmatically

Sathish Nadarajan
 
Solution Architect
February 22, 2019
 
Rate this article
 
Views
1427

In the earlier article, we saw how to create a Data Source Programmatically. Now, as a continuation, let us see how to create an Index.

The code to create an index is straight forward.

 namespace CS.Help.Console
 {
     using Microsoft.Azure.Search;
     using Microsoft.Azure.Search.Models;
     using Microsoft.WindowsAzure.Storage;
     using Microsoft.WindowsAzure.Storage.Blob;
     using System.Linq;
 
     class Program
     {
         static void Main(string[] args)
         {
             CreateIndex();
 
             
         }
 
         private static void CreateIndex()
         {
             string searchServiceName = "Search Service Name";
             string searchQueryApiKey = "API Key";
             SearchServiceClient serviceClient = new SearchServiceClient(searchServiceName, new SearchCredentials(searchQueryApiKey));
 
             string indexName = "myindex";
             var definition = new Index()
             {
                 Name = indexName,
                 Fields = FieldBuilder.BuildForType<BlobDocuments>()
             };
 
             Index index = serviceClient.Indexes.CreateOrUpdate(definition);
 
         }
 
          
     }
 }
 

Happy Coding,

Sathish Nadarajan.

Category : Azure, Search

Author Info

Sathish Nadarajan
 
Solution Architect
 
Rate this article
 
Sathish is a Microsoft MVP for SharePoint (Office Servers and Services) having 15+ years of experience in Microsoft Technologies. He holds a Masters Degree in Computer Aided Design and Business ...read more
 

Azure Search Service – Create a Data Source programmatically – C# Programmatically

Sathish Nadarajan
 
Solution Architect
February 14, 2019
 
Rate this article
 
Views
2448

Sometime back, we saw the entire process of Creating and using the Azure Search Service through the portal here. I would suggest to go through that article before further proceeding. This article, can be considered as the follow up. The same activities, let us do through programmatically.

Now, the Objective is to create the Index and do a query against that Index. Already to Query against the index has been covered in one of the earlier article.

Here, we will see how to Create a Data Source for the Search Indexer. To create an Indexer, we require the below items in sequence.

1. SkillSet

2. DataSource

3. Index

4. Indexer.

We will see them in sequence in the upcoming Articles. In this article, let us focus only on the creation of data source.

1. To Create a Data Source, as usual I have created a console application.

2. Add the below NuGet Package. “Microsoft.Azure.Search”

3. Go to the Azure Portal and make a note of the below items. Provided, I assume that, we have created a Azure Search Service and a Blob Storage and a Container in the Blob Storage.

4. Make a Note of the

a. Search Service Name

b. Search Query API Key – Make a note of either the primary or secondary admin keys. Both should work.

c. Blob Storage Connection string. To get this, go to the blob storage and the Access Keys as shown below.

d. Container Name. If we want only a folder inside the container, make a note of that as well.

5. Now, we got all the required parameters. With these parameters, the below code will create the Azure Search Service DataSource.

 namespace CS.Help.Console
 {
     using Microsoft.Azure.Search;
     using Microsoft.Azure.Search.Models;
 
     class Program
     {
         static void Main(string[] args)
         {
             CreateDataSource();
 
             System.Console.ReadLine();
         }
 
         private static void CreateDataSource()
         {
             //Assign the Search Service Name
             string searchServiceName = "SEARCH SERVICE NAME";
             string searchQueryApiKey = "KEY WHICH WE GOT FROM THE AZURE PORTAL";
 
             string dataSourceName = "DATASOURCE NAME";
 
             SearchServiceClient serviceClient = new SearchServiceClient(searchServiceName, new SearchCredentials(searchQueryApiKey));
 
             bool isDataSourceExists = serviceClient.DataSources.Exists(dataSourceName);
 
             if (!isDataSourceExists)
             {
                 string storageConnectionString = "CONNECTION STRING WHICH WE GOT FROM THE PORTAL";
                 var ds = DataSource.AzureBlobStorage(dataSourceName, storageConnectionString, "palsbsearchcontainer");
                 DataSource dataSource = serviceClient.DataSources.CreateOrUpdate(ds);
                 System.Console.WriteLine("Data Source Created Successfully");
             }
             else
             {
                 System.Console.WriteLine("Data Source Already Exists");
             }
         }
     }
 }
 

6. After the execution, the data source will be created as below.

Happy Coding,

Sathish Nadarajan.

Author Info

Sathish Nadarajan
 
Solution Architect
 
Rate this article
 
Sathish is a Microsoft MVP for SharePoint (Office Servers and Services) having 15+ years of experience in Microsoft Technologies. He holds a Masters Degree in Computer Aided Design and Business ...read more
 

How to Identify the In-Active Users from SharePoint Online using C# CSOM Programmatically

Sathish Nadarajan
 
Solution Architect
February 13, 2019
 
Rate this article
 
Views
4172

A common problem during the data management within SharePoint is, some of the users might be leaving the company and the documents created by them will remain on their name. Though, the admin will delete the user from the Admin portal, the Users will be available on the Site Collection Level. Recently, I came up with a requirement to update these users with a given service account.

As part of that, Started writing a Piece of C# Script, which will identify, whether the particular user is Active or not. There are two ways, which I was thinking. Either to query and identify any unique property on the “User Information List”. I was able to query that hidden list and get the User details. But, I could not find any difference between an active user and an In-Active User.

Hence, I tried with querying on the User Profiles. The deleted User Profile is not available on the User Profile of the SharePoint admin portal itself. Hence, I was about to mimic the same thing using the C#. The Code is very straight forward.

 namespace CS.Help.Console
 {
     using Microsoft.SharePoint.Client.UserProfiles;
     using OfficeDevPnP.Core;
 
     class Program
     {
         static void Main(string[] args)
         {
             string webURL = "https://****.sharepoint.com/sites/DemoTeamSite/";
             string userName = "sathish@*****.com";
             string password = "*****";
 
 //Initiating the PNP Auth Manager
             AuthenticationManager authenticationManager = new AuthenticationManager();
 
 // Get the ClientContext
             var clientContext = authenticationManager.GetSharePointOnlineAuthenticatedContextTenant(webURL, userName, password);
 
             clientContext.Load(clientContext.Web);
             clientContext.ExecuteQuery();
 
 // create the PeopleManager Object
             PeopleManager peopleManager = new PeopleManager(clientContext);
 // Query for that User
             var profileProperty = peopleManager.GetPropertiesFor("i:0#.f|membership|sathish@*****.com");
             clientContext.Load(profileProperty);
             clientContext.ExecuteQuery();
 
 //The Profileproperty has a property called “ServerObjectIsNull”.  
 //For the InActive Users, it is TRUE and for the Active Users it is FALSE.
 
             bool activeStatus = profileProperty.ServerObjectIsNull == false ? true : false;
 
             System.Console.ReadLine();
         }
     }
 }
 

The code seems to be simple and straight forward. Hope that helps.

Happy Coding,

Sathish Nadarajan.

Category : .Net, Office 365, SharePoint

Author Info

Sathish Nadarajan
 
Solution Architect
 
Rate this article
 
Sathish is a Microsoft MVP for SharePoint (Office Servers and Services) having 15+ years of experience in Microsoft Technologies. He holds a Masters Degree in Computer Aided Design and Business ...read more
 

Leave a comment