Install SSL certificate to the Server and Binding of SSL certificate to IIS Website

Ahamed Fazil Buhari
 
Senior Developer
January 20, 2018
 
Rate this article
 
Views
4044

Hi everyone, this is continuation of my previous article “Generate CSR in Windows Server for SSL Certificate”. In this article we will see how to install SSL certificate to your website.

Install SSL Certificate

In my case I have the certificate ready, so I go ahead with how to install SSL certificate in your server.

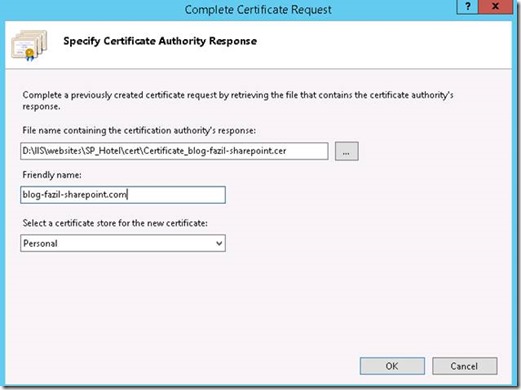
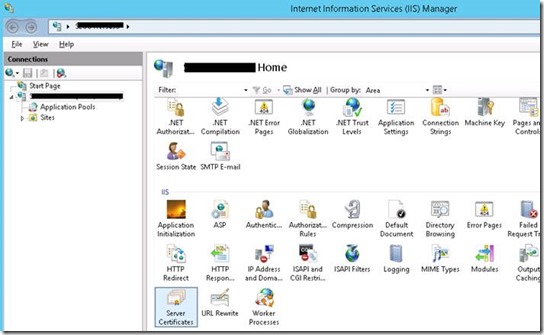
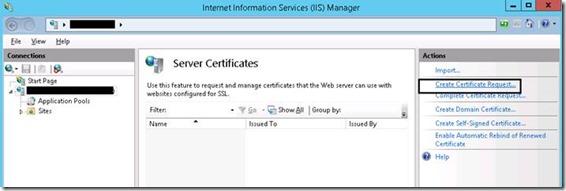
Step 1: Go to IIS -> Server Certificates -> Complete Certificate Request.

clip_image002

Step 2: Browse for the certificate with .cer extention which you received from SSL certificate provider

clip_image004

Step 3: Click on OK.

clip_image006

Binding Certificate to a Web Site

The final step to add certificate to your website is to bind the certificate for your site in IIS.

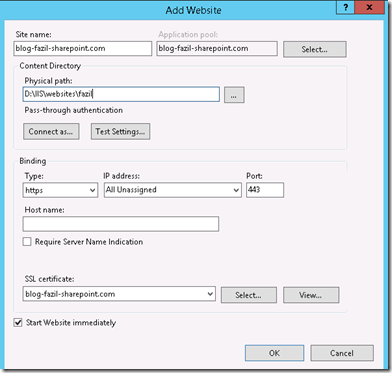
Step 1: Go to IIS Manager and if you are creating new site with https then straight away you can select certificate as shown below,

clip_image007

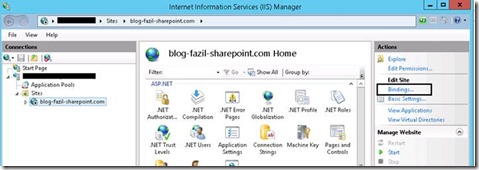
Step 2: To add certificate for existing site. Click on the site name and in right panel under Actions select Bindings…

clip_image009

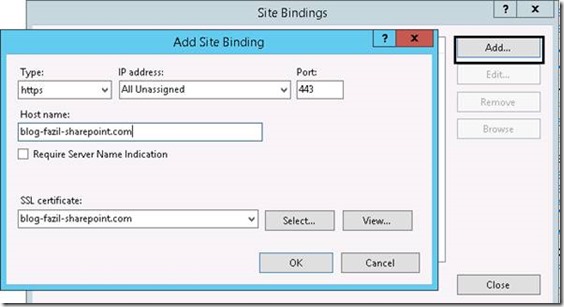
Step 3: In Site Bindings window, click on Add button and create https site by choosing the certificate which we installed in previous steps.

Enter binding details:

· Type: https

· IP address: leave blank (internal)

· Port: 443

· Host name: same as common name in certificate

· Require SNI: check

· SSL certificate: pick corresponding certificate from the list (name matching)

clip_image011

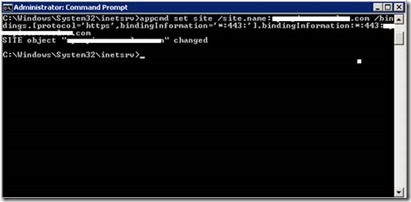
In some cases, host name could be disabled. In that case – Use the below command to update the host name in your https binding (open the cmd as Administrator and navigate to the following path – OR we can add https site through UI (Please refer the document ‘Ordering SSL for IIS’ inserted under ‘Request for Certificate’ topic for adding https through UI)

o C:\Windows\System32\inetsrv and run the below command


o appcmd set site /site.name:YourSiteName /bindings.[protocol=’https’,bindingInformation=’*:443:’].bindingInformation:*:443: YourSiteName

clip_image013

I hope you will find this article useful. Thank you J

Happy Coding

Ahamed

Category : IIS, Windows

Author Info

Ahamed Fazil Buhari
 
Senior Developer
 
Rate this article
 
Ahamed is a Senior Developer and he has very good experience in the field of Microsoft Technologies, especially SharePoint, Azure, M365, SPFx, .NET and client side scripting - JavaScript, TypeScript, ...read more
 

How to generate CSR in Windows Server for SSL Certificate

Ahamed Fazil Buhari
 
Senior Developer
 
Rate this article
 
Views
5515

Hi everyone, in this article we will see how to create SSL certificate for your website. The first step is to generate CSR from the server where you would like to host your website. To generate CSR please follow below steps. Here we are using Windows Server 2012 R2 and IIS of version 8.5

Step 1: Go to Internet Information Service (IIS) Manager. And double click on ‘Server Certificates’ as shown below.

clip_image002

Step 2: In Server Certificates window, check on right panel under Actions -> click on ‘Create Certificate Request’.

clip_image004

Step 3: In Create Request window, provide all necessary information. You can find sample data from below screenshot. It doesn’t matter if we you have given mydomain.com or for www.mydomain.com as common name, anyway both will be covered.

clip_image005

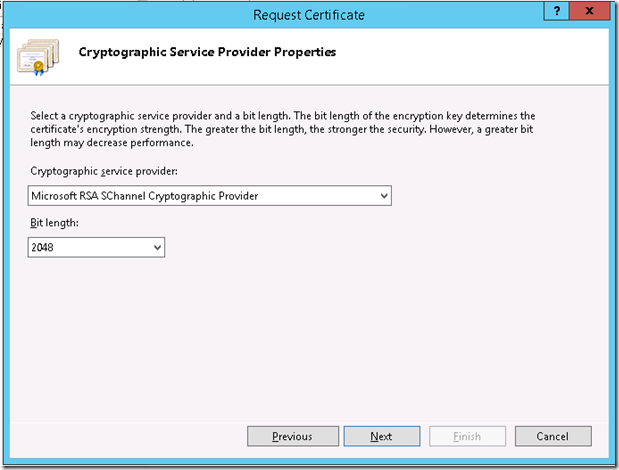
Step 4: Click on Next. Make sure you selected Bit length as 2048 which is recommended. (The bit length decides the level of security of your SSL certificate. Example, 2048-bit key is much stronger than a 1024-bit key.) Also, please make sure that the SSL certificate provider supports your bit key length. Most of the certificate providers like GoDaddy, Symantec recommended to use bit key 2048.

(The Microsoft RSA Schannel Cryptographic Provider supports hashing, data signing, and signature verification. The algorithm identifier CALG_SSL3_SHAMD5 is used for SSL 3.0 and TLS 1.0 client authentication – MSDN)

clip_image006

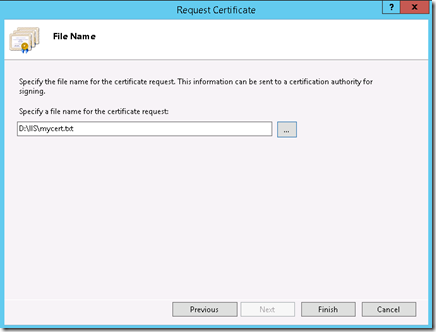
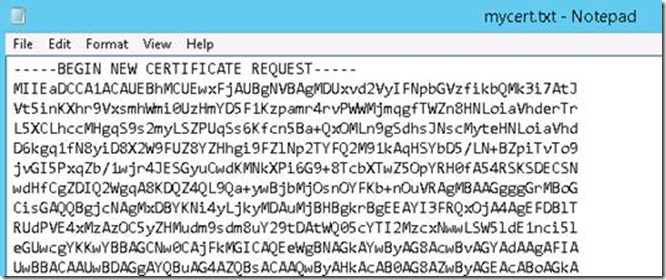
Step 5: Click on Next and provide folder path to save your CSR in txt format.

clip_image007

clip_image009

Step 6: Once the CSR’s been generated. Share your CSR with the SSL certificate provider. There are many SSL certificate provider available – comodo, identrust, godaddy, symantec etc. Choose wisely based on your need. And submit your CSR to the certificate provider who will generate SSL certificate and share it to you.

In the next article – “Install SSL certificate to the Server and Binding of SSL certificate to IIS Website” we will see how to install SSL certificate which you received from SSL provider.

Happy Coding

Ahamed

Category : Windows

Author Info

Ahamed Fazil Buhari
 
Senior Developer
 
Rate this article
 
Ahamed is a Senior Developer and he has very good experience in the field of Microsoft Technologies, especially SharePoint, Azure, M365, SPFx, .NET and client side scripting - JavaScript, TypeScript, ...read more
 

How to Create HTTPS/SSL enabled WebApplication with HostHeader in SharePoint 2013 Using PowerShell

Sathish Nadarajan
 
Solution Architect
January 9, 2014
 
Rate this article
 
Views
34343

In some old articles, we saw about creating various types of WebApplications. Hope we are familiar with creating various web applications. Here, I faced another challenge. Thought of sharing that to the Community.

The requirement was something like, I want a web application, whose URL should be like https://MYDevelopmentSite.ss.loc:1000/Sites/MyDeveloperSite instead of https://Servername:1000/Sites/MyDeveloperSite. We may think, that, this is very simple. Even I thought the same thing. That is, this is going to be a straight forward one. But, the problem here is the site is SSL Enabled one.

Let us see, how to create the web application using power shell and discuss about the problem and the error faced later.

 $ap = New-SPAuthenticationProvider
 
 New-SPWebApplication -Name "MyDevelopmentSite" -DatabaseName "WSS_Content_MyDevelopmentSite" -HostHeader "MyDevelopmentSite.DC07.Loc" -Port 4001 -ApplicationPool "MyDevelopmentSite" -ApplicationPoolAccount "DC07SPFarm" -URL "https://MyDevelopmentSite.DC07.Loc" -AuthenticationProvider $ap –SecureSocketsLayer
 

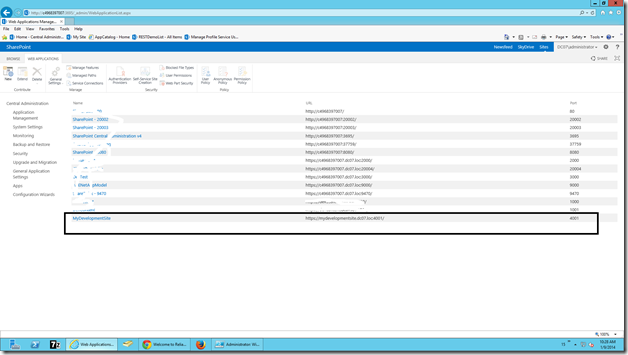
This will create the WebApplication with a host header. And the URL of the WebApplication would be https://MyDevelopmentSite.dc07.loc:4001/

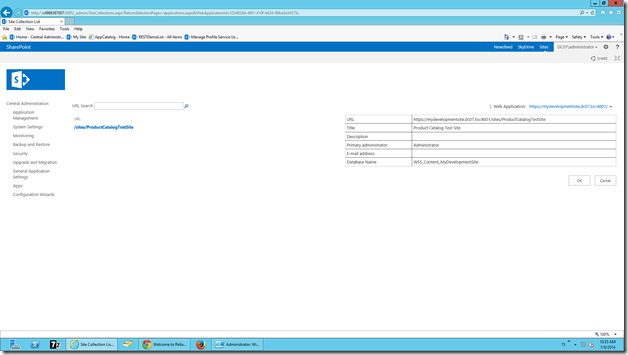
Let us go to the Central Administration to confirm whether the web app has been created or not.
image

Yes, it got Created.

Now, let us create a Sitecollection on this web application with the below script.

 $template = Get-SPWebTemplate "PRODUCTCATALOG#0"
 
 #$template
 
 New-SPSite -Url "https://MyDevelopmentSite.DC07.Loc:4001/sites/ProductCatalogTestSite" -OwnerAlias "Administrator@dc07.loc" -Template $template -Name "Product Catalog Test Site" 
 

The Site Collection has been created. Now, try accessing the Site Collection by the URL specified above.
image

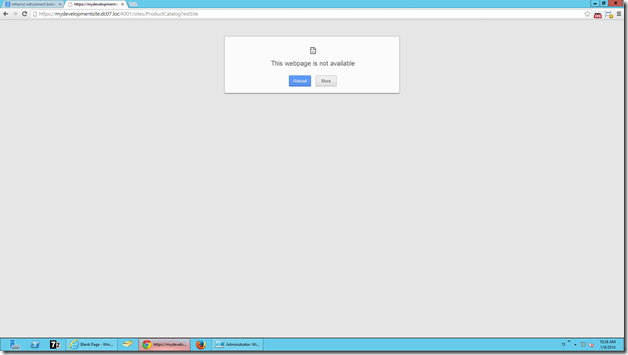
When try accessing this URL, We can see the below error message.
image

“The Webpage is not available” is a very weird exception. I know, everyone will get angry by seeing this exception. But once, we faced this, then this is a very simple exception.

The reason for this one is, this is SSL enabled. But till now, we haven’t binded any certificate for this web application. Let us do that by going to the IIS. The steps are as follows.

1. Open the inetmgr.

2. Create a SSL. To create, have a look on this article.

3. Bind the Certificate to the WebApplication Created. Refer here to do that.

Once, we done with the binding and try opening the page, again, we may not have smile on our face. The below page will be thrown on our screen.

You attempted to reach mydevelopmentsite.dc07.loc, but instead you actually reached a server identifying itself as C4968397007.DC07.Loc. This may be caused by a misconfiguration on the server or by something more serious. An attacker on your network could be trying to get you to visit a fake (and potentially harmful) version of mydevelopmentsite.dc07.loc.

The screen would be something like

image

When we see this kind of exception, the immediate action item would regarding the Certificate. The Certificate, which we created from our IIS (Self-Signed Certificate) is the one which causes this exception. If you have a look at the Certificate, the “Issued To” would be the Machine Name.

image

Now, we need to change the “Issued To” field. That we cannot do for a self-signed certificate. At that, time, there is no other go, that we need to create a Domain-Certificate. For that, we require the Domain Certificate Authority. We had already seen enough information about the Certificate Authority and the Domain Certificates in the previous posts.

For reference, I am giving the links here.

https://www.sharepointpals.com/post/Installing-Certificate-Authority-by-Active-Directory-Certificate-Services-on-Windows-Server-2008-R2

https://www.sharepointpals.com/post/Creating-a-Domain-Certificate-from-Certificate-Authority-through-IIS-Server

https://www.sharepointpals.com/post/Creating-a-Domain-Certificate-from-Certificate-Authority-through-MMC

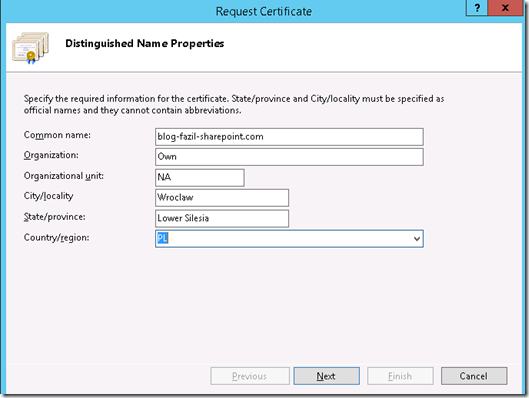
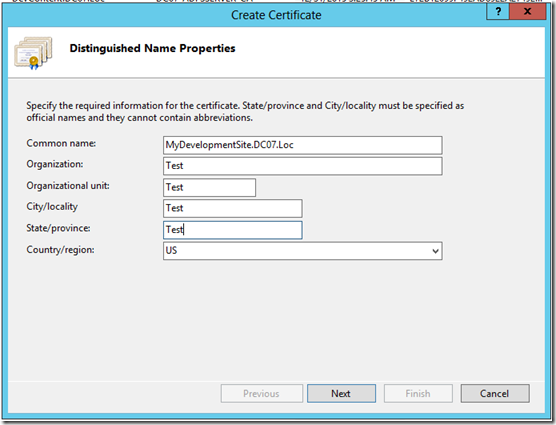
Let us Assume that, we are creating the Domain Certificate from IIS itself. Since that is the easiest approach. The important thing we need to note down is the “Common Name”
image

This should match the host header. This is the actual problem.

Then the created certificate would be

image

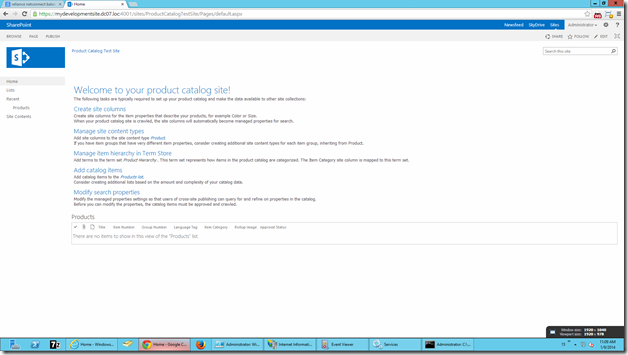
Now, map this certificate to the web application, which we created and try login.

Thus we created a web application with a host header and mapped that to a Domain Certificate.
image

In the next posts, we will see some more interesting requirements which I faced.

Happy Coding.

Sathish Nadarajan.

Author Info

Sathish Nadarajan
 
Solution Architect
 
Rate this article
 
Sathish is a Microsoft MVP for SharePoint (Office Servers and Services) having 15+ years of experience in Microsoft Technologies. He holds a Masters Degree in Computer Aided Design and Business ...read more
 

Leave a comment