How to Increase the Size of the Hard disk in Azure Virtual Machine (VM)

Sathish Nadarajan
 
Solution Architect
August 22, 2018
 
Rate this article
 
Views
55661

In this article, let us see how to increase the size of the Azure VM. By default, when we create a normal VM in Azure, the size of the disk would be 128 GB or something like that based on the plan which we have chosen. And one important thing is, the Temporary storage D: drive will be lost whenever you stop start the VM. Hence, all the data and the software’s which we are installing on the VM should only be on the C: drive. Hence, the C: may reach the maximum size very quickly.

In that case, we need to increase the size of the VM without affecting the data. Note: the action is irreversible. We can increase the size, but not decrease. Let us see that step by step.

1. Login to portal.azure.com and go to the Virtual machines Section.

2. Make sure that the VM is De-Allocated.

clip_image002

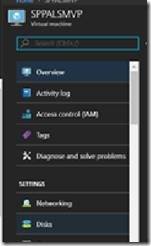
3. Click on the “Disks”

clip_image004

4. Select the OS disk.

clip_image006

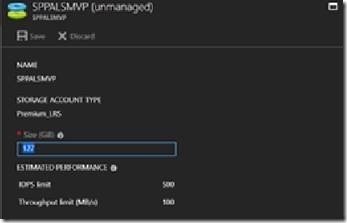
5. The default size would be something as shown below.

clip_image008

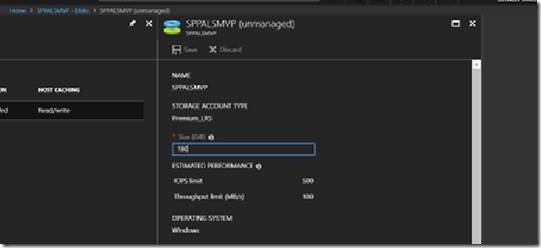
6. Change the size based on the requirement. Consider the cost as well, while giving a large volume.

clip_image010

7. Click on Save. That’s it. Now, we have increased the size of the VM. Now, let us login to the VM to utilize the space.

8. Login to the VM. Go to Server Manager.

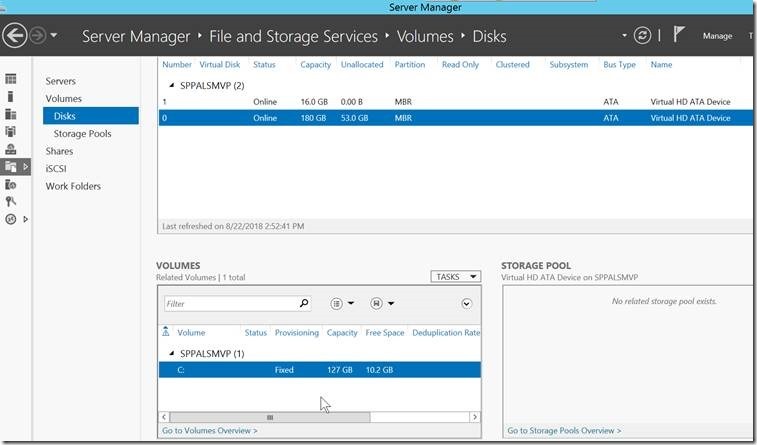
9. Click on the File and Storage Services.

clip_image012

10. Select the drive which we want to extend. Obviously it is going to be the C drive I believe.

clip_image014

11. Click on the Volume and Select “Extend Volume”

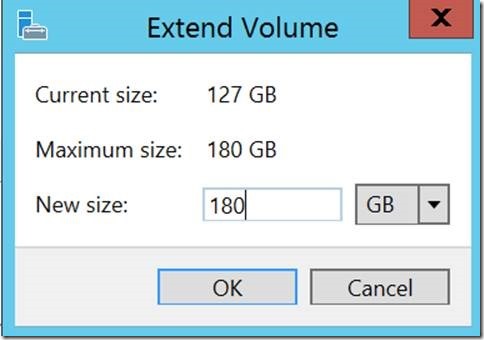
12. Give the Values appropriately.

clip_image016

13. Now, go back to the Windows Explorer and we can see the new volume of Drives.

clip_image018

Hope, this simple step reduces the time much.

Happy Coding,

Sathish Nadarajan.
Category : Azure

Author Info

Sathish Nadarajan
 
Solution Architect
 
Rate this article
 
Sathish is a Microsoft MVP for SharePoint (Office Servers and Services) having 15+ years of experience in Microsoft Technologies. He holds a Masters Degree in Computer Aided Design and Business ...read more
 

How to Get the Size of the Document with and Without Version in SharePoint using PowerShell Script – Server-Side Object Model

Sathish Nadarajan
 
Solution Architect
March 13, 2018
 
Rate this article
 
Views
5428

Recently faced an interesting requirement to get the Size of the Documents with and Without Version during the preparation of Inventory in one of the Migration assignment.

Usually, we can get the size of the Web Site from the admin console itself. But, it will give you the size including the Versions of the documents. But if the customer wants to migrate only the final version, then the size may not be realistic.

To be precise, if the size of the Web shows as 20 GB in the Console, and the requirement is to migrate only the final version, then the content migrated would be only 5 GB. (The numbers which I am referring are for example purpose only.) Hence, the remaining 15 GB, we don’t event consider for our planning.

The below piece of PowerShell Script will give you both the Options.

 function GetSPFolderSize ($Folder)
 {
    $byteCount = 0   
          
         # calculate the files in the immediate folder    
 
         foreach ($SPFile in $Folder.Files)    
         {       
             $byteCount += $SPFile.TotalLength 
 
             # The below line will include the versions  
 
               foreach ($SPFileVersion in $SPFile.Versions)   
               {              
                 $byteCount += $SPFileVersion.Size   
               }
               
              
         }        
         # Handle sub folders     
         foreach ($SubFolder  in $Folder.SubFolders)    
         {       
             $byteCount += GetSPFolderSize  $SubFolder
         }        
     return $byteCount  
 }
 

To call the method,

 $webBytes = GetSPFolderSize  $Web.RootFolder
 

The $webBytes variable will contain the size in Bytes.

Happy Coding,

Sathish Nadarajan.
Category : PowerShell, SharePoint

Author Info

Sathish Nadarajan
 
Solution Architect
 
Rate this article
 
Sathish is a Microsoft MVP for SharePoint (Office Servers and Services) having 15+ years of experience in Microsoft Technologies. He holds a Masters Degree in Computer Aided Design and Business ...read more
 

How to Identify the Size of the Content Database using PowerShell in SharePoint 2013

Sathish Nadarajan
 
Solution Architect
January 12, 2015
 
Rate this article
 
Views
23193

Recently I came across a requirement like retrieving the Content DB Size of a WebApplication using PowerShell. The WebApplication may have many Content DBs. So, all the Content DBs needs to be listed and their corresponding sizes needs to be exported into an Excel as output.

Thought of Sharing to the community.

 $LogTime = Get-Date -Format yyyy-MM-dd_hh-mm
 
 $LogFile = ".ContentDBSize-$LogTime.rtf"
 
 #cls
 
 ##================================================================================================
 
 ## Description : Get the Content DBs and their Sizes
 
 ## Author : Sathish Nadarajan
 
 ## Date : 09-Jan-2015
 
 ##================================================================================================
 
 $Host.UI.RawUI.WindowTitle = "-- Get Content DBs Size --"
 
 $StartDate = Get-Date
 
 Write-Host -ForegroundColor White "------------------------------------"
 
 Write-Host -ForegroundColor White "| Get Content DBs Size |"
 
 Write-Host -ForegroundColor White "| Started on: $StartDate |"
 
 Write-Host -ForegroundColor White "------------------------------------"
 
 #start-transcript $logfile
 
 ################################################### Add SharePoint PowerShell Snapin ######################################
 
 if ( (Get-PSSnapin -Name Microsoft.SharePoint.PowerShell -ErrorAction SilentlyContinue) -eq $null ) {
 
 Add-PSSnapin Microsoft.SharePoint.Powershell
 
 }
 
 ########################################################### End of PowerShell Snapin ########################################
 
 ########################################################### Set the Exxecution Path #########################################
 
 $scriptBase = split-path $SCRIPT:MyInvocation.MyCommand.Path -parent
 
 Set-Location $scriptBase
 
 ########################################################### End of Set the Exxecution Path ##################################
 
 ########################################################### Prepare the Output File with Header #############################
 
 $Output = $scriptBase + "" + "ContentDBInfo.csv";
 
 "WebApplication" + "," + "ContentDBName" + "," + "Size in MB" | Out-File -Encoding Default -FilePath $Output;
 
 ############################################### End of Prepare the Output File with Header ##################################
 
 $webApplication = Read-Host "Please enter the WebApplication URL"
 
 $contentDataBases = Get-SPContentDatabase -webapplication $webApplication
 
 Write-Host "The Count of Content Databases for the WebApplication is :- " $contentDataBases.Count -ForegroundColor Green
 
 if($contentDataBases.Count -ne $null)
 
 {
 
 for($i=0; $i -le $contentDataBases.Count-1; $i++)
 
 {
 
 Write-Host $contentDataBases[$i].Name
 
 $contentDataBase = Get-SPDatabase | where-object { $_.Name -eq $contentDataBases[$i].Name }
 
 $webApplication + "," + $contentDataBase.Name + "," + $contentDataBase.disksizerequired/1024/1024 | Out-File -Encoding Default -Append -FilePath $Output;
 
 }
 
 }
 

Happy Coding.

Sathish Nadarajan.

Author Info

Sathish Nadarajan
 
Solution Architect
 
Rate this article
 
Sathish is a Microsoft MVP for SharePoint (Office Servers and Services) having 15+ years of experience in Microsoft Technologies. He holds a Masters Degree in Computer Aided Design and Business ...read more
 

Leave a comment