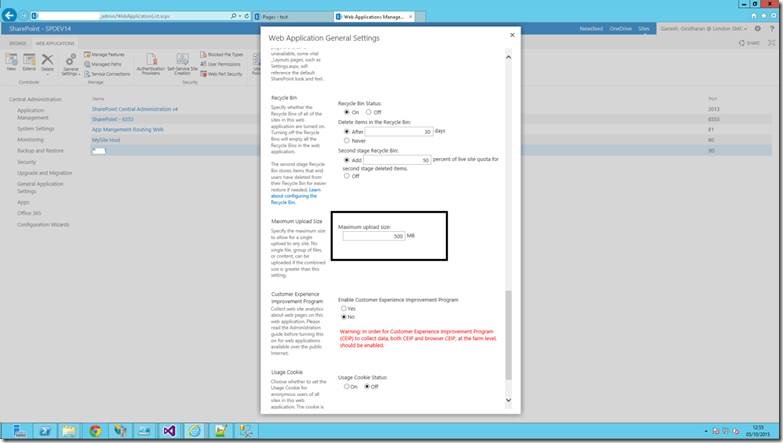
In this article, let us see how to modify the maximum file upload size in SharePoint 2013 using PowerShell and Central Administration. Especially, this will be very useful, when we are using the SharePoint Client Object Model. (CSOM). Usually CSOM restricts to 3 MB by default. If we want to upload a larger file using CSOM, sharepoint does not allow that.
First let us see how to do that using PowerShell.
Open the PowerShell Console with Admin credentials and execute the below script.
 $ws = [Microsoft.SharePoint.Administration.SPWebService]::ContentService
 $ws.ClientRequestServiceSettings.MaxReceivedMessageSize = 5242880
 $ws.ClientRequestServiceSettings.MaxParseMessageSize  = 5242880
 $ws.Update()
The above will increase the file size to 512 MB.
Now, let us see the same thing in Central Admin.
1. Go to Central Admin
2. Go to Manage Web Applications
3. Select the WebApplication
4. Click on the General Settings.
5. Modify the Maximum Upload Size on the popup.
Happy Coding,
Sathish Nadarajan.


Leave a comment