NodeJS – Step by Step Procedure to Setup and Create a NodeJS application and use TypeScript as a Programming Language

Sathish Nadarajan
 
Solution Architect
October 1, 2021
 
Rate this article
 
Views
1015

All of us are familiar about the popularity and the power of Node JS. By default the NodeJS application will have the start page as a JS file and predominantly it is meant for the JavaScript. But, when I wanted to create a Node WebSite, which is going to interact with SharePoint Online using PNPJS, I was in a situation that, TypeScript is more friendlier than JS for any PNP and SharePoint Online coding.

Hence, wanted to explore, how to create or use Typescript within the Node JS application and make the DEV environment a bit faster and cleaner.

In this article, let us see the steps to create a NodeJS application and use typescript as a Programming Language on it.

1. Install Node LTS from the below path.

https://nodejs.org/en/download/


2. Ensure that the Node is installed properly by typing “node -v”. This will give the version of the node installed.

3. Create a folder with the app name – C:\NodeApps\DemoNodeJSWithTypeScript
4. Open the command prompt.

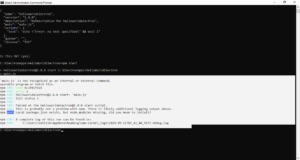
5. Create a solution using “npm init”.

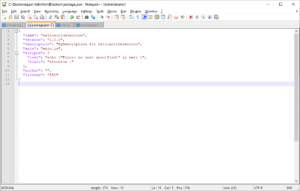
6. The command will create the package.json file.


Package.json

{
"name": "demonodejswithtypescript",
"version": "1.0.0",
"description": "",
"main": "index.js",
"scripts": {
"test": "echo "Error: no test specified" && exit 1"
},
"author": "",
"license": "ISC"
}

7. Install TypeScript using the command npm install -g typescript

8. Ensure the version of typescript by tsc –version

9. We need to create the config file for the TypeScript. Tscofig.json.
a. We can create this by running the command “tsc –init”.


10. Now, the tsconfig.json has been created. Have a look on the site, for more information about the tsconfig.
11. Update the tsconfig as below.

{
"compilerOptions": {
/* Visit https://aka.ms/tsconfig.json to read more about this file */
"target": "es6", /* Set the JavaScript language version for emitted JavaScript and include compatible library declarations. */
"module": "commonjs", /* Specify what module code is generated. */
"rootDir": "./src", /* Specify the root folder within your source files. */
"moduleResolution": "node", /* Specify how TypeScript looks up a file from a given module specifier. */
"outDir": "./dist", /* Specify an output folder for all emitted files. */
"esModuleInterop": true, /* Emit additional JavaScript to ease support for importing CommonJS modules. This enables `allowSyntheticDefaultImports` for type compatibility. */
"forceConsistentCasingInFileNames": true, /* Ensure that casing is correct in imports. */
"strict": true, /* Enable all strict type-checking options. */
"skipLibCheck": true /* Skip type checking all .d.ts files. */
},
"exclude": [
"./node_modules"
]
}

12. Create the folders SRC and DIST as updated above on the tsconfig.json file. The folder structure will looks as below.


13. Create a file called index.ts inside the src folder.
14. Write some TS code here.

function sum (num1:number, num2:number){
return num1 + num2;
}
console.log(sum(8,4))

15. Now, install the typescript compiler npm install -D typescript

16. Now run tsc ;- this will create the corresponding index.js on the outdir dist folder.

17. Now, the solution and the index.js will be shown as below.


18. Now execute “node dist/index.js” to run the application.


19. Install ts-node by “npm install -D ts-node
a. Ts-node allows us to point to a Typescript file. It will run .ts, compile it and run it with Node.js for us.
20. Update the config file as below.

{
"name": "demonodejswithtypescript",
"version": "1.0.0",
"description": "",
"main": "index.js",
"scripts": {
"test": "echo "Error: no test specified" && exit 1",
"start": "ts-node ./src/index.ts"
},
"author": "",
"license": "ISC",
"devDependencies": {
"ts-node": "^10.2.1",
"typescript": "^4.4.3"
}
}

21. Now we can execute by using “npm start” itself. This will automatically trigger the index.ts file.
22. Then install the below packages for various purposes.

Npm install express
Npm install -D @types/node
Npm install -D @types/express


23. Update the index.ts as below.

import express, { Application, ErrorRequestHandler, Request, response, Response } from 'express';

const app: Application = express();
const PORT = process.env.PORT || 2000;

app.get("/", async (req: Request, res: Response): Promise => {

res.send("Hello Typescript with Node.js!")

});

app.use(function (err: any, req: Request, res: Response, next: ErrorCallback) {
res.status(err.status || 500);
res.send(err);
});

app.listen(PORT, (): void => {
console.log(`Server Running here https://localhost:${PORT}`);
});

24. Now run “npm start


25. Browse the page http://localhost:2000


26. The next step is to continuously monitor the TS files changes, so that the npm server should automatically refresh. For that, I prefer to go with Nodemon.

27. Npm install -D nodemon

28. Update the package.json with the script parameter dev. The final package.json will looks like below.

{
"name": "demonodejswithtypescript",
"version": "1.0.0",
"description": "",
"main": "index.js",
"scripts": {
"test": "echo "Error: no test specified" && exit 1",
"start": "ts-node ./src/index.ts",
"dev": "nodemon ./src/index.ts"
},
"author": "",
"license": "ISC",
"devDependencies": {
"@types/express": "^4.17.13",
"@types/node": "^16.10.2",
"ts-node": "^10.2.1",
"typescript": "^4.4.3"
},
"dependencies": {
"express": "^4.17.1"
}
}

29. Now we can use the command “npm run dev

Though it’s a bit lengthy, this will be useful for someone who wants to develop a Node application with TypeScript. Especially the stand alone application for the SharePoint Online. Yes, this is a start and the objective is to use this application with PNPJS to interact with SharePoint Online sites in the upcoming articles. Stay Tuned!!!

Download the Source HERE

Happy Coding
Sathish Nadarajan

Author Info

Sathish Nadarajan
 
Solution Architect
 
Rate this article
 
Sathish is a Microsoft MVP for SharePoint (Office Servers and Services) having 15+ years of experience in Microsoft Technologies. He holds a Masters Degree in Computer Aided Design and Business ...read more
 

ElectronJS – Step by Step Procedure to Setup and Create a Hello World App using Electron JS

Sathish Nadarajan
 
Solution Architect
September 14, 2021
 
Rate this article
 
Views
1486

In this article, let us see the step by step procedure to create my first hello world app using Electron JS

1. Install Node LTS from the below path.
https://nodejs.org/en/download/


2. Create a folder with the app name – C:\ElectronApps\HelloWorldElectron
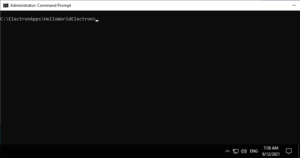
3. Open the command prompt.


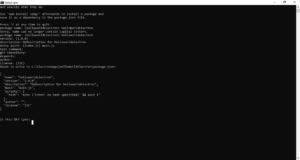
4. Create a solution using “npm init”.


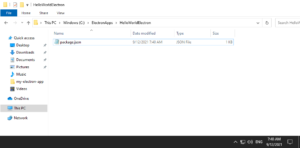
5. The command will create the package.json file.


6. Install Electron JS using the command

npm install –save-dev electron


7. Try starting the application.
Npm start


We may get the above exception. This means, we haven’t created the main.js file. Let us create the main.js.

And the Preload.js and the index.js

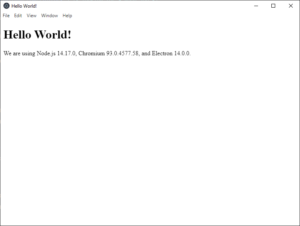
Then again “npm start”. The output will be as shown below.

8. The finished code of different files are as below.

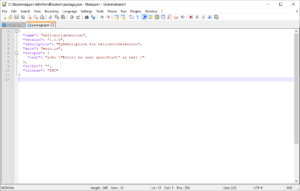
Package.json

{
"name": "helloworldelectron",
"version": "1.0.0",
"description": "MyDescription for helloworldelectron",
"main": "main.js",
"scripts": {
"test": "echo "Error: no test specified" && exit 1",
"start": "electron ."
},
"author": "",
"license": "ISC",
"devDependencies": {
"electron": "^14.0.0"
}
}

Main.js

// main.js

// Modules to control application life and create native browser window
const { app, BrowserWindow } = require('electron')
const path = require('path')

function createWindow () {
// Create the browser window.
const mainWindow = new BrowserWindow({
width: 800,
height: 600,
webPreferences: {
preload: path.join(__dirname, 'preload.js')
}
})

// and load the index.html of the app.
mainWindow.loadFile('index.html')

// Open the DevTools.
// mainWindow.webContents.openDevTools()
}

// This method will be called when Electron has finished
// initialization and is ready to create browser windows.
// Some APIs can only be used after this event occurs.
app.whenReady().then(() => {
createWindow()

app.on('activate', function () {
// On macOS it's common to re-create a window in the app when the
// dock icon is clicked and there are no other windows open.
if (BrowserWindow.getAllWindows().length === 0) createWindow()
})
})

// Quit when all windows are closed, except on macOS. There, it's common
// for applications and their menu bar to stay active until the user quits
// explicitly with Cmd + Q.
app.on('window-all-closed', function () {
if (process.platform !== 'darwin') app.quit()
})

// In this file you can include the rest of your app's specific main process
// code. You can also put them in separate files and require them here.

Preload.js

// preload.js

// All of the Node.js APIs are available in the preload process.
// It has the same sandbox as a Chrome extension.
window.addEventListener('DOMContentLoaded', () => {
const replaceText = (selector, text) => {
const element = document.getElementById(selector)
if (element) element.innerText = text
}

for (const dependency of ['chrome', 'node', 'electron']) {
replaceText(`${dependency}-version`, process.versions[dependency])
}
})

Index.html

<!--index.html-->

<!DOCTYPE html>
<html>
  <head>
    <meta charset="UTF-8">
    <!-- https://developer.mozilla.org/en-US/docs/Web/HTTP/CSP -->
    <meta http-equiv="Content-Security-Policy" content="default-src 'self'; script-src 'self'">
    <meta http-equiv="X-Content-Security-Policy" content="default-src 'self'; script-src 'self'">
    <title>Hello World!</title>
  </head>
  <body>
    <h1>Hello World!</h1>
    We are using Node.js <span id="node-version"></span>,
    Chromium <span id="chrome-version"></span>,
    and Electron <span id="electron-version"></span>.

    <!-- You can also require other files to run in this process -->
    <script src="./renderer.js"></script>
  </body>
</html>


Happy Coding
Sathish Nadarajan
Author Info

Sathish Nadarajan
 
Solution Architect
 
Rate this article
 
Sathish is a Microsoft MVP for SharePoint (Office Servers and Services) having 15+ years of experience in Microsoft Technologies. He holds a Masters Degree in Computer Aided Design and Business ...read more
 

Refreshing JavaScript – Calling an Async method within Map method in Typescript – SPFx

Sathish Nadarajan
 
Solution Architect
August 27, 2021
 
Rate this article
 
Views
1118

Recently faced an issue. I need to iterate a list of items and need to call an Async method. But the map needs to wait until the last async method is been returned. Usually what happens is, since the method is async, after the first value, it goes beyond the map method and returns. For that, we must write the method with async and Promise All. The pseudo method is as below.

public getTasks = async (Id: number): Promise<any> => {
    try {
      let tasksListItems = await sp.web.lists.getByTitle('Tasks').items.expand('AssignedTo').select('*', 'AssignedTo/Title', 'AssignedTo/EMail', 'AssignedTo/Name').filter(`ProjectID eq ${Id} `).get();

      let taskIds = [];
      taskIds = await Promise.all(tasksListItems.map(async item => {
        return {
          key: item.Id,
          text: item.AssignedTo1.Title,
          taskTitle: item.Title,
          isMember: await graphDataProvider.isMemberOfOffice365Group(item.AssignedTo.Name.split('|')[2], await this.getCurrentUserPrinciple())
        }
      }));
      return taskIds.filter(task => task.isMember);
    }
   catch (error) {
      return null;
    }
  }

Points to be considered.
1. The method should be declared as async method.
2. The map should be surrounded with await Promise.all()
3. Within the map method, we can very well call the async method using the await keyword.

Happy Coding
Sathish Nadarajan

Author Info

Sathish Nadarajan
 
Solution Architect
 
Rate this article
 
Sathish is a Microsoft MVP for SharePoint (Office Servers and Services) having 15+ years of experience in Microsoft Technologies. He holds a Masters Degree in Computer Aided Design and Business ...read more
 

How to Find the User belongs to an Office 365 Group using Graph API in SharePoint Online – SPFx (SharePoint Framework)

Sathish Nadarajan
 
Solution Architect
August 25, 2021
 
Rate this article
 
Views
2060

In this article, let us see whether the logged in user (or any user) belongs to a particular Office 365 Group member/owner or not. The below class is self-explanatory.

GraphDataProvider.ts

//Import the necessary modules.
import { WebPartContext } from "@microsoft/sp-webpart-base";
import validator from 'validator';
import IGraphDataProvider from "./IGraphDataProvider";
import customLogger from '../../../common/services/CustomLogger';

export class GraphDataProvider implements IGraphDataProvider {

    public context: WebPartContext;

    public setup(context: WebPartContext): void {
        this.context = context;
    }

    public isMemberOfOffice365Group = async (groupId: string, userPrinciple: string): Promise<boolean> => {
        try {
            let isMember = false;

            if (validator.isUUID(groupId)) {
                let membersAndOwners = await this.getMembersOfGroup(groupId);
                membersAndOwners = membersAndOwners.map(user => { return user.toLowerCase() })
                isMember = membersAndOwners.indexOf(userPrinciple.toLowerCase()) != -1 ? true : false;
            }
            else {
                isMember = groupId.toLowerCase() == userPrinciple.toLowerCase() ? true : false;
            }
            return isMember;
        } catch (error) {

 
            return false;
        }

    }

    private getMembersOfGroup = async (groupID: string): Promise<string[]> => {
        try {
 

            let membersAndOwners: string[] = [];

            let client = await this.context.msGraphClientFactory.getClient();

            let groupmembers = await client.api(`/groups/${groupID}`).expand('members').get();
            let groupowners = await client.api(`/groups/${groupID}`).expand('owners').get();

            if (groupmembers.members) {
                groupmembers.members.forEach(member => {
                    membersAndOwners.push(member.userPrincipalName);
                })
            }
            if (groupowners.owners) {
                groupowners.owners.forEach(owner => {
                    membersAndOwners.push(owner.userPrincipalName);
                })
            }
            return membersAndOwners;
        }
        catch (error) {
 
            return null;
        }

    }
}

const graphDataProvider = new GraphDataProvider();
export default graphDataProvider;

IGraphDataProvider.ts

export default interface IGraphDataProvider {
    isMemberOfOffice365Group  (groupId: string, userPrinciple: string): Promise<boolean> ;
}

And on the Consumption Component,

import graphDataProvider from '../../services/GraphDataProvider';

let isMember = await graphDataProvider.isMemberOfOffice365Group(Group, currentUserPrinciple)

Happy Coding
Sathish Nadarajan

Author Info

Sathish Nadarajan
 
Solution Architect
 
Rate this article
 
Sathish is a Microsoft MVP for SharePoint (Office Servers and Services) having 15+ years of experience in Microsoft Technologies. He holds a Masters Degree in Computer Aided Design and Business ...read more
 

Refreshing JavaScript – Push Un-Shift methods in Array.

Sathish Nadarajan
 
Solution Architect
August 16, 2021
 
Rate this article
 
Views
499

Arrays are very common datatype which we will be using in our Day-to-day life. In which inserting the records and retrieving based on
the index is very common scenario.

Push: – To Insert an item at the bottom of the array, we will use the Push method.

Un-Shift: – To Insert an item at the top of an array, we can use unshift method.

The example is as follows.

myParentArray.map(parentArrayItem => {
          if (parentArrayItem.Action != null) {
            childArray.push({
              Id: parentArrayItem.Id,
              Title: parentArrayItem.Title,

            })

          }
          else {
            childArray.unshift({
              Id: parentArrayItem.Id,
              Title: parentArrayItem.Title,
             })
          }
        })

In the above example, if the parentArrayItem.Action has value, then it will be pushed at the bottom of the ChildArray. If there is no Action, then it will be placed on the top of the ChildArray.

Happy Coding
Sathish Nadarajan
Author Info

Sathish Nadarajan
 
Solution Architect
 
Rate this article
 
Sathish is a Microsoft MVP for SharePoint (Office Servers and Services) having 15+ years of experience in Microsoft Technologies. He holds a Masters Degree in Computer Aided Design and Business ...read more
 

SPFx – Check Whether File Exists Using PnP in SharePoint WebParts

Sathish Nadarajan
 
Solution Architect
August 4, 2021
 
Rate this article
 
Views
2142

Usually while uploading any image or file, there might be scenario, whether the file with the same name is already present or not. Unfortunately, there is no direct method like isExists() present.

Though we have an option to override the existing version etc., I don’t want to do any action if the file is already present. For that, the below snippet was useful. Thought of sharing with the community.

public createImage = async (filename: string, serverRelativeUrl: string): Promise<any> => {
    try {

      const fileExists = await sp.web
        .getFileByServerRelativeUrl(`${serverRelativeUrl}/ Images/${filename}.svg`)
        .select('Exists').get()
        .then((d) => d.Exists)
        .catch(() => false);

//Basically, the above line will tell you whether the file is present on the 
//Images folder or not

      if (!fileExists) {
        await sp.web.getFolderByServerRelativeUrl(`${serverRelativeUrl}/ Images/`)
.files.add(`${filename}.svg`, <<blobValuefortheimage>>, true);
      }

 
    }
    catch (error) {
       //Log
    }
  }

Happy Coding
Sathish Nadarajan
Author Info

Sathish Nadarajan
 
Solution Architect
 
Rate this article
 
Sathish is a Microsoft MVP for SharePoint (Office Servers and Services) having 15+ years of experience in Microsoft Technologies. He holds a Masters Degree in Computer Aided Design and Business ...read more
 

SPFX – Array Manipulation Using TypeScript – Explained with SetTheory Concepts

Sathish Nadarajan
 
Solution Architect
August 3, 2021
 
Rate this article
 
Views
1598

Almost in every application or webpart, any developer would be dealing with the Array and any type of collection.  There are few scenarios which I faced with respect to the Difference, Union etc., Just wanted to share with the audience.

For the below article, let us use the basic Arrays.  I have two Array of file names.

One with the total files which I have in a document library.

allFilesInsideFolder = [‘File1.txt’, ‘File2.txt’, ‘File3.txt’, ‘File4.txt’, ‘File5.txt’]

The Second one, only the required files.

filesToCopy = [ ‘File2.txt’, ‘File5.txt’, ‘Files6.txt’]


Difference

Basically, I need to delete the files “File1, File3 and File4”.  To identify that, doing a for loop and all, I don’t want to do that.  The simplest way is as below.


allFilesInsideFolder = [‘File1.txt’, ‘File2.txt’, ‘File3.txt’, ‘File4.txt’, ‘File5.txt’]
filesToCopy = [ ‘File2.txt’, ‘File5.txt’, ‘Files6.txt’]
let filesToBeDeleted = allFilesInsideFolder.filter(x => !filesToCopy.includes(x));
filesToBeDeleted = [‘File1.txt’,‘File3.txt’, ‘File4.txt’]


Intersection

May be, in some scenario if I want only the files which are available on both the array, then


allFilesInsideFolder = [‘File1.txt’, ‘File2.txt’, ‘File3.txt’, ‘File4.txt’, ‘File5.txt’]
filesToCopy = [ ‘File2.txt’, ‘File5.txt’, ‘Files6.txt’]
let intersectionFiles = allFilesInsideFolder.filter(x => filesToCopy.includes(x));
intersectionFiles = [ ‘File2.txt’, ‘File5.txt’]


Symmetric Difference

In case, if I want only the unique files, i.e., any file which is present either in allFilesInsideFolder or filesToCopy array, then


allFilesInsideFolder = [‘File1.txt’, ‘File2.txt’, ‘File3.txt’, ‘File4.txt’, ‘File5.txt’]
filesToCopy = [ ‘File2.txt’, ‘File5.txt’, ‘Files6.txt’]
let symmetricdifference = allFilesInsideFolder
.filter(x => ! filesToCopy.includes(x))
.concat(filesToCopy.filter(x => ! allFilesInsideFolder.includes(x)));
symmetricdifference = [ ‘File1.txt’, ‘File3.txt’,‘File4.txt’,‘File6.txt’]


Union

In case, if I want both the array elements, then


allFilesInsideFolder = [‘File1.txt’, ‘File2.txt’, ‘File3.txt’, ‘File4.txt’, ‘File5.txt’]
filesToCopy = [ ‘File2.txt’, ‘File5.txt’, ‘Files6.txt’]
let union = [...allFilesInsideFolder, ... filesToCopy];
union = [‘File1.txt’, ‘File2.txt’, ‘File3.txt’, ‘File4.txt’, ‘File5.txt’, ‘File2.txt’, ‘File5.txt’, ‘Files6.txt’]


This will have duplicates.  But the distinct union will not have duplicates.


Distinct Union

If I want the distinct elements in both the arrays, then


allFilesInsideFolder = [‘File1.txt’, ‘File2.txt’, ‘File3.txt’, ‘File4.txt’, ‘File5.txt’]
filesToCopy = [ ‘File2.txt’, ‘File5.txt’, ‘Files6.txt’]
let distinctunion = [...new Set([...allFilesInsideFolder, ... filesToCopy)];
distinctunion = [‘File1.txt’, ‘File2.txt’, ‘File3.txt’, ‘File4.txt’, ‘File5.txt’, ‘Files6.txt’]


Happy Coding

Sathish Nadarajan


Author Info

Sathish Nadarajan
 
Solution Architect
 
Rate this article
 
Sathish is a Microsoft MVP for SharePoint (Office Servers and Services) having 15+ years of experience in Microsoft Technologies. He holds a Masters Degree in Computer Aided Design and Business ...read more
 

SPFX – Configure the WebPart using the Property Pane Configuration

Sathish Nadarajan
 
Solution Architect
March 8, 2021
 
Rate this article
 
Views
3312

The Property Pane is used to configure our WebPart based on the requirement.  The Property pane properties are defined in propertyPaneSettings.

The property pane looks as below.

And the default code for the method getPropertyPaneConfiguration is as below.

protected getPropertyPaneConfiguration(): IPropertyPaneConfiguration {
    return {
      pages: [
        {
          header: {
            description: null
          },
          groups: [
            {
              //groupName: strings.BasicGroupName,
              groupFields: [
                PropertyPaneTextField('description', {
                  label: strings.DescriptionFieldLabel
                })
              ]
            }
            
          ]
        }
      ]
    };
  }

And the requirement is On this WebPart, I need to introduce a text box in which the users can enter a number.  The webpart should retrieve only those many values from the list.  Now, we are going to introduce a new Text Box in the Property Pane.

The first step is to introduce a Props in the WebPartProps interface.

export interface IDisplayLargeListWebPartProps {
  description: string;
  numberofItems:number;
}

Then Update the getPropertyPaneConfiguration Method.

protected getPropertyPaneConfiguration(): IPropertyPaneConfiguration {
    return {
      pages: [
        {
          header: {
            description: null
          },
          groups: [
            {
              //groupName: strings.BasicGroupName,
              groupFields: [
                PropertyPaneTextField('description', {
                  label: strings.DescriptionFieldLabel
                }),
                PropertyPaneTextField('numberofItems', {
                  label: "Number of Items"
                })
              ]
            }
          ]
        }
      ]
    };
  }

This will render a new text box as below.


Now, we can get the value from this prop “numberofItems” and pass to our component props.  While rendering the component, we can pass the new property.

public render(): void {
    debugger;
    const element: React.ReactElement<IDisplayLargeListProps> = React.createElement(
      DisplayLargeList,
      {

        description: this.properties.description,
        numberofItems:this.properties.numberofItems
      }
    );

    ReactDom.render(element, this.domElement);
  }

On the component props file, we need to add the property numberofItems.

export interface IDisplayLargeListProps {
  description: string;
  numberofItems:number;
}

And on the component, we can use this property as below.

private getAllLargeListItems = async (): Promise<any> => {
    try {

      let allLargeListItems: any[] = [];
      
      let numberofItems = this.props.numberofItems;
      
      let largeListItems = await sp.web.lists.getByTitle('LargeList').items.select('Title').top(numberofItems).get();

      largeListItems.forEach(item => {
        allLargeListItems.push({
          Id: item.ID,
          name: item.Title, 
        });
      });

      return allLargeListItems;
    }
    catch (error) {

    }
  }

Similarly we can have any kind of controls within the Property Pane.

The following field types are supported:

  • Button
  • Checkbox
  • Choice group
  • Dropdown
  • Horizontal rule
  • Label
  • Link
  • Slider
  • Textbox
  • Multi-line Textbox
  • Toggle
  • Custom

Happy Coding

Sathish Nadarajan
Author Info

Sathish Nadarajan
 
Solution Architect
 
Rate this article
 
Sathish is a Microsoft MVP for SharePoint (Office Servers and Services) having 15+ years of experience in Microsoft Technologies. He holds a Masters Degree in Computer Aided Design and Business ...read more
 

Webpack and Typescript configuration in React – Part 3

Ahamed Fazil Buhari
 
Senior Developer
May 12, 2018
 
Rate this article
 
Views
2020

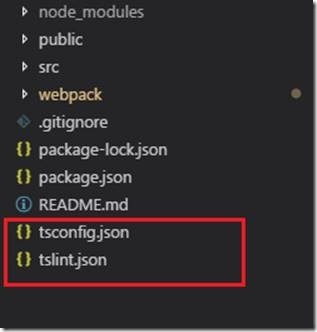
Hello everyone, this is the continuation of my previous articles – Introduction to Webpack and Typescript configuration in React – Part 1, Webpack and Typescript configuration in React – Part 2. In this article we will see about Typescript configuration (tsconfig.js) and tslint configuration (tslint.js).

clip_image002

If you plan to use typescript for your development then, tsconfig is important to be taken care before you write your code in typescript. The official documentation for tsconfig from typescript is available here. The packages are already installed; please refer Introduction to Webpack and Typescript configuration in React – Part 1 for the packages that needs to be installed for compiler and loader

tsconfig.js

 {
     "compilerOptions": {
         "outDir": "./dist/",
         "sourceMap": true,
         "noImplicitAny": true,
         "module": "commonjs",
         "target": "es5",
         "lib": [
             "es5",
             "es2015",
             "es2017",
             "dom",
             "scripthost"
         ],
         "jsx": "react",
         "experimentalDecorators": true
     },
     "include": [
         "./src/**/*"
     ],
     "exclude": [
         "node_modules",
         "dist"
   ]
 }
 

tslint.js

 {
   "rules": {
     "class-name": true,
     "curly": true,
     "eofline": true,
     "forin": true,
     "indent": [true, "spaces"],
     "label-position": true,
     "max-line-length": [true, 140],
     "no-arg": true,
     "no-bitwise": true,
     "no-console": [true, "debug", "info", "time", "timeEnd", "trace"],
     "no-construct": true,
     "no-debugger": true,
     "no-duplicate-variable": true,
     "no-empty": true,
     "no-eval": true,
     "no-shadowed-variable": true,
     "no-string-literal": false,
     "no-switch-case-fall-through": true,
     "no-trailing-whitespace": true,
     "no-unused-expression": true,
     "no-unused-variable": [true],
     "no-use-before-declare": true,
     "one-line": [
       true,
       "check-open-brace",
       "check-catch",
       "check-else",
       "check-whitespace"
     ],
     "quotemark": [false, "single"],
     "radix": true,
     "semicolon": true,
     "trailing-comma": false,
     "triple-equals": [true, "allow-null-check"],
     "typedef-whitespace": [
       true,
       {
         "call-signature": "nospace",
         "index-signature": "nospace",
         "parameter": "nospace",
         "property-declaration": "nospace",
         "variable-declaration": "nospace"
       }
     ],
     "variable-name": false,
     "whitespace": [
       true,
       "check-branch",
       "check-decl",
       "check-operator",
       "check-separator",
       "check-type"
     ]
   }
 }
 

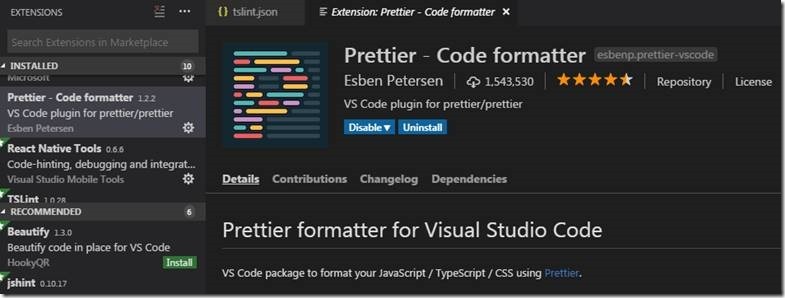
To format the code, I use “Prettier – Code formatter” extension which is available for VS code –

clip_image004

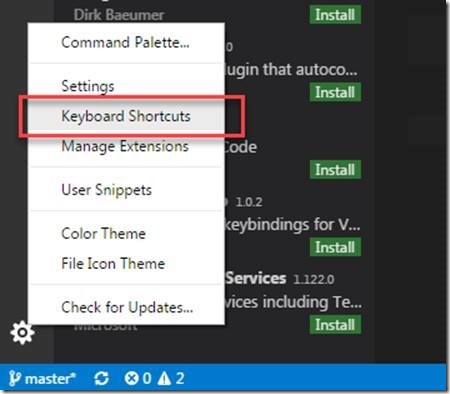
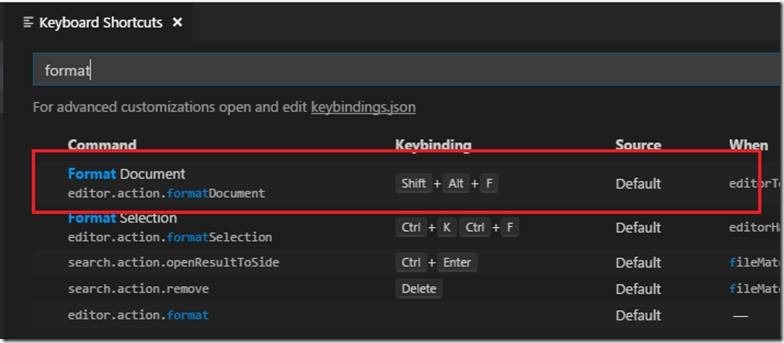
The shortcut to format your code could be Shift + Alt + F and still you can change the combination by going to Keyboard shortcut settings.

clip_image006

clip_image008

I hope this series of articles on Webpack and Typescript configuration is useful and for easy access of code, I uploaded a empty project with only these configuration setup in my github

https://github.com/ahamedfazil/react-redux-typescript-configuration/tree/master/configuration

Happy Coding

Ahamed

Author Info

Ahamed Fazil Buhari
 
Senior Developer
 
Rate this article
 
Ahamed is a Senior Developer and he has very good experience in the field of Microsoft Technologies, especially SharePoint, Azure, M365, SPFx, .NET and client side scripting - JavaScript, TypeScript, ...read more
 

Webpack and Typescript configuration in React – Part 2

Ahamed Fazil Buhari
 
Senior Developer
May 11, 2018
 
Rate this article
 
Views
3623

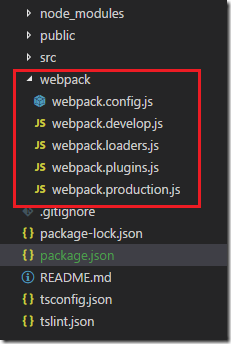
Hello everyone, this is the continuation of my previous article – In this we will see how to configure your webpack. To gain more knowledge on what webpack is and what is the use of it, please refer my article – Introduction to Webpack and Typescript configuration in React – Part 1. I have simple react application which uses Typescript. In the below screenshot you can see structure of my application.


image


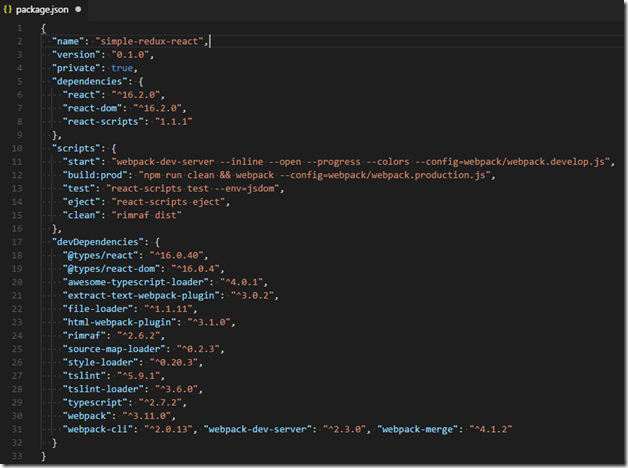
And the package.json will be available as below after installing various packages and dev dependencies,


image


The below files are used for webpack folder:

webpack.config.js

 const path = require('path');
 const loadersConfig = require('./webpack.loaders.js');
 const pluginsConfig = require('./webpack.plugins.js');
 
 module.exports = function() {
     return {
         entry: "./src/index.tsx",
         output: {
             filename: "bundle.js",
             path: __dirname + "/dist"
         },
         plugins: pluginsConfig,
         module: {
             rules: loadersConfig
         },
         // Enable sourcemaps for debugging webpack's output.
         devtool: 'inline-source-map',
         resolve: {
             // Add '.ts' and '.tsx' as resolvable extensions.
             extensions: [".ts", ".tsx", ".js", "min.js", ".json"],
             modules: ['node_modules'],
             alias : {
                 environment: path.join(__dirname, '../src/environment', (process.env.NODE_ENV || 'local'))
             }
         },
         devServer: {
             stats: 'minimal',
             port: 3000, // most common port
             contentBase: './dist',
             inline: true
           },
     };
 };


webpack.develop.js – Configuration for development purpose.

 const path = require('path');
 const config = require('./webpack.config.js');
 const webpackMerge = require('webpack-merge');
 const ExtractTextPlugin = require('extract-text-webpack-plugin');
 
 module.exports = webpackMerge(config(), {
   output: {
     path: path.resolve('src'),
     filename: 'bundle.js',
     publicPath: '/',
     devtoolModuleFilenameTemplate: '[absolute-resource-path]'
   },
   devtool: 'inline-source-map',
   module: {
     rules: [
       { enforce: 'pre', test: /.js$/, loader: 'source-map-loader', exclude: /node_modules/ }
     ]
   },
   devServer: {
     stats: 'minimal',
     contentBase: './src',
     historyApiFallback: true,
     watchOptions: {
       aggregateTimeout: 300,
       poll: 1000
     }
   },
   plugins: [
     new ExtractTextPlugin('[name].css')
   ]
 });
 

webpack.loader.js – Loader configuration

 const ExtractTextPlugin = require("extract-text-webpack-plugin");
 
 module.exports = [
   {
     enforce: "pre",
     test: /.js$/,
     loader: "source-map-loader"
   },
   {
     test: /.tsx?$/,
     exclude: /node_modules/,
     loader: "awesome-typescript-loader"
   },
   {
     test: /.css$/,
     use: ["style-loader", "css-loader"]
   },
   {
     test: /.scss/,
     exclude: /node_modules/,
     loader: ExtractTextPlugin.extract({
       fallback: "style-loader",
       use: ["css-loader", "sass-loader"]
     })
   },
   {
     test: /.(jpe?g|png|gif|svg)$/i,
     loader: "file-loader",
     options: {
       name: "images/[name].[ext]"
     }
   }
 ];
 

webpack.plugins.js – Plugins configuration

 const webpack = require("webpack");
 const HtmlWebpackPlugin = require("html-webpack-plugin");
 
 module.exports = [
   new webpack.ProvidePlugin({
     React: "react"
   }),
   new HtmlWebpackPlugin({
     template: "src/index.html",
     favicon: "src/favicon.ico"
   }),
   new webpack.EnvironmentPlugin({
     NODE_ENV: 'development', // use 'development' unless process.env.NODE_ENV is defined
     //NODE_ENV: 'production'
   })  
 ];


webpack.production.js – Plugins and different output path for production

 const path = require('path');
 const config = require('./webpack.config.js');
 const webpack = require('webpack');
 const webpackMerge = require('webpack-merge');
 const ExtractTextPlugin = require('extract-text-webpack-plugin');
 
 module.exports = webpackMerge(config(), {
   output: {
     path: path.resolve('dist'),
     filename: 'js/[name].min.[hash].js',
     publicPath: '/'
   },
   devtool: 'source-map',
   plugins: [
     new ExtractTextPlugin({filename: 'css/[name].[hash].css'}),
     new webpack.LoaderOptionsPlugin({
       minimize: true,
       debug: false
     }),
     new webpack.optimize.UglifyJsPlugin({
       beautify: false,
       sourceMap: false,
       mangle: {
         screw_ie8: true,
         keep_fnames: true
       },
       compress: {
         screw_ie8: true,
         warnings: false
       },
       comments: false
     })
   ]
 });
 

To run the script for development –

Use: npm start

To run the script for production – it will create dist folder and it will have

Use: npm run-script build:prod


Happy Coding

Ahamed

Author Info

Ahamed Fazil Buhari
 
Senior Developer
 
Rate this article
 
Ahamed is a Senior Developer and he has very good experience in the field of Microsoft Technologies, especially SharePoint, Azure, M365, SPFx, .NET and client side scripting - JavaScript, TypeScript, ...read more
 

Leave a comment