Azure static web app is one of the cool resource in Azure where Full stack developer can really enjoy doing development. Few key points that really makes development easy is because the whole front end and back end stay in the same place. Deployment is super easy and staging environments are well structured. With few clicks your application go live with global hosting. To know more Static Web App
Over the last decade, frontend frameworks and libraries (React, Angular, Vue and many more) are evolving and playing major role in the development. The modern static website is developed mostly with this frontend frameworks. There are some framework which are specialized in making static sites and some of them are Nextjs, Gatsby, Hugo.
In this article we are going to see how we can create simple Nextjs application and deploy it to Azure static web app.
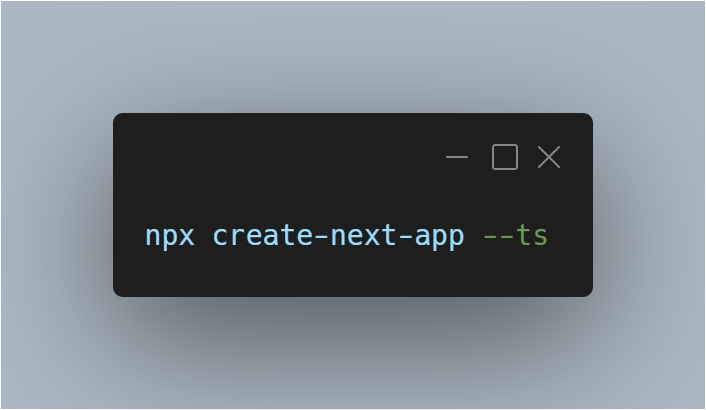
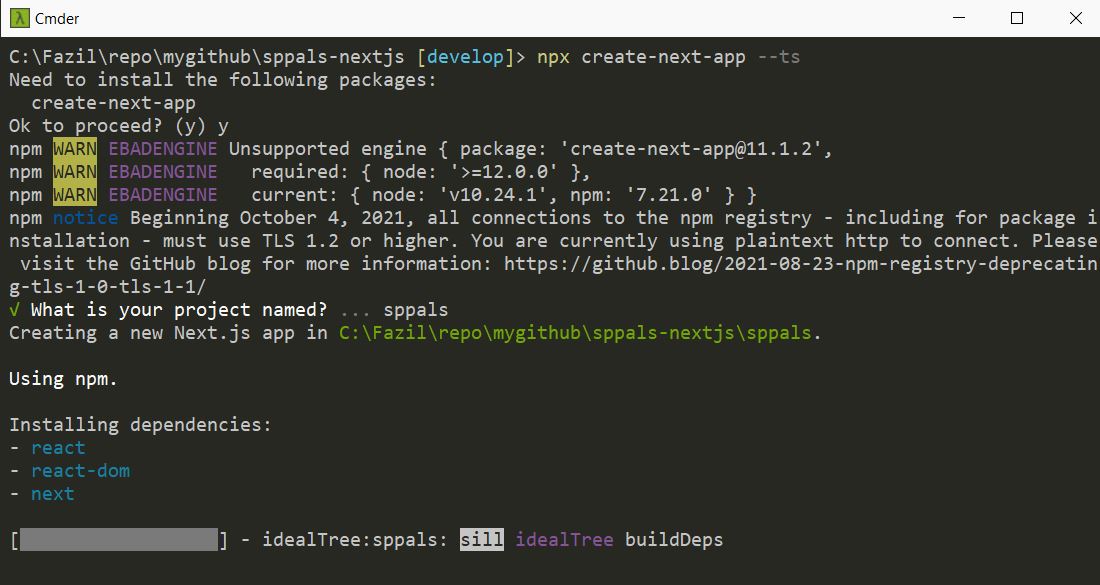
Step 1: Create Nextjs application and push it to github repository. I created a Nextjs with Typescript with following command
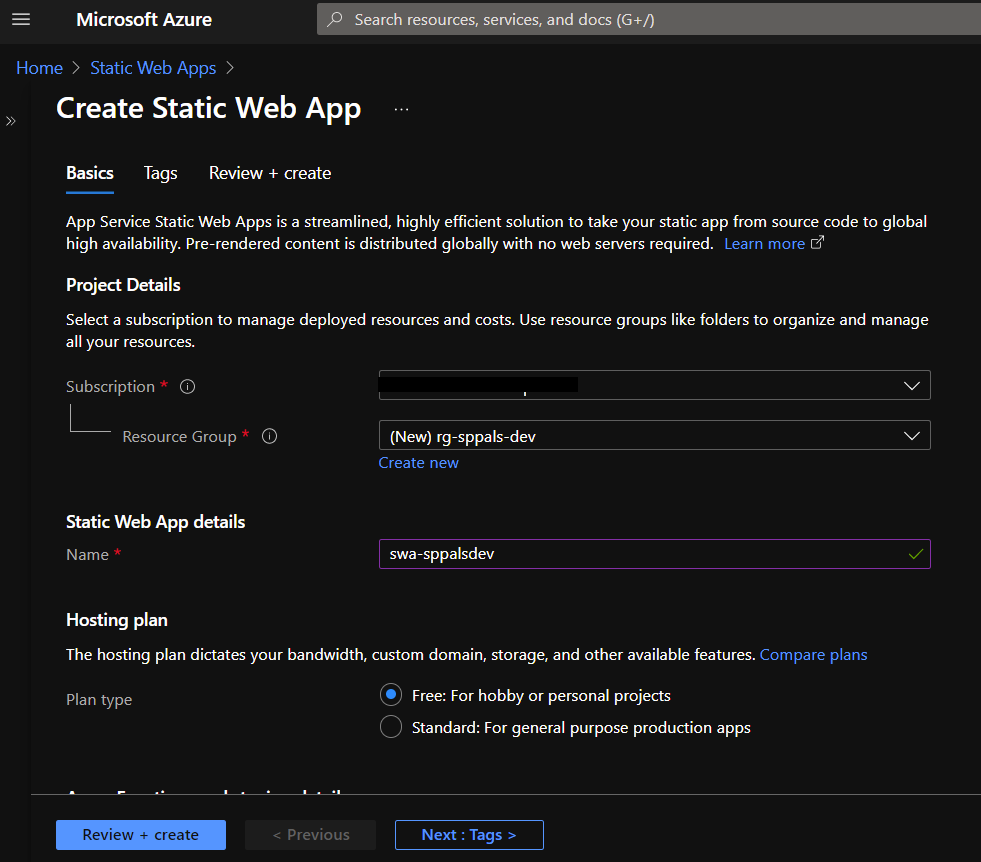
Step 2.a: Create Static web app from azure portal by providing resource group, name of the static web app, hosting plan and so on.
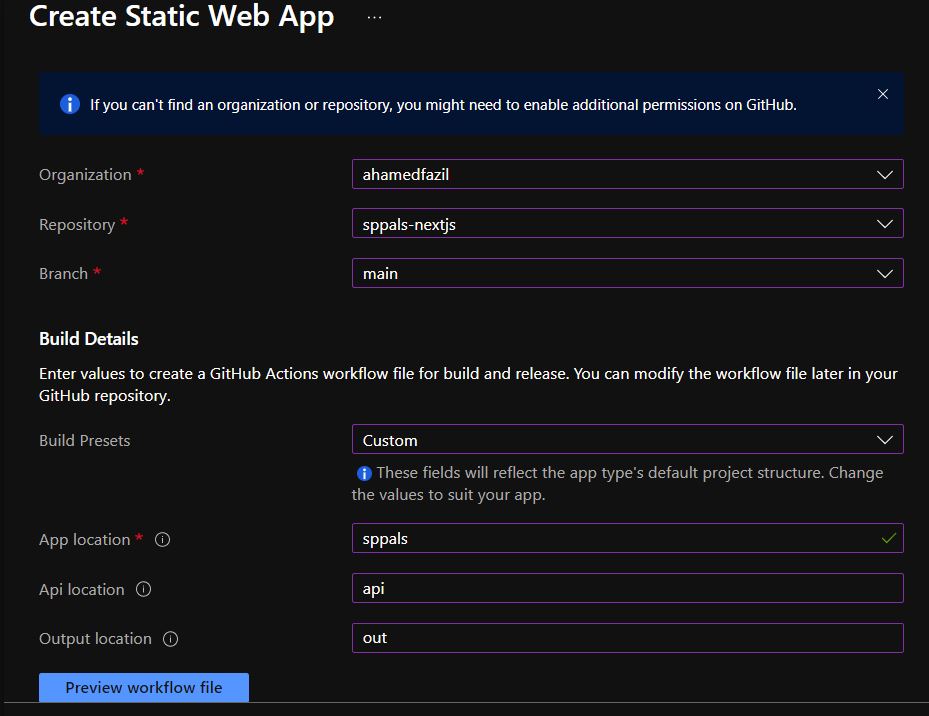
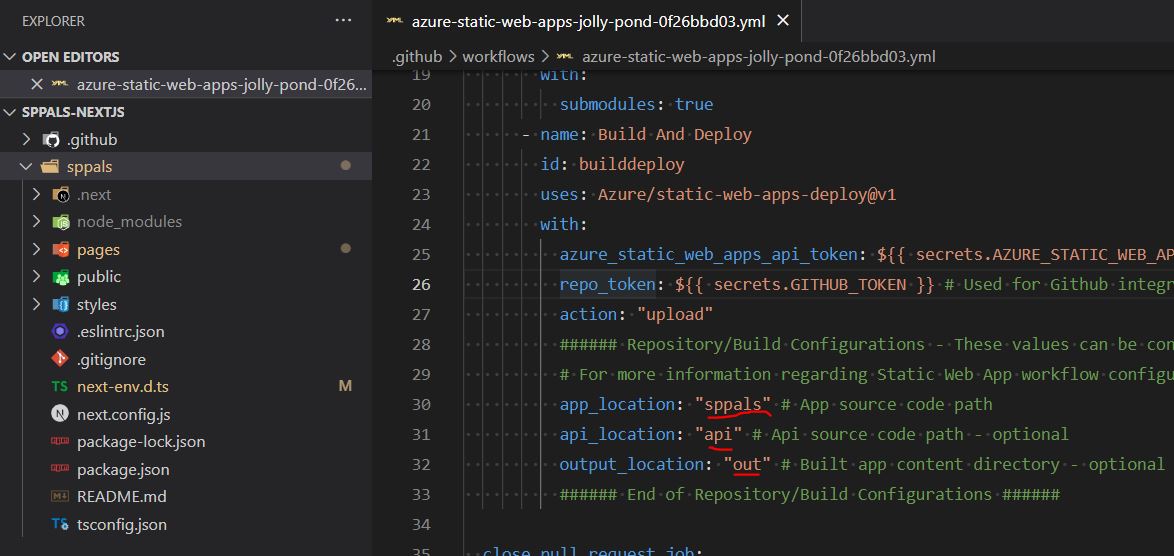
Step 2.b: Important step while creating static web app is providing right information in Build details, only based on that yml workflow file will be generated and the value inside this yml can be changed later. There are various build presets available but in our case we select Custom since Nextjs preset is not present in the static web app.
App location -> This is the main entry point to your application, in our case its called sppals because that is how we named our Nextjs application in Step 1.
Api location -> This is useful if we create an API for our Static web app using Azure functions. We will see later on how to create function app in static web app, but for now we just provide api
Output location -> This should be the build output from Nextjs and its always be out
Basically all these values – sppals, api, out are nothing but a folder name in our repository which will be used as an entry point during build for static web app.
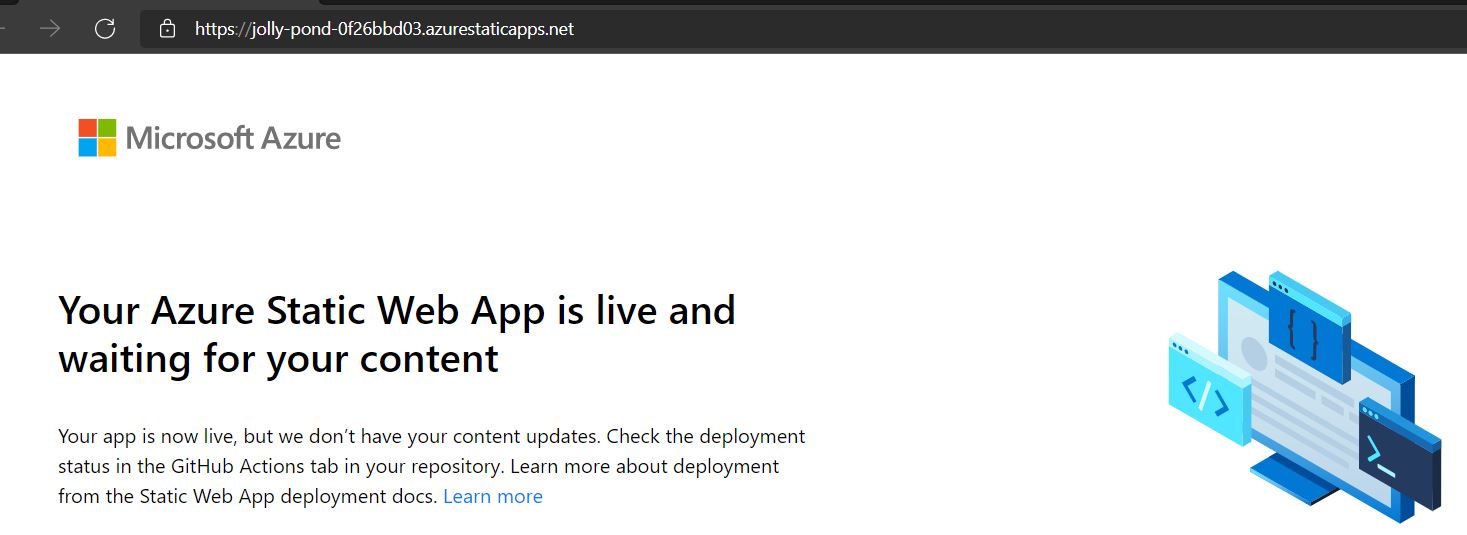
Step 3: Once you create static web app, azure will create an auto-generated public domain for development and testing. The url given to your static web app is already live and active
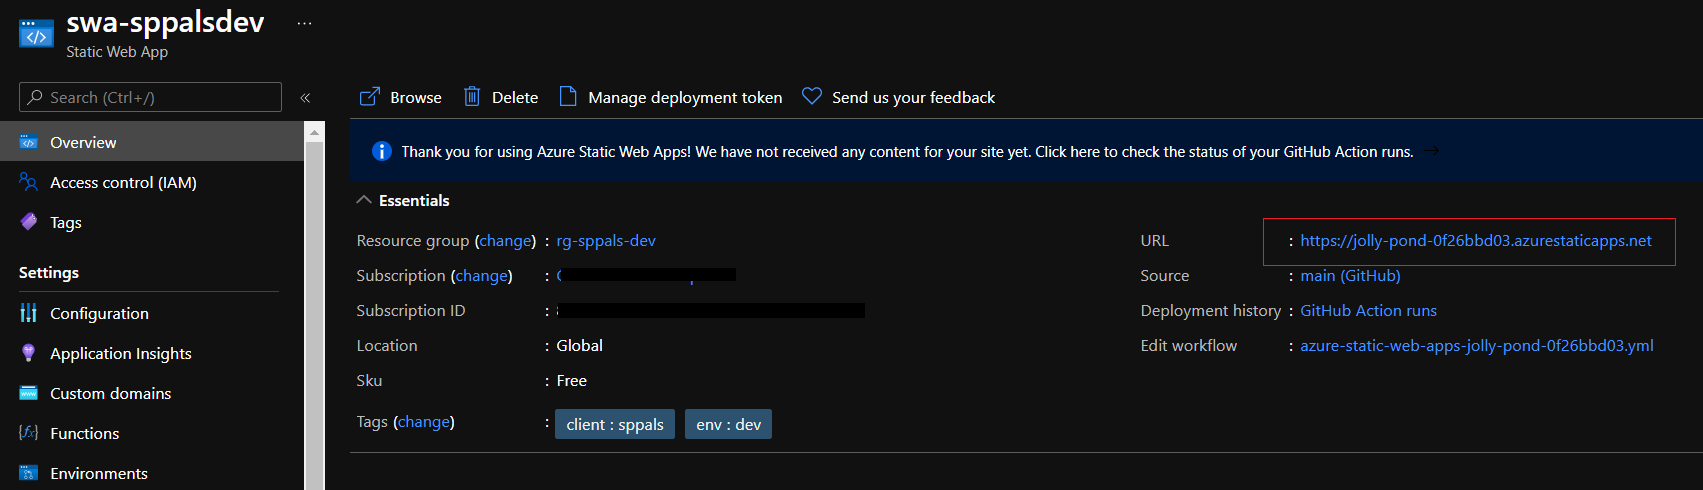
Step 4: Your github repo should be updated with the github workflow file and the file looks as below and you can already notice the values provided in Build Details while creating static webapp.
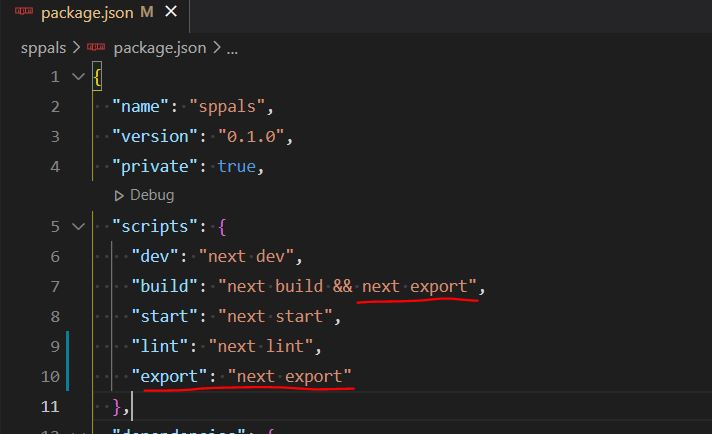
One important step in your Nextjs project is, make sure you update package.json file build script by adding && next export and add new script next export so that it will produce build file in out folder.
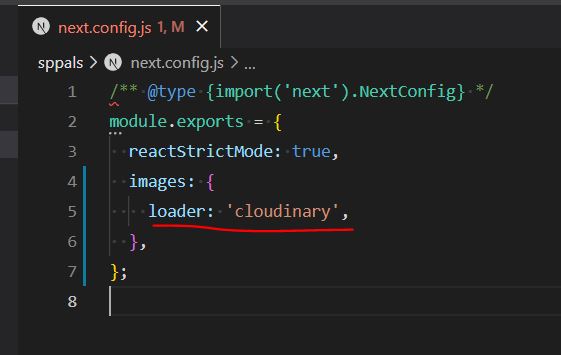
Also update the next.config.js file for Image optimization https://nextjs.org/docs/basic-features/image-optimization#loader , we do not need loader for image optiomization if we deploy nextjs in vercel but here we deploy to static web app so we need to explicitly mention Loader for Image optimization in next.config.js file
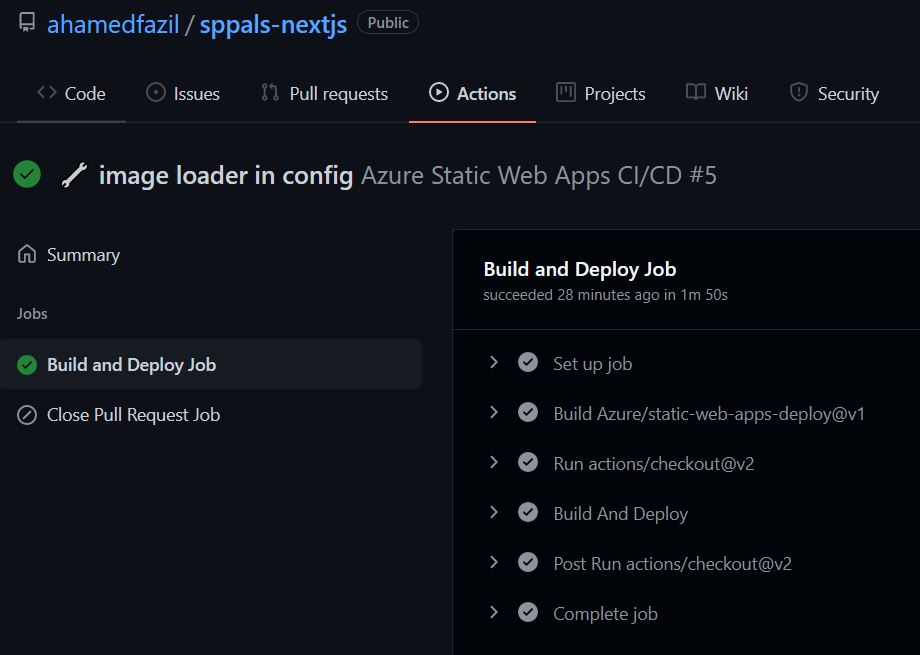
Once we push the changes to github, it will create an action and then it build and deploy your nextjs solution to azure static web app.
Hope this article is useful to make initial setup with your Nextjs and azure static web app.
Happy coding
Fazil

Leave a comment