How to Find the User belongs to an Office 365 Group using Graph API in SharePoint Online – SPFx (SharePoint Framework)

Sathish Nadarajan
 
Solution Architect
August 25, 2021
 
Rate this article
 
Views
2060

In this article, let us see whether the logged in user (or any user) belongs to a particular Office 365 Group member/owner or not. The below class is self-explanatory.

GraphDataProvider.ts

//Import the necessary modules.
import { WebPartContext } from "@microsoft/sp-webpart-base";
import validator from 'validator';
import IGraphDataProvider from "./IGraphDataProvider";
import customLogger from '../../../common/services/CustomLogger';

export class GraphDataProvider implements IGraphDataProvider {

    public context: WebPartContext;

    public setup(context: WebPartContext): void {
        this.context = context;
    }

    public isMemberOfOffice365Group = async (groupId: string, userPrinciple: string): Promise<boolean> => {
        try {
            let isMember = false;

            if (validator.isUUID(groupId)) {
                let membersAndOwners = await this.getMembersOfGroup(groupId);
                membersAndOwners = membersAndOwners.map(user => { return user.toLowerCase() })
                isMember = membersAndOwners.indexOf(userPrinciple.toLowerCase()) != -1 ? true : false;
            }
            else {
                isMember = groupId.toLowerCase() == userPrinciple.toLowerCase() ? true : false;
            }
            return isMember;
        } catch (error) {

 
            return false;
        }

    }

    private getMembersOfGroup = async (groupID: string): Promise<string[]> => {
        try {
 

            let membersAndOwners: string[] = [];

            let client = await this.context.msGraphClientFactory.getClient();

            let groupmembers = await client.api(`/groups/${groupID}`).expand('members').get();
            let groupowners = await client.api(`/groups/${groupID}`).expand('owners').get();

            if (groupmembers.members) {
                groupmembers.members.forEach(member => {
                    membersAndOwners.push(member.userPrincipalName);
                })
            }
            if (groupowners.owners) {
                groupowners.owners.forEach(owner => {
                    membersAndOwners.push(owner.userPrincipalName);
                })
            }
            return membersAndOwners;
        }
        catch (error) {
 
            return null;
        }

    }
}

const graphDataProvider = new GraphDataProvider();
export default graphDataProvider;

IGraphDataProvider.ts

export default interface IGraphDataProvider {
    isMemberOfOffice365Group  (groupId: string, userPrinciple: string): Promise<boolean> ;
}

And on the Consumption Component,

import graphDataProvider from '../../services/GraphDataProvider';

let isMember = await graphDataProvider.isMemberOfOffice365Group(Group, currentUserPrinciple)

Happy Coding
Sathish Nadarajan

Author Info

Sathish Nadarajan
 
Solution Architect
 
Rate this article
 
Sathish is a Microsoft MVP for SharePoint (Office Servers and Services) having 15+ years of experience in Microsoft Technologies. He holds a Masters Degree in Computer Aided Design and Business ...read more
 

How to Create Users in Azure AD

Sathish Nadarajan
 
Solution Architect
July 15, 2016
 
Rate this article
 
Views
3925

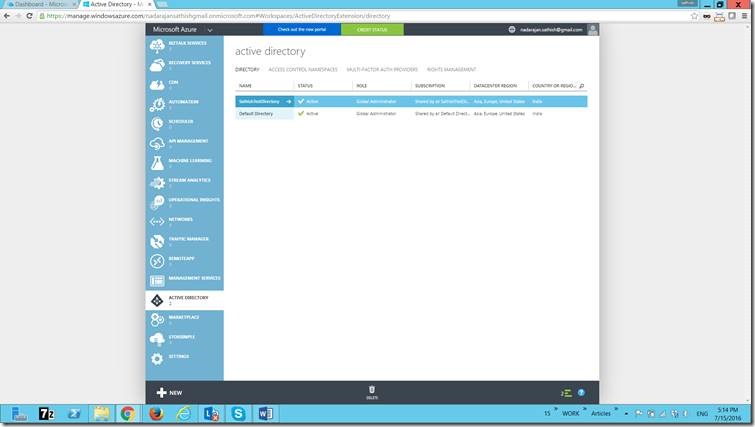
In the previous article, we saw how to create the Azure AD. Now, let us have a look on Creation of Users. After the AD is setup properly, the below screen will be displayed.

clip_image002

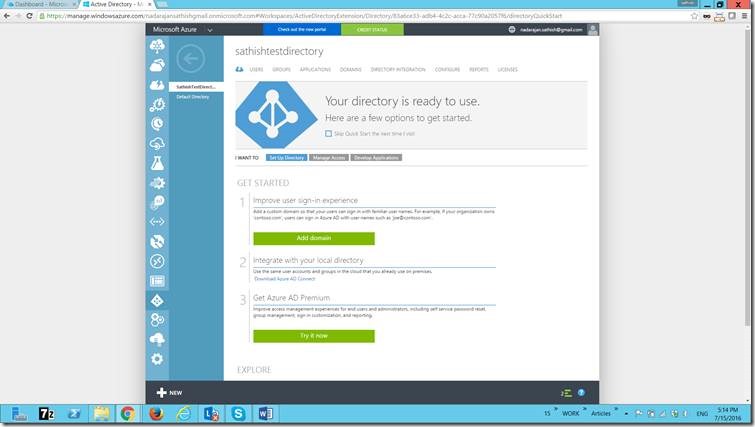
Click on the directory which we created.

There are many options we can see.

clip_image004

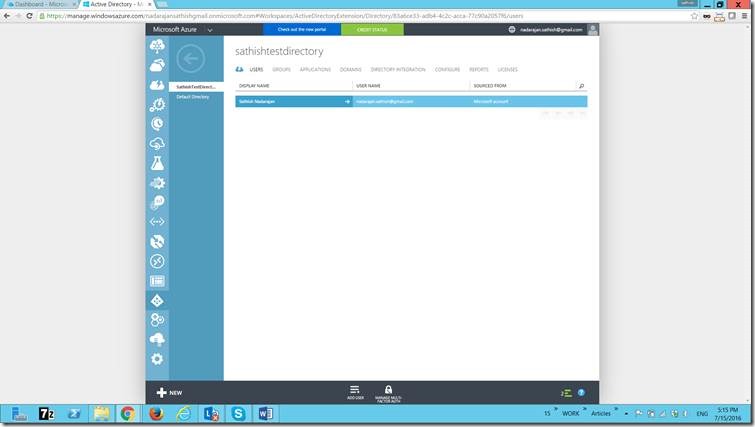
Out of them, let us focus only the Users Creation for the time being.

Once, I click the Users at the top menu, the current user list will be appearing.

clip_image006

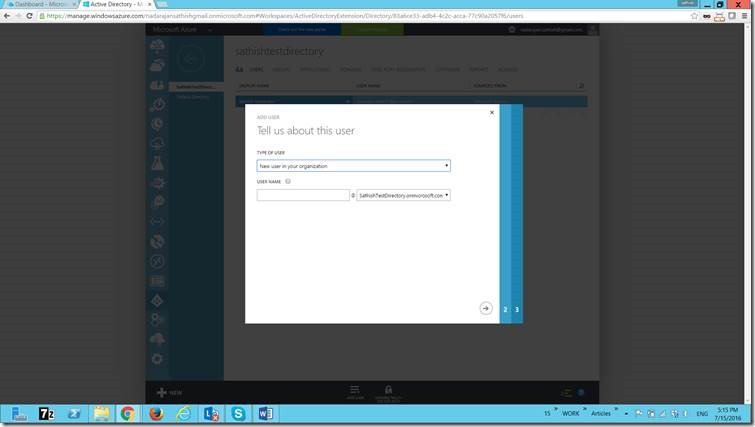
Click Add Users at the bottom.

clip_image008

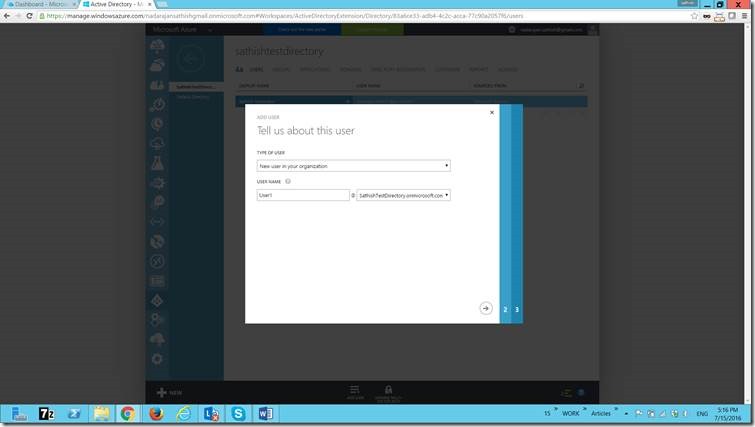
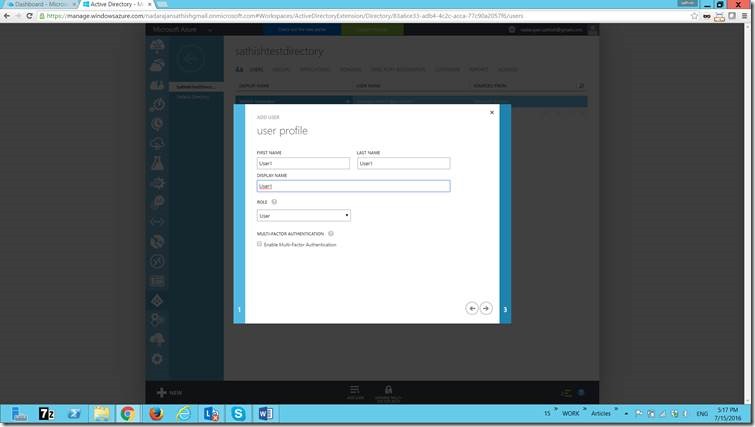
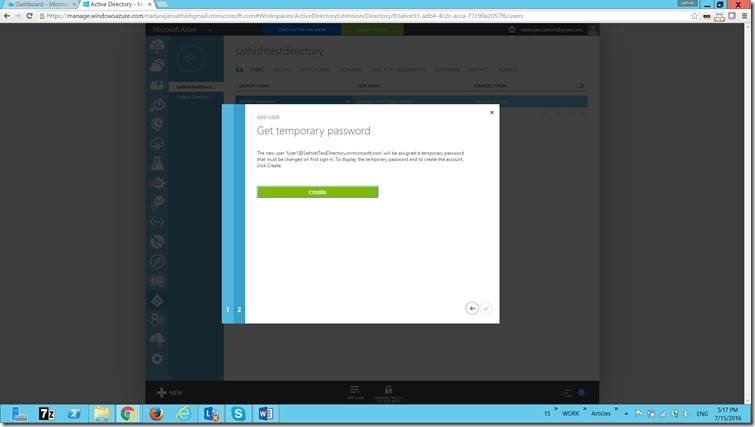
Give the UserName and the other information on the corresponding screens. Please refer to the below screen shots.

clip_image010

clip_image012

clip_image014

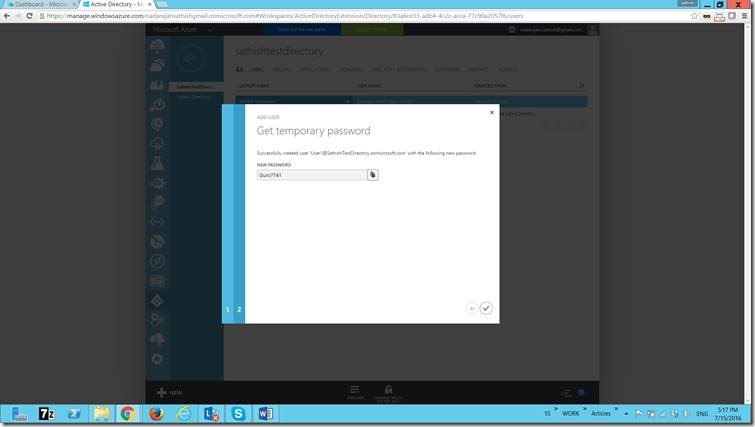
The temporary password screen will be appearing, once the user got created.

clip_image016

Copy the password.

Now, open the new window and go back to https://portal.azure.com

Login with the new User which we created just now.

user1@sathishtestdirectory.onmicrosoft.com

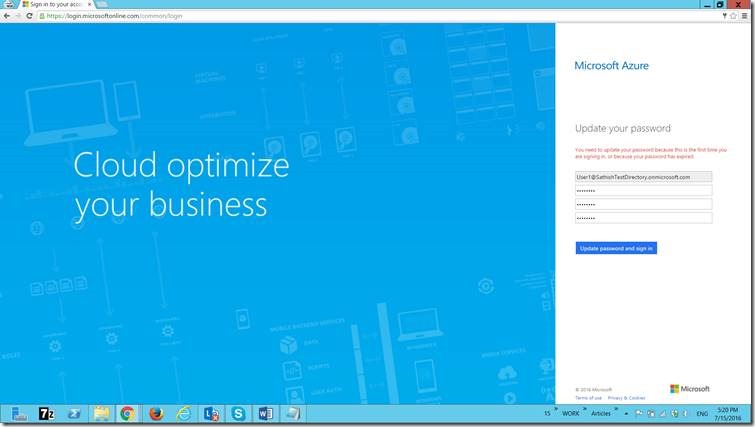
The system will be prompted to change the password.

clip_image018

Change the password.

Now, we are done with the User Creation.

Happy Coding,

Sathish Nadarajan.

Category : Active Directory, Azure

Author Info

Sathish Nadarajan
 
Solution Architect
 
Rate this article
 
Sathish is a Microsoft MVP for SharePoint (Office Servers and Services) having 15+ years of experience in Microsoft Technologies. He holds a Masters Degree in Computer Aided Design and Business ...read more
 

Leave a comment