In one of the requirement, we need to update the Profile Card with few other custom attribute information for the entire organization. We were able to do it with Microsoft Graph API with the Tenant Admin Credentials. Thought of Sharing that with the Community.
As usual, let us start with what is Profile Card?
Profile Card is the Popup window in which you can see the information about the user.
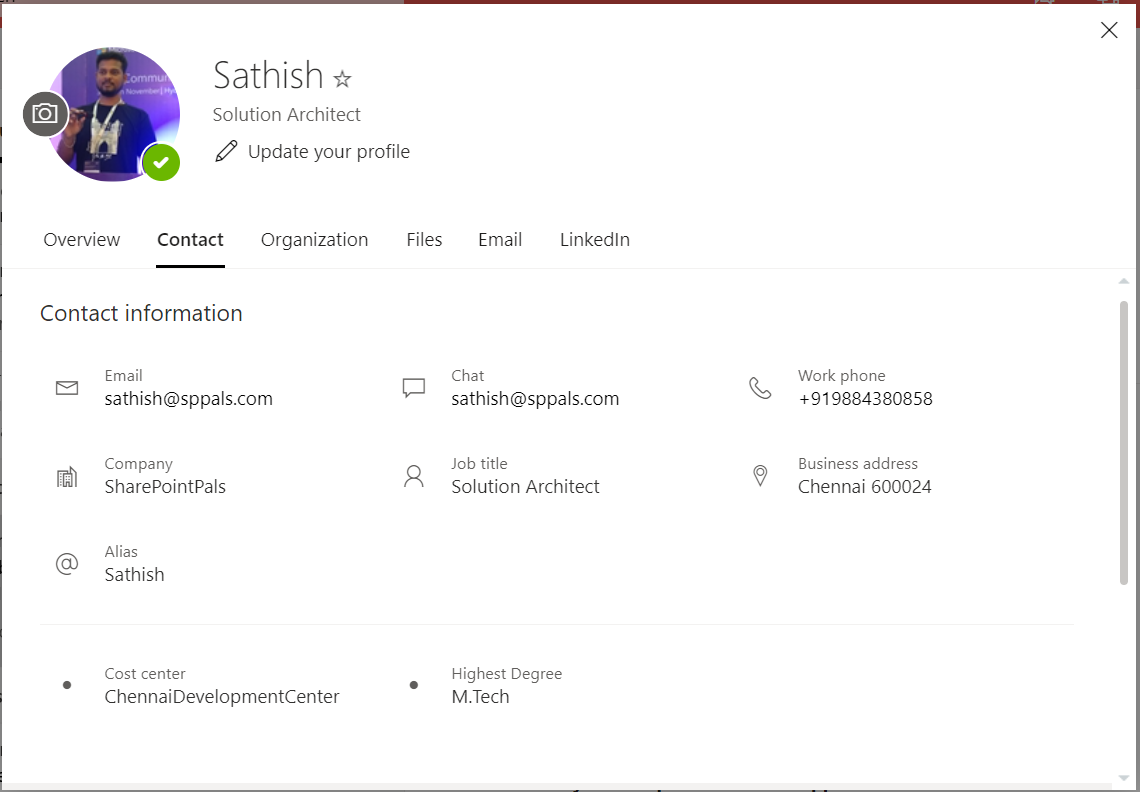
To see this, mouse hover on the user and click on more information.
In the above image, if you could see, the information like “Cost Center”, “Highest Degree” are the custom attributes, which what we are going to update.
By default, these information will not be available. Now, we are going to update or make these details to be showed on the profile card.
Default Profile Card Information:
• Profile Photo
• Contact Information
• Organizational Info such as who is your manager, who are your reportees
• People you collaborate with
• Recent Email Messages between and the person looking at your profile
• Upcoming events that you and the person looking at your profile have in common (Outlook Mobile only)
• Recent Files you’ve shared in OneDrive for work or school, SharePoint Online or Outlook on the Web with the person looking at your profile
• LinkedIn information (also subject to your visibility settings on LinkedIn)
Additional Attributes Can be added:
| Azure AD attribute | User entity property |
| UserPrincipalName | userPrincipalName |
| Fax | faxNumber |
| StreetAddress | streetAddress |
| PostalCode | postalCode |
| StateOrProvince | state |
| Alias | mailNickname |
- Graph API : https://graph.microsoft.com/beta/organization/ 61943e96-b3a9-49dd-b8f7-d0a531c31c0b /settings/profileCardProperties
- Method : POST
- Standard :
- Content-Type: application/json { “directoryPropertyName”: “Alias” }
- Content-Type: application/json { “directoryPropertyName”: “UserPrincipalName” }
- Content-Type: application/json { “directoryPropertyName”: “Fax” }
- Content-Type: application/json { “directoryPropertyName”: “StreetAddress” }
- Content-Type: application/json { “directoryPropertyName”: “PostalCode” }
- Content-Type: application/json { “directoryPropertyName”: “StateOrProvince” }
- Custom :
- { “directoryPropertyName”: “customAttribute4”, “annotations”: [ { “MyNative”: “Cost center”, “localizations”: [ { “languageTag”: “de”, “displayName”: “Kostenstelle” } ] } ] }
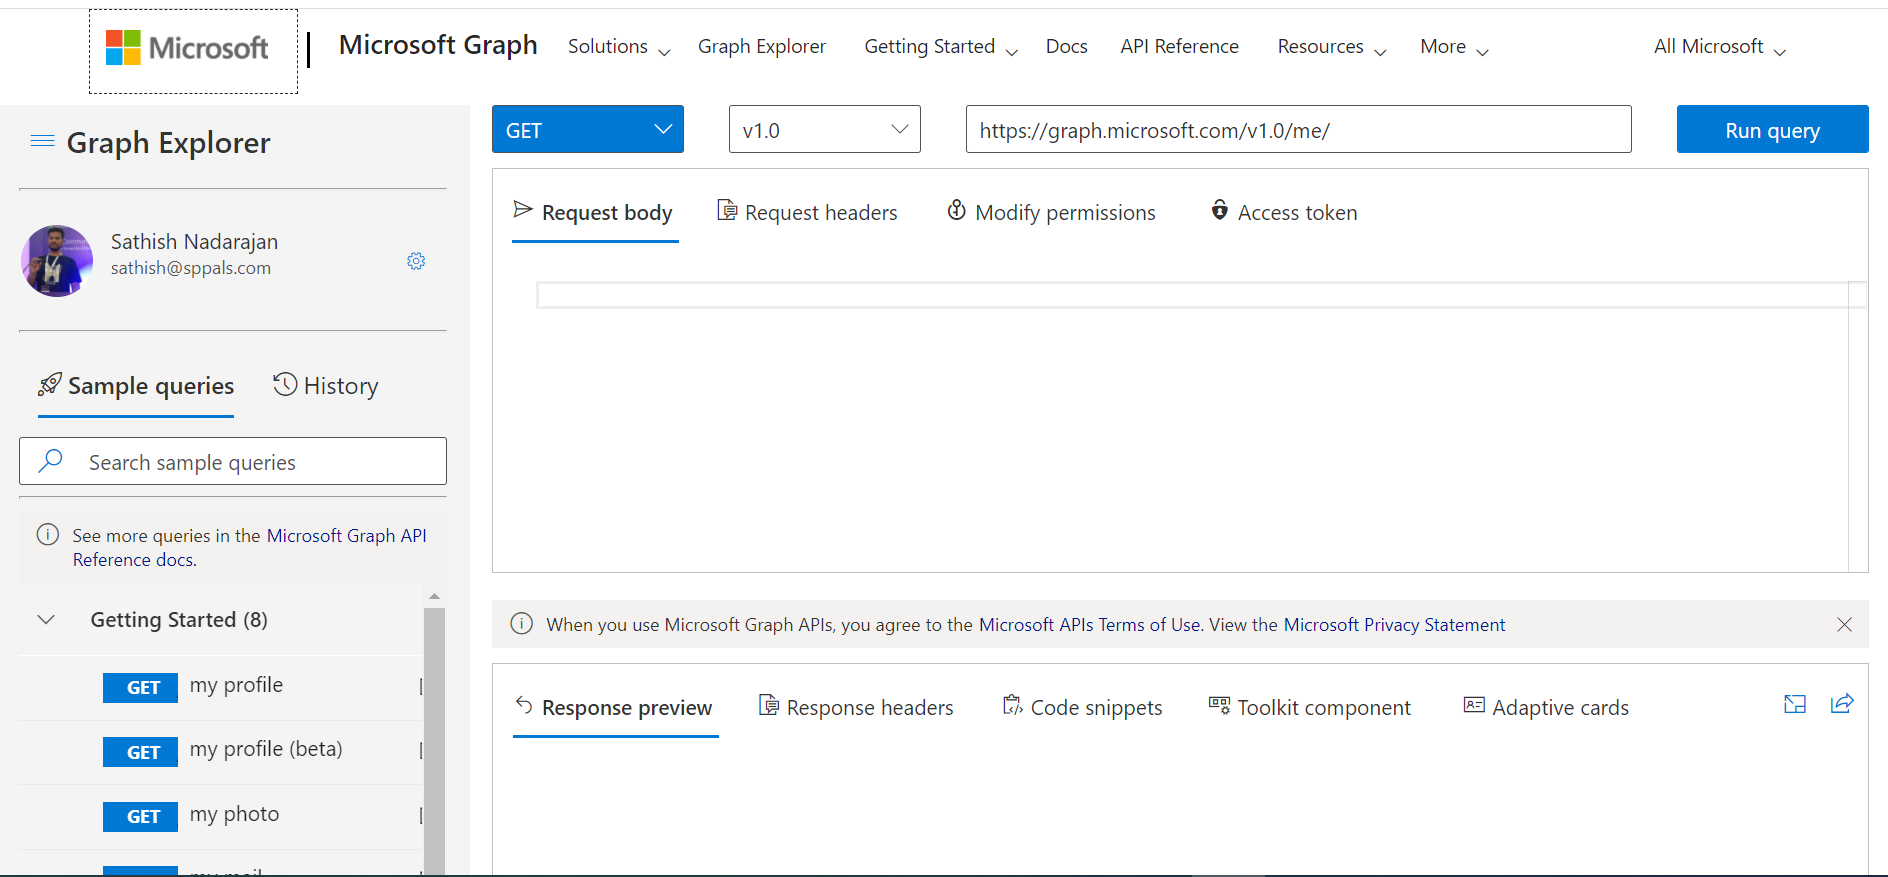
1. With the above information handy, let us open the Graph Explorer.
2. Let me post the API url and the method as POST and the body with the Standard attribute as shown below. Here, I am going to add the StreetAddress to the profile card.
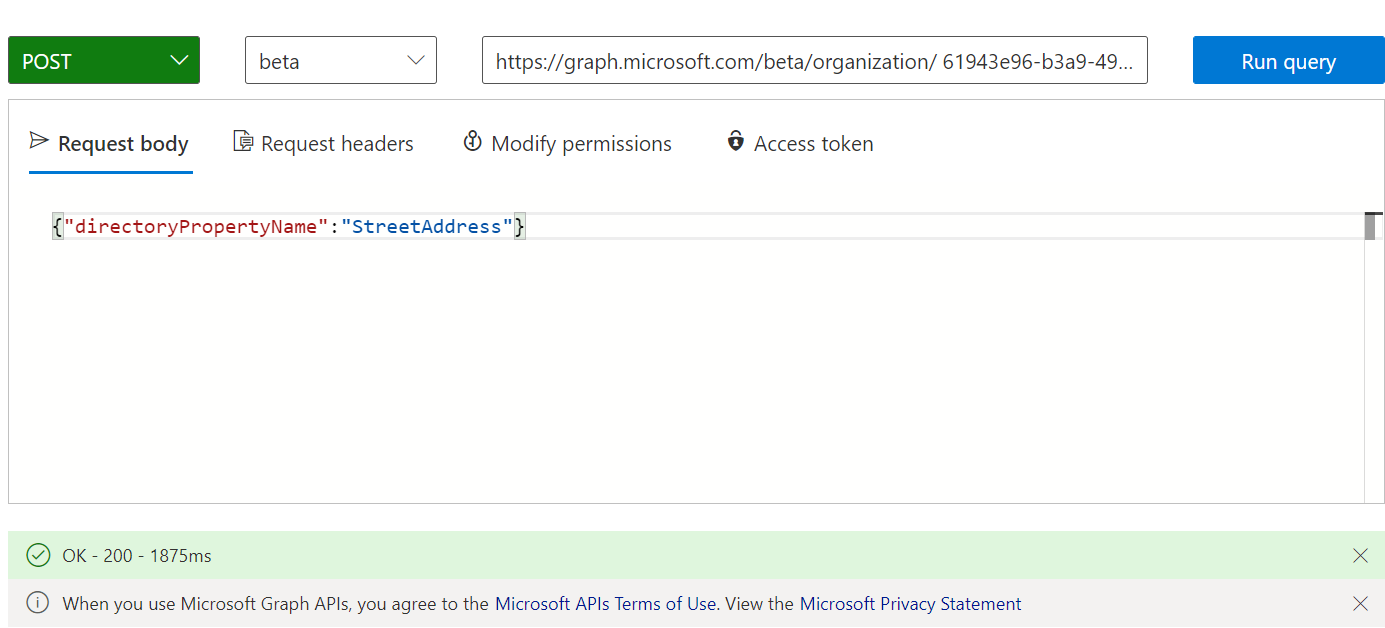
3. By executing, we will get the response code as 200 – OK
• Then we need to wait for 24 hours. Only after 24 hours, the property will be appearing on the profile card.
• One more cons are, until the StreetAddress gets appearing, we need to wait to add the other property. i.e., to show all the 6 attribute in the profile card, it will take 6 days.
4. Now, let us update the property in the Azure AD.
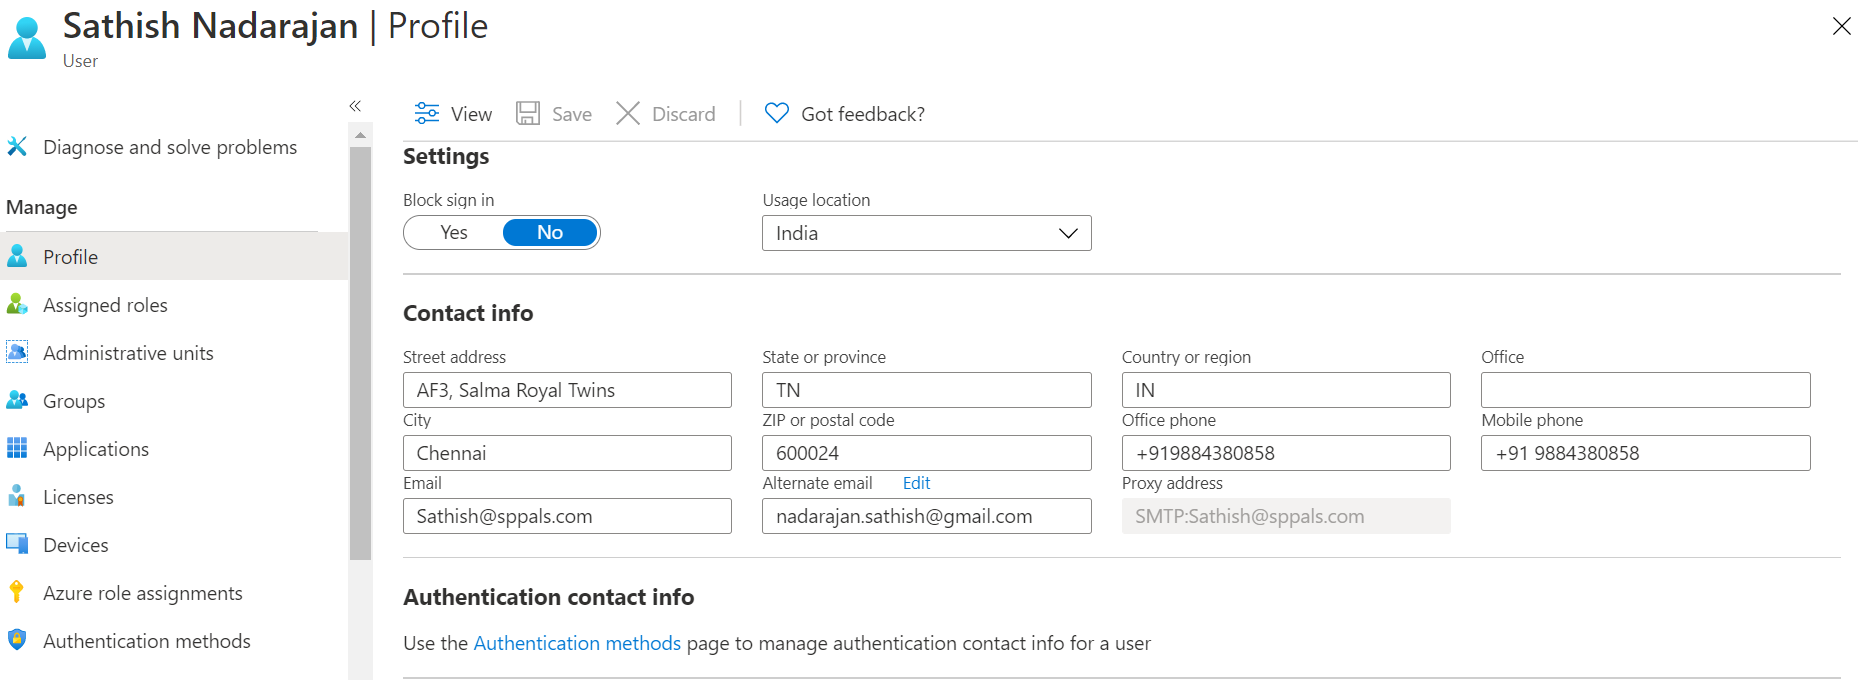
5. We mentioned the Street Address. Hence, after 24 hours, the Street address will start appearing.
6. Now, let us see how to add the Custom Attribute. Only the difference is the Request Body.
{ “directoryPropertyName”: “customAttribute4”, “annotations”: [ { “displayName”: “MyNativePlace”, “localizations”: [ { “languageTag”: “de”, “displayName”: “Kostenstelle” } ] } ] }
7. We will add the Custom Attribute 1-15. The maximum is 15 only. In the above JSON, I am going to show my Native place in the profile card.
8. We can remove the localizations if we don’t prefer the language specific.
9. Now, let us see, where we can update the 15 properties.
10. Go to the Admin Center and select the User.
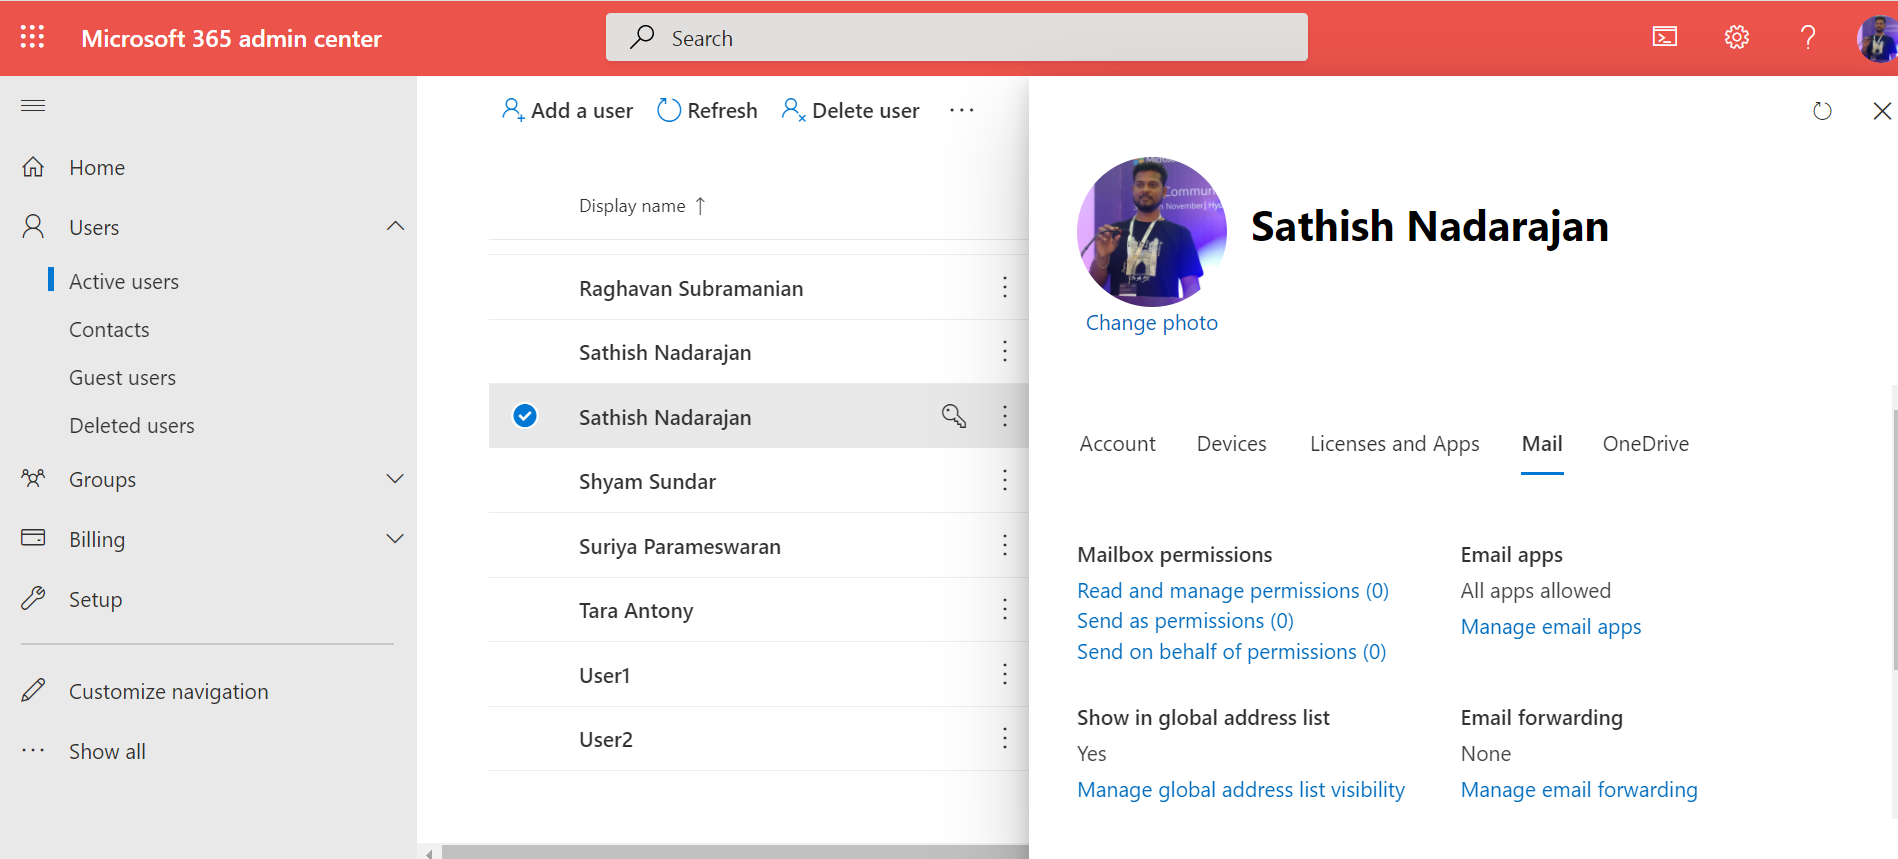
11. Go to Mails tab.
12. Select “Edit Exchange Properties”

13. Click on More Options.
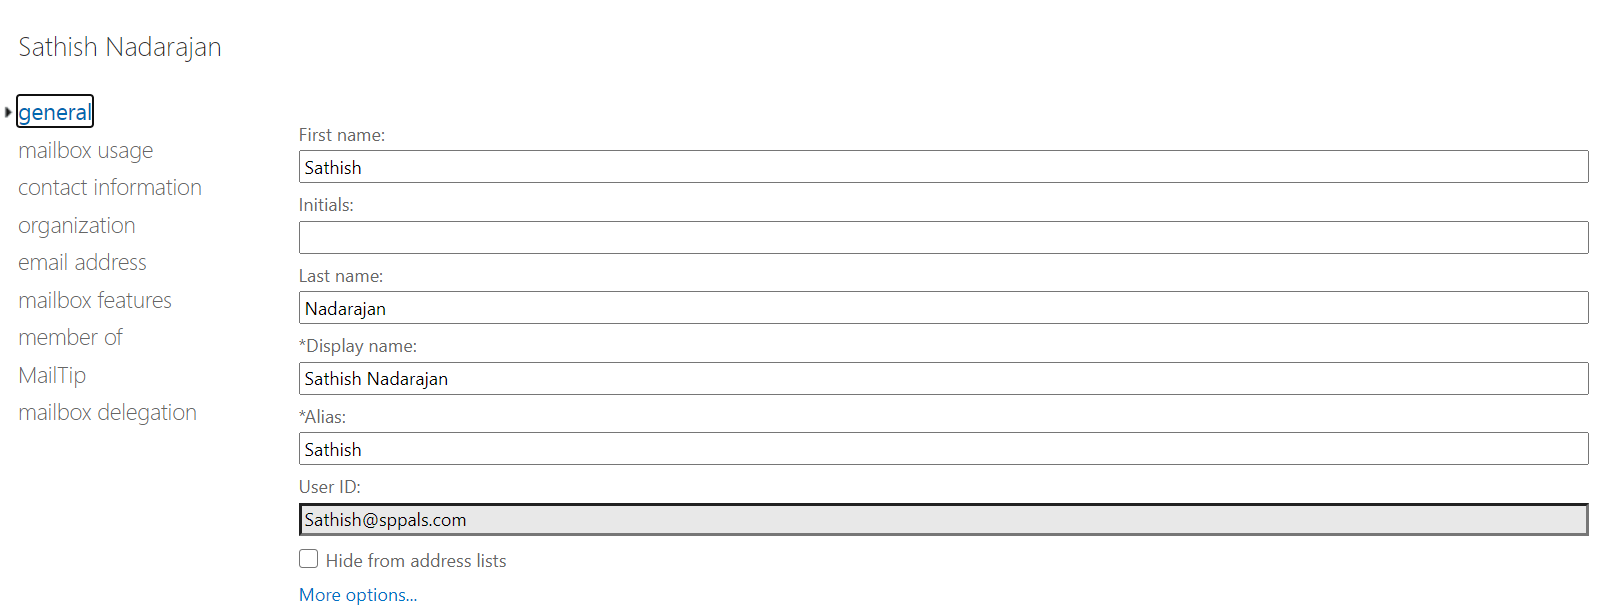
14. We should be seeing the below and on that click edit icon.

15. Enter the Value as below.
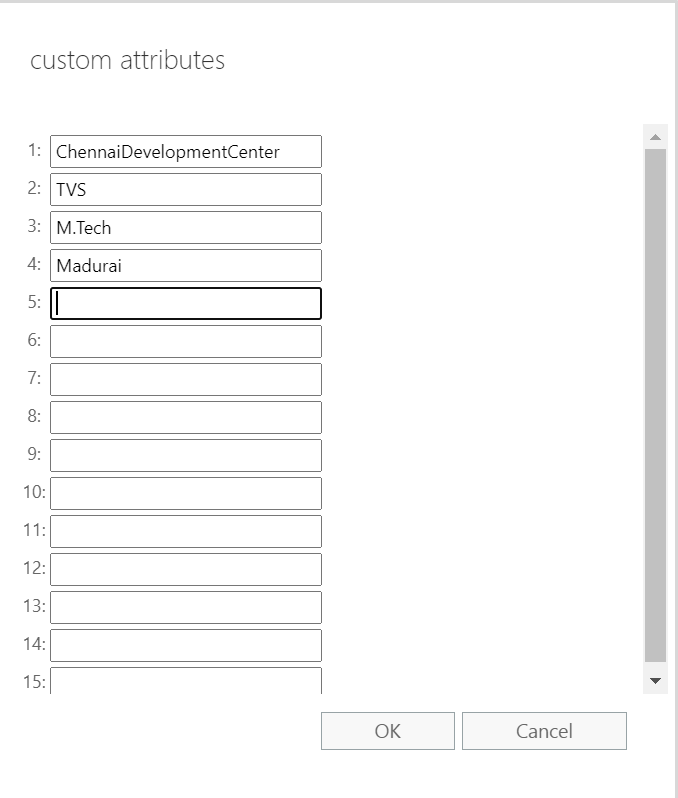
16. Click on Save.
17. Wait for 24 hours.
18. The attributes will get added on the Profile Card.
The further reference materials are
- https://techcommunity.microsoft.com/t5/microsoft-search-blog/new-profile-card-customization-through-microsoft-graph-beta/ba-p/1216517
- https://docs.microsoft.com/en-us/graph/add-properties-profilecard https://docs.microsoft.com/en-us/graph/add-properties-profilecard
- What is Profile Card – https://support.microsoft.com/en-us/office/profile-cards-in-microsoft-365-e80f931f-5fc4-4a59-ba6e-c1e35a85b501?ui=en-us&rs=en-us&ad=us
- https://support.microsoft.com/en-us/office/profile-cards-in-microsoft-365-e80f931f-5fc4-4a59-ba6e-c1e35a85b501?ui=en-us&rs=en-us&ad=us
- Tenant ID – https://docs.microsoft.com/en-us/onedrive/find-your-office-365-tenant-id https://docs.microsoft.com/en-us/onedrive/find-your-office-365-tenant-id
- My Video on Profile Card Customization : https://youtu.be/Cq11IMZ7_no
Happy Coding
Sathish Nadarajan

Leave a comment