As of today there is no out of the box way to easily export a Power Apps Canvas App and import it to another SharePoint list/library. There are many articles that really don’t provide a complete solution and fails one or another way depending on the controls and functions used in the Power Apps while importing the package into the tenant. I have explained my findings which pretty much works for almost all type of Canvas apps for SharePoint Forms.
Once you saved your Source SharePoint List/Library Power Apps forms, Click “See all versions” to go to the versions page. From here you can export the Power Apps and associated connections as a package.
Click “Export Package” to open the Export form.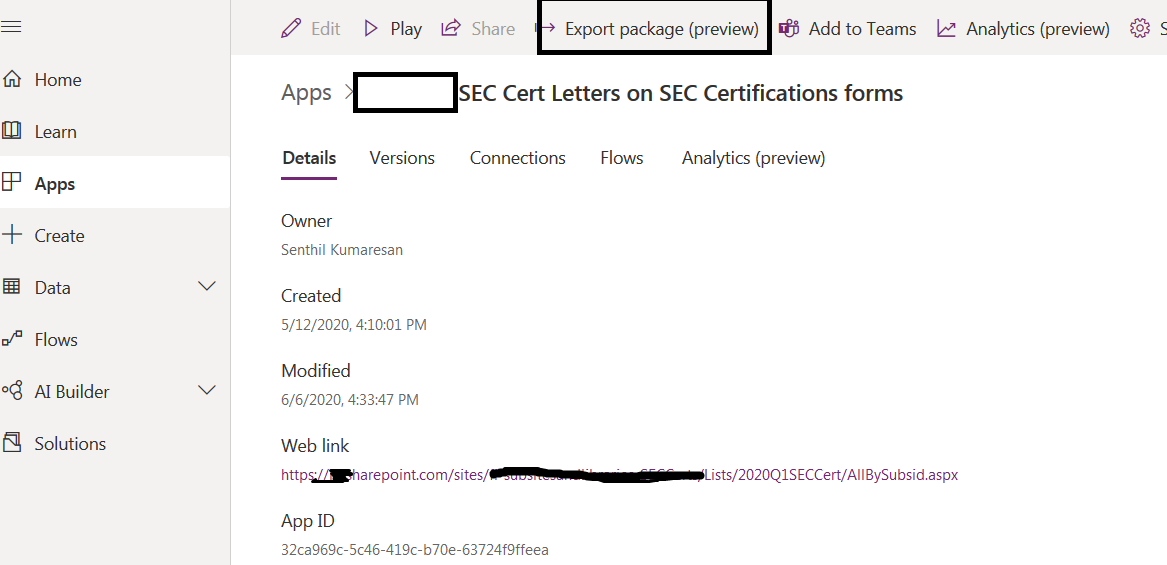
Select the Action Icon for the Power Apps in the below export package form. Select “Create as new” in the Import Setup and Save it.
Click Export to export the package as .zip file.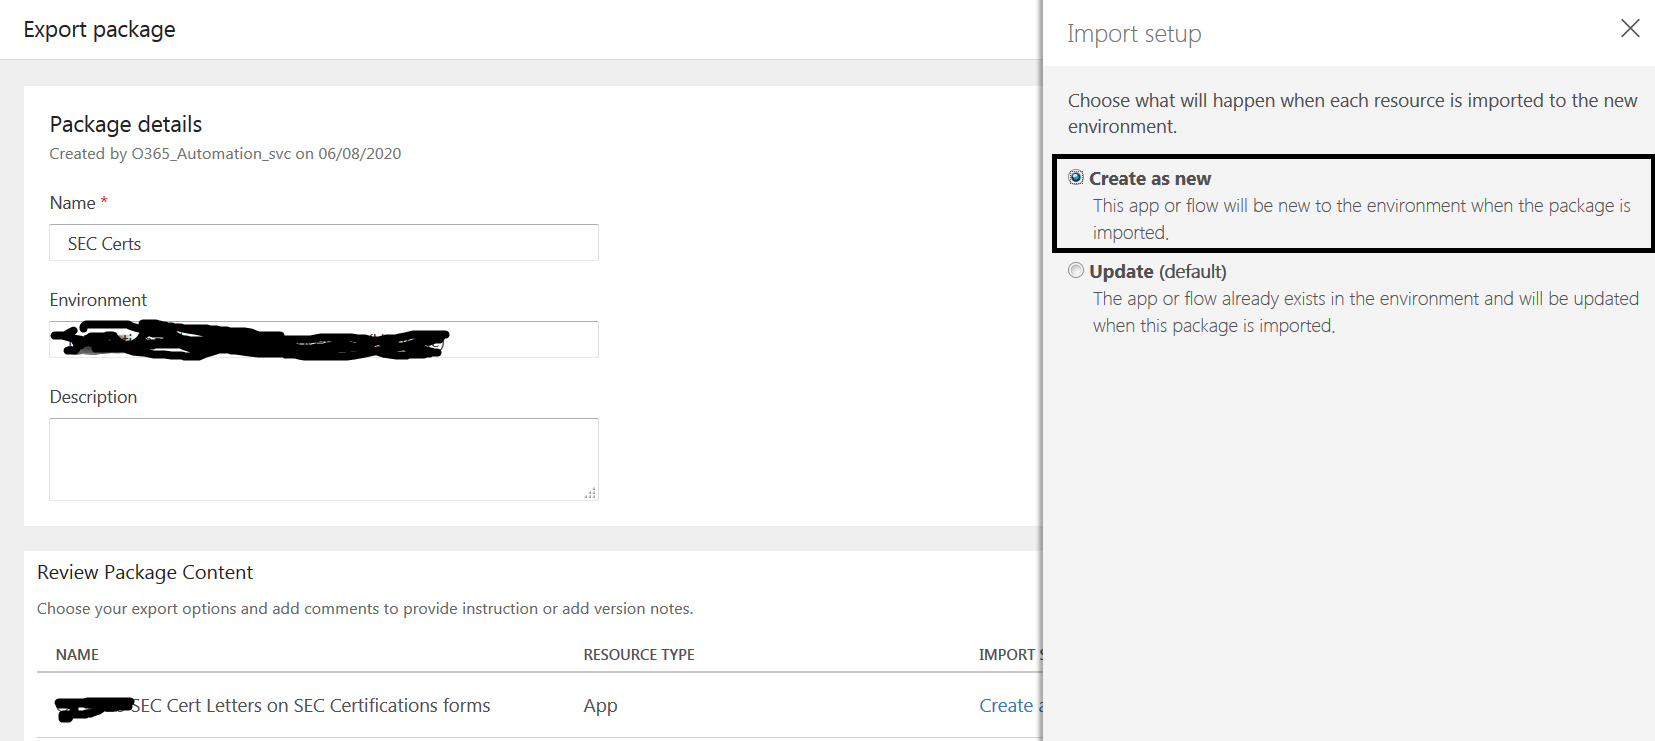
After exporting the file, you need to update the references of the file by opening the file using a Zip/Rar software like WinRar or 7Zip.
You need to first get the destination Site URL, List’s Name, List ID and List URL where you want to import the Power Apps form
Ex. List Name – SEC Cert Forms
List ID – You can get the List/Library ID by going to list settings URL.
Ex. https://senthil.sharepoint.com/sites/test/_layouts/15/listedit.aspx?List={d4d33ec1-1b38-4cc6-9281-73b24fb2debc}
Open the downloaded .zip file and extract the Manifest.json file to local folder.
Use a Text Editor or Json Editor to find the ListID, ListName and List URL values of the Source List and replace these values with the Destination Site URL, List ID, List Name and ListURL values in the Manifest.json file.
Add the updated Manifest.json file back to the exported zip file.
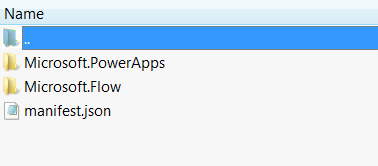
I have a flow associated with the Power Apps and my screenshot above shows flow exported as part of the package. You can ignore the Microsoft.Flow folder.
Open the Microsoft.PowerApps folder and Extract the <numericvalue>.json file to local folder. Use a Text Editor or Json Editor to find the ListID, ListName and List URL values of the Source List and replace these values with the Destination Site URL, List ID, List Name and ListURL values. Add the updated <numericvalue>.json file back to the zip file.
You will have to further open the .msapp file using a zip/rar software. This file contains the actual functions and controls that you have used in your Power Apps.
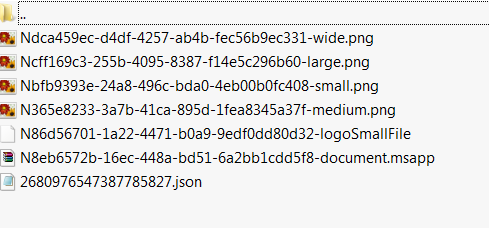
Below are the contents of the .msapp file.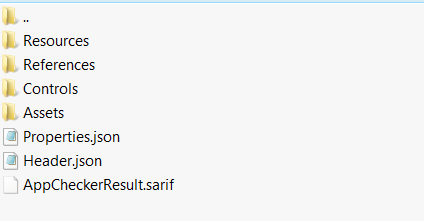
Extract the below listed files and open the files using a Text Editor or Json Editor to find the ListID, ListName and List URL values of the Source List and replace these values with the Destination Site URL, List ID, List Name and ListURL values
Update them back to the same location in the . msapp file using the zip/rar software.
1. Properties.json – File containing properties of the form
2. Controls/1.json – File containing Data Source and Function references for SharePointIntegration control
3. Controls/3.json – File containing the functions and control references used in the Power apps form
4. References/Datasources.json – File containing Data Source structures such as collections and SharePoint Lists
5. References/AuxDataMap.json
Important Note: If you have any other additional SharePoint List/library Data Sources in your Power Apps form that are used as Lookup list or for fetching information from another list, make sure you replace those additional SharePoint List/Library ID, URL and Name with the destination site’s SharePoint List/Library ID, URL and Name in the above files.
Once the above files have been updated, they can be replaced back to the. msapp file.
Further the. msapp file has to be updated or replaced again back to the Exported main zip file.
Make sure you do not have an existing Power Apps form associated with the destination SharePoint List/Library as we are going to import the Power Apps as a new form.
Import the main zip file that you updated by opening the “Import canvas app”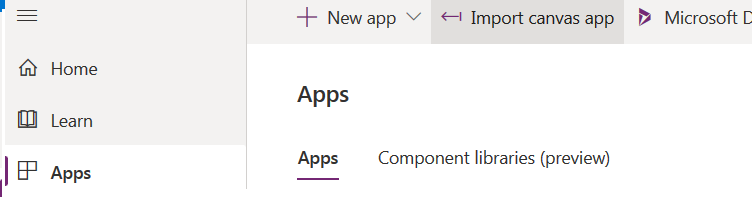
In the Import Package form, Select the Action icon for the Power Apps form and choose “Create as new”. Save it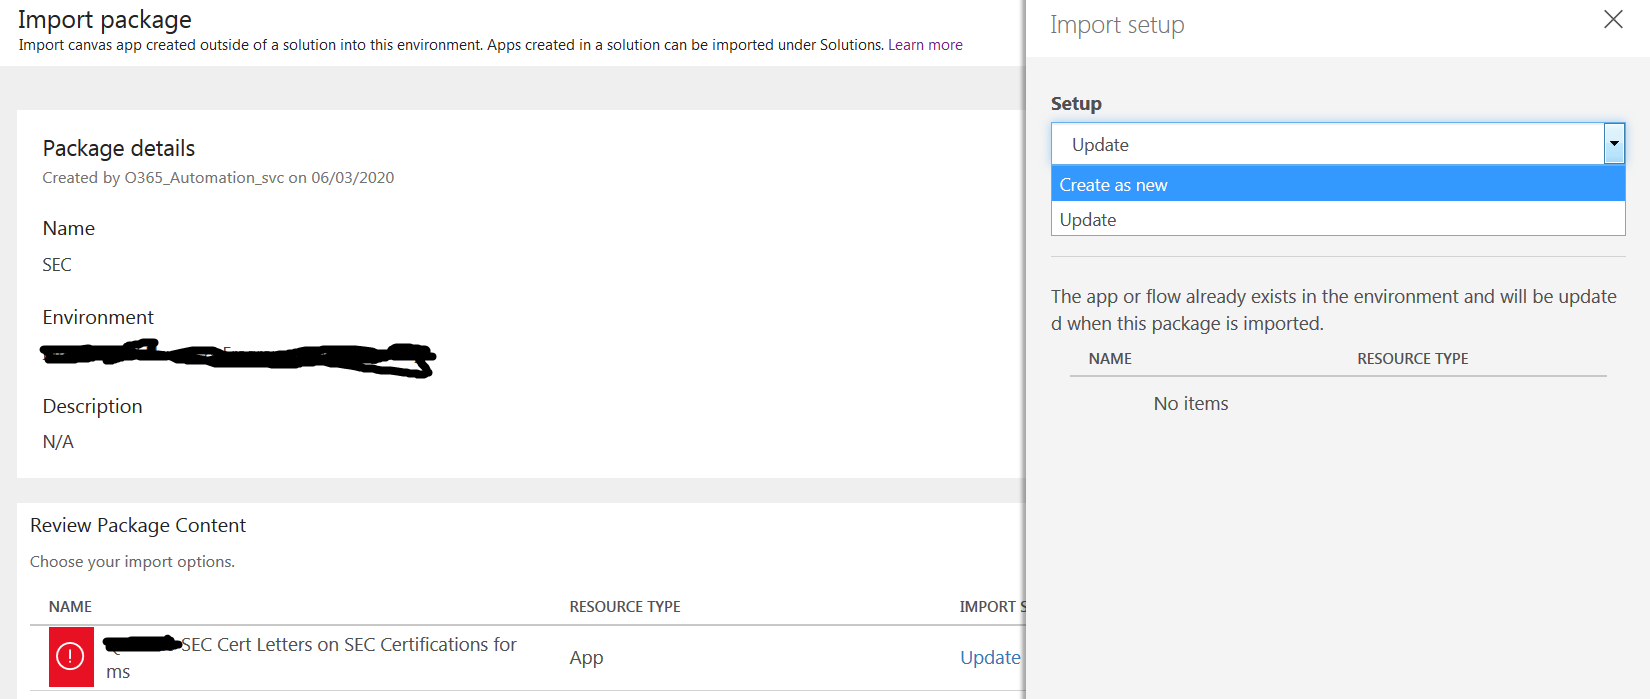
Select the connections used and choose the accounts to be used in the form. Click Import to import the package which will create the Power Apps form and associate with the destination SharePoint list/library.
You can then open the Power Apps form and Publish it to destination SharePoint list/library.

Leave a comment