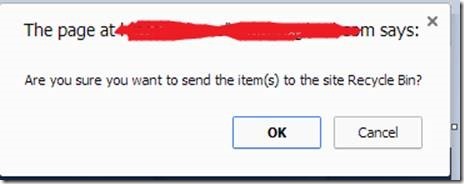
Recently I came up with requirement to change delete action’s confirmation message. Are you sure you want to send the item(s) to the Recycle Bin? to Are you sure you want to Cancel the Request? Also when clicking on the Delete icon, it should not delete the item; instead it should update the status of the item.
I have followed below approch to solve this problem.
Replace the ‘Delete Item’ button on the Ribbon bar with a copied ‘Delete Item’ button and then use ECMAScript and Sharepoint Client Object Model to remove the item and implement business logics.
Below are the steps to impelemet above functionality.
- Create 2 JS files for ViewForm and Edit Form,
- In the JS file under document.ready place the below code.
 $(document).ready(function(){
 //for view form
 var button = document.getElementById("Ribbon.ListForm.Display.Manage.DeleteItem-Medium");
 if (button != null) {
     var $button = $(button);
     var html = $button.html();
     $button.after("<div id='deleteIcon' OnMouseOver='ApplyCSSFunction()'><a style='cursor:pointer;'>" + html + "</a></div>").hide().next().click(function (e) {
 		DeleteCurrentItem();
     });
     $(".ms-cui-ctl-mediumlabel:eq(3)").css("vertical-align","top");
 	$(".ms-cui-ctl-mediumlabel:eq(3)").css("margin-left","4px");
 $('.ms-cui-ctl-mediumlabel:eq(3)').text("Cancel Request");
 	}

 $("#deleteIcon").mouseleave(function() {
  	  $("#deleteIcon").css("border-style","none");
         });
 });
- Write your business logic in DeleteCurrentItem() method.
 function DeleteCurrentItem()
 {
 $("#deleteIcon").css("border-style","none");
 var deleteConfirm = confirm("Are you sure you want to cancel this request?");
 if(deleteConfirm)
 {
  var deleteItemID=getParameterByName('ID');
  DeleteItem(deleteItemID);
 }
 }
- We need to change the highlighted line on the above code to make it work in Edit form.
View Form:
var button = document.getElementById(“Ribbon.ListForm.Display.Manage.DeleteItem-Medium”);
Edit Form:
var button = document.getElementById(“Ribbon.ListForm.Edit.Actions.DeleteItem-Large”);
Output:


Leave a comment