This post on Napa App provides step by step detailed instructions to create a jQuery based Twitter feed Client Web Part in SharePoint 2013. The App explained in this blog post is a SharePoint-hosted App which supports only Java Script CSOM. This post also shows you how to create a Custom Property in SharePoint Napa App and also explains how to refer custom Scripts and CSS in a Napa App.
This App requires an isolated App domain for Napa Apps and an App URL already configured in your environment. If you have not configured Napa App, then check out my earlier post on configuring Napa Apps here .
This article is a part of SharePoint 2013 intranet web part series and you can have a look into other web parts in this link.
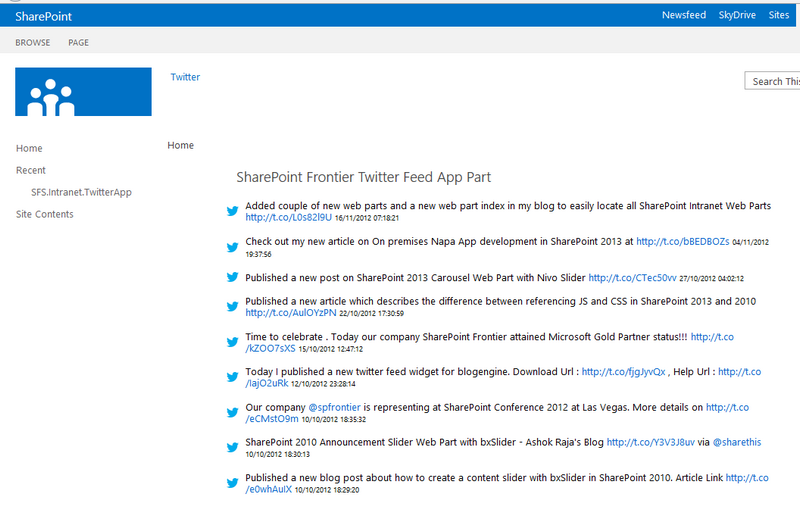
The objective of this article to build a Twitter feed App Part as shown below.
Follow the bellow steps to create the Twitter Feed Napa App.
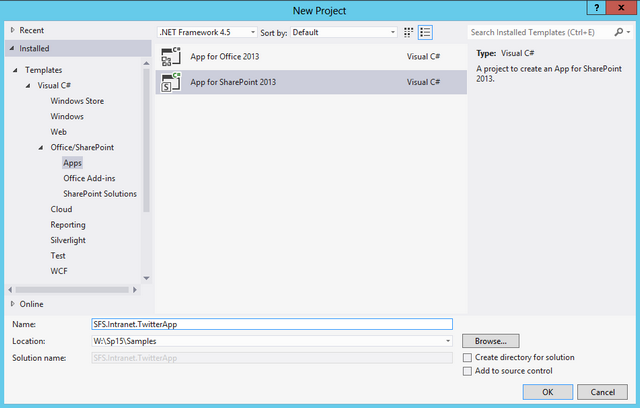
1. Open Visual Studio 2012 and select Apps under Office/SharePoint . Create a new "App for SharePoint 2013" with the name "SFS.Intranet.TwitterApp"
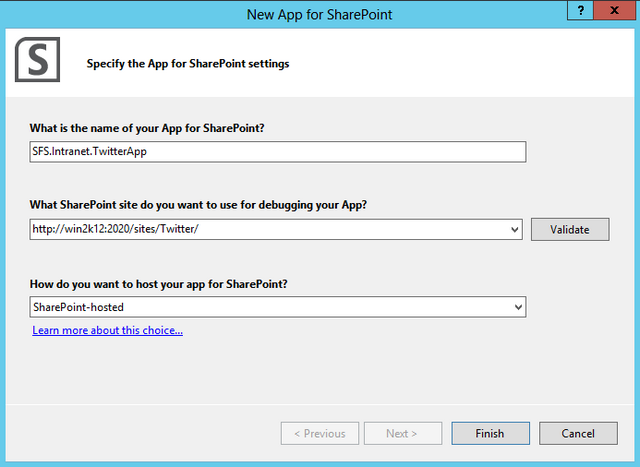
2. Provide an URL of an existing SharePoint Site in which you want to deploy and test the App.
3. Select the App type as "SharePoint-hosted" as this sample is targeted towards On-Premises deployment. To learn more about Hosting options for apps for SharePoint check out this MSDN article. To learn about configuring SharePoint Napa App for local dev environment ( On- Premises) check out this article .
4. Download Twitter plugin for jQuery from here.
5. Extract plugin source and add the JavaScript file jquery.tweetable.min.js into the Scripts Module and add style.css and Images folder into Content Module
6. I have replaced the AppIcon with a Twitter logo in Images module. (The image should be exactly 96 x 96 pixel )
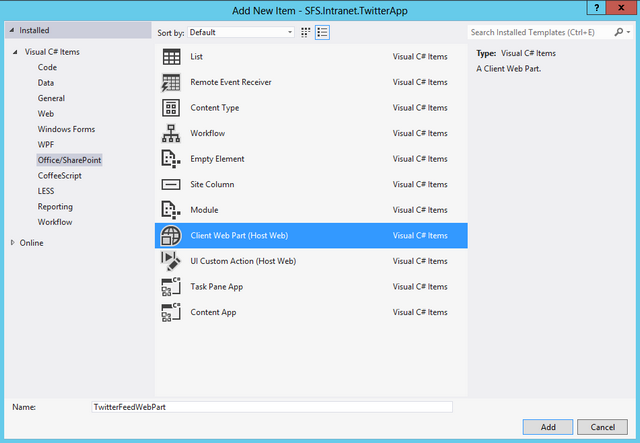
7. Right click the Project in Solution Explorer and click Add new item to Add a new Client Web Part (Host Web) with the name "TwitterFeedWebPart".
8. Rename the Feature to SFS.Intranet.TwitterApp. Although the feature can be in any name , I have renamed it to easily identify it.
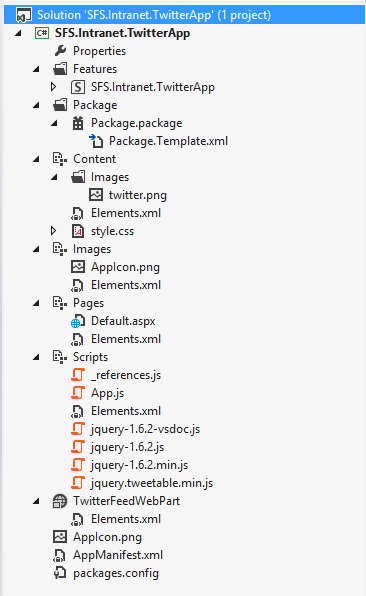
9. The below is the screen shot of my solution explorer after adding the above mentioned files
10. Replace the content of TwitterFeedWebPart’s element file with the code given below.
 <?xml version="1.0" encoding="utf-8"?>
 <Elements xmlns="http://schemas.microsoft.com/sharepoint/">
   <ClientWebPart Name="TwitterFeedWebPart1" Title="SharePoint Frontier Twitter Feed App Part" Description="SharePoint Frontier Twitter Feed App Part by Ashok Raja .T" DefaultWidth="800" DefaultHeight="600">

     <!-- Content element identifies the location of the page that will render inside the client web part
          Properties are referenced on the query string using the pattern _propertyName_
          Example: Src="~appWebUrl/Pages/ClientWebPart1.aspx?Property1=_property1_" -->
     <Content Type="html" Src="~appWebUrl/Pages/Default.aspx?TwitterAccount=_TwitterAccount_" />

     <!-- Define properties in the Properties element
          Remember to put Property Name on the Src attribute of the Content element above -->
     <Properties>
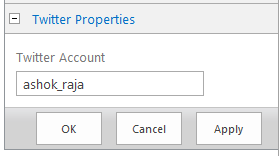
       <Property Name="TwitterAccount" Type="string" WebBrowsable="true" WebDisplayName="Twitter Account" WebDescription="Twitter Account for which the feed is to be shown" WebCategory="Twitter Properties" DefaultValue="ashok_raja" RequiresDesignerPermission="true" />
     </Properties>

   </ClientWebPart>
 </Elements>
Src attribute in content element contains the URL of the page that has to be rendered in the client web part. You can Add Properties for Client Web Part inside the properties node. The value assigned for these properties in run time will be passed on to the content page via query string of URL mentioned in Src attribute. Properties are referenced on the query string using the pattern _propertyName_. In our scenario the property name is TwitterAccount, so the query string would be TwitterAccount=_TwitterAccount_
11. Replace the code of Default.aspx with the below code.
 <%@ Register TagPrefix="WebPartPages" Namespace="Microsoft.SharePoint.WebPartPages" Assembly="Microsoft.SharePoint, Version=15.0.0.0, Culture=neutral, PublicKeyToken=71e9bce111e9429c" %>

 <WebPartPages:AllowFraming ID="AllowFraming1" runat="server" ScrollBars="None" />

 <script type="text/javascript" src="../Scripts/jquery-1.6.2.min.js"></script>
 <script type="text/javascript" src="../Scripts/jquery.tweetable.min.js"></script>

 <link rel="Stylesheet" type="text/css" href="../Content/style.css" />
 <script type="text/javascript">
     function getQueryStringParameter(paramToRetrieve) {
         var params;
         var strParams;

         params = document.URL.split("?")[1].split("&");
         strParams = "";
         for (var i = 0; i < params.length; i = i + 1) {
             var singleParam = params[i].split("=");
             if (singleParam[0] == paramToRetrieve)
                 return singleParam[1];
         }
     }
     var twitterId = decodeURIComponent(getQueryStringParameter("TwitterAccount"));

     $(document).ready(function () {
         $('#tweets').tweetable({ username: twitterId, time: true, limit: 10, replies: false, position: 'append' });
     });
 </script>

 <div id="tweets"></div>
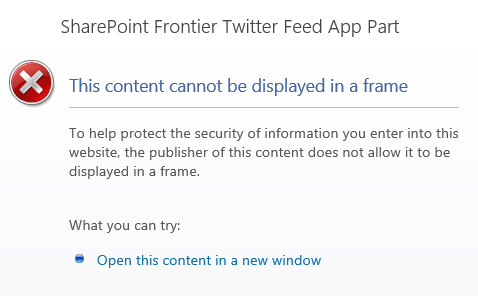
If the content page is a SharePoint Web Page, then this line " <WebPartPages:AllowFraming ID="AllowFraming1" runat="server" /> " has to be added some where after the Register nodes in the page. If you miss this line ,Internet explorer will throw an error stating "This content cannot be displayed in a frame" and in Fire Fox and Chrome a blank web part will be rendered.
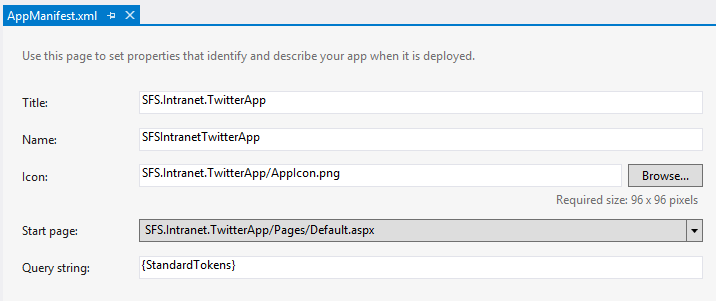
12. Double click the AppManifest.xml and ensure that its configured as shown below
13. Now build and deploy the App (Right click the solution and click deploy)
14. Open the Site which you have provided as the debugging site at step 2
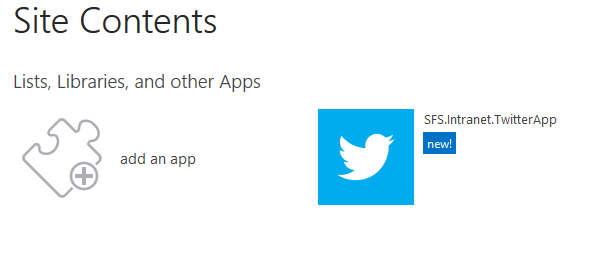
15. If successfully deployed our App will be listed under "Site Contents" (From settings select View Site Contents)
16. Edit a page and click the add web part link (I have edited the home page to add the web part)
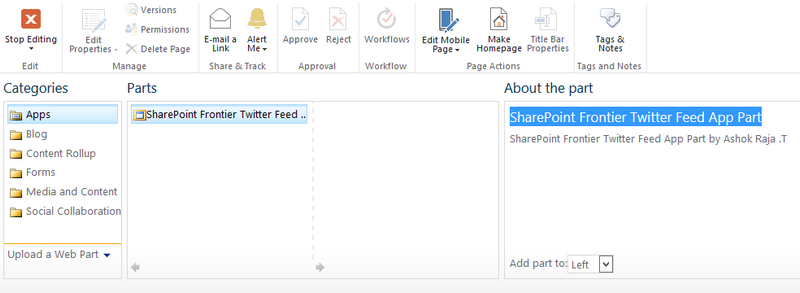
17. Select "SharePoint Frontier Twitter Feed App Part" under the Apps Category. Click Ok to add the App Part to the page. (It may prompt for Authentication depending upon User Account Control Settings)
18. By default it will bring the Tweets from my account as I have configured ashok_raja as the default value.
19. Edit the App Part and change the Twitter Account under Twitter Properties to your desired account
20. Click Ok and Save the App Part.
That’s it. If you have followed all the steps properly you would be able to see the App Part as shown in beginning of the article .

Leave a comment