This article shows you how to create and provision a page layout in SharePoint 2013 and also explains the basics behind creating a page layout in SharePoint
The basic thing you may require to create a page layout is a content type. This content type can be an existing content type based on Page or any other custom content type created based on Page Content Type. In this article an existing default content type will be used for demonstration. If you are looking at creating a new content type and mapping it into a Page Layout please refer this article.
So, where to begin and how to get the base for a page layout?
We can begin by making a copy of an existing page layout located at C:\Program Files\Common Files\microsoft shared\Web Server Extensions\15\TEMPLATE\FEATURES\PublishingLayouts\PageLayouts
The above location has all the layouts that are used in a default publishing site in SharePoint 2103.
For this sample, I’ll use the BlankWebPartPage.aspx as the base page layout. This layout comes with multiple web part zones. You can add or remove zones to the existing zones available in the page. The default page layout has reference to resource files to display name / title of the zone. You can replace it with different names. But ensure that you use the same name while provisioning web parts to that zone via features.
Ok, let’s start now.
1. Create a new empty SharePoint Project in your Visual Studio
2. Add a Module Named “BasePageLayouts” into it
3. Rename the default file “Sample.txt” to “MyFirstPageLayout.aspx”
4. Copy Past the content of “BlankWebPartPage.aspx” located at “C:\Program Files\Common Files\microsoft shared\Web Server Extensions\15\TEMPLATE\FEATURES\PublishingLayouts\PageLayouts” to the newly created “MyFirstPageLayout.aspx”
Now the page layout is ready. You can make changes to this page layout by adding or removing WebPart zones or any controls that you wish to be part of your page layout. The next step is to provision this Page Layout by making changes to the module file. Change the attributes of File as mentioned below.
<?xml version="1.0" encoding="utf-8"?>
<Elements xmlns="http://schemas.microsoft.com/sharepoint/">
<Module Name="BasePageLayouts" Url="_catalogs/masterpage" RootWebOnly="TRUE">
<File Path="BasePageLayoutsMyFirstPageLayout.aspx" Url="MyFirstPageLayout.aspx" Type="GhostableInLibrary">
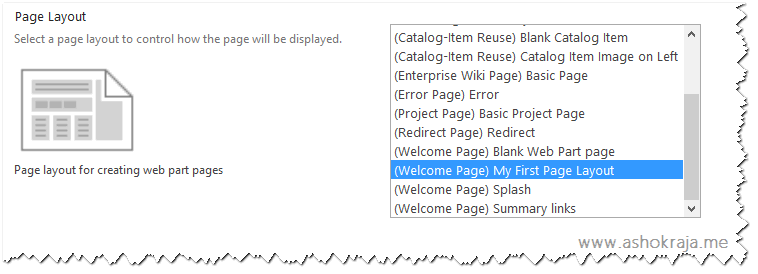
<Property Name="Title" Value="My First Page Layout" />
<Property Name="MasterPageDescription" Value="$Resources:cmscore,PageLayout_BlankWebPartPage_Description;" />
<Property Name="ContentType" Value="$Resources:cmscore,contenttype_pagelayout_name;" />
<Property Name="PublishingPreviewImage" Value="~SiteCollection/_catalogs/masterpage/$Resources:core,Culture;/Preview Images/BlankWebPartPage.png, ~SiteCollection/_catalogs/masterpage/$Resources:core,Culture;/Preview Images/BlankWebPartPage.png" />
<Property Name="PublishingAssociatedContentType" Value=";#$Resources:cmscore,contenttype_welcomepage_name;;#0x010100C568DB52D9D0A14D9B2FDCC96666E9F2007948130EC3DB064584E219954237AF390064DEA0F50FC8C147B0B6EA0636C4A7D4;#" />
</File>
</Module>
</Elements>So, how do I know that this how it has to be referred and from where did I have this details.
Almost all the things you were looking around the web are available in your 15 hive itself. If you try to understand how a default SharePoint site is created and how things work behind the scene, this will provide more information and insight towards SharePoint.
Coming back to the point, this information displayed above is available in the file named “ProvisionedFiles.xml” located in “C:\Program Files\Common Files\microsoft shared\Web Server Extensions\15\TEMPLATE\FEATURES\PublishingLayouts”
Ensure that the URL is set to “_catalogs/masterpage” in the Module element. Because, this is the location where the page layout has to be deployed. Also ensure that “RootWebOnly” is set to “TRUE” (All Caps, this is how Boolean value has to be set via any XML file used in Module or Element file in SharePoint) to make sure that this module can be deployed only in top level site.
The below are the list of changes I have made
In Module Element I have added URL to “_catalogs/masterpage” and RootWebOnly to “TRUE”.
In File Element I have changed the URL to “MyFirstPageLayout.aspx” (removed BasePageLayouts from the URL, because it’s already mapped in Module) and added Type attribute with value “GhostableInLibrary”.
In the list of properties of the File Element, I have changed the value attribute of Property with name attribute “Title” to “My First Page Layout”.
That’s it, now the Page Layout is ready. You can deploy it and create your First Page based on your new page layout.
Further Reading
1. Create Publishing Page using Custom PageLayout by PowerShell in SharePoint 2013
2. How to Create a Page Layout with ContentType in SharePoint 2013 – Part II
3. How to Create a Page Layout with ContentType in SharePoint 2013 using Design Manager – Part III
Related Articles
Difference between provisioning a custom pagelayout and custom page in SharePoint with Visual Studio

Leave a comment