How to Publish and Deploy PowerPoint Add-In

Sathish Nadarajan
 
Solution Architect
January 22, 2021
 
Rate this article
 
Views
1675

We saw the creation of PowerPoint Add-In in the earlier article.  As a continuation, in this article, let us see how to Publish and Deploy the Add-In to various users.

There are many ways, we can do the deployment.  But basically, as I mentioned in the earlier article, there are two components which we need to be focused on.  The Web and the Add-In Manifest.xml.

First, the Web needs to be deployed in any of the public website or in Azure Service Application.

Then the publish the App as well.  While doing this, provide the URL of the AppWeb.  Then distribute this XML file to the end users.  We will see them step by step below.

  1. Publish the App Web to Azure. Doesn’t require much explanation.  Please refer to the below screen shots.


  1. Once the App Web is deployed, ensure that you are able to access your files using the URL. And give the App Service anonymous permission based on your requirement.  This URL will be helpful for us when we publish the App Project.
  2. Right Click on the App Project and click Publish.

4. Once, the Publish is success, then the Manifest.XML will be generated.

5. This XML is the distributable to other users. There are many ways to do this.  Its better explained in the below article. https://docs.microsoft.com/en-us/office/dev/add-ins/publish/publish

6. I tried the SharePoint Catalog (For Windows) and the Side Loading (for Mac) for the testing.


SharePoint Catalog:

  1. Open the AppCatalog and upload the Manifest.XML to the “AddIns for Office” Section.
  2. Login to PowerPoint with the Same tenant user.
  3. Open the PowerPoint.
  4. Click on the Insert Tab -> Get AddIns

  1. On the Popup, go to the My Organization Tab, we should be able to see the Uploaded AddIn.

  1. Select that.
  2. It will start appearing on the Ribbon.


Side Loading for Mac:

  1. Open the path /Users/<username>/Library/Containers/com.microsoft.Powerpoint/Data/Documents/wef
  2. If we don’t see the wef folder, then create
  3. Upload the XML file in the path.
  4. Restart the PowerPoint
  5. We should be able to see the Add-In appearing on the Ribbon.

Request the readers to go through the above mentioned link for further information.


Happy Coding,

Sathish Nadarajan.


Author Info

Sathish Nadarajan
 
Solution Architect
 
Rate this article
 
Sathish is a Microsoft MVP for SharePoint (Office Servers and Services) having 15+ years of experience in Microsoft Technologies. He holds a Masters Degree in Computer Aided Design and Business ...read more
 

Step by Step Procedure to Create a PowerPoint Add-In

Sathish Nadarajan
 
Solution Architect
January 21, 2021
 
Rate this article
 
Views
3684

In an earlier article, we saw how to create a simple Outlook AddIn. AS part of that, in this article, let us how to create a PowerPoint AddIn.

1. Create a New Project in Visual Studio.

2. Choose the Add-in Type. In our case, we are going to add new functionality to Power Point.

3. The Solution will get created as below.

It comprises of two projects. One is the Web Application which we need to deploy in any of the domain or in Azure Web Service.
The First One contains only the XML file which we need to distribute to the end Users. There are few mechanisms, by which we can deliver this to the end users.
4. Now, let us come back and have a look on the components of the solution. The three important files in which we are making changes are Home.html, Home.css, Home.js.
5. My requirement was to display a set of Images on the task pane. And when the User Clicks, the Image should be inserted into the slide.


6. Let us how to update the HTML file to list all our Images on the Task Pane.

<!DOCTYPE html>
<html>
<head>
    <meta charset="UTF-8" />
    <meta http-equiv="X-UA-Compatible" content="IE=Edge" />

    <script src="Scripts/jquery-1.9.1.js" type="text/javascript"></script>
    <script src="Scripts/FabricUI/MessageBanner.js" type="text/javascript"></script>
    <script src="https://appsforoffice.microsoft.com/lib/1/hosted/office.js" type="text/javascript"></script>

    <!-- To enable offline debugging using a local reference to Office.js, use:                        -->
    <!-- <script src="Scripts/Office/MicrosoftAjax.js" type="text/javascript"></script>  -->
    <!-- <script src="Scripts/Office/1/office.js" type="text/javascript"></script>  -->

    <link href="Home.css" rel="stylesheet" type="text/css" />
    <script src="Home.js" type="text/javascript"></script>

    <!-- For the Office UI Fabric, go to https://aka.ms/office-ui-fabric to learn more. -->
    <link rel="stylesheet" href="https://appsforoffice.microsoft.com/fabric/2.1.0/fabric.min.css">
    <link rel="stylesheet" href="https://appsforoffice.microsoft.com/fabric/2.1.0/fabric.components.min.css">

    <!-- To enable the offline use of Office UI Fabric, use: -->
    <!-- link rel="stylesheet" href="Content/fabric.min.css" -->
    <!-- link rel="stylesheet" href="Content/fabric.components.min.css" -->
</head>
 

<body class="ms-font-m ms-welcome">
    <div id="content-header">
        <div class="cls-title"><span>PP Image Library</span></div>
    </div>
    <div id="content-main">
        <div class="padding">
            <p>Double click on an item and insert it to the slides.</p>
            <div class="container" style="padding: 8px;">

                <img id="1" crossOrigin="anonymous" class="myimages" src="https://source.unsplash.com/600x600/?sig=1" alt="1.jpg"/>
                <img id="2" crossOrigin="anonymous" class="myimages" src="https://source.unsplash.com/600x800/?sig=12" alt="1.jpg"/>
                <img id="3" crossOrigin="anonymous" class="myimages" src="https://source.unsplash.com/800x600/?sig=71" alt="1.jpg"/>
                <img id="4" crossOrigin="anonymous" class="myimages" src="https://source.unsplash.com/600x600/?sig=40" alt="1.jpg"/>
                <img id="5" crossOrigin="anonymous" class="myimages" src="https://source.unsplash.com/600x600/?sig=32" alt="1.jpg"/>

            </div>


        </div>
    </div>
</body>

</html>

7. The corresponding JS file would be as below.

'use strict';

(function () {

    Office.onReady(function () {
        // Office is ready
        $(document).ready(function () {
            // The document is ready
             
            $('.myimages').click(insertImage);
        });
    });

     
    var imagebase64 = "";  

    function insertImage(id) {

        console.log(id);

        var src = $(id)[0].currentTarget.href;

        var img = document.getElementById($(id)[0].currentTarget.id);

        const canvas = document.createElement('canvas');
        const ctx = canvas.getContext('2d');
        canvas.width = img.naturalWidth;
        canvas.height = img.naturalHeight;

        //img.crossOrigin = 'anonymous';
        //img.setAttribute('crossOrigin', 'anonymous');
        ctx.drawImage(img, 0, 0);

        var temp = canvas.toDataURL().split(',')[1];


        Office.context.document.setSelectedDataAsync(temp, {
            coercionType: Office.CoercionType.Image,
            imageLeft: 50,
            imageTop: 50
            //imageWidth: 400
            //imageHeight: canvas.height
        },
            function (asyncResult) {
                if (asyncResult.status === Office.AsyncResultStatus.Failed) {
                    console.log(asyncResult.error.message);
                }
            });
    }

    function insertText() {
        Office.context.document.setSelectedDataAsync("Hello World!",
            function (asyncResult) {
                if (asyncResult.status === Office.AsyncResultStatus.Failed) {
                    console.log(asyncResult.error.message);
                }
            });
    }
})();

8. No need to explain about the CSS. It depends on the end users.
9. Now, hit F5 from the Visual Studio.
10. The PowerPoint Opens with our Add-In Visible.

11. On Click of that, the task pane (home.html) will get opened and rendered with the Images.

12. On Click of any image, the corresponding image will be inserted into the Slide.

13. The InsertImage method is responsible for inserting the image into the slide.

function insertImage(id) {

        console.log(id);

        var src = $(id)[0].currentTarget.href;

        var img = document.getElementById($(id)[0].currentTarget.id);

        const canvas = document.createElement('canvas');
        const ctx = canvas.getContext('2d');
        canvas.width = img.naturalWidth;
        canvas.height = img.naturalHeight;

        //img.crossOrigin = 'anonymous';
        //img.setAttribute('crossOrigin', 'anonymous');
        ctx.drawImage(img, 0, 0);

        var temp = canvas.toDataURL().split(',')[1];


        //var reader = new FileReader();
        //reader.onloadend = function () {
        //    imagebase64 = reader.result;
        //};
        //reader.readAsDataURL(img.href);  

        //Office.context.document.setSelectedDataAsync(getImageAsBase64String(src), {
        Office.context.document.setSelectedDataAsync(temp, {
            coercionType: Office.CoercionType.Image,
            imageLeft: 50,
            imageTop: 50
            //imageWidth: 400
            //imageHeight: canvas.height
        },
            function (asyncResult) {
                if (asyncResult.status === Office.AsyncResultStatus.Failed) {
                    console.log(asyncResult.error.message);
                }
            });
    }

In the next article, let us see how to Publish and Deploy this Add-In.

Happy Coding,
Sathish Nadarajan.

Author Info

Sathish Nadarajan
 
Solution Architect
 
Rate this article
 
Sathish is a Microsoft MVP for SharePoint (Office Servers and Services) having 15+ years of experience in Microsoft Technologies. He holds a Masters Degree in Computer Aided Design and Business ...read more
 

PowerShell Script To Uninstall App From SharePoint Online

Sriram Varadarajan
 
Solution Architect
April 23, 2017
 
Rate this article
 
Views
6979

In the recent past we added some third party apps from SharePoint Store to SharePoint Online App catalog site. But they where not available for users on SPO site’s under "Apps You can Add" section.
So, we  tried uninstalling the APP and got the following error messages

The Url ‘/sites/TSTAppCatalogue/APP NAME’ cannot be resolved to a web. The web may be temporarily unavailable. And received the following error too.

An expected exception was thrown while running task ‘GetMyApps’. Microsoft.SharePoint.SPException: Error in the application.     at Microsoft.SharePoint.ApplicationPages.StorefrontBase.TaskGetMyApps()

We suspect that the app was not properly installed because of the presence of a stale entry and we are looking for possibilities to completely remove the app from appcatalog and then re-install it again.

Manual un-installing wasn’t fixing the issue. But removing it Via script work.

Uninstallation Script

 [System.Reflection.Assembly]::LoadWithPartialName("Microsoft.SharePoint.Client")
 [System.Reflection.Assembly]::LoadWithPartialName("Microsoft.SharePoint.Client.Runtime")
 
 
 Function Get-ClientContext([string]$Url,[string]$UserName,[string]$Password)
 {
     $SecurePassword = $Password | ConvertTo-SecureString -AsPlainText -Force
     $context = New-Object Microsoft.SharePoint.Client.ClientContext($Url)
     $context.Credentials = New-Object Microsoft.SharePoint.Client.SharePointOnlineCredentials($UserName, $SecurePassword)
     return $context
 }
 
 
 Function Uninstall-AppInstance([Microsoft.SharePoint.Client.ClientContext]$Context,[Guid]$AppInstanceId)
 {
     $appInst = $Context.Web.GetAppInstanceById($AppInstanceId)
     $appInst.Uninstall()
     $context.ExecuteQuery()
  }
 
 
 $UserName = "USER ID"
 $Password = Read-Host -AsSecureString "Enter the password"    
 $Url = " appcatalog URL"
 $AppInstanceid = New-Object Guid("xxxx-xx-xx-xx-xxxx")  #specify App Instance Id here
 
 $creds = New-Object Microsoft.SharePoint.Client.SharePointOnlineCredentials($UserName, $Password)
 
 $context = New-Object Microsoft.SharePoint.Client.ClientContext($Url)  
 $context.credentials = $creds  
 
 Uninstall-AppInstance -Context $context -AppInstanceId $AppInstanceid
 $context.Dispose()

Author Info

Sriram Varadarajan
 
Solution Architect
 
Rate this article
 
Sriram is a Technology Evangelist with 15+ years experience in Microsoft Technologies. He is an enterprise architect working for large pharmaceutical organization which has presence globally with largest Microsoft implementation ...read more
 

App Permission and App Management in SharePoint Online Apps

Sriram Varadarajan
 
Solution Architect
 
Rate this article
 
Views
38084

In this article we can have a look at different options available in Office 365 to manage SharePoint Online APPS and 0365 APPS with different privileges.

Manage App Permission (Security & Compliance)

Microsoft newly added this module under security and compliance (which is in PROTECTION.OFFICE.COM), this feature help us to manage the APPs which consume/use information from Office 365.

App permissions help you decide which apps you allow your users access to, and which ones you want to ban.

Note: Business users can consume third party APPs in Office 365 only if the integrated APPS setting is turned on in your tenant.

clip_image002

We might end up seeing 2 different APP under Manager Permission Module

1. An organization’s Azure AD administrator configures the app and assigns it to individual users or to the entire organization, and these app will show up in the manager permission portal

2. Develop an app that registers in a user’s Azure AD without admin assignment, by allowing users to sign on with their Office 365 credentials.

Note: Not every APP is displayed under APP launcher, to know how Apps are displayed under the APP launcher for every user, please refer this link.

SharePoint App Permission (SharePoint Admin Center)

Users either from APP-catalog or from the office stores based on the configuration made, they can install custom apps and third party apps in their SharePoint tenant that depends on user requirement.

ADMIN will get to see all the SharePoint APPS which is installed with tenant scope and can still restrict the APP that can be consumed by the business user.

This module is under SharePoint Admin Center => Apps => App Permissions.

Note: Any app with site collection/web/list scope are listed under Site settings => Site app permission page.

Admin can remove app permissions from SharePoint app permission page. After removing the app from app permission page, we can see the app in site contents page because it’s just the app permission which is revoked.

Note: Whenever a user installs a tenant scoped app in SharePoint site collection, it will create a new entry in SharePoint app permission page. If the user installs the same app in multiple site collections, duplicate app entries can be seen in SharePoint tenant app permission page with different app ids.

App permission request scopes

tenancy

http://sharepoint/content/tenant

site collection

http://sharepoint/content/sitecollection

website

http://sharepoint/content/sitecollection/web

list

http://sharepoint/content/sitecollection/web/list

App Permissions Requests

1. Read-only

·         View Items

·         Open Items

·         View Versions

·         Create Alerts

·         Use Self-Service Site Creation

·         View Pages

2. Write

Read-Only permissions, plus:

·         Add Items

·         Edit Items

·         Delete Items

·         Delete Versions

·         Browse Directories

·         Edit Personal User Information

·         Manage Personal Views

·         Add/Remove Personal Web Parts

·         Update Personal Web Parts

3. Manage

Write permissions, plus:

·         Manage Lists

·         Add and Customize Pages

·         Apply Themes and Borders

·         Apply Style Sheets

4. Full control

All permissions

Author Info

Sriram Varadarajan
 
Solution Architect
 
Rate this article
 
Sriram is a Technology Evangelist with 15+ years experience in Microsoft Technologies. He is an enterprise architect working for large pharmaceutical organization which has presence globally with largest Microsoft implementation ...read more
 

How to create a custom menu action and display the selected item with MVC 4 Web Grid in SharePoint Add-In

Krishna KV
 
Team Leader, Aspire Systems
February 4, 2017
 
Rate this article
 
Views
5033

In this article, lets see how to create a custom action menu in a custom list and display items with MVC4 Web Grid in a SharePoint Add-In

clip_image002


clip_image004

clip_image006

clip_image008

clip_image010

clip_image012

clip_image014

Change the Element.xml As below

 <CustomAction Id="388fcc1e-8f53-4e0f-a130-bc4466bff515.View Projects"
                 RegistrationType="List"
                 RegistrationId="{$ListId:Lists/Employees;}"
                 Location="CommandUI.Ribbon"
                 Sequence="10001"
                HostWebDialog="true"
                HostWebDialogHeight="300"
                HostWebDialogWidth="900"
                  
                 Title="View Employees">
     <CommandUIExtension>
   <CommandUIHandler Command="Invoke_View ProjectsButtonRequest"
                           CommandAction="~remoteAppUrl/Home/Index?{StandardTokens}&SPListItemId={SelectedItemId}&SPListId={SelectedListId}"/>

Employee.Cs

 public class Employee
 {
         public string Title { get; set; }
         public string Name { get; set; }
         public string Department { get; set; }
         public DateTime Doj { get; set; }
 }

HomeController.CS

 [SharePointContextFilter]
         public ActionResult Index(string SPListItemId)
         {
 
             var spContext = SharePointContextProvider.Current.GetSharePointContext(HttpContext);
 
             var ids = Request.QueryString["SPListItemId"];
             List<Employee> employees = new List<Employee>();
 
             using (var clientContext = spContext.CreateUserClientContextForSPHost())
             {
                 if (clientContext != null)
                 {
                     var lst = clientContext.Web.Lists.GetByTitle("Employees");
                     var query = new CamlQuery();
                     if (!string.IsNullOrEmpty(SPListItemId) && SPListItemId != "null")
                     {
 
                         string filter = "<View><Query><Where><In><FieldRef Name="ID"/><Values>";
                         foreach (string id in SPListItemId.Split(','))
                             filter += "<Value Type="Number">" + id + "</Value>";
                         filter += "</Values></In></Where></Query></View>";
 
                         query.ViewXml = filter;
 
 
                     }
                     var items = lst.GetItems(query);
                     clientContext.Load(items, item => item.Include(itm => itm["Title"], itm => itm["Department"], itm => itm["DOJ"]));
                     clientContext.ExecuteQuery();
                     foreach (var item in items)
                     {
                         employees.Add(new Employee()
                         {
                             Title = Convert.ToString(item["Title"]),
                             Department = Convert.ToString(item["Department"]),
                             Doj = Convert.ToDateTime(item["DOJ"])
                         });
                     }
                 }
             }
 
             return View(employees);
         }

The SPListItemId parameter is the querystring value return from the custom action.

Index.Cshtml

 @{
     Layout = null;
 }
 
 <script src="~/Scripts/jquery-1.10.2.js"></script>
 
 
 <div class="jumbotron">
     <h2>View Employees</h2>
 
 
 </div>
 <div class="row">
     @{
         var grid = new WebGrid(rowsPerPage: 4, defaultSort: "Department", ajaxUpdateContainerId: "grid");
         grid.Bind(Model);
         grid.Pager(WebGridPagerModes.All);
 
         @grid.GetHtml(htmlAttributes: new { id = "grid" }, fillEmptyRows: false,
       columns: new[]
       {
           grid.Column("Title",header:"Title"),
           grid.Column("Name"),
           grid.Column("Department"),
           grid.Column("DOJ",header:"Date Of Join")
       })
     }
 </div>

Author Info

Krishna KV
 
Team Leader, Aspire Systems
 
Rate this article
 
Krishna K.V has been working in IT Industry for over 7+ years. He holds a Master Degree in Information Technology. He is more interested to learn and share new technologies, ...read more
 

How to filter, select and expand SharePoint API using PNP JS Core and Angular Js in a SharePoint AddIn Custom Action

Krishna KV
 
Team Leader, Aspire Systems
January 2, 2017
 
Rate this article
 
Views
17489

In this article, we can have a look at how to perform  filter and expand operation on a SharePoint  look up field using PNP JS Core and Angular Js in a SharePoint AddIn Custom Action. To simulate this scenario , I have created 2 custom lists named Technologies and projects with below fields

Technologies

· Title

Project

· Title

· Technology (Lookup)

· Duration

Creating a SharePoint Hosted APP using angular JS

Add the required angular and PNP Javascript file

App.Service.js

 var app = angular.module('projectApp', []);
 (function () {
     app.service('appService', ['$http','$q',function ($http,$q) {
         function getUrlParamByName(name) {
             name = name.replace(/[[]/, "\[").replace(/[]]/, "\]");
             var regex = new RegExp("[\?&]" + name + "=([^&#]*)");
             var results = regex.exec(location.search);
             return results === null ? "" : decodeURIComponent(results[1].replace(/+/g, " "));
         }
   this.getListByFilterExpand = function (title, filter,expand,select) {
             var d = $q.defer();
             $pnp.sp.crossDomainWeb(appWebUrl, hostWebUrl).lists.getByTitle(title).items.filter(filter).expand(expand).select(select).get().then(function (response) {
                 d.resolve(response);
             });
             return d.promise;
         } 
 }]);
 })();
 

customMenu.ctrl.js

 (function () {
 
     app.controller('customMenuCtrl', ['$scope', 'appService', function ($scope, appService) {
        
         var listTitle = 'Projects';
 
 
 var id = getUrlParamByName('SPListItemId') ?
             getUrlParamByName('SPListItemId') : 1;
 
 appService.getListByFilterExpand(listTitle, 'TechnologyId eq ' + id, 'Technology', 'Id,Title,Technology/Title,Duration').then(function (response) {
                 console.log(response);
                 $scope.projects = response;
             });       
     }]);
 })();

Project.aspx

 <script src="../Scripts/angular-1.5.8.js"></script>
 <script src="../Scripts/fetch.js"></script>
 <script src="../Scripts/es6-promise.min.js"></script>
 <script src="../Scripts/pnp.js"></script>
 <script src="../App/app.service.js"></script>
 <script src="../App/customMenu.ctrl.js.js"></script>
 <asp:Content ContentPlaceHolderID="PlaceHolderMain" runat="server">
     <WebPartPages:AllowFraming ID="AllowFraming" runat="server" />
 
     <div data-ng-app="projectApp">
         <div ng-controller="customMenuCtrl">
             <table class="table table-bordered">
                 <thead>
                     <tr>
                         <td>Project Name</td>
                         <th>Technology</th>
                         <td>Duration (in months)</td>
 
                     </tr>
                 </thead>
                 <tbody>
                     <tr ng-repeat="project in projects">
                         <td>{{project.Title}}</td>
                         <th>{{project.Technology.Title}}</th>
                         <th>{{project.Duration}}</th>
                     </tr>
                 </tbody>
             </table>
         </div>
     </div>
 
 </asp:Content>
 

Run the project

clip_image002

It will display the technology based on ID 1.

Adding custom action menu to the list Technologies to list the project based on the technologies.

clip_image004

clip_image006

clip_image008

Element.xml

 <?xml version="1.0" encoding="utf-8"?>
 <Elements xmlns="http://schemas.microsoft.com/sharepoint/">
   <CustomAction Id="b71dcf73-c914-44c3-9f2a-41271530058f.ViewProjectCustomAction"
                 RegistrationType="List"
                 RegistrationId="{$ListId:Lists/Technlogies;}"
                 Location="EditControlBlock"
                 Sequence="1"
                 HostWebDialog="true"
                 HostWebDialogHeight="300"
                 HostWebDialogWidth="900"
                 Title="View Project">
     <!-- 
     Update the Url below to the page you want the custom action to use.
     Start the URL with the token ~remoteAppUrl if the page is in the
     associated web project, use ~appWebUrl if page is in the app project.
     -->
     <UrlAction Url="~appWebUrl/Pages/Project.aspx?{StandardTokens}&SPListItemId={ItemId}&SPListId={ListId}" />
   </CustomAction>
 </Elements>
 

This attributes will enable to display the custom action menu URL as a dialog. HostWebDialog="true" HostWebDialogHeight="300" HostWebDialogWidth="900"

clip_image009

clip_image011

Author Info

Krishna KV
 
Team Leader, Aspire Systems
 
Rate this article
 
Krishna K.V has been working in IT Industry for over 7+ years. He holds a Master Degree in Information Technology. He is more interested to learn and share new technologies, ...read more
 

How to use PNP JS Core with typescript and System JS in a SharePoint hosted App / Add-in

Krishna KV
 
Team Leader, Aspire Systems
October 31, 2016
 
Rate this article
 
Views
10376

Lets see how to use Typescript and System Js with PNP JS Core in SharePoint Hosted App / Add-in in this blog post. To begin with, lets add reference to typed definitions of fetch and es6-promise modules to enable intellisense to VS Code.

Typings/DefinitelyTyped for PNP

The typescript allows us to have the declaration files which helps us to know the shape of the code by referencing the related files. It is used for the development purpose to check the error on compile time for the types. As we need to include the below files for our project.

· Fetch.d.ts https://raw.githubusercontent.com/DefinitelyTyped/DefinitelyTyped/9027703c0bd831319dcdf7f3169f7a468537f448/whatwg-fetch/whatwg-fetch.d.ts

· Promise.d.ts

https://raw.githubusercontent.com/DefinitelyTyped/DefinitelyTyped/830e8ebd9ef137d039d5c7ede24a421f08595f83/es6-promise/es6-promise.d.ts

Pnp.d.ts

 class Employee {
     public Title: string;
     public Name: string;
     public Designation: string;
 }
 

Employee.ts is the model for the SharePoint list.

App.ts

 import pnp from 'pnp' //importing the package PNP
 class app
 {
     private lstEmployees: Array<Employee>;
     private appWebUrl: string;
     private hostWebUrl: string;
     constructor() {        
         this.appWebUrl = this.getUrlParamByName("SPAppWebUrl");
         this.hostWebUrl = this.getUrlParamByName("SPHostUrl");
         this.getListItems(this.appWebUrl, this.hostWebUrl);
     }
 
     private getUrlParamByName(name): string {
     name = name.replace(/[[]/, "\[").replace(/[]]/, "\]");
     var regex = new RegExp("[\?&]" + name + "=([^&#]*)");
     var results = regex.exec(location.search);
     return results === null ? "" : decodeURIComponent(results[1].replace(/+/g, " "));
 }
 
 
     private getListItems(appWebUrl,hostWeburl): void
     {
         pnp.sp.crossDomainWeb(appWebUrl, hostWeburl).lists.getByTitle('Test').items.get().then(data => {
             this.lstEmployees = data;
             var table = <HTMLTableElement> document.getElementById('empData');
                       
             for (let employee of this.lstEmployees) {
                 var tableRow = table.insertRow(table.rows.length);
                 tableRow.insertCell(0).innerHTML = employee.Title;
                 tableRow.insertCell(1).innerHTML = employee.Name;
                 tableRow.insertCell(2).innerHTML = employee.Designation;                
             }         
             
 
         }).catch(function (error) {
             alert('error');
             console.log(error);
         });
     }
 }
 export =new app();
 

Default.aspx

[Code 3]

 <script src="../Scripts/Reflect.js"></script>
     <script src="../Scripts/system.src.js"></script>
 
     <script src="../Scripts/fetch.js"></script>
     <script src="../Scripts/es6-promise.min.js"></script>
     <script src="../Scripts/pnp.js"></script>
 <script>
         System.config({
             map: {
                 app: 'app', //app folder name
                 'pnp': '../Scripts/pnp.js' //Refer the package PNP from this specific file, as pnp.d.ts will not available in the deployment.
             },
             packages: {
                 app: {
                     main: 'app.js',
                     defaultExtension: 'js'
                 }
             }
         });
         System.import('app').catch(function(err){ console.error(err); });
             </script>
     <div>
         <table id="empData">
             <tr>
                 <th>Title</th>
                 <th>Name</th>
                 <th>Designation</th>
             </tr>
        </table>

Author Info

Krishna KV
 
Team Leader, Aspire Systems
 
Rate this article
 
Krishna K.V has been working in IT Industry for over 7+ years. He holds a Master Degree in Information Technology. He is more interested to learn and share new technologies, ...read more
 

How to Deploy Provider Hosted Apps (Add-Ins) programmatically using CSOM in SharePoint Office 365 by Activating Developer Site Feature

Sathish Nadarajan
 
Solution Architect
October 11, 2016
 
Rate this article
 
Views
7307

ArticleEarlierIn the earlier Article, we saw how to install an APP by activating the Side Loading Feature. In the same manner, let us see how to deploy the app by activating the Developer Site Feature.

Usually, this method will not be accepted by most of the Clients, because activating the developer feature will not be suitable on the Production environment as most of the production environments will be of team, publishing, Community Sites.

But even, let us know, how the thing can be achieved. The code is very straight forward.

 namespace Console.Office365
 {
     using Microsoft.SharePoint.Client;
     using Newtonsoft.Json.Linq;
     using System;
     using System.Collections.Generic;
     using System.IO;
     using System.Linq;
 
     class Program
     {
         static void Main(string[] args)
         {
             DeployAPPDeveloperFeature();
         }
 
         public static void DeployAPPDeveloperFeature()
         {
             OfficeDevPnP.Core.AuthenticationManager authMgr = new OfficeDevPnP.Core.AuthenticationManager();
 
             string userName = "*******@*****.onmicrosoft.com";
             string password = "********";
             string siteUrl = "https://*******.sharepoint.com/sites/CommunitySite/";
 
             using (var clientContext = authMgr.GetSharePointOnlineAuthenticatedContextTenant(siteUrl, userName, password))
             {
                 Web web = clientContext.Web;
                 clientContext.Load(web);
                 clientContext.ExecuteQueryRetry();
 
                 var appInstance = Deploy(clientContext, "D:\PRACTICE SOURCE CODE\PNP\Office365.PHA.OnPrem.APP\Office365.PHA.OnPrem.APP\bin\Debug\app.publish\1.0.0.0\Office365.PHA.OnPrem.APP.app");
                 if (appInstance != null && appInstance.Status == AppInstanceStatus.Initialized)
                 {
                     System.Console.WriteLine("App was installed.");
                 }
             }
         }
 
         public static AppInstance Deploy(ClientContext context, string appFullPath)
         {
             EnsureDeveloperFeature(context);
             using (var packageStream = System.IO.File.OpenRead(appFullPath))
             {
                 var appInstance = context.Web.LoadAndInstallApp(packageStream);
                 context.Load(appInstance);
                 context.ExecuteQuery();
                 return appInstance;
             }
         }
 
 
         /// <summary>
         /// Ensure Developer Feature 
         /// </summary>
         /// <param name="ctx"></param>
         private static void EnsureDeveloperFeature(ClientContext ctx)
         {
             var result = ctx.LoadQuery(ctx.Site.Features.Where(f => f.DefinitionId == DeveloperFeatureId));
             ctx.ExecuteQuery();
             if (result.Any()) return;
             var feature = ctx.Site.Features.Add(DeveloperFeatureId, true, FeatureDefinitionScope.None);
             ctx.ExecuteQuery();
         }
 
 
         private static readonly Guid DeveloperFeatureId = new Guid("e374875e-06b6-11e0-b0fa-57f5dfd72085");
 
 
     }
 
 }


In this approach also, we will be facing the TRUST issue similar to the earlier post. But, even then, there is another alternative approach is there. “APP Stapling”. Let us see what is APP Stapling in the upcoming article.

Happy Coding,

Sathish Nadarajan.

Author Info

Sathish Nadarajan
 
Solution Architect
 
Rate this article
 
Sathish is a Microsoft MVP for SharePoint (Office Servers and Services) having 15+ years of experience in Microsoft Technologies. He holds a Masters Degree in Computer Aided Design and Business ...read more
 

SharePoint OAuth using Client ID and Secret

Krishna KV
 
Team Leader, Aspire Systems
August 21, 2016
 
Rate this article
 
Views
51991

SharePoint OAuth is used to authorize the user using a token instead of credentials (username and password). The token can grant access to a specific site or list. Users can also share their data’s (document, pictures, content) with other site user without sharing their credentials.

If the SharePoint add-ins need to access the site information the add-ins should have the Client ID and Client Secret. We can generate the same using the SharePoint site or power shell and add them to the Add-ins. There can be single client id to be associated with add-ins, whereas multiple client secret is possible.

To create a client ID and client secret.

http://{sharepointsite}/_layouts/15/AppRegNew.aspx

Client ID – it Is a GUID for the SharePoint Add in.

Client Secret – it is the password for the add-ins. It is associated with the client id; it will be shown again. We need to store in secure or able to regenerate a new client secret.

Title – It is a user friendly name used to display in the add in trust screen.

Add in domain- The host of the remote server of the add in. If the https is not configured in 443, then we need to mention the port number.

Redirect URL – The end point of the remote application to send ACS authentication code.

The client secret will be expired after a year created using AppRegNew.aspx. We can update a new secret key using power shell. We can increase the duration of the client secret up to maximum of 3 years. The newly generate key takes 24 hours or straight away to update, it is better to generate new secret key before a day. If the secret key expires the add-ins will return the error “The remote server returned an error: (401) Unauthorized.”

To view the list of add ins.

https://{sharepointsite}/_layouts/15/AppPrincipals.aspx

To view the details of an add-ins or grant permission

https://{sharepointsite}/_layouts/15/Appinv.aspx

· It will not return the client secret.

Refreshing a client secret.

Prerequisites

· http://go.microsoft.com/fwlink/p/?linkid=236298 (Microsoft online power shell Module 32 bit)

· http://go.microsoft.com/fwlink/p/?linkid=236297 (Microsoft online power shell Module 64 bit)

· https://www.microsoft.com/download/details.aspx?id=39267 (Microsoft Online Services Sign-In Assistant)

Open the power shell and execute the below cmdlets.

 import-module MSOnline
 Connect-MsolService (provide the tenant administrator username and password)
 Store the client id in a variable
 $clientId="358658dc-f04b-4c37-a260-2227eb51dde1"
 
 Generate a key with default expiration (one year). 
 $bytes = New-Object Byte[] 32
 $rand = [System.Security.Cryptography.RandomNumberGenerator]::Create()
 $rand.GetBytes($bytes)
 $rand.Dispose()
 $newClientSecret = [System.Convert]::ToBase64String($bytes)
 New-MsolServicePrincipalCredential -AppPrincipalId $clientId -Type Symmetric -Usage Sign -Value $newClientSecret
 New-MsolServicePrincipalCredential -AppPrincipalId $clientId -Type Symmetric -Usage Verify -Value $newClientSecret
 New-MsolServicePrincipalCredential -AppPrincipalId $clientId -Type Password -Usage Verify -Value $newClientSecret
 $newClientSecret
 
 Generate the client secret with three years expiration. 
 	Includinh–EndDateparameter parameter on the three calls of the New-MsolServicePrincipalCredential cmdlet
 $bytes = New-Object Byte[] 32
 $rand = [System.Security.Cryptography.RandomNumberGenerator]::Create()
 $rand.GetBytes($bytes)
 $rand.Dispose()
 $newClientSecret = [System.Convert]::ToBase64String($bytes)
 $dtStart = [System.DateTime]::Now
 $dtEnd = $dtStart.AddYears(3)
 New-MsolServicePrincipalCredential -AppPrincipalId $clientId -Type Symmetric -Usage Sign -Value $newClientSecret -StartDate $dtStart  –EndDate $dtEnd
 New-MsolServicePrincipalCredential -AppPrincipalId $clientId -Type Symmetric -Usage Verify -Value $newClientSecret   -StartDate $dtStart  –EndDate $dtEnd
 New-MsolServicePrincipalCredential -AppPrincipalId $clientId -Type Password -Usage Verify -Value $newClientSecret   -StartDate $dtStart  –EndDate $dtEnd
 $newClientSecret

Updating the new secret in app.config/web.config

  <add key="ClientId" value="your client id here" />
  <add key="ClientSecret" value="your new secret here" />
  <add key="SecondaryClientSecret" value="your old secret here" />
Category : Office 365, SharePoint

Author Info

Krishna KV
 
Team Leader, Aspire Systems
 
Rate this article
 
Krishna K.V has been working in IT Industry for over 7+ years. He holds a Master Degree in Information Technology. He is more interested to learn and share new technologies, ...read more
 

How To Upgrade A SharePoint Hosted App

Sriram Varadarajan
 
Solution Architect
July 16, 2016
 
Rate this article
 
Views
6653

As we all know, Microsoft is pushing everything in to APP model and that too with it comes to SharePoint Online I don’t have to say much. In this blog post I’m not going to explaining more on APP model, the below scenarios talks only about SharePoint Hosted APP.

Issue Definition: Developed a SharePoint hosted App and when I try to update the app and republish it to the App Store, the changes done to the App are not getting reflected.

Though we can’t say it’s an issue with MS, probably we can say it’s a GAP.

Scenario:

First Time App Installation:

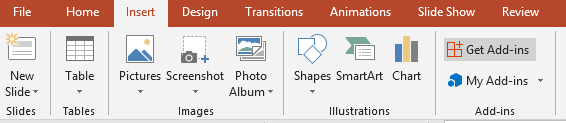
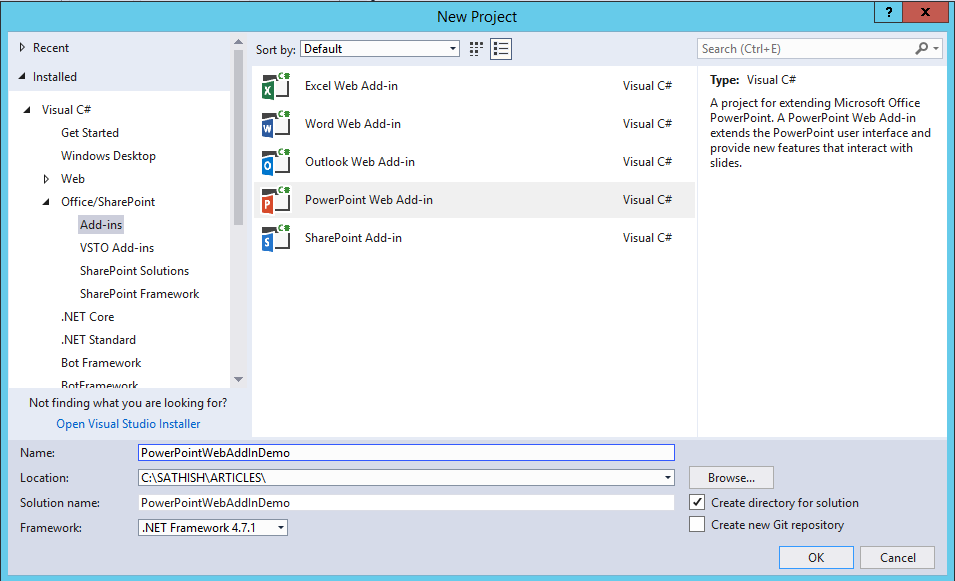
1. Create a project using SharePoint app template in VS 2013

2. Add "Lists" folder under this project

3. Create a new SP list and name it as "List1"

4. Right click List1 and add new item. Choose page and name it as "CustomNewForm.aspx"

5. Set the Deployment type to ElementFile in CustomNewForm.aspx properties window

6. Open List1 Schema.xml and update the following line,

From: <Form Type="NewForm" Url="NewForm.aspx" SetupPath="pages\form.aspx" WebPartZoneID="Main" />

To: <Form Type="NewForm" Url="CustomNewForm.aspx" Path="CustomNewForm.aspx" WebPartZoneID="Main" UseLegacyForm="FALSE" />

7. Replace CustomNewForm.aspx content with,

 <%@ Page language="C#" MasterPageFile="~masterurl/default.master" Inherits="Microsoft.SharePoint.WebPartPages.WebPartPage, Microsoft.SharePoint, Version=15.0.0.0, Culture=neutral, PublicKeyToken=71e9bce111e9429c" %>
 <%@ Register Tagprefix="Utilities" Namespace="Microsoft.SharePoint.Utilities" Assembly="Microsoft.SharePoint, Version=15.0.0.0, Culture=neutral, PublicKeyToken=71e9bce111e9429c" %>
 <%@ Register Tagprefix="WebPartPages" Namespace="Microsoft.SharePoint.WebPartPages" Assembly="Microsoft.SharePoint, Version=15.0.0.0, Culture=neutral, PublicKeyToken=71e9bce111e9429c" %>
 <%@ Register Tagprefix="SharePoint" Namespace="Microsoft.SharePoint.WebControls" Assembly="Microsoft.SharePoint, Version=15.0.0.0, Culture=neutral, PublicKeyToken=71e9bce111e9429c" %>
 
 <asp:Content ContentPlaceHolderId="PlaceHolderAdditionalPageHead" runat="server">
     <SharePoint:ScriptLink name="sp.js" runat="server" OnDemand="true" LoadAfterUI="true" Localizable="false" />
     <style type="text/css">
         .tg  {border-collapse:collapse;border-spacing:0;}
         .tg td{font-family:Arial, sans-serif;font-size:14px;padding:10px 5px;border-style:solid;border-width:1px;overflow:hidden;word-break:normal;}
         .tg th{font-family:Arial, sans-serif;font-size:14px;font-weight:normal;padding:10px 5px;border-style:solid;border-width:1px;overflow:hidden;word-break:normal;}
         .tg .tg-yw4l{vertical-align:top}
     </style>
 </asp:Content>
 
 <asp:Content ContentPlaceHolderID="PlaceHolderPageTitleInTitleArea" runat="server">
     SharePoint Online Site Provisioning
 </asp:Content>
 
 <asp:Content ContentPlaceHolderId="PlaceHolderMain" runat="server">
     <WebPartPages:WebPartZone runat="server" FrameType="TitleBarOnly" ID="full" Title="loc:full" />
     <table class="tg">
       <tr>
         <th class="tg-yw4l">1</th>
         <th class="tg-yw4l">2</th>
         <th class="tg-yw4l">3</th>
       </tr>
       <tr>
         <td class="tg-yw4l">4</td>
         <td class="tg-yw4l">5</td>
         <td class="tg-yw4l">6</td>
       </tr>
     </table>
 </asp:Content>
 

8. Now open AppManifest.xml and make sure the version is set to 1.0.0.0

9. Deploy this app to a developer site collection and test the CustomNewForm.aspx

10. It works fine and now we will go with app upgrade.

Let’s talk about upgrade:

I updated the existing customnewform.aspx and I deployed the solution and I don’t see my new change getting reflected there.

Why isn’t coming and what’s the gap?

Here is what happens; when we deploy the APP package for the first time, the SharePoint takes the file which are under your list

clip_image002

But surprisingly when it comes to upgrade, this is what you need to do

· While upgrading the app and particularly when need to replace the file.  Please create a Module

clip_image004

Update the Item file as follows:

 <Elements xmlns="http://schemas.microsoft.com/sharepoint/">
    <Module Name="Module1" Url="Lists/ApproversList">
    <File Path="UpdationCustomNewForm.aspx" Url=" CustomNewForm.aspx" ReplaceContent="TRUE" Type="Ghostable"/>
    </Module>
 </Elements>

And place the updated code inside the new page created under the MODULE.

· Now you need to specify the feature upgrade action.

 <UpgradeActions>
   <VersionRange BeginVersion="1.0.0.0">
     <ApplyElementManifests>
        <ElementManifest Location="Module1Elements.xml" />
     </ApplyElementManifests>
   </VersionRange>
 </UpgradeActions>

This is important as we’re educating the APP to perform it’s based on the current version installed/available.

We can have multiple BEGIN and END element with different version in it.

This would solve the issue, now you could see all the modification made by you available.

Conclusion:

Though there isn’t best way available to get rid of this, here is what MS says; whenever you create an APP make sure that you create MODULE underneath your list and make sure to modify the content in both place for seamless upgradation modification.

Author Info

Sriram Varadarajan
 
Solution Architect
 
Rate this article
 
Sriram is a Technology Evangelist with 15+ years experience in Microsoft Technologies. He is an enterprise architect working for large pharmaceutical organization which has presence globally with largest Microsoft implementation ...read more
 

Leave a comment