In an earlier article, we saw how to create a simple Outlook AddIn. AS part of that, in this article, let us how to create a PowerPoint AddIn.
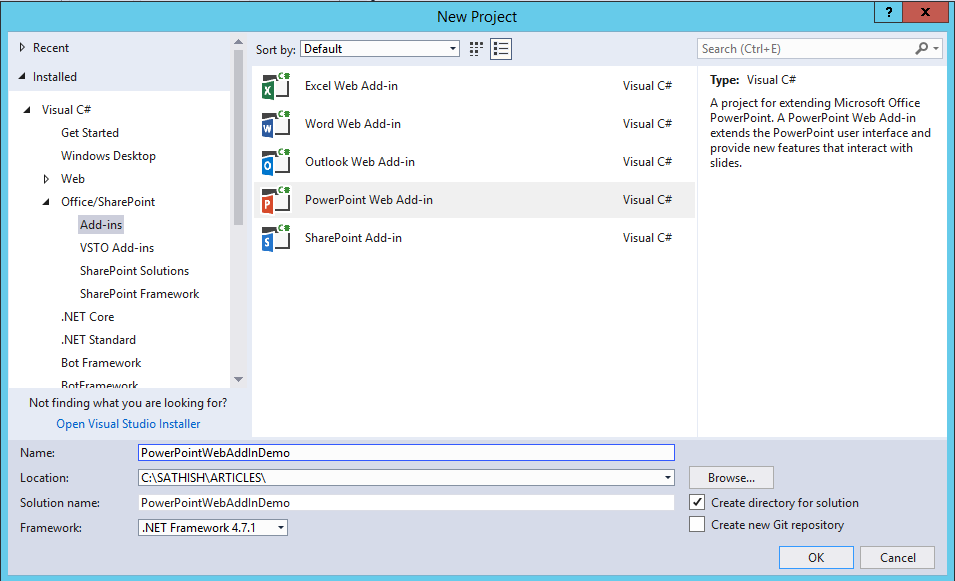
1. Create a New Project in Visual Studio.
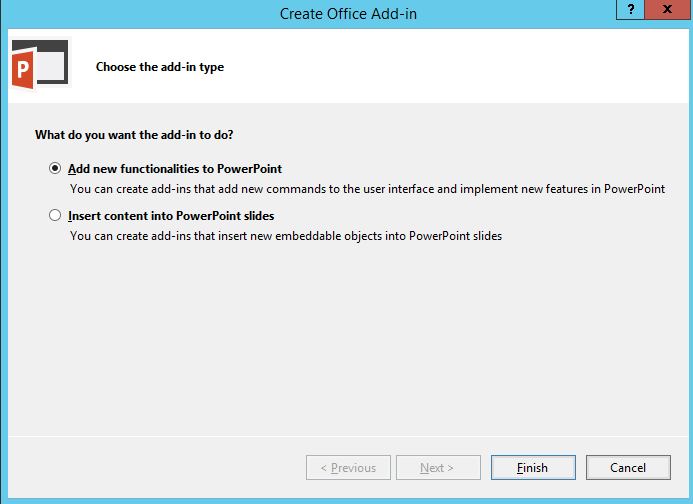
2. Choose the Add-in Type. In our case, we are going to add new functionality to Power Point.
3. The Solution will get created as below.
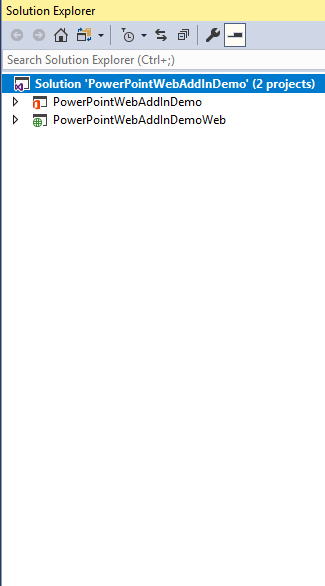
It comprises of two projects. One is the Web Application which we need to deploy in any of the domain or in Azure Web Service.
The First One contains only the XML file which we need to distribute to the end Users. There are few mechanisms, by which we can deliver this to the end users.
4. Now, let us come back and have a look on the components of the solution. The three important files in which we are making changes are Home.html, Home.css, Home.js.
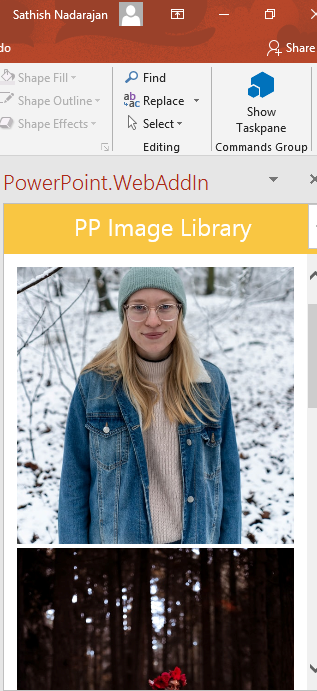
5. My requirement was to display a set of Images on the task pane. And when the User Clicks, the Image should be inserted into the slide.
6. Let us how to update the HTML file to list all our Images on the Task Pane.
<!DOCTYPE html>
<html>
<head>
    <meta charset="UTF-8" />
    <meta http-equiv="X-UA-Compatible" content="IE=Edge" />

    <script src="Scripts/jquery-1.9.1.js" type="text/javascript"></script>
    <script src="Scripts/FabricUI/MessageBanner.js" type="text/javascript"></script>
    <script src="https://appsforoffice.microsoft.com/lib/1/hosted/office.js" type="text/javascript"></script>

    <!-- To enable offline debugging using a local reference to Office.js, use:                        -->
    <!-- <script src="Scripts/Office/MicrosoftAjax.js" type="text/javascript"></script>  -->
    <!-- <script src="Scripts/Office/1/office.js" type="text/javascript"></script>  -->

    <link href="Home.css" rel="stylesheet" type="text/css" />
    <script src="Home.js" type="text/javascript"></script>

    <!-- For the Office UI Fabric, go to https://aka.ms/office-ui-fabric to learn more. -->
    <link rel="stylesheet" href="https://appsforoffice.microsoft.com/fabric/2.1.0/fabric.min.css">
    <link rel="stylesheet" href="https://appsforoffice.microsoft.com/fabric/2.1.0/fabric.components.min.css">

    <!-- To enable the offline use of Office UI Fabric, use: -->
    <!-- link rel="stylesheet" href="Content/fabric.min.css" -->
    <!-- link rel="stylesheet" href="Content/fabric.components.min.css" -->
</head>


<body class="ms-font-m ms-welcome">
    <div id="content-header">
        <div class="cls-title"><span>PP Image Library</span></div>
    </div>
    <div id="content-main">
        <div class="padding">
            <p>Double click on an item and insert it to the slides.</p>
            <div class="container" style="padding: 8px;">

                <img id="1" crossOrigin="anonymous" class="myimages" src="https://source.unsplash.com/600x600/?sig=1" alt="1.jpg"/>
                <img id="2" crossOrigin="anonymous" class="myimages" src="https://source.unsplash.com/600x800/?sig=12" alt="1.jpg"/>
                <img id="3" crossOrigin="anonymous" class="myimages" src="https://source.unsplash.com/800x600/?sig=71" alt="1.jpg"/>
                <img id="4" crossOrigin="anonymous" class="myimages" src="https://source.unsplash.com/600x600/?sig=40" alt="1.jpg"/>
                <img id="5" crossOrigin="anonymous" class="myimages" src="https://source.unsplash.com/600x600/?sig=32" alt="1.jpg"/>

            </div>


        </div>
    </div>
</body>

</html>
7. The corresponding JS file would be as below.
'use strict';

(function () {

    Office.onReady(function () {
        // Office is ready
        $(document).ready(function () {
            // The document is ready

            $('.myimages').click(insertImage);
        });
    });


    var imagebase64 = "";

    function insertImage(id) {

        console.log(id);

        var src = $(id)[0].currentTarget.href;

        var img = document.getElementById($(id)[0].currentTarget.id);

        const canvas = document.createElement('canvas');
        const ctx = canvas.getContext('2d');
        canvas.width = img.naturalWidth;
        canvas.height = img.naturalHeight;

        //img.crossOrigin = 'anonymous';
        //img.setAttribute('crossOrigin', 'anonymous');
        ctx.drawImage(img, 0, 0);

        var temp = canvas.toDataURL().split(',')[1];


        Office.context.document.setSelectedDataAsync(temp, {
            coercionType: Office.CoercionType.Image,
            imageLeft: 50,
            imageTop: 50
            //imageWidth: 400
            //imageHeight: canvas.height
        },
            function (asyncResult) {
                if (asyncResult.status === Office.AsyncResultStatus.Failed) {
                    console.log(asyncResult.error.message);
                }
            });
    }

    function insertText() {
        Office.context.document.setSelectedDataAsync("Hello World!",
            function (asyncResult) {
                if (asyncResult.status === Office.AsyncResultStatus.Failed) {
                    console.log(asyncResult.error.message);
                }
            });
    }
})();
8. No need to explain about the CSS. It depends on the end users.
9. Now, hit F5 from the Visual Studio.
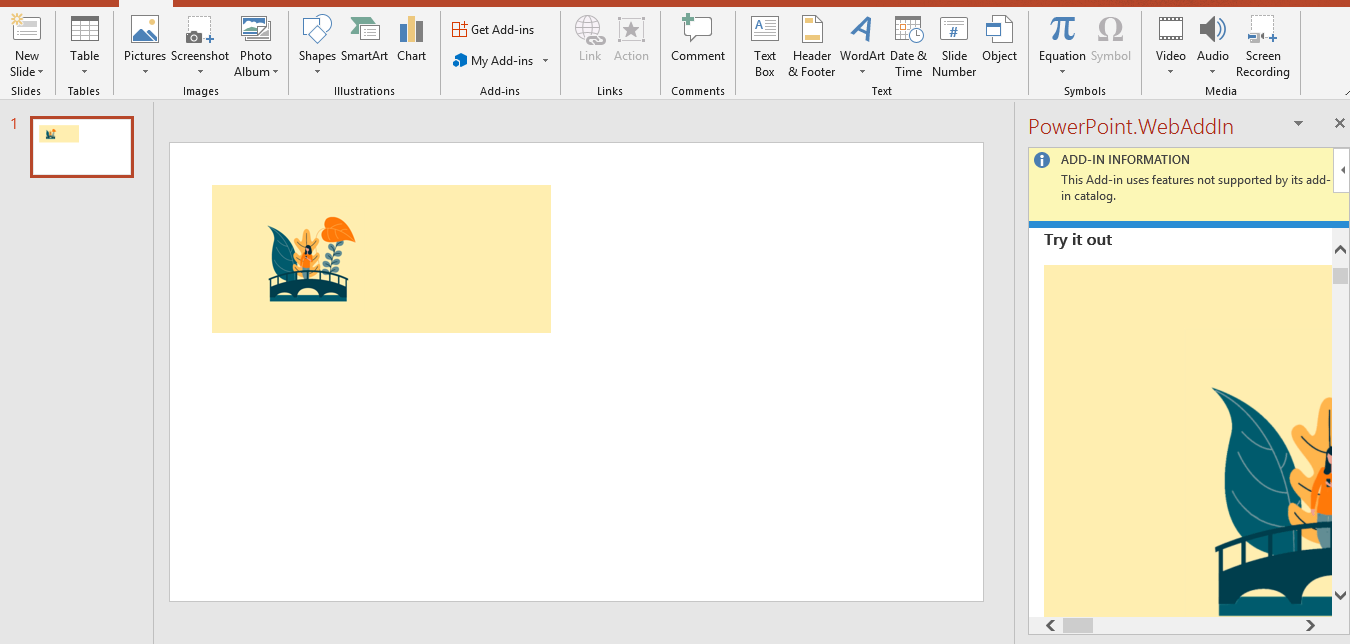
10. The PowerPoint Opens with our Add-In Visible.
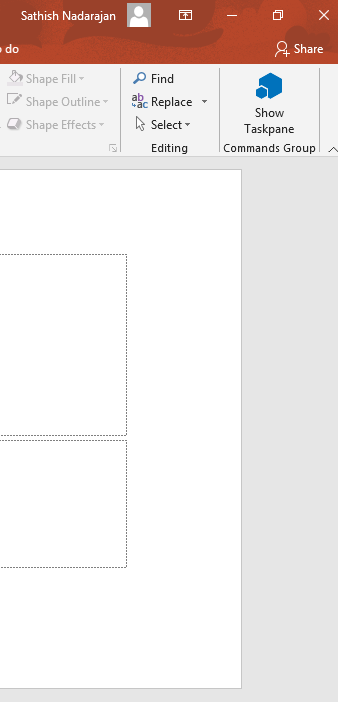
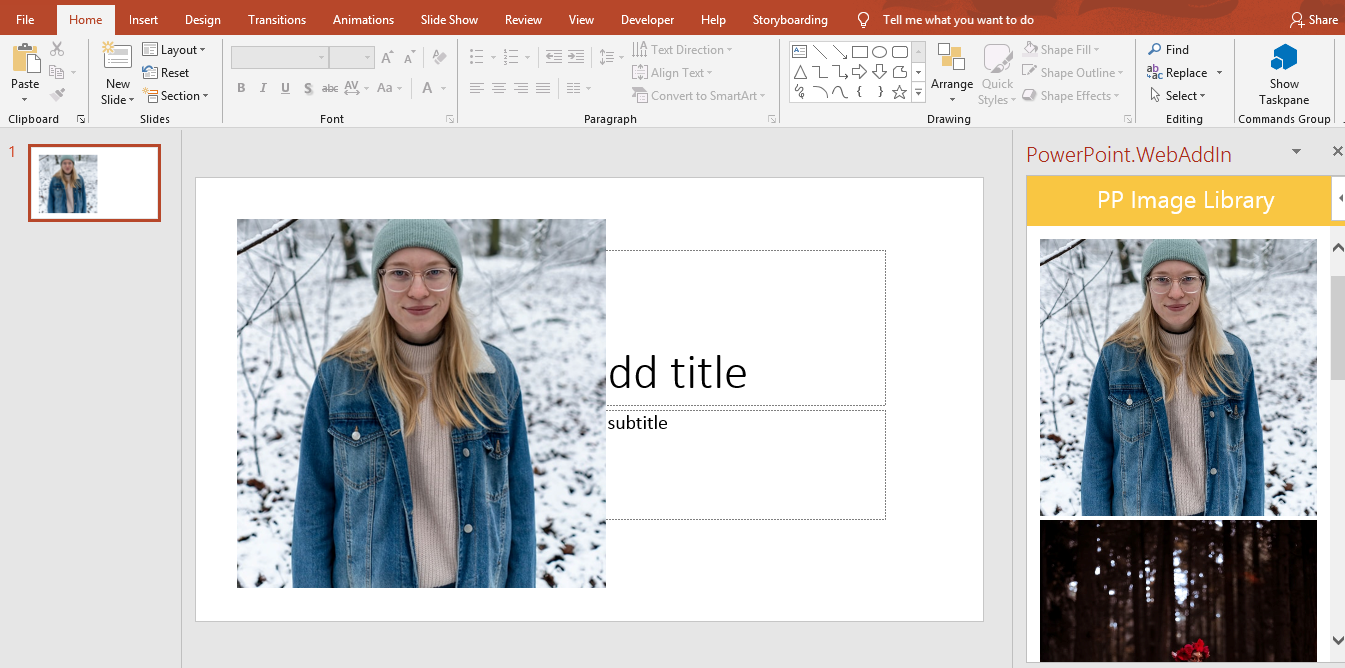
11. On Click of that, the task pane (home.html) will get opened and rendered with the Images.
12. On Click of any image, the corresponding image will be inserted into the Slide.
13. The InsertImage method is responsible for inserting the image into the slide.
function insertImage(id) {

        console.log(id);

        var src = $(id)[0].currentTarget.href;

        var img = document.getElementById($(id)[0].currentTarget.id);

        const canvas = document.createElement('canvas');
        const ctx = canvas.getContext('2d');
        canvas.width = img.naturalWidth;
        canvas.height = img.naturalHeight;

        //img.crossOrigin = 'anonymous';
        //img.setAttribute('crossOrigin', 'anonymous');
        ctx.drawImage(img, 0, 0);

        var temp = canvas.toDataURL().split(',')[1];


        //var reader = new FileReader();
        //reader.onloadend = function () {
        //    imagebase64 = reader.result;
        //};
        //reader.readAsDataURL(img.href);

        //Office.context.document.setSelectedDataAsync(getImageAsBase64String(src), {
        Office.context.document.setSelectedDataAsync(temp, {
            coercionType: Office.CoercionType.Image,
            imageLeft: 50,
            imageTop: 50
            //imageWidth: 400
            //imageHeight: canvas.height
        },
            function (asyncResult) {
                if (asyncResult.status === Office.AsyncResultStatus.Failed) {
                    console.log(asyncResult.error.message);
                }
            });
    }
In the next article, let us see how to Publish and Deploy this Add-In.
Happy Coding,
Sathish Nadarajan.

Leave a comment