In the previous article, we saw the preparatory steps for the App Development Environment. But on that, we did not see, how to configure the DNS as a Domain/Subdomain. Let us have a look on that now.
The most important change in SharePoint 2013 for developers is the introduction of SharePoint apps. An app for SharePoint is a small and isolated application that provides a specific bit of functionality. Apps have their own, isolated URLs, which are separate from the URLs of the sites where the app is being deployed to and where the app is being used.
In order to provide isolated apps run in their own domain, instead of in the same domain name as your farm. Using a different domain name for apps helps prevent cross-site scripting between apps and SharePoint sites.
Each installation of an app has its own unique URL within the app domain.
The app’s URL is based on a template “http://[app prefix][app hash].[app domain]/[relative site url]/[app name]. When you add an app to a site, a substite called appweb is created to host the app content.
Because apps run in their own app domain , The farm admin will have to configure Domain Name Services (DNS) in the environment in order to be able to host apps. There is a page on TechNet that describes how to setup you DNS.
The Fam administrator can choose whether he want’s your app domain to be a subdomain of the domain that hosts the SharePoint environment (option B), or whether you want to create a completely new domain for your apps (option A).
Creating a new domain specifically to host your apps in is a bit more secure, but it also requires a little bit more configuration. The below sub section describe both approaches.
Option A: Create a new domain to host Apps
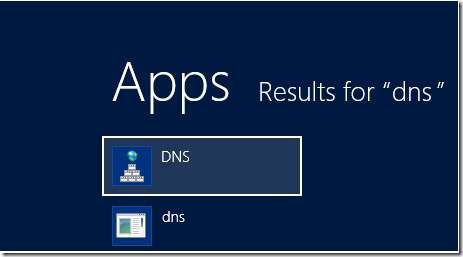
Go to “Start” menu in sharePoint 2013 Server.
Click on “Administrative Tools”
Select “DNS
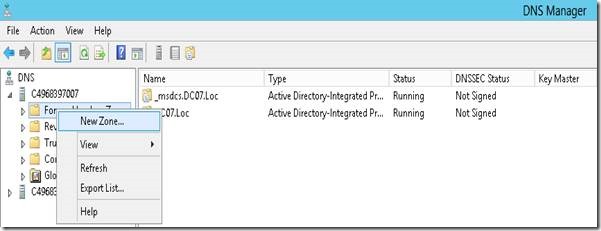
Right click “Forward Lookup Zones” and select “New Zone…”
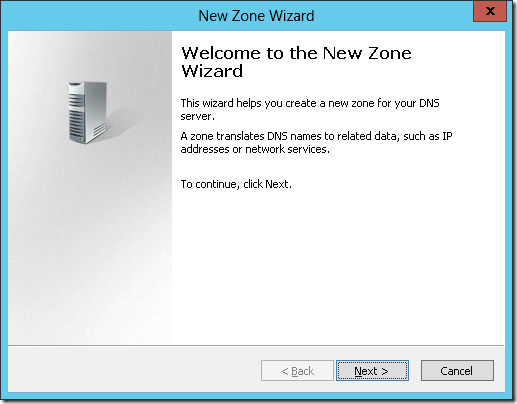
Click “Next”
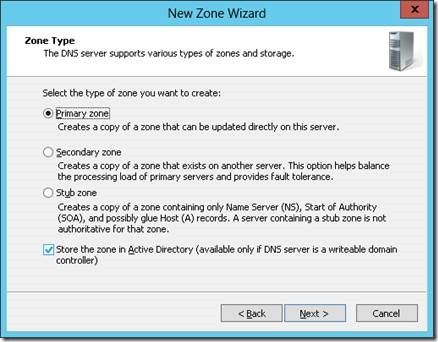
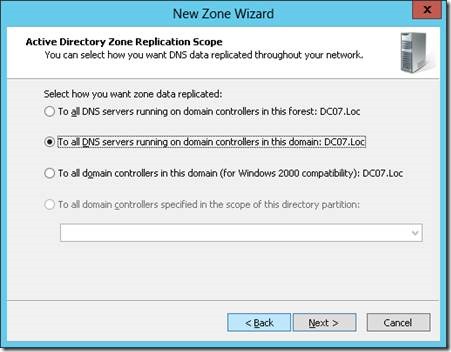
Keep the default and click “Next” again
In most cases, especially your development server will be in it’s own domain you can use the default on the next tab again and can just click “Next”
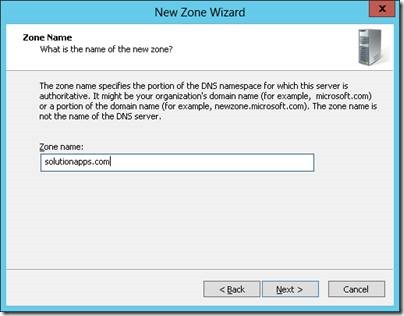
You now have to specify a zone name. It’s up to you what you choose here. My domain name is “solutions.com” and for our POC app domain. We will use “solutionapps.com”
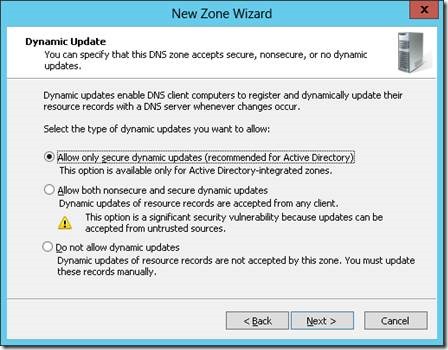
Click “Next”
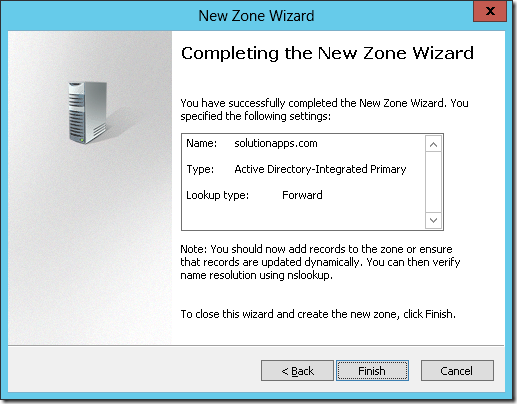
Click “Finish” button to complete the New Zone wizard.
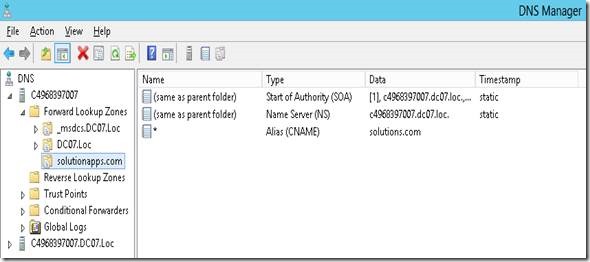
Right click on your new zone and select “New Alias (CNAME)…”
Fill in a * for “Alias name (uses parent domain if left blank)”
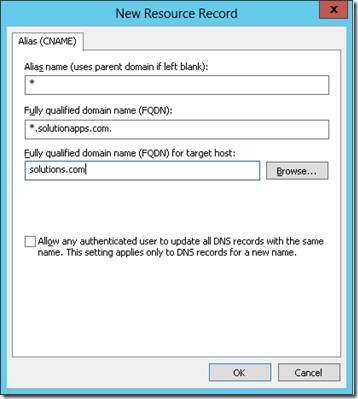
Click “Browse”
Double click on your server name
Double click “Forward Lookup Zones”
Double click the domain of your SharePoint environment. In my case this is “solutions.com”.
Select “(Same as parent folder)” and click “OK”
Click “OK”.
Note that selecting the FQDN of the domain in here will only work in single server scenarios. If you are using more than one server you should be pointing to the DNS record of the web server in here. This is either the DNS A record for the web server, or the DNS record of the primary cluster address for NLB environments.
Option B: Create a sub domain to host Apps
Go to “Start”
Click on “Administrative Tools”
Select “DNS”
![clip_image001[1] clip_image001[1]](/wp-content/uploads/be/clip_image001%5B1%5D_thumb_1.png)
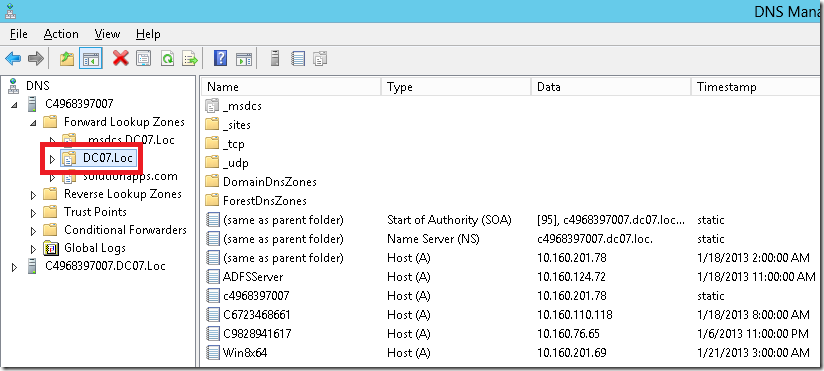
Right click on the name of your domain and select “New Alias (CNAME)…”
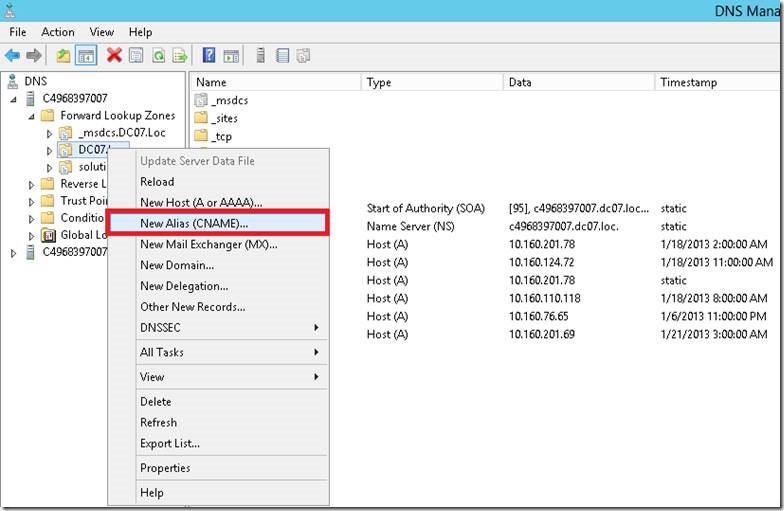
Fill in “*.app” for “Alias name (uses parent domain if left blank)”
Click “Browse”
Double click on your server name
Double click “Forward Lookup Zones”
Double click the domain of your SharePoint environment. In our case this is “DC07.Loc”
Select “(Same as parent folder)” and click “OK”
Click “OK”
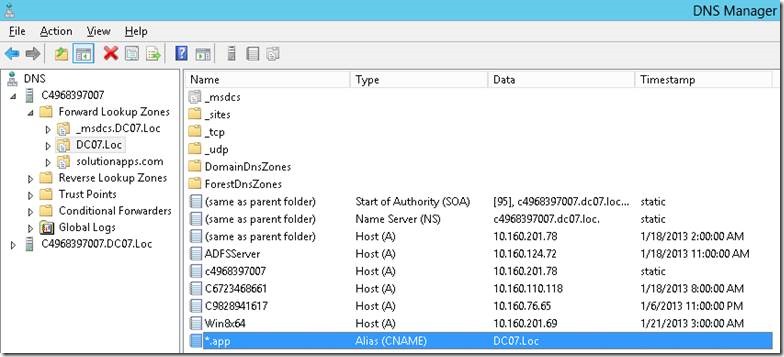
Note that selecting the FQDN of the domain in here will only work in single server scenarios. If you are using more than one server you should be pointing to the DNS record of the web server in here. This is either the DNS A record for the web server, or the DNS record of the primary cluster address for NLB environments.
Configuring App Domain
Go to Central Administration
Click on “Apps” in the left side navigation
Click “Configure App URLs”
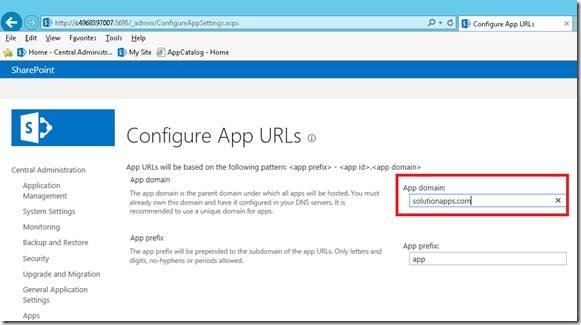
Fill in the URL of the app domain that you configured.
If you choose to use Option A the url will be something like “solutionapps.com”, if you choose to use Option B it will look like dc07.loc.
Fill in an app prefix. This can be anything you like, although it is best to keep this short. we used “app” for our POC
Click OK.
Happy Coding
Sathish Nadarajan



![clip_image001[1] clip_image001[1]](/wp-content/uploads/be/clip_image001%5B1%5D_thumb_1.png)


Leave a comment