How to Create Azure Function APP in Azure Portal and Trigger an EXE

Sathish Nadarajan
 
Solution Architect
May 6, 2018
 
Rate this article
 
Views
4967

In most of the times, dealing with Office 365 scheduled jobs, we are supposed to write some sort of Console Applications (EXEs) which will be scheduled to execute periodically from the Windows Task Scheduler of the Application Server. But, in recent days, customers do not want to maintain a Server for this application either don’t want to keep this Executables in their available server along with some other application, for the sake of isolation.

Hence, the other way is to host this EXE as a function APP in the Azure and configure the Function APP based on our timings.

In this article, let us see how to do that with a sample EXE which will insert a record on a SharePoint List. i.e., whenever the Function APP Executes, it will insert a record a list.

Note: There are various types of Triggers available for the Function APP. In this scenario, we are going to look at the “Timer Trigger”. In most of our requirements, we will be using either “Timer Trigger” or the “HTTP Trigger”

Now, let us see the step by step procedures.

1. Login to the Azure Portal.

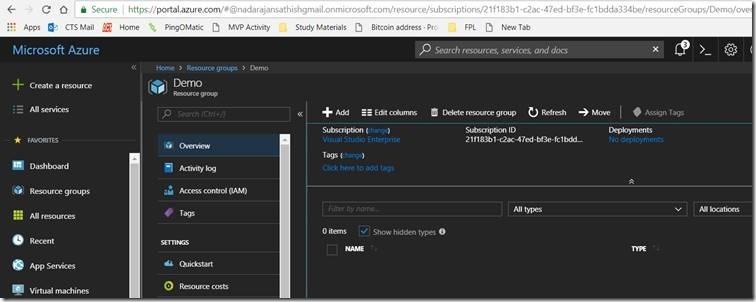
2. Go to the Resource group which we have. In my case, I have a Resource Group called “Demo”

clip_image002

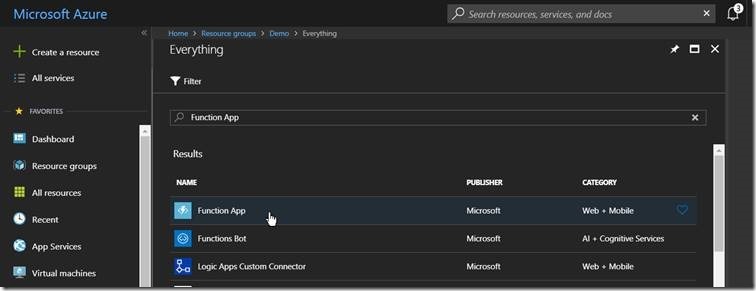
3. Click on the Add Button and type “function app”

clip_image004

4. Select the Function APP from the list.

clip_image006

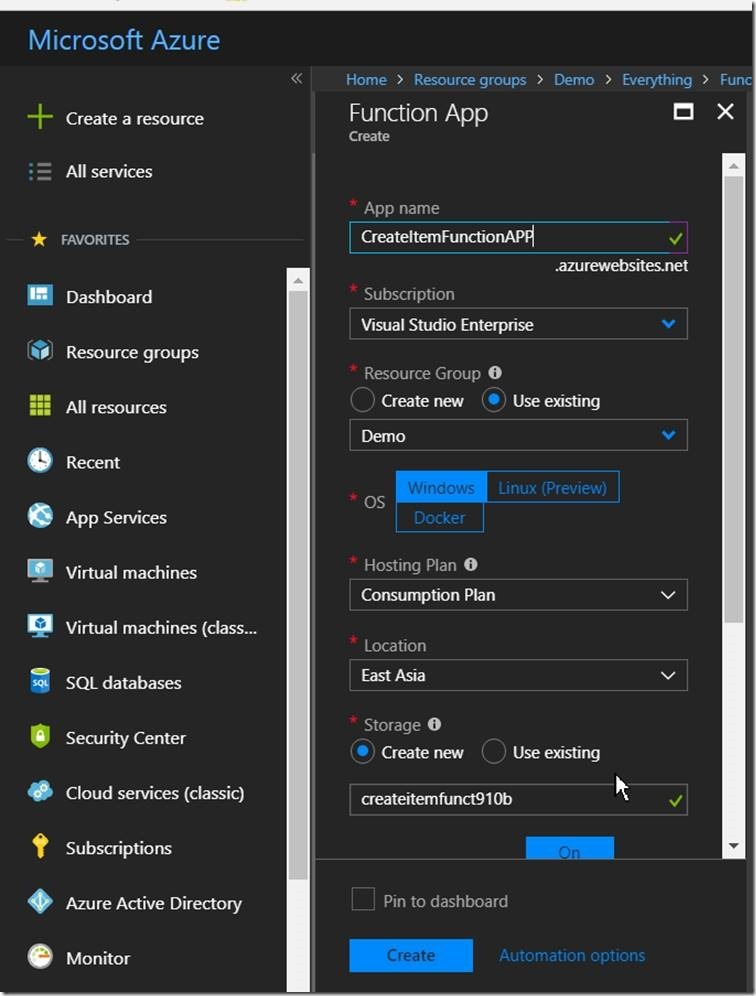
5. Enter the details of the Function APP and Click Create.

clip_image008

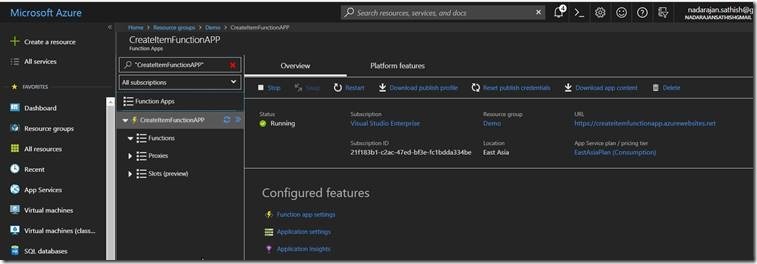
6. Once, the function app got created, go to the function app and click Add functions.

clip_image010

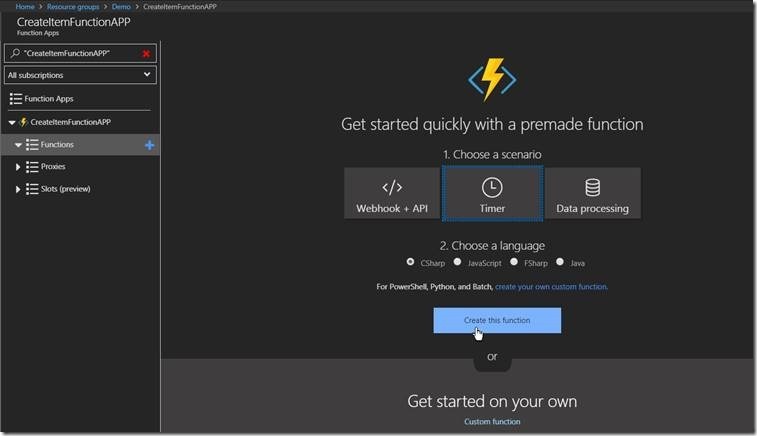
7. As we said in the beginning, let us create a function with a Timer as trigger.

clip_image012

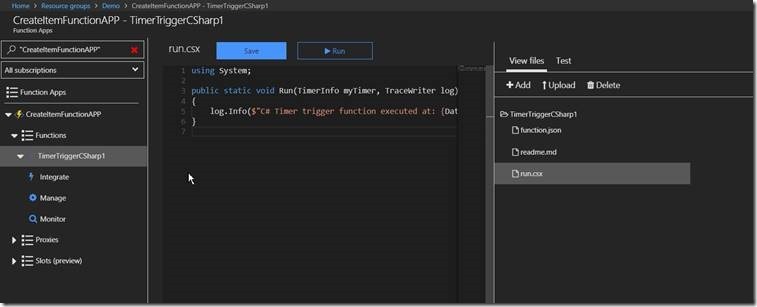
8. Once, it got created, we can see the default 3 files as below.

clip_image014

9. The functions.json is used to give the input and the configuration.

10. The Run.csx is the actual file, which can be treated as our Program.CS in the console application.

11. By default, a sample code will be given on the run.csx.

 using System;
 
 public static void Run(TimerInfo myTimer, TraceWriter log)
 {
     log.Info($"C# Timer trigger function executed at: {DateTime.Now}");
 }
 

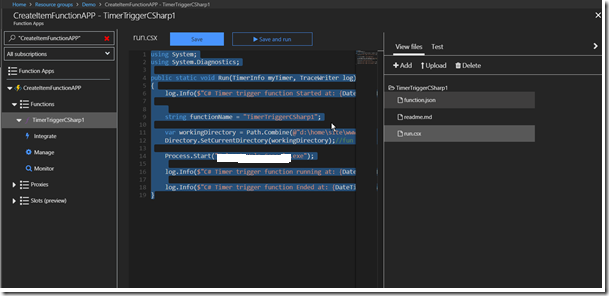
12. Replace the code with the below line of code.

 using System;
 using System.Diagnostics;
 
 public static void Run(TimerInfo myTimer, TraceWriter log)
 {
     log.Info($"C# Timer trigger function Started at: {DateTime.Now}");
 
     
     string functionName = "TimerTriggerCSharp1";
 
     var workingDirectory = Path.Combine(@"d:homesitewwwroot", functionName);
     Directory.SetCurrentDirectory(workingDirectory);//fun fact - the default working directory is d:windowssystem32
 
     Process.Start("FunctionAPP.InsertRecord.exe");
     
     log.Info($"C# Timer trigger function running at: {DateTime.Now}");
     
     log.Info($"C# Timer trigger function Ended at: {DateTime.Now}");
 }
 

13. On the screen, it will look like

image

14. On the right hand side, click on the “Upload” button and upload all the necessary files for the EXE to execute. Usually, I will be uploading all the files under bin/debug or bin/release.

15. After uploading the files, click on Run. The EXE will be executed and a new record will be inserted on the My Demo list.

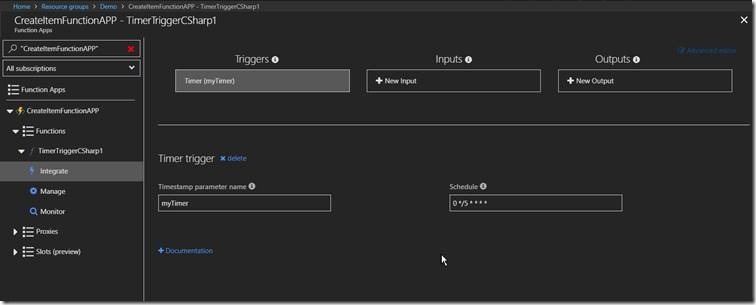
16. To configure the timer job, go to “Integrate” section and update the value on the Schedule.

clip_image018

Very straight forward. With this, we don’t require any physical server to host a repetitive tasks done on the SharePoint Office 365.

Happy Coding,

Sathish Nadarajan.
Category : Azure, Function APP

Author Info

Sathish Nadarajan
 
Solution Architect
 
Rate this article
 
Sathish is a Microsoft MVP for SharePoint (Office Servers and Services) having 15+ years of experience in Microsoft Technologies. He holds a Masters Degree in Computer Aided Design and Business ...read more
 

How to Execute EXE from SharePoint 2013 using Javascript.

Sathish Nadarajan
 
Solution Architect
June 15, 2015
 
Rate this article
 
Views
15375

In the last article, we saw how to execute an EXE by means of Central Admin Setting. But the same thing can also be done using the JavaScript. It has its own limitation. Anyhow, let us know about that. The limitation, let me post at the end.

The Javascript to execute is as follows. It is very simple and straight forward.

 <input type=”button” value=”Launch Notepad” onclick=”LaunchApp” />
 <script>
 function LaunchApp() {
 var ws = new ActiveXObject(‘WScript.Shell’);
 ws.Exec(‘C:\Windows\notepad.exe’);
 }
 < /script>
 

This requires the following Browser settings modifications as well. This is because, as we are using ActiveXObjects.

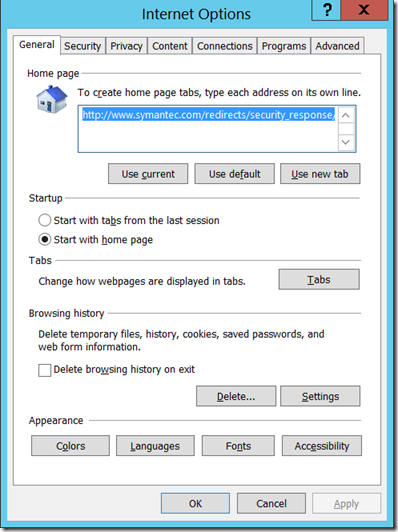
1. Open the Internet Options from the Tools Menu.

image

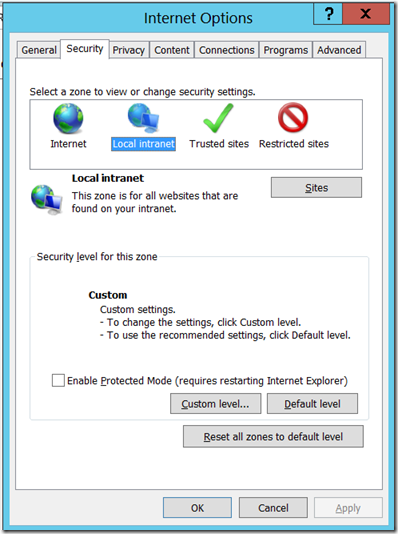
2. On the Security Tab, select the relevant Zone. i.e., either the Local intranet, trusted sites etc.,

image

3. Click on the Custom Level.

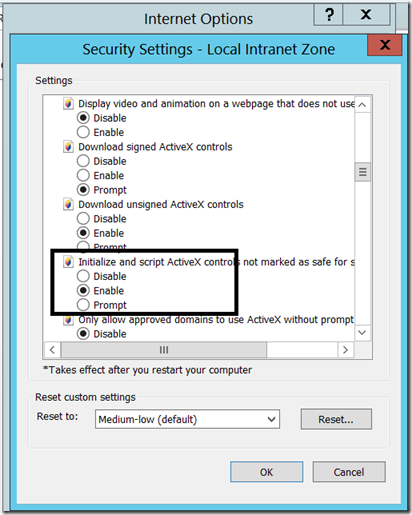
4. Select the “Initialize and Script ActiveX Controls not marked as safe” as enabled.

image

5. Clear the Cookies and Cache.

6. Refresh the browser and Click on the Link. The ActiveX objects will get initialized properly.

As I said earlier, the limitation is, this method will not execute an EXE which is being stored in the Document Library. This will retrieve only the default EXE’s from the Client Machine. In that scenario, we need to map the Document Library as a Network Folder on the Client’s Machine and then execute this. That involves a lot of training to the end user. Probably in very rare scenario, we can go with this, if there is no other option.

Happy Coding,

Sathish Nadarajan.
Category : JavaScript, SharePoint

Author Info

Sathish Nadarajan
 
Solution Architect
 
Rate this article
 
Sathish is a Microsoft MVP for SharePoint (Office Servers and Services) having 15+ years of experience in Microsoft Technologies. He holds a Masters Degree in Computer Aided Design and Business ...read more
 

How to Execute an EXE stored in a Document Library directly in Client’s Machine in SharePoint 2013

Sathish Nadarajan
 
Solution Architect
June 14, 2015
 
Rate this article
 
Views
17261

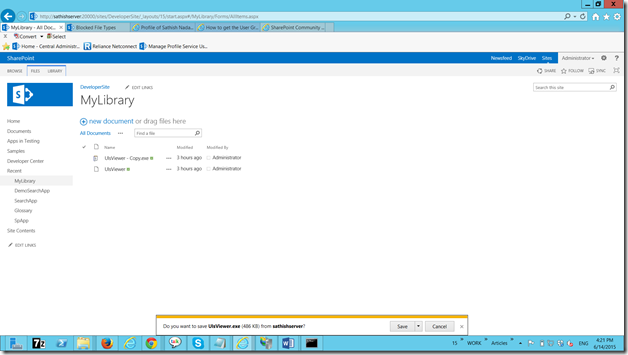
Recently in our application, I met with some requirement like, there are certain tools (utilities/EXE’s) were there, which were stored on the Document Libraries. When the End User clicks on those links, they are asking for the default SAVE, SAVE AS Options alone. As shown in the figure below.

image

There is no Run Option. i.e., if the user is a frequent user, then the download is happening whenever he clicks on the link. To avoid this, and to make a User friendly approach, on click, directly it should Run. It will ask for your permission. That we cannot avoid. But, the download will not happen frequently.

To achieve, this again, let us go by step by step. In the Previous article, we saw how to upload the EXE files into SharePoint Document Library.

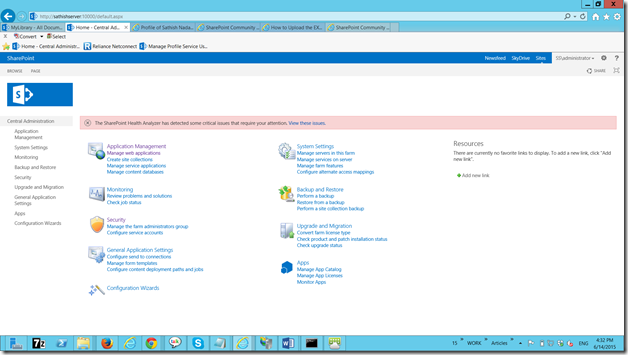
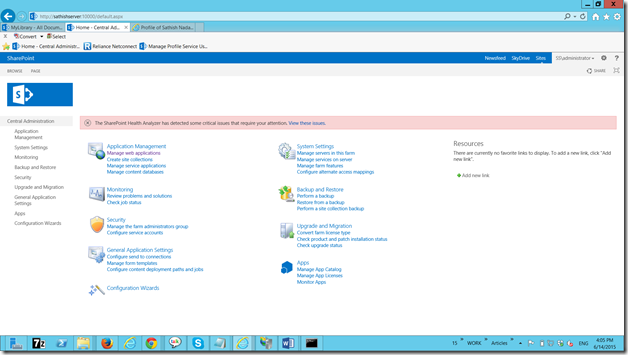
1. Go to Central Administration.

image

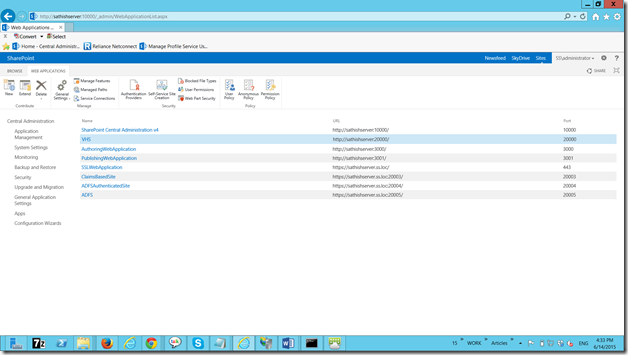
2. Go to Manage Web Applications.

image

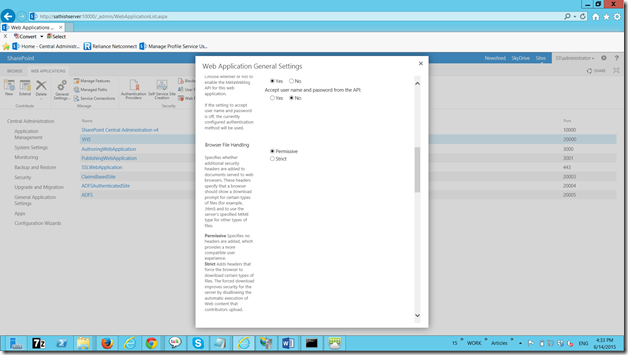
3. Select the Web Application and Click on General Settings.

image

4. On the Browse file Handling Section, select Permissive. By default, it will be Strict.

5. Click OK and come back.

6. Click on the EXE from your document library.

7. We will get the third option called Run.

image

For the testing purpose, I have created a TrialWindows.exe and uploaded.


Happy Coding,

Sathish Nadarajan.
Category : SharePoint

Author Info

Sathish Nadarajan
 
Solution Architect
 
Rate this article
 
Sathish is a Microsoft MVP for SharePoint (Office Servers and Services) having 15+ years of experience in Microsoft Technologies. He holds a Masters Degree in Computer Aided Design and Business ...read more
 

How to Upload the EXE, MSI Files into SharePoint 2013 Document Library

Sathish Nadarajan
 
Solution Architect
 
Rate this article
 
Views
17098

After a long time, I thought of sharing this simple steps to the community. The title will tell the requirement. i.e., by default, SharePoint does not allow the end user to Upload the Executable into SharePoint Document Library. We need to make a small settings change in the Central Administration level.

Let see that step by step.

1. Go To Central Administration.

image

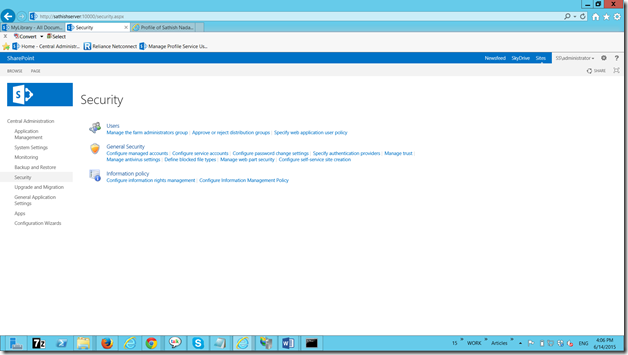
2. Select the Security Tab.

image

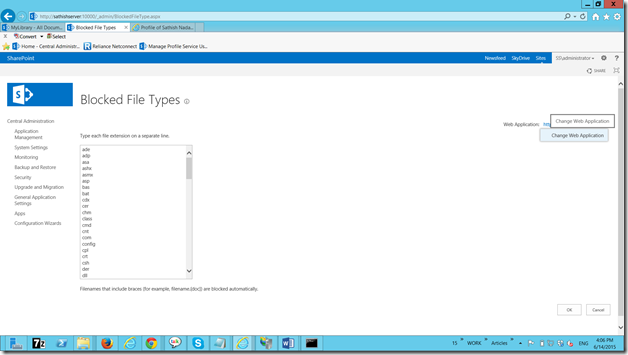
3. Under General Security, Click on the “Define Blocked file Types”.

image

4. The screen comprises the Change Web Application option and the list of files listed on a list box. Select the web application appropriately.

5. Then in the List Items, delete the EXE and MSI Files (Here each file extension is separated/listed in each lines).

6. Let me remove the EXE and MSI.

7. Click on OK.

8. That’s it. Now, if we try upload EXE in the Web Application, your system will allow you to upload.

The default other blocked file extensions are

ade

adp

asa

ashx

asmx

asp

bas

bat

cdx

cer

chm

class

cmd

cnt

com

config

cpl

crt

csh

der

dll

fxp

gadget

grp

hlp

hpj

hta

htr

htw

ida

idc

idq

ins

isp

its

jse

json

ksh

lnk

mad

maf

mag

mam

maq

mar

mas

mat

mau

mav

maw

mcf

mda

mdb

mde

mdt

mdw

mdz

msc

msh

msh1

msh1xml

msh2

msh2xml

mshxml

msi

ms-one-stub

msp

mst

ops

pcd

pif

pl

prf

prg

printer

ps1

ps1xml

ps2

ps2xml

psc1

psc2

pst

reg

rem

scf

scr

sct

shb

shs

shtm

shtml

soap

stm

svc

url

vb

vbe

vbs

vsix

ws

wsc

wsf

wsh

xamlx

The above steps are common for the WebApplication. There is no option, that a single document library can accept this. This is a generic settings.

Happy Coding,

Sathish Nadarajan.
Category : SharePoint

Author Info

Sathish Nadarajan
 
Solution Architect
 
Rate this article
 
Sathish is a Microsoft MVP for SharePoint (Office Servers and Services) having 15+ years of experience in Microsoft Technologies. He holds a Masters Degree in Computer Aided Design and Business ...read more
 

Leave a comment