How TaxonomyField Managed Property renders on Search Service Application in SharePoint 2013

Sathish Nadarajan
 
Solution Architect
May 14, 2015
 
Rate this article
 
Views
18280

In the last article, we saw how to do a CAML Query execution against the taxonomy field. In this article, again, let us discuss about the Managed Properties and How to do a Search based on the Taxonomy Field.

Basically, Managed Metadata Service Application and the Search Service Application are more of a kind of integral architecture. And one important interesting thing is, when we search for a Term, there are certain options like, whether the Results mapped to the Child Terms should also come or not.

In detail, Let us assume that, we have a Term called Term1 and a child term called Term11. When I search for the records which are mapped for Term1, then obviously the records mapped for Term11 will also come. We can restrict this as well.

To do that, the Search Query will be as below. This example is for the OOB Content Search WebPart.

To retrieve the Child Terms

owsTaxIdMyTerm: {Term.IDWithChildren} -> This will retrieve the Term from the Navigation and render the results with Children.

owsTaxIdMyTerm: {Term} or {Term.ID} or {Term.IDNoChildren} – This will retrieve only the current term and not the child terms.

The same thing during the custom content Search WebPart can be as below.

owsTaxIdMyTerm:#0<<TermGUID>> – This will retrieve the Term from the Navigation and render the results with Children.

owsTaxIdMyTerm:#<<TermGUID>> – This will retrieve only the current term and not the child terms.

The sample query would be

"(" + MyTaxonomyColumn1 + ":#0" + strTermid + " OR " + MyTaxonomyColumn2 + ":#0" + strTermid + ")

As I said, earlier I am not sure how the Search Service Application differentiates between the #0 and #.

When I closely looked at the results given on the ManagedProperty of a TaxonomyField,

GP0|#<<GUID of the Term>>;L0|#0<<GUID of the Term>>|<<Term Name>>;GTSet|#<<GUID of TermSet>>;GPP|#<<Guid of the Parent Term>>;GPP|#<<Guid of the Parent Term>>

The GPP is the Parent Term GUID till the top most Parent Term.

In case of a Multi Value column, the Managed Property would be separated by a ‘;’.

When I was struggling with this kind of requirement, the Technet Article helped a lot. I request the readers to go through that as well to get a clear understanding about this.

Again, this kind of information will not be required frequently. But when we got struck with this kind of requirement, then we will require this for sure. Post your queries on the below discussion section for further information.

Happy Coding,

Sathish Nadarajan.

Category : Search, SharePoint

Author Info

Sathish Nadarajan
 
Solution Architect
 
Rate this article
 
Sathish is a Microsoft MVP for SharePoint (Office Servers and Services) having 15+ years of experience in Microsoft Technologies. He holds a Masters Degree in Computer Aided Design and Business ...read more
 

Cross Site Publishing – Managed Property and Crawled Property – Part 5

Sathish Nadarajan
 
Solution Architect
March 2, 2015
 
Rate this article
 
Views
15127

Managed Property and Crawled Property

Before diving deep into this, let us try to understand what these properties are at a high level. This will definitely help us for a better understanding.

A crawled property is content and metadata that is extracted from an item, such as a document or a URL, during a crawl. In simple, a crawled property is nothing but a metadata for a SiteColumn. It may not be handled by the developers, but with the help of a Managed Property, we can extract the metadata from Crawled Property. We cannot create the Crawled Property on our own. SharePoint will create the Crawled Property. We can create the Managed Property and Map the Managed Property to the Crawled Property. So that these Managed Properties will be used by the search queries, webparts etc.,

Now, coming to the step by step approach.

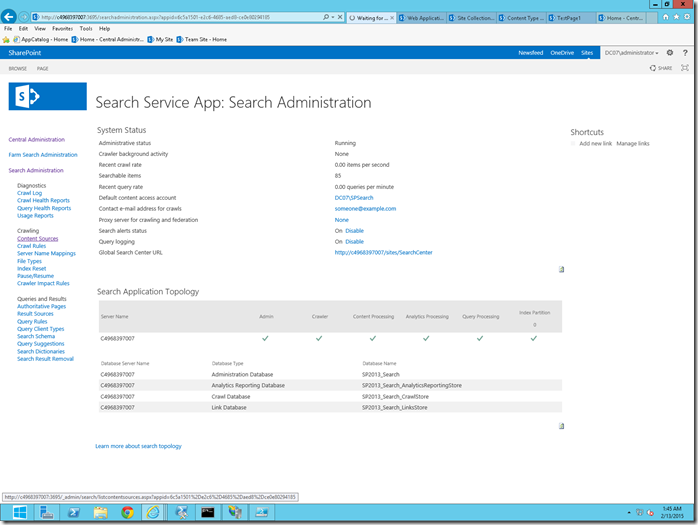
1. Let us do a Full Crawl. To do a full crawl, let me login to the Central Admin -> Search Service Application.

image

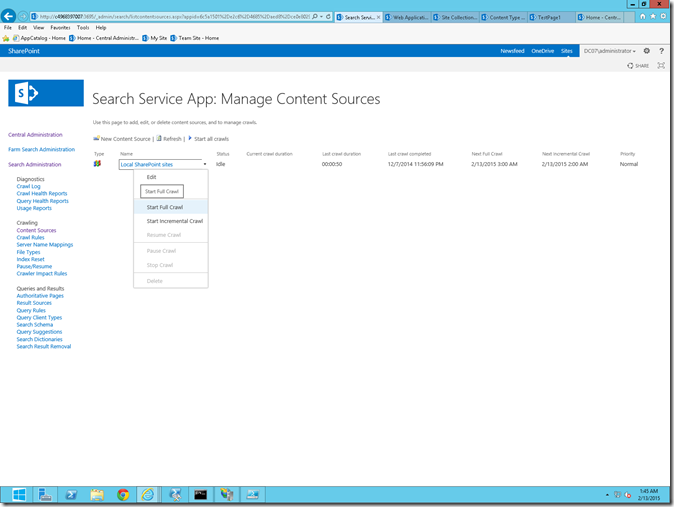
2. Click on the Content Sources. Select the Content Source and from the Context Menu, Select the “Start Full Crawl”

image

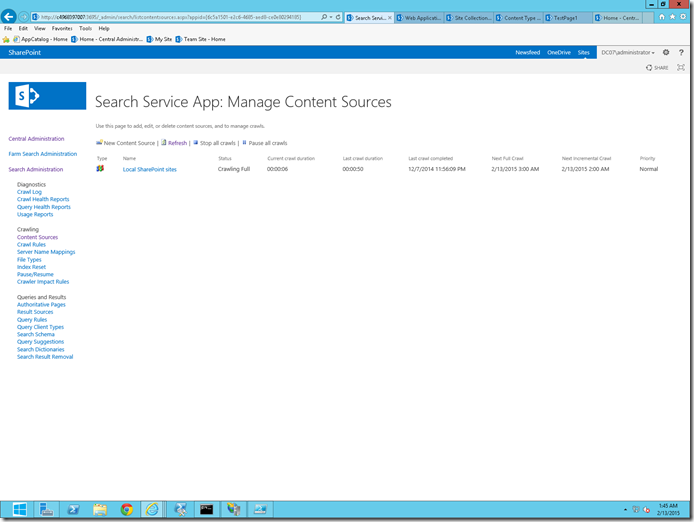
3. During the Crawl, the status will be “Crawling Full”

image

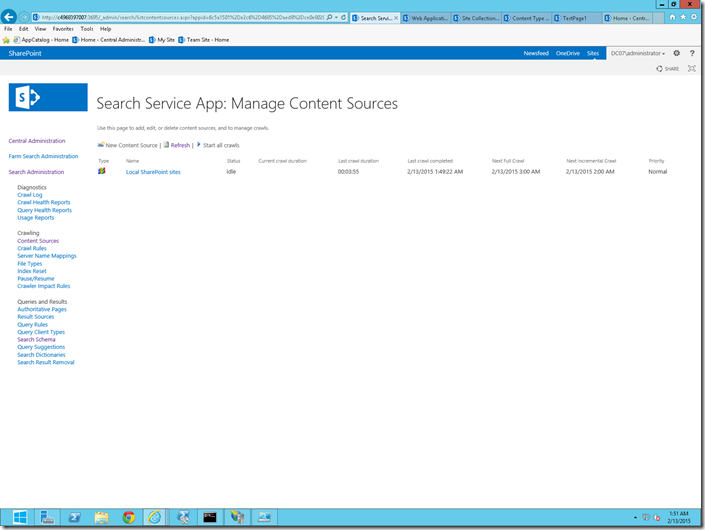
4. Wait until the Status becomes “Idle”. This means the Crawl Completed. View the logs for verification. If any error happened during the Crawl, it would have been captured on the Crawl Logs. But as of now, as we don’t have much on our farm, there is no error.

image

5. Once, the crawl completed, make sure the Crawled Property got created. For that, let us go to Central Admin -> Search Service Application-> Search Schema. Select the Crawled Property Link.

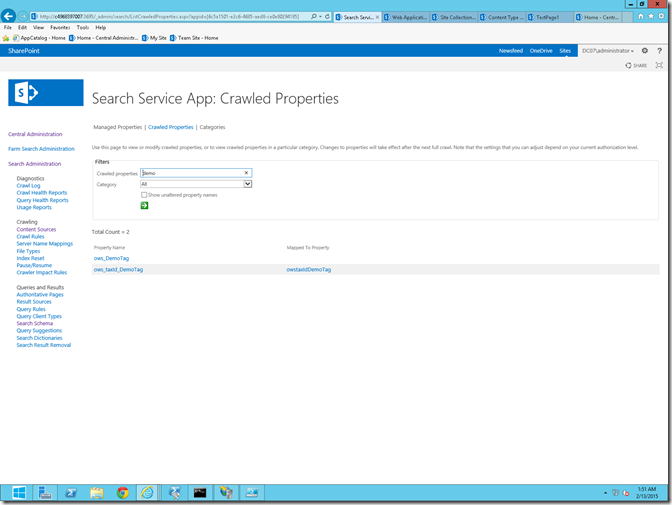
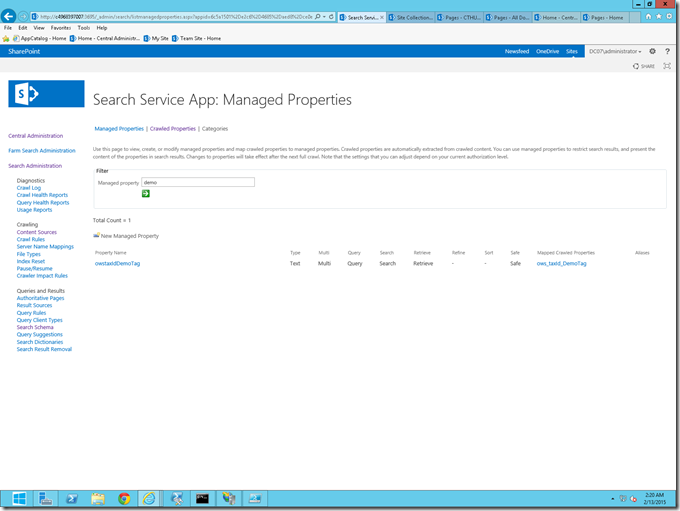
6. Search for a keyword called “Demo”. We will be able to see the following property.

image

7. Make sure that Managed Properties got created.

image

8. With this, our Managed Properties and Crawled Properties got created and mapped Properly. If the Managed Property does not created by default, then we need to create it manually using PowerShell Scripts.

9. We can use the below script to create the Managed Property.

#Get the Search SErvice Application

$cat = Get-SPEnterpriseSearchMetadataCategory –SearchApplication $searchapp –Identity $_.Category

#Get the Crawled Property First

$cp = Get-SPEnterpriseSearchMetadataCrawledProperty -SearchApplication $searchapp -name $_.CrawledPropertyName -Category $cat -ea silentlycontinue

#If the Crawled Property is not null, then go inside

if ($cp)

{

# Check whether Managed Property already exists

$property = Get-SPEnterpriseSearchMetadataManagedProperty -SearchApplication $searchapp -Identity $_.ManagedPropertyName -ea silentlycontinue

if ($property)

{

Write-Host -f yellow "Cannot create managed property" $_.ManagedPropertyName "because it already exists"

$ExistingManagedProp = "Cannot create managed property " + $_.ManagedPropertyName + " because it already exists" | out-file "$path\ExistingManagedProp.txt" -append

}

else

{

# If already not there, then create Managed Property

New-SPEnterpriseSearchMetadataManagedProperty -Name $_.ManagedPropertyName -SearchApplication $searchapp -Type $_.Type -Description $_.Description

#Get the managed Property which Just now, we created

$mp = Get-SPEnterpriseSearchMetadataManagedProperty -SearchApplication $searchapp -Identity $_.ManagedPropertyName

#Map the Managed Property with the Corresponding Crawled Property

New-SPEnterpriseSearchMetadataMapping -SearchApplication $searchapp -ManagedProperty $mp –CrawledProperty $cp

}

}

else

{

Write-Host -f Yellow "The specified crawled property " $_.CrawledPropertyName " does not exists… Please check whether you have given valid crawled property name"

$a = "The specified crawled property " + $_.CrawledPropertyName + " does not exists… Please check whether you have given valid crawled property name"| out-file "$path\CrawledPropErrorLogs.txt" -append

}

10. The Managed Property should be Retrievable, Searchable, Queryable, Refinable etc., For that, we can execute the below script.

$searchapp = Get-SPEnterpriseSearchServiceApplication

$ManagedProperty = Get-SPEnterpriseSearchMetadataManagedProperty -SearchApplication $searchapp -Identity $_.ManagedPropertyName -ea silentlycontinue

if($ManagedProperty)

{

$ManagedProperty.Searchable = $true

$ManagedProperty.Queryable = $true

$ManagedProperty.Sortable = $true

$ManagedProperty.Retrievable = $true

$ManagedProperty.Refinable = $true

$ManagedProperty.SafeForAnonymous = $true

$ManagedProperty.update()

write-host "The searchable, queryable, Sortable, Retrievable and Refinable for the managed property" $_.ManagedPropertyName "has been enabled successfully …… Done !" -fore green

}

else

{

Write-Host -f Yellow "The specified managed property " $_.ManagedPropertyName " does not exists… Please check whether you have given valid managed property name"

$a = "The specified managed property " + $_.ManagedPropertyName + " does not exists… Please check whether you have given valid crawled property name"| out-file $OutputPath -append

}

Let us see about the Enable Library as a Catalog in Part6

Happy Coding.

Sathish Nadarajan.

Author Info

Sathish Nadarajan
 
Solution Architect
 
Rate this article
 
Sathish is a Microsoft MVP for SharePoint (Office Servers and Services) having 15+ years of experience in Microsoft Technologies. He holds a Masters Degree in Computer Aided Design and Business ...read more
 

Cross Site Publishing – Managed Metadata Service Application Creation – Part 3

Sathish Nadarajan
 
Solution Architect
February 23, 2015
 
Rate this article
 
Views
9974

Create Managed Metadata Service Application.

Follow the Steps to create the Managed Metadata Service Application.

1. Go to Central Admin->Manage Service Applications

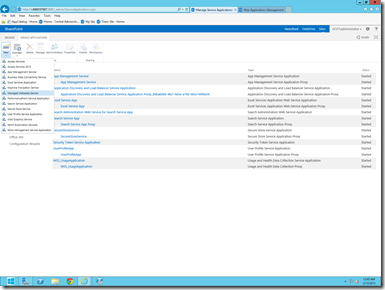
2. Click on New and Select Managed Metadata Service

image

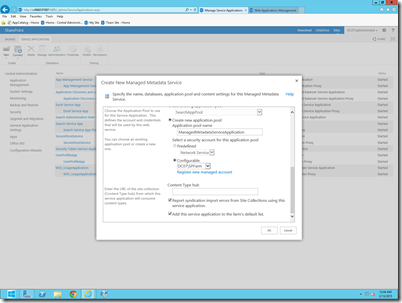
3. Key in the Name as “ManagedMetadataServiceApplication” and the necessary information as below.

image

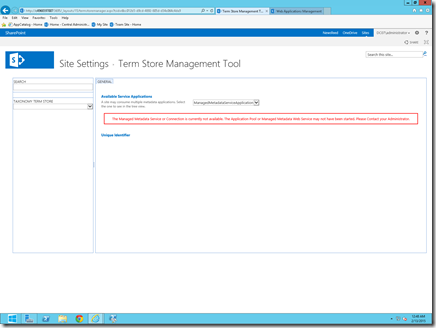
4. As soon as it got created, if we try to open, we may get the below error page.

image

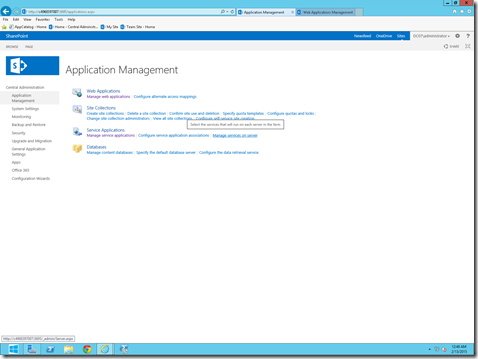
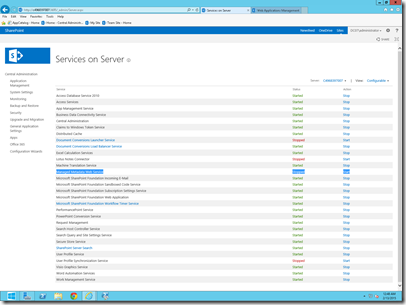
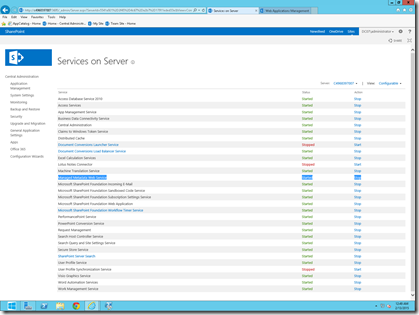
5. For this make sure that the “Managed Metadata Web Service” has been started. To do that, follow the screen shots.

image


image

image


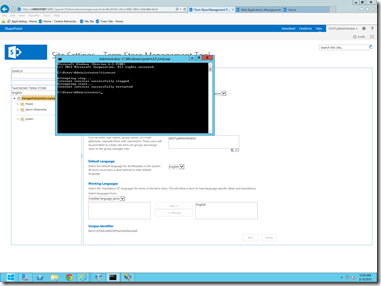
6. Then do an IISRESET

image

7. Now go back to Managed Metadata Service Application. We will be able to see the default term sets.

image

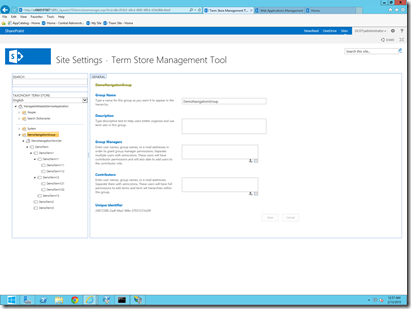
8. On that, let me create a Term group called – DemoNavigationTermGroup and create the terms as shown in the below figure.

image

Let us see about the Content Type Creations in Part4

Happy Coding.

Sathish Nadarajan.

Author Info

Sathish Nadarajan
 
Solution Architect
 
Rate this article
 
Sathish is a Microsoft MVP for SharePoint (Office Servers and Services) having 15+ years of experience in Microsoft Technologies. He holds a Masters Degree in Computer Aided Design and Business ...read more
 

How to Update Managed Property as Searchable, Queryable, Sortable, Refinable, Retrievable in SharePoint 2013 using PowerShell

Sathish Nadarajan
 
Solution Architect
February 3, 2015
 
Rate this article
 
Views
20352

In the previous article, we saw How to create a Managed Property in SharePoint 2013 using PowerShell.

In this article, let us see how to Update Managed Property with various properties.

The script is as follows.

 $LogTime = Get-Date -Format yyyy-MM-dd_hh-mm
 $LogFile = ".UpdateManagedPropertyPatch-$LogTime.rtf"
 
 #start-transcript $logfile
 
 # Add SharePoint PowerShell Snapin
 
 
 if ( (Get-PSSnapin -Name Microsoft.SharePoint.PowerShell -ErrorAction SilentlyContinue) -eq $null ) {
     Add-PSSnapin Microsoft.SharePoint.Powershell
 }
 
 $scriptBase = split-path $SCRIPT:MyInvocation.MyCommand.Path -parent
 Set-Location $scriptBase
 
 $OutputPath = $scriptBase + "" + "ManagedPropErrors.txt"
 
 
 if (test-path $OutputPath)
 {
     remove-item $OutputPath
 }
 
 
 $csvfile = $scriptBase + "" + "EditManagedProp.csv"
 Import-csv $csvfile | where {
 
 $searchapp = Get-SPEnterpriseSearchServiceApplication
 
 $ManagedProperty = Get-SPEnterpriseSearchMetadataManagedProperty -SearchApplication $searchapp -Identity $_.ManagedPropertyName -ea silentlycontinue
 
 if($ManagedProperty)
 {
     $ManagedProperty.Searchable = $true
     $ManagedProperty.Queryable = $true
     $ManagedProperty.Sortable = $true
     $ManagedProperty.Retrievable = $true
     $ManagedProperty.Refinable = $true
     $ManagedProperty.SafeForAnonymous = $true
     $ManagedProperty.update()
     write-host "The searchable, queryable, Sortable, Retrievable and Refinable for the managed property" $_.ManagedPropertyName "has been enabled successfully ...... Done !" -fore green
 }
 else
 {
     Write-Host -f Yellow "The specified managed property " $_.ManagedPropertyName " does not exists... Please check whether you have given valid managed property name"
     $a = "The specified managed property " + $_.ManagedPropertyName + " does not exists... Please check whether you have given valid crawled property name"| out-file $OutputPath -append
 }
 
 
 }
 #stop-transcript 
 

DOWNLOAD HERE

Happy Coding.

Sathish Nadarajan.

Author Info

Sathish Nadarajan
 
Solution Architect
 
Rate this article
 
Sathish is a Microsoft MVP for SharePoint (Office Servers and Services) having 15+ years of experience in Microsoft Technologies. He holds a Masters Degree in Computer Aided Design and Business ...read more
 

Sharepoint 2013: Programmatically creating Managed Metadata column & mapping it with termset.

Arunraj Venugopal
 
SharePoint Developer
October 15, 2014
 
Rate this article
 
Views
27023

Let us discuss the creation of a Managed Metadata column in a site, adding the managed metadata column in a site content type and mapping the metadata column with the termset in Sharepoint 2013.

Step1:

Creating managed metadata column by using field element in visual studio.

 <Field
          Type="TaxonomyFieldTypeMulti"   DisplayName="Tag" StaticName="AceTag"   Name="WCMAceTag"  Group="ACE Custom Columns" ShowField="Term1033"
          Description="Tagging metadata site column for tagging article content category."  Required="FALSE"  EnforceUniqueValues="FALSE" ID="{7B311B12-295F-4923-8D7E-A0B4CBB0E050}"
          DisplaceOnUpgrade="TRUE" Overwrite="TRUE" Mult="TRUE">
     <Customization>
       <ArrayOfProperty>
         <Property>
           <Name>TextField</Name>
           <Value xmlns:q6="http://www.w3.org/2001/XMLSchema"
                  p4:type="q6:string"
                  xmlns:p4="http://www.w3.org/2001/XMLSchema-instance">{A7B047A8-8FAD-4C1C-A14A-434ECB84CAD1}</Value>
         </Property>
       </ArrayOfProperty>
     </Customization>
   </Field>
 

Major Attributes Information:

Mult: The mult attribute should be true if the type of the managed metadata column is multi values

ShowField: It should Term1033

ID: it should be created using Tools->Create Guid which is different from the id of xmlns:p4="http://www.w3.org/2001/XMLSchema-instance">{A7B047A8-8FAD-4C1C-A14A-434ECB84CAD1}</Value>

Step2: Adding a column in a content type.

Step2.1: Right click on the project and select option “Add” to create a content type file.

Step2.2 Select Content type and provide a name for it.

Step2.3 Add the above column in the <FieldRef> </FieldRef>

E.g.:

<FieldRef DisplayName="Tag" Name="WCMAceTag" Description="Tagging metadata site column for tagging article content category." Required="FALSE" ID="{7B311B12-295F-4923-8D7E-A0B4CBB0E050}" />

Step3: Adding content type in a list which will be created using visual studio’s wizard.

Step3.1: Create a project in visual studio

Step3.2: Select a valid site collection url

Step3.3: Select an option “Sandbox or Farm”

Step3.4: Right click on the project and click add option to create a list

Step3.5: Select a list option in dialog box and provide a name.

Step3.6: Double click on the newly added list instance and click content type.

Step3.7: Select a content type which is newly added in the content type.

Note: Close a solution once it is saved and open the solution to add the content type if you don’t find it at the first time. Check the content is deployed in the site collection properly.

Step4: Add an event receiver in the content type feature by right click on the feature and click Add to include the event receiver.

Include the following code in the feature activation.

 SPSecurity.RunWithElevatedPrivileges (delegate()
             {
                 using (SPSite CurrentSite = properties.Feature.Parent as SPSite)
                 {
 
                     Guid fieldDepartment = new Guid("{78E7263A-6860-4705-ACE5-DEB5B07BFC21}");
                     AssociateMetadata(CurrentSite, fieldDepartment, "Content", "Department");
 
                     Guid fieldTag = new Guid("{7B311B12-295F-4923-8D7E-A0B4CBB0E050}");
                     AssociateMetadata(CurrentSite, fieldTag, "NET", "StateMap");
 }});
 

Parameter Details:

fieldDepartment is required to have a guid which is for notes field associated with metadata column declaration.

Content and Net are the group name of the term store management.

Statemap and Department are the termset for which the managed metadata column will be mapped.

AssociateMetadata column is a method which will use to map the column using the above parameters

    private void AssociateMetadata(SPSite CurrentSite, Guid fieldId, string _MMSGroupName, string _MMSTermsetName)
         {
             string _MMSServiceAppName = " "ManagedMetadataServiceApplication";
             if (CurrentSite.RootWeb.Fields.Contains(fieldId))
             {
                 TaxonomySession session = new TaxonomySession(CurrentSite);
 
                 if (session.TermStores.Count != 0)
                 {
 
                     var termStore = session.TermStores[_MMSServiceAppName];
 
                     foreach (Group grp in termStore.Groups)
 
                     {
 
                         if (grp.Name.ToUpper() == _MMSGroupName.ToUpper())
                         {
                             var group = grp;
                             var termSet = group.TermSets[_MMSTermsetName];
                             TaxonomyField field = CurrentSite.RootWeb.Fields[fieldId] as TaxonomyField;
                             field.SspId = termSet.TermStore.Id;
                             field.TermSetId = termSet.Id;
                             field.TargetTemplate = string.Empty;
                             field.AnchorId = Guid.Empty;
                             field.Update();
 
                             break;
                         }
                     }
                 }
             }


         }
 

Include the following code in the feature deactivation

 SPSecurity.RunWithElevatedPrivileges(delegate()
            {
                using (SPSite CurrentSite = properties.Feature.Parent as SPSite)
                {
 
 
                    Guid fieldDepartment = new Guid("{78E7263A-6860-4705-ACE5-DEB5B07BFC21}");//new Guid("{78E7263A-6860-4705-ACE5-DEB5B07BFC21}");
                    DeAssociateMetadata(CurrentSite, fieldDepartment);
 
                    Guid fieldTag = new Guid("{7B311B12-295F-4923-8D7E-A0B4CBB0E050}");
                    DeAssociateMetadata(CurrentSite, fieldTag);
 }
 });


.

DeAssociateMetadata is method that will remove the mapping between managed metadata column and ther termset.

 private void DeAssociateMetadata(SPSite currSite, Guid fieldId)
         {
             if (currSite.RootWeb.Fields.Contains(fieldId))
             {
                 TaxonomyField field = currSite.RootWeb.Fields[fieldId] as TaxonomyField;
 
                 field.SspId = Guid.Empty;
                 field.TermSetId = Guid.Empty;
 
                 field.TargetTemplate = string.Empty;
                 field.AnchorId = Guid.Empty;
                 field.Update();
             }
 
         }
 

Note: The example is based on the site collection level feature.
Author Info

Arunraj Venugopal
 
SharePoint Developer
 
Rate this article
 
Works as a SharePoint Developer in a CMM Level 5 Company ...read more
 

How to Use Content Type Hub in SharePoint 2013

Sathish Nadarajan
 
Solution Architect
May 25, 2014
 
Rate this article
 
Views
48466

Content Type Hub – A wonderful concept which Microsoft introduced on the era of SharePoint 2010 itself. Let us see what it is, why we require that, and how to use that on this article.

What it is?

A Centralized site collection on which we will create all our site columns and Content Types and through the Managed Metadata Service Application, these Content Types can be used across our SPFarm. i.e., other site collections can use these content types.

Why we require this?

When we are dealing with more than one Site Collections, i.e., Preview, staging and actual site collections, we may require to create same content type on all of the a above mentioned site collections. To avoid that, we can create the content type on the Content Type Hub Site collection and we can use those content types across our required site collections.

How to use that?

Let us see, how to use the content type hub in sharepoint 2013.

Let us see that with step by step procedures.

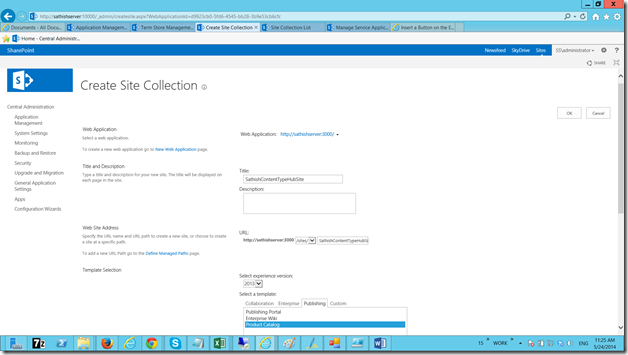
1. Let us create our SiteCollection for the Content Type Hub.

image

I have chosen the Product Catalog Template.

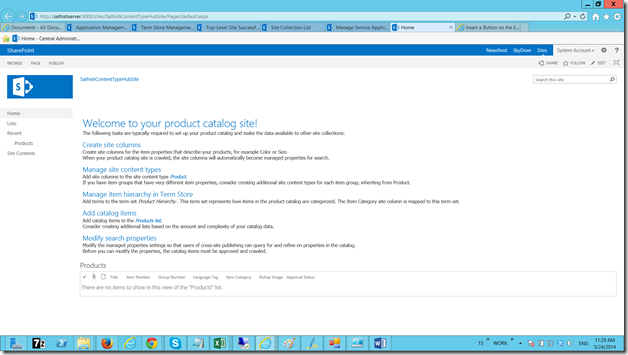
2. The site will look like below.

image

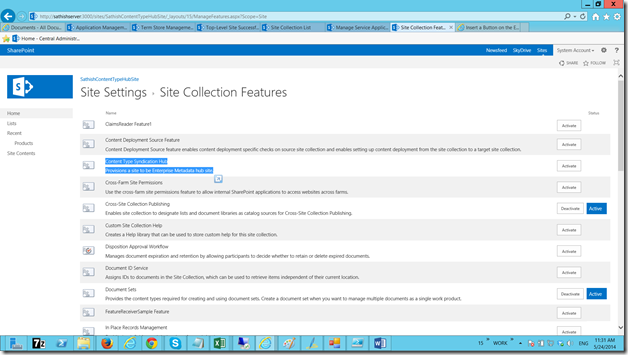
3. Go to Site Collection Feature.
image

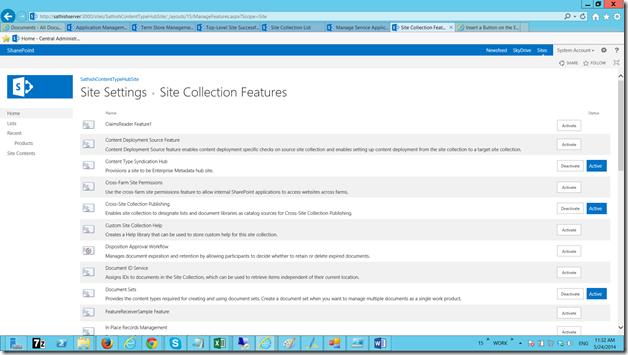
4. Now the site collection can be used as a Content Type Hub.

image

5. Let us create some Site Columns and Content Types on this Site Collection.

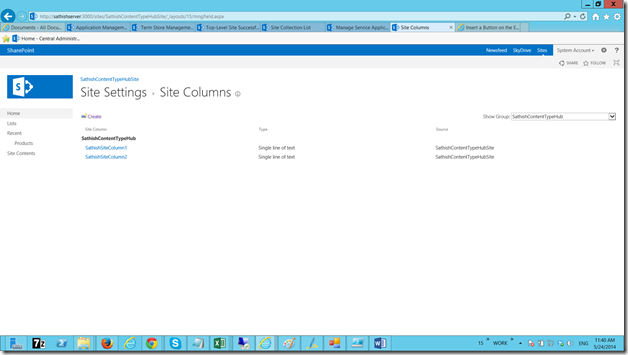
6. The Site Columns created are as follows.

image

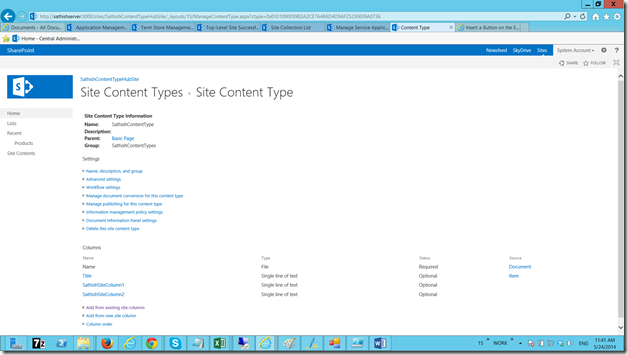
7. Now, Create the Content Type using these Site Columns.

image

8. Then Execute the following scripts.

 Add-PSSnapin "Microsoft.SharePoint.PowerShell"
 
 $mms = Get-SPServiceApplication -Name "Managed Metadata Service" 
 
 Set-SPMetadataServiceApplication -Identity $mms -HubUri "http://sathishserver:3000/sites/SathishContentTypeHubSite/"
 
 Write-Host "Done" -ForegroundColor Green 
 
 $mmsp = Get-SPServiceApplicationProxy | ? {$_.DisplayName -eq "Managed Metadata Service"} 
 
 Set-SPMetadataServiceApplicationProxy -Identity $mmsp -ContentTypeSyndicationEnabled -ContentTypePushdownEnabled -Confirm:$false 
 
 Write-Host "Done" -ForegroundColor Green  
 

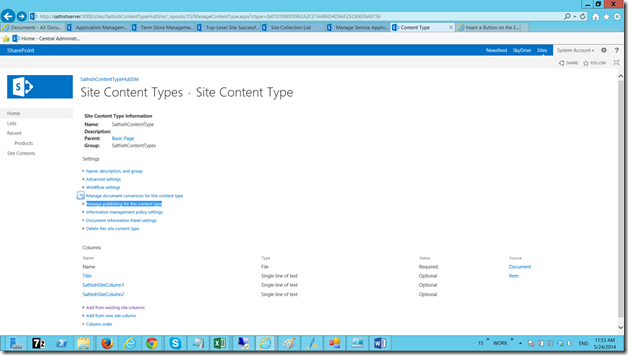
9. Now coming back to the Content Type Hub Site Collection and Go to the Content Type which we just created.

image

10. Select the “Manage Publishing For this Content Type”

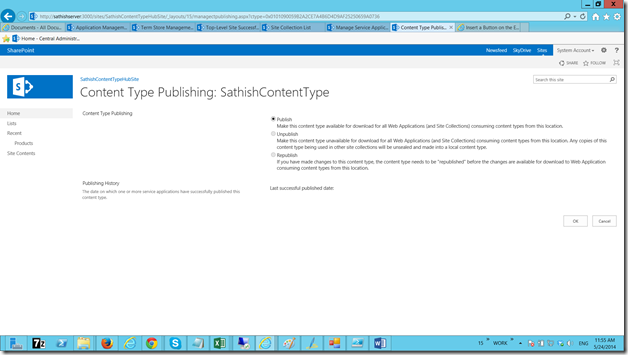
11. Publish the Content Type.

image

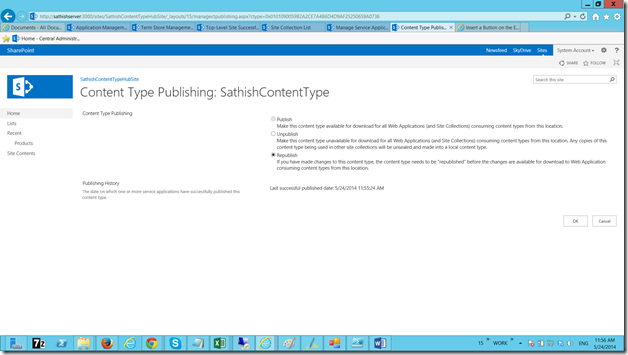
12. Now, the Content Type has been published.

13. To Confirm that, if we again go to the same page, the Last Successful published date can be seen.

image

14. Now, come to the Site Collection on which we require these site columns.

15. I am using my publishing site collection.

image

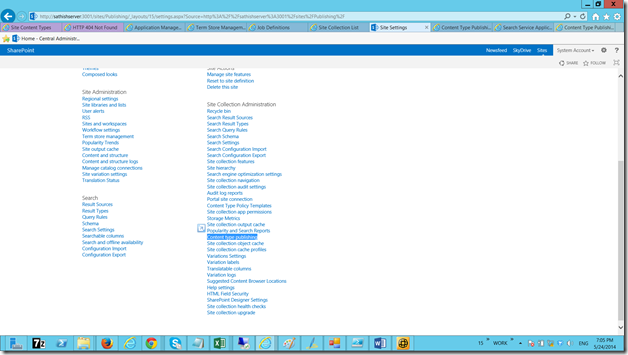
16. Go to Site Settings and Select the “Content Type Publishing”

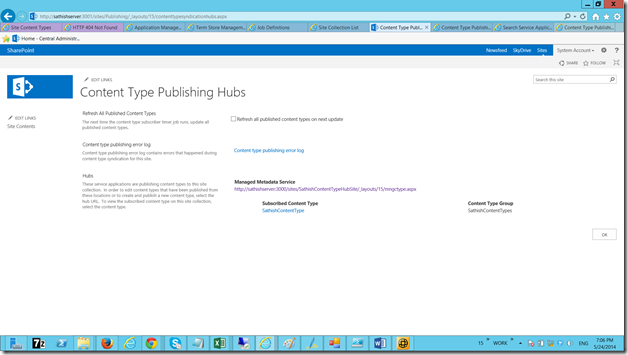
image

17. You can see the published content types here.
image

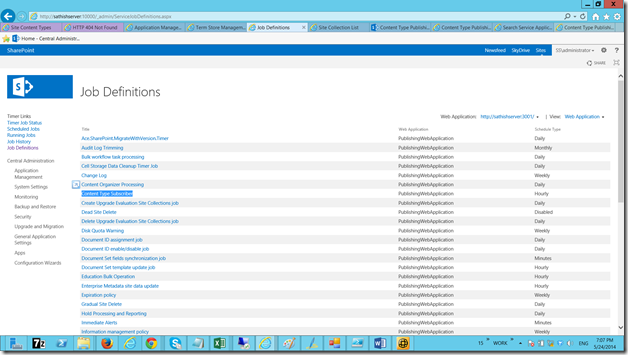
18. If you are not able to see that immediately, there is a timer job which needs to run. This timer is configured as Hourly basis by default. We can execute this time manually also. The timer is “Content Type Subscriber”.

image

19. Now, when we are going to the Content Types of the Publishing Site, we will be able to see our Content Type, which has been created on the ContentTypeHub Site Collection.

Note:

There are no way, we can set the HubRUI of the ManagedMetada Service through the UI. Even for updating also, we need to follow the powershell only.

Happy Coding.

Sathish Nadarajan.

Author Info

Sathish Nadarajan
 
Solution Architect
 
Rate this article
 
Sathish is a Microsoft MVP for SharePoint (Office Servers and Services) having 15+ years of experience in Microsoft Technologies. He holds a Masters Degree in Computer Aided Design and Business ...read more
 

Import Termset and Terms into Termstore Management in Sharepoint 2013

Arunraj Venugopal
 
SharePoint Developer
April 11, 2014
 
Rate this article
 
Views
15075

Let us discuss about how the termset and terms can be imported to Termstore Management under a group Name in Sharepoint 2013.

By importing Termset and Terms into Termstore Management using excel will reduce the time consumption for manual process and power shell script.

Procedure for importing termset and Terms into Termstore Management

Step1: Open Central Administration

clip_image002

Step2: Click Manage Service applications

clip_image004

Step3: Click ManagedMetadataServices

clip_image006

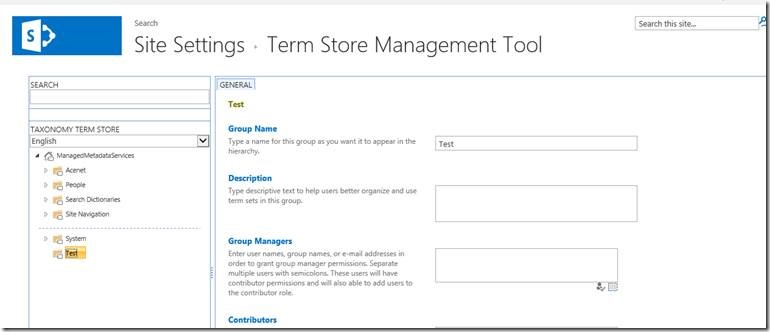
Step4: Create Group Name “Test” by clicking on the dropdown icon on the ManagedMetadataServices

clip_image008

clip_image010

Step5: Prepare Csv file with termset and Terms.

Note: In the excel file, Testing is a termset in which two different terms are existing; they are Home and Home2. The excel file contains term level from 1 to 7, but this example contains term level till 4th level.

In the column D, the value true for each terms since tagging is available for all ther terms. It could be false if you there is no tagging which doesn’t create any impact.

clip_image012

Step6: Save the file.clip_image014

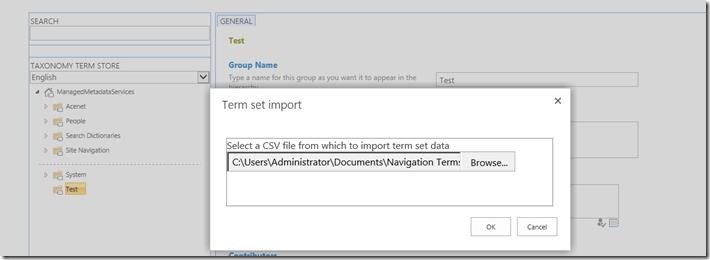
Step7: Click dropdown icon on Test group name to import the termset and its terms.

clip_image016

clip_image018

Step8: The below screenshot shows the result of the termset imported from the csv file.
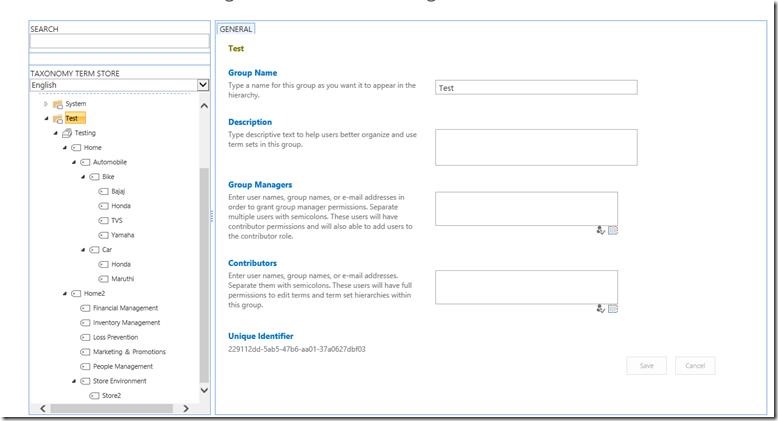
clip_image020

I hope it is useful for everyone.
Author Info

Arunraj Venugopal
 
SharePoint Developer
 
Rate this article
 
Works as a SharePoint Developer in a CMM Level 5 Company ...read more
 

Navigation – Using Managed Metadata Feature of SharePoint 2013

Mythili Ranganathan
 
SharePoint Architect
December 27, 2013
 
Rate this article
 
Views
24236

In this Post, let us see the Managed Metadata based navigation SharePoint 2013. It powers the navigation structure and automatically generates pages based on the taxonomy hierarchy. The new Term Store makes it easy and fast to create an intuitive site with user-friendly and search engine-friendly URLs. You can create; maintain the navigation for all sites in your farm.

Steps:

To achieve this, you need to work with the Central administration and Site settings.

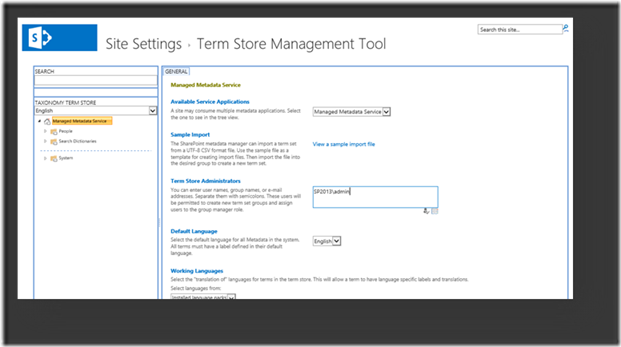
1. Open the Term Store Management Tool to define the Term sets and Terms by clicking on the Managed Metadata Service Application instance in Central Admin

clip_image002

2. Define the Taxonomy for Navigation – Groups, Termsets and Terms for the Managed Metadata Service as mentioned in below Picture

clip_image004

clip_image006

clip_image008

3. Create Publishing Web Application; you will have default “Structured Navigation” applicable for the Global and Current Navigation for the web application

clip_image010

4. Click on the Settings link and Go To “Site Settings” link

5. Click on the “Navigation” link from the “Look and Feel” section

clip_image012

6. Check the Navigation Settings available for the Global Navigation be default:

7. Change the Global Navigation and Current Navigation to “Managed Navigation” instead of “Structured Navigation”

clip_image014

8. Select the “Countries” Term Set for Managed Navigation as shown below and Click on Ok button

clip_image016

clip_image018

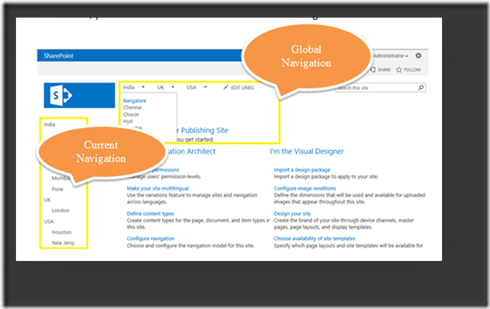
9. Navigate to Home Page and observe the changes in Navigations both Global and Current, you should be able to see the Countries as Navigational nodes.

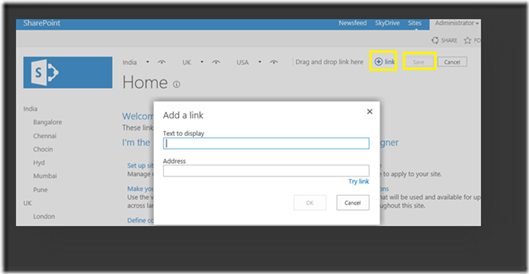
10. Click on the “Edit Links” link in Global Navigation and Click on Add Link button to add a new City in United States “New York”.

clip_image020

clip_image022

11. Drag and Drop the new link into “USA” menu properly and save it

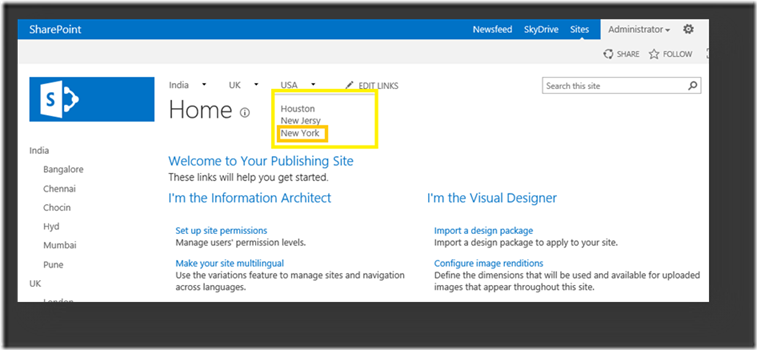
12. Refresh the Page and you should be able to see newly added link in both the Navigations

clip_image024

13. Go to Term Store Manager Tool from Site Settings and Observe the changes in the Termsets (look for the one that you have added new)

14. Repeat the same steps for Current Navigation and Add new link node for the “UK”

15. Hide the Cities for Mumbai from Global Navigation

16. Edit the Master Page and Allow Current Navigation’s for more than 2 levels so that you can View cities from Mumbai in Current Navigation


With this, we are done with the fundamentals of Navigation using the Managed Metadata Service Application. 


Happy SharePointing,

Mythili Ranganathan

Author Info

Mythili Ranganathan
 
SharePoint Architect
 
Rate this article
 
Mythili is a SharePoint Architect in a CMM Level 5 Company, with strong passion towards Microsoft Technologies (SharePoint, C# & ASP.Net) ...read more
 

Creating and Configuring Managed Metadata Service Application in SharePoint 2013

Mythili Ranganathan
 
SharePoint Architect
December 24, 2013
 
Rate this article
 
Views
45363

In this post, let us see the step by step procedure to create and configure Managed Metadata Service Application in SharePoint 2013.

Managed Metadata Service, allows to use Managed Metadata and share ContentTypes on SiteCollections and WebApplication level.

By Creating Managed Metadata Service Application, Managed Metadata Service will be automatically created. Service will identify the database to be served as term store and connection provides access to the service. All enterprise managed terms will be stored in the DB that is specified by managed metadata service. Whenever administrator creating connection to the service and publishing the managed metadata service, he need to know the URL of the service. We can also use managed metadata service to share content types.

To use managed metadata, a web application need to have connection to the managed metadata service. When managed metadata service is created, a connection will be created to the web application.

With this background information regarding MMSA, let us see the steps to create and configure the managed Metadata service in central administration.

Steps:

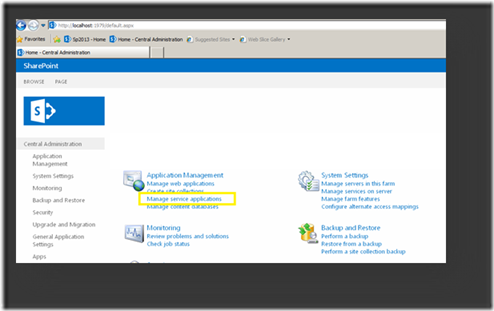
1. Go to Central Administration -> Application Management -> Manage Service applications

clip_image002

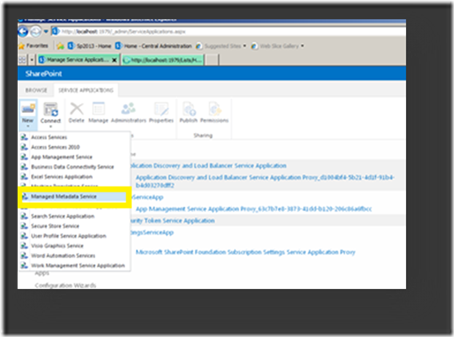
2. In Manage service applications, add new managed metadata service as shown in the screen below.

clip_image004

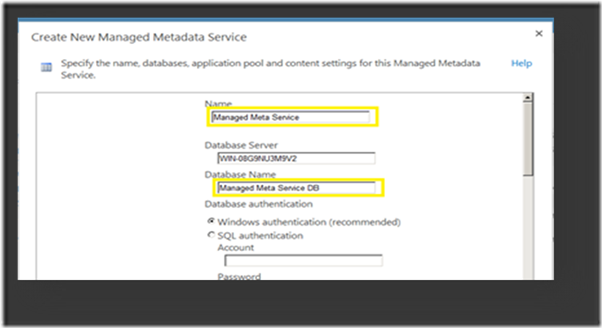
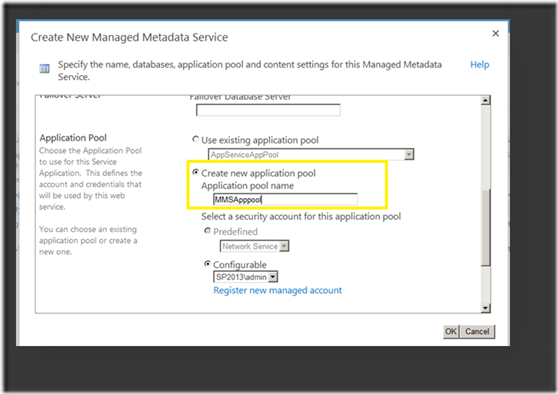
3. Add Name, Database name, Application pool name details in the popup as shown screen below.

· Service Name

· Database Name

· Application Pool to run the service, either you can use the existing app pool / create a new one by selecting the option available.

clip_image006

clip_image008

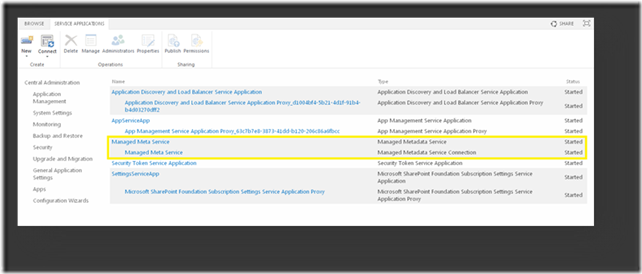
And now, the Managed Metadata service is configured.

clip_image010

4. Check for Managed Metadata service Application.

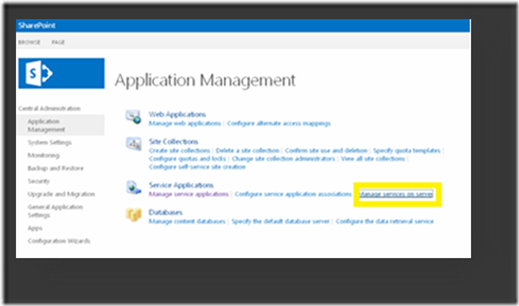
Go to Central Admin -> Mange Services on Server

clip_image012
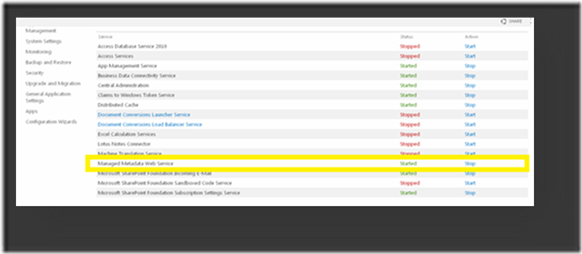
5. Start the Managed Metadata service. If you start this service, Managed Metadata creates the service applications.
clip_image014

clip_image016

clip_image018

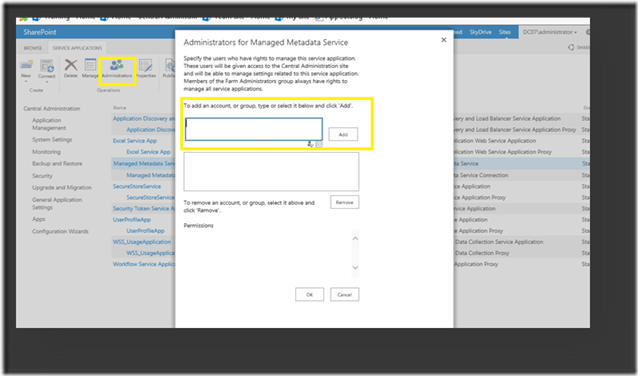
6. Once the Managed Metadata service is created, on the Administrators group add appropriate users and give permissions accordingly.


clip_image020


With this, we are done with Creating the Managed Metadata Service Application.  On the Next post, let us discuss about using the Managed Metadata Service for the Navigation on the Site Collection Level.


Happy SharePointing.

Mythili Ranganathan.

Author Info

Mythili Ranganathan
 
SharePoint Architect
 
Rate this article
 
Mythili is a SharePoint Architect in a CMM Level 5 Company, with strong passion towards Microsoft Technologies (SharePoint, C# & ASP.Net) ...read more
 

Leave a comment