SPFx – React Barcode.

Sathish Nadarajan
 
Solution Architect
August 24, 2021
 
Rate this article
 
Views
698

In one of the webpart, I must create the barcode based on the value generated. For that, after few analyses, found a react package. Hence sharing the information for easy access.

The package name is, React-Barcode.
Install using the below commands from your VS Code Terminal.

npm i react-barcode
https://www.npmjs.com/package/react-barcode

The usage is as below.

import * as React from 'react';
import styles from './Barcodesample.module.scss';
import { IBarcodesampleProps } from './IBarcodesampleProps';
import { escape } from '@microsoft/sp-lodash-subset';
import Barcode from 'react-barcode';

export default class Barcodesample extends React.Component<IBarcodesampleProps, {}> {
  public render(): React.ReactElement<IBarcodesampleProps> {
    return (
      <div className={ styles.barcodesample }>

<div id={`${this.state.MyDynamicValue}`}  >
<div>
         <Barcode value={"000000000321"}
                width={2}
                height={100}
                format={"CODE128"}
                displayValue={true}
                textAlign={"center"}
                background={"#fff"}
                lineColor="#000000"
                margin={0}
                fontSize={20}
              /> 
</div>
</div>
      </div>
    );
  }
}

The Output is as below.

The tag Barcode is rendered as div with svg format image.

To store this, we can use the below lines of code.

let itemNosvg = document.getElementById(`${this.state.MyDynamicValue }`).getElementsByTagName("svg")[0];
        let itemNoblob = new Blob([new XMLSerializer().serializeToString(itemNosvg)], { type: 'image/svg+xml' });
        await sp.web.getFolderByServerRelativeUrl(`${serverRelativeUrl}/ Images/Barcodes`).files.add(`${this.state.MyDynamicValue}.svg`, itemNoblob, true);

Happy Coding
Sathish Nadarajan

Author Info

Sathish Nadarajan
 
Solution Architect
 
Rate this article
 
Sathish is a Microsoft MVP for SharePoint (Office Servers and Services) having 15+ years of experience in Microsoft Technologies. He holds a Masters Degree in Computer Aided Design and Business ...read more
 

Using Microsoft Graph Toolkit in SPFx Solution

Ahamed Fazil Buhari
 
Senior Developer
April 27, 2021
 
Rate this article
 
Views
1575

The Microsoft Graph Toolkit (MGT) is a ready-made component that works with Microsoft Graph. The authentication is provided (SharePoint provider) within the components. MGT really gives quick results with beautiful output and with few lines of code. You can read more about MGT in here.

Microsoft provides npm package for mgt that we can use in our React solutions. Since we use React for most of our SPFx solutions, so this package @microsoft/mgt-react will be handy to use. In this article, we will see how we can make use of this cool package in the SharePoint Framework solution.

Let’s start with installing right package versions for mgt to work in spfx and by modifying little bit on complier side. I have added the below two packages (@microsoft/mgt, @microsoft/mgt-react) in my spfx solution package.json,

mgt package

And from the compiler side (as a devDependency) we need to update mainly two things one is the Typescript version and another one is the rush stack compiler version. Rush stack compiler is aligned with Typescript version and the main purpose of the rush stack is for Typescript compiler, tslint, and other stuff related to compiling our code.

So we update rush-stack-compiler version from 3.3 to 3.7 (here I am using SPFx v1.11.0), to do that we remove @microsoft/rush-stack-compiler-3.3 and add @microsoft/rush-stack-compiler-3.7, also add typescript 3.7.7 in devDependencies and then you can run npm i
or you can run below npm commands.

npm un @microsoft/rush-stack-compiler-3.3
npm i @microsoft/mgt-react @microsoft/mgt
npm i --save-dev @microsoft/rush-stack-compiler-3.7 typescript@3.7.7
 

rushstack typescript
Once you have installed the packages, make sure to update tsconfig.json file to right rush-compiler. Because we updated rush-complier to 3.7
tsconfig

with new typescript versions, the following rule can be removed from tslint.json file
tslint

Now you can save and run your solution and during the build, we can notice typescript version, but I got tslint module not found error. To overcome that, I have installed tslint package as a dev dependency

tslinterror

npm i --save-dev tslint

tslintupdate

We have done with updating packages and setting up our solution that will run mgt. Now get into the code and see how we make use of mgt components.

Firstly, we need to authorize and for that we need to receive access token, it can be easily done through SharePoint Provider by adding this line in your webpart class, onInit() function

provider

sharepointprovider

Now we can use mgt components anywhere in your react components, in the below example I have used Person component and I just passed my email address or you can even say “me” inside personQuery prop to get current user in Person component.

importcompoenent

personcomponent
The result will be,

result


Likewise, we can use other mgt components in our solution. To know more about the components and how it behaves, then you visit this playground site MGT playground


Happy Coding

Fazil

Author Info

Ahamed Fazil Buhari
 
Senior Developer
 
Rate this article
 
Ahamed is a Senior Developer and he has very good experience in the field of Microsoft Technologies, especially SharePoint, Azure, M365, SPFx, .NET and client side scripting - JavaScript, TypeScript, ...read more
 

Skeleton code for global state management using useContext, useReducer in SPFx solution

Ahamed Fazil Buhari
 
Senior Developer
 
Rate this article
 
Views
1543

React plays a vital role in SPFx development. It’s important to have better state management especially for a bigger solution and make use of its features in an efficient way in our SPFx solutions.

Hooks are not new anymore, and we probably familiar with this hooks thing and there are too many blogs, videos, articles available for hooks for you to learn. Don’t worry, it’s not another hooks lesson. Having basic knowledge on hooks, useContext, useReducer is necessary for this article, otherwise you can stop here and get basic knowledge about those stuff and come back here.

The whole code is available in the github

useContext

It’s essential to know how we design our context and what properties we keep inside it, here I have made an interface called I{WebPartName}Context and it basically holds the properties, callbacks that are necessary for your webpart class. Apart from this if you want to have other properties, we can have it here. Like, Themevariable, this.DisplayMode and so on

  1. SPFx Context (this.context)
  2. WebPart Properties (this.properties)
  3. DisplayMode, themevariable and so on..

I always use this.contex and this.properties(only if your webpart has Properties) in all the webpart even if it’s just a hello world.

Here the webpart name is -> GlobalStateSkeleton
Context Interface

Once we set up our context, we need to put this in a Provider(react stuff) so that every component in your webpart can make use of it.

context Provider


Now we have made our own context, which means we crossed halfway, so easy right. Here comes the second half which needs special attention.

useReducer

Just like other articles in the internet, I am  going to use this phrase “If you are familiar with redux then it’s gonna be easy for you to grab what’s going on”. No worries, even if you have no idea about Redux, you can make it. In short useReducer has three main things,

  1. State
  2. Action
  3. Dispatch

Not gonna explain deep on these, since our topic is not about deep dive into useReducer. But I highly recommend to have knowledge on these three things from useReducer perspective.

We have done enough with webpart class, now move to components folder and there we see a component with your webpart name in my case GlobalStateSkeleton, let’s make this as Functional component and I am going to use this as Hight Order Component (Higher Orders Functions are functions that perform operations on other functions). Below points to keep in mind while designing hoc,

  • It shouldn’t contain anything related to business requirement but as a plain HOC.
  • Even if it’s a simple textbox in your webpart then lets not keep directly in HOC but define this in other component and refer it here,
  • No API calls in the HOC

Below code is the auto-generated code that we get from yeoman while we create a new webpart, lets see how we change this to efficient hoc

I have modified it as below and since it’s going to be our hoc. And its dedicated mainly to Reducer + Context + other component.

There are some helper package you notice (immer, react-context-devtool), but those are just to make development easy. As you can notice there are two new context and it born for reducer,

  1. DispatchContext -> holds dispatch method that we used to change global state
  2. StateContext -> holds the global state

How we consume all, below I have created a dummy component (it can be in any depth)

In conclusion, we have three context

  1. {WebPartName}Context – which holds this.context, properties and so on.
  2. DispatchContext – That helps to call dispatch method anywhere in our code. (coupled with useReducer)
  3. StateContext – It holds the global state of our solution. (coupled with useReducer)

Here is the link to the github-> https://github.com/ahamedfazil/spfx-skeleton/

Happy Coding

Fazil

Author Info

Ahamed Fazil Buhari
 
Senior Developer
 
Rate this article
 
Ahamed is a Senior Developer and he has very good experience in the field of Microsoft Technologies, especially SharePoint, Azure, M365, SPFx, .NET and client side scripting - JavaScript, TypeScript, ...read more
 

SPFX – Configure the WebPart using the Property Pane Configuration

Sathish Nadarajan
 
Solution Architect
March 8, 2021
 
Rate this article
 
Views
3302

The Property Pane is used to configure our WebPart based on the requirement.  The Property pane properties are defined in propertyPaneSettings.

The property pane looks as below.

And the default code for the method getPropertyPaneConfiguration is as below.

protected getPropertyPaneConfiguration(): IPropertyPaneConfiguration {
    return {
      pages: [
        {
          header: {
            description: null
          },
          groups: [
            {
              //groupName: strings.BasicGroupName,
              groupFields: [
                PropertyPaneTextField('description', {
                  label: strings.DescriptionFieldLabel
                })
              ]
            }
            
          ]
        }
      ]
    };
  }

And the requirement is On this WebPart, I need to introduce a text box in which the users can enter a number.  The webpart should retrieve only those many values from the list.  Now, we are going to introduce a new Text Box in the Property Pane.

The first step is to introduce a Props in the WebPartProps interface.

export interface IDisplayLargeListWebPartProps {
  description: string;
  numberofItems:number;
}

Then Update the getPropertyPaneConfiguration Method.

protected getPropertyPaneConfiguration(): IPropertyPaneConfiguration {
    return {
      pages: [
        {
          header: {
            description: null
          },
          groups: [
            {
              //groupName: strings.BasicGroupName,
              groupFields: [
                PropertyPaneTextField('description', {
                  label: strings.DescriptionFieldLabel
                }),
                PropertyPaneTextField('numberofItems', {
                  label: "Number of Items"
                })
              ]
            }
          ]
        }
      ]
    };
  }

This will render a new text box as below.


Now, we can get the value from this prop “numberofItems” and pass to our component props.  While rendering the component, we can pass the new property.

public render(): void {
    debugger;
    const element: React.ReactElement<IDisplayLargeListProps> = React.createElement(
      DisplayLargeList,
      {

        description: this.properties.description,
        numberofItems:this.properties.numberofItems
      }
    );

    ReactDom.render(element, this.domElement);
  }

On the component props file, we need to add the property numberofItems.

export interface IDisplayLargeListProps {
  description: string;
  numberofItems:number;
}

And on the component, we can use this property as below.

private getAllLargeListItems = async (): Promise<any> => {
    try {

      let allLargeListItems: any[] = [];
      
      let numberofItems = this.props.numberofItems;
      
      let largeListItems = await sp.web.lists.getByTitle('LargeList').items.select('Title').top(numberofItems).get();

      largeListItems.forEach(item => {
        allLargeListItems.push({
          Id: item.ID,
          name: item.Title, 
        });
      });

      return allLargeListItems;
    }
    catch (error) {

    }
  }

Similarly we can have any kind of controls within the Property Pane.

The following field types are supported:

  • Button
  • Checkbox
  • Choice group
  • Dropdown
  • Horizontal rule
  • Label
  • Link
  • Slider
  • Textbox
  • Multi-line Textbox
  • Toggle
  • Custom

Happy Coding

Sathish Nadarajan

Author Info

Sathish Nadarajan
 
Solution Architect
 
Rate this article
 
Sathish is a Microsoft MVP for SharePoint (Office Servers and Services) having 15+ years of experience in Microsoft Technologies. He holds a Masters Degree in Computer Aided Design and Business ...read more
 

How To Add WebPart To Newly Provisioned Site (Or Subsite) Using CSOM – C# Programmatically

Ahamed Fazil Buhari
 
Senior Developer
March 25, 2019
 
Rate this article
 
Views
2169

Hi,

In the below article we will see how to provision Sub Site and add new Web part into the subsite using CSOM (Console Application). To add the webpart into the page, we need XML of that web part.

We can get XML of the webpart using Export option and save the file as .xml (if we need some links or content to be added in the web part then we can add those content and then export, so it will be available in the xml as well).

I have the Site URL and Client ID values in app.config file. Please refer this article if you are not familiar with Token based authentication


I hope the below code with comments explains everything.

using Microsoft.SharePoint.Client;
 using OfficeDevPnP.Core.Entities;
 using System;
 
 namespace SPpals.TemplateProvision
 {
     public static class SPpals
     {
         public static void ProvisionFunction()
         {
             string topRootSite = "https://fazildev.sharepoint.com/sites/sppals/";
             var siteUri = new Uri(topRootSite);
             var realm = TokenHelper.GetRealmFromTargetUrl(siteUri);
             // Client ID and Secrent Key will be taken from App.config file
             var accessToken = TokenHelper.GetAppOnlyAccessToken(TokenHelper.SharePointPrincipal,
             siteUri.Authority, realm).AccessToken;
             using (var ctx = TokenHelper.GetClientContextWithAccessToken(siteUri.ToString(), accessToken))
             {
                 string subSite = "MyTest";
                 ProvisionSubSite(subSite, ctx);
             }
         }
 
         static void ProvisionSubSite(string subSiteInternalName, ClientContext ctx)
         {
             try
             {
                 // If the site is subsite of a subsite, then use OpenWeb as show below in comment
                 // ctx.Site.OpenWeb("top-subsite-url-name").WebExists(subSite);
                 // Check If Subsite existing
                 Web subSiteWeb = ctx.Site.RootWeb;
                 if (subSiteWeb.WebExists(subSiteInternalName))
                 {
                     Console.WriteLine("Already Exists");
                     subSiteWeb = ctx.Site.RootWeb.GetWeb(subSiteInternalName);
                 }
                 else
                 {
                     WebCreationInformation webCreationInformation = new WebCreationInformation()
                     {
                         // I create TeamSite as subsite - you can find different type of sites here
                         //  https://www.jasjitchopra.com/sharepoint-2013-site-templates-codes-for-powershell/
                         WebTemplate = "STS#0",
                         Title = subSiteInternalName,
                         Url = subSiteInternalName,
                         Language = 1033,
                         UseSamePermissionsAsParentSite = true
                     };
                     subSiteWeb = ctx.Web.Webs.Add(webCreationInformation);                    
                 }
                 ctx.Load(subSiteWeb);
                 ctx.ExecuteQuery();
                 string pageUrl = subSiteWeb.ServerRelativeUrl + "/SitePages/Home.aspx";
                 subSiteWeb.AddWebPartToWebPartPage(pageUrl, AddWebPart());
             }
             catch (Exception ex)
             {
                 Console.WriteLine("Something went wrong. " + ex.Message);
             }
         }
 
         static WebPartEntity AddWebPart()
         {
             // Give file path to the XML which we extracted
             string webPartXml = "C:\buh\WebPart\Content.xml";
             WebPartEntity webpart = new WebPartEntity
             {
                 WebPartXml = System.IO.File.ReadAllText(webPartXml),
                 WebPartZone = "Left"
             };
             return webpart;
         }
     }
 }


Please add the following reference from Nuget package and include TokenHelper.cs file into your project for Token authentication.


Happy Coding

Ahamed

Category : Office 365, SharePoint

Author Info

Ahamed Fazil Buhari
 
Senior Developer
 
Rate this article
 
Ahamed is a Senior Developer and he has very good experience in the field of Microsoft Technologies, especially SharePoint, Azure, M365, SPFx, .NET and client side scripting - JavaScript, TypeScript, ...read more
 

How to check load/performance time on each method of your SPFx Web part/Extension

Manimekalai
 
Technology Specialist
August 21, 2018
 
Rate this article
 
Views
2501

In this article, we are going to see how to check the performance time on each method of the SPFx WebPart or Extension.

It is very straight forward.  We need to add few lines of code on every method of our webpart or extension component.

Add the below code related to window.performance on each method as shown below


  public async onInit(): Promise<void> {
     this.footerPlaceholder
     if (window.performance != undefined && window.performance != null) {
       if (window.performance.mark != undefined && window.performance.mark != null) {
         window.performance.mark('Method-Begin');
       }
     }
     Log.info(LOG_SOURCE, `Initialized ${strings.Title}`);
     }
 
     /** call render method for generating the needed html elements*/
     return(await this.renderPlaceHolders());
   }
 
 
 private async renderPlaceHolders(): Promise<void> {
     if (window.performance != undefined && window.performance != null) {
       if (window.performance.mark != undefined && window.performance.mark != null) {
         window.performance.mark('Method-Start');
       }
     }
     try {
    /**Handling the header placeholder*/
     if (!this.footerPlaceholder) {
       this.footerPlaceholder =
         this.context.placeholderProvider.tryCreateContent(
           PlaceholderName.Bottom,
           { onDispose: this._onDispose });
 
     /** The extension should not assume that the expected placeholder is available.*/
       if (!this.footerPlaceholder) {
         console.error('The expected placeholder (Bottom) was not found.');
         return;
       }
       const element: React.ReactElement<ICollabFooterProps> = React.createElement(
         CollabFooter,
         {}
       );
       ReactDom.render(element, this.footerPlaceholder.domElement);
     
   }
     catch (ex) {
     }
     finally {
       if (window.performance != undefined && window.performance != null) {
         if (window.performance.mark != undefined && window.performance.mark != null) {
           window.performance.mark('Method-End');
         }
       }
     }
   }
 

Once the app deployed, go to the page and open the console then enter the below code to test the load performance time of the web part

performance.getEntries()

This will give the exact load time of the SPFX web part

Sample output:

1.      PerformanceMark {name: “TestSPFX-Begin”, entryType: “mark”, startTime: 9862.00000000099, duration: 0}

2.      130:PerformanceMark {name: “TestSPFX-Start”, entryType: “mark”, startTime: 9862.00000000099, duration: 0}

3.       131:PerformanceMark {name: “TestSPFX-End”, entryType: “mark”, startTime: 9865.0000000016, duration: 0}

Category : SharePoint, SPFx

Author Info

Manimekalai
 
Technology Specialist
 
Rate this article
 
Having 6 years of experience in design and development of SharePoint applications, Mani has expertise in developing applications using Office 365, SharePoint 2013 & 2010, SPFX, SP Designer Workflows, Visual ...read more
 

SPFx Web part -Working with GIT version Control

Manimekalai
 
Technology Specialist
July 19, 2018
 
Rate this article
 
Views
4305


ü After setting up your SPFx project, you can use GIT repositories to manage your project source code.

ü Below are the pre-requisites to make use of GIT,

o A VSTS account. If you don’t have one, you can sign up for one for free

o GIT for windows

ü After creating VSTS account, Navigate to https://<your account name>.visualstudio.com

ü Create a new project and choose version control as GIT

ü To work with Git, you need to clone your project to your computer

ü Open the node.js command prompt

git clone https://xxxx/MyFirstProject/_git/xxx

ü Enter your office 365 credentials

ü After running the previous command, Git downloads an empty project into a new folder for you to work with

ü Create SPFx Webpart/Extension into the newly create folder path

ü Now you will be in your master branch but you should not work on the master branch for that you have to use the below command to work on your local folder without altering the master branch

git branch feature/newwebpart

git checkout feature/newwebpart

ü Now your local branch is ready to start working

ü Once you are done with your work, check-in your branch and push the code to TFS using the below steps

ü Go to Visual Studio Code, Click on Git Icon from the left side bar

ü Provide Check in Comments in the message box

clip_image002

ü Click on the Commit All as shown in the picture

ü Once committed, click on publish if the branch is not published and from the next time just click on the push option to push the code to your branch.

ü Once you are done with the above step, Go to your git repository and navigate to branches folder https://clt-3fcc36e5-70bf-47b7-99c8-95581a97b955.visualstudio.com/xxx/_git/xxx/branches

ü Click on Pull Request à New Pull request

ü Create New Pull Request to merge your local branch with your master branch

clip_image004

ü Add proper comments in the description section and select Reviewers name to review your code.

ü Once done, your pull request will be created and it will be available for review.

clip_image006

Thanks!

Category : GitHub, SharePoint, SPFx

Author Info

Manimekalai
 
Technology Specialist
 
Rate this article
 
Having 6 years of experience in design and development of SharePoint applications, Mani has expertise in developing applications using Office 365, SharePoint 2013 & 2010, SPFX, SP Designer Workflows, Visual ...read more
 

Step by Step Procedure to implement VSTS Continuous Integration on SharePoint Webparts Solution

Sriram
 
Technology Specialist
May 15, 2018
 
Rate this article
 
Views
3733

In this article, we will see how to automate the build process once the code got checked in into TFS.

Automating build process and deployment process have many advantages. In this article let’s see how to automate build process; in the next article we will cover the continuous deployment process.

What is Continuous Integration?

Continuous Integration (CI) is the process of automating the build and testing of code every time a team member commits changes to version control. CI encourages developers to share their code and unit tests by merging their changes into a shared version control repository after every small task completion. Committing code triggers an automated build system to grab the latest code from the shared repository and to build, test, and validate the full master branch (also known as the trunk or main).

Continuous Integration Benefits

Ø Improve Developer Productivity

Ø Continuous integration helps your team be more productive by freeing developers from manual tasks and encouraging behaviors that help reduce the number of errors and bugs released to customers.

Ø Find and Address Bugs Earlier and Quicker.

Ø With more frequent testing, your team can discover and address bugs earlier before they grow into larger problems later.

Ø Deliver updates faster

Ø Continuous integration delivers updates to their customers faster and more frequently.

Prerequisites:

1. Make sure the user account that you’re going to use has permission to register the agent. Should be added in Agent Pool Administrators and Agent Pool Service Accounts.

2. Install Visual Studio/MS Build in TFS server to build the code in TFS server.

3. Install Microsoft Office Developer tools which will add SharePoint related DLLs in Build server.

4. Agent Pool Configuration

· Log on to the TFS server using the account for which you’ve prepared permissions as explained above.

· In your web browser, sign on to TFS, and navigate to the Agent pools tab:

URL:

clip_image002

5. Click Download agent.

6. On the Get agent dialog box, click Windows.

7. Click the Download button.

8. Extract the downloaded agent and run the Configure Agent in the command window by pointing to the extracted files location.

clip_image004

9. After agent pool creation, provide access to the required person by adding them in the Agent Pool Administrators and Agent Pool Service Accounts by selecting the Roles tab.

clip_image005

Create a Build Definition:

Below are the steps we need to follow to define the build.

  1. Open TFS url and navigate to Build tab and click on Create New Build Definition icon.

clip_image007

  1. Select Empty build definition in pop up.

clip_image009

  1. Select the Continuous Integration Check Box and Choose the Repository and agent queue accordingly to create the build.

clip_image011

clip_image012
  1. In the Build Definition click on Add Build Step
  2. Add the Visual Studio Build step and provide configuration values as mentioned below.

Here, provide TFS solution path in Solution option, values provided for Platform and Configuration are Variabile to which we will assign value on Variables tab. Clean option is to clean then solution then it will build it.

clip_image014

clip_image015
  1. Add Publish Build Artifacts and in that provide Drop folder location in which package will be captured. Publish Build Artifacts is to to publish the Artifacts in Drop folder which we will refere when deploying the solutin.

clip_image017

7. Under Repository tab, select true for Clean. This is to clean the repository before the build.

8. Set the variables as mentioned below.

clip_image019

clip_image020

9. Save the Build Definition

Build the solution

1. Check in your solution into TFS.

2. Go to TFS and click on Build Tab.

3. In the Left hand side select the Build Definition using which you want to run the solution.

4. In the build definition, in Visual Studio step make sure you have selected the solution which you want to run.

5. Click on Queue build and then in the pop up click on OK.

clip_image022

6. TFS will start building the solution; once it is done we will get the output screen as below.

clip_image024

Common Build Issues

1. If we run SharePoint Server object Model code or code which refers OfficeDevPnp we will get below build error.


Solution: As we don’t have SharePoint related DLLs in Build server we will get this error. To solve this issue create a folder in C Drive and place all the necessary files there. Open the solution in Visual Studio Unload the solution then in csproj file in that provide hint path for the dll to which it is throwing error.

clip_image026

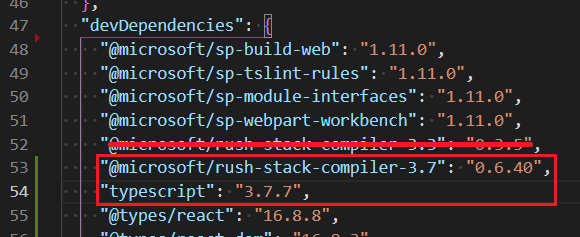
2. If there is no Visual Studio or .Net framework in the TFS servere, we will get below error message.

clip_image028

Installing Visual Studio/Appropriate MSBuild version on TFS server will resolve this issue.

Author Info

Sriram
 
Technology Specialist
 
Rate this article
 
Sriram T has been working in IT industry for over 6 years He holds Bachelor's degree in Computer Science Engineering. Sriram write articles and blogs related to SharePoint 2013, SharePoint ...read more
 

Bundle (Scaffolding) the SharePoint Framework (SPFx) WebParts into a single JS file

Sathish Nadarajan
 
Solution Architect
May 7, 2018
 
Rate this article
 
Views
3929

By this time, all of us would have created a lot of SPFx webparts. One interesting thing is, even if we have more than one webpart in a solution, while scaffolding, there are individual JS files got created which can be scaffolded into a single JS file.

As usual, let us see this by step by step demo. The steps at the high level are as follows.

1. Create a Solution called BundlingDemo by executing “yo @microsoft/sharepoint”

2. Add the WebPart WP1

3. Add the Second WebPart WP2.

4. The solution will look like below.

clip_image002

5. Let us do the Bundle by executing “gulp bundle –ship”

6. The output of this bundle commands, i.e., the deployable items will be available under temp\deploy folder.

7. If we could see, there are 2 JS files got created with each 8 KB. (As it is a blank webpart, this is a bare minimal size)

clip_image004

8. The two files got created, based on the value on the Config.JSON file. By default, the config.json will be as below.

 {
   "$schema": "https://dev.office.com/json-schemas/spfx-build/config.2.0.schema.json",
   "version": "2.0",
   "bundles": {
     "wp-1-web-part": {
       "components": [
         {
           "entrypoint": "./lib/webparts/wp1/Wp1WebPart.js",
           "manifest": "./src/webparts/wp1/Wp1WebPart.manifest.json"
         }
       ]
     },
     "wp-2-web-part": {
       "components": [
         {
           "entrypoint": "./lib/webparts/wp2/Wp2WebPart.js",
           "manifest": "./src/webparts/wp2/Wp2WebPart.manifest.json"
         }
       ]
     }
   },
   "externals": {},
   "localizedResources": {
     "Wp1WebPartStrings": "lib/webparts/wp1/loc/{locale}.js",
     "Wp2WebPartStrings": "lib/webparts/wp2/loc/{locale}.js"
   }
 }
 

9. Now, to make it as a single output JS file, we need to change the config.json as below.

 {
   "$schema": "https://dev.office.com/json-schemas/spfx-build/config.2.0.schema.json",
   "version": "2.0",
   "bundles": {
     "webpart-bundles": {
       "components": [
         {
           "entrypoint": "./lib/webparts/wp1/Wp1WebPart.js",
           "manifest": "./src/webparts/wp1/Wp1WebPart.manifest.json"
         },
         {
           "entrypoint": "./lib/webparts/wp2/Wp2WebPart.js",
           "manifest": "./src/webparts/wp2/Wp2WebPart.manifest.json"
         }
       ]
     } 
   },
   "externals": {},
   "localizedResources": {
     "Wp1WebPartStrings": "lib/webparts/wp1/loc/{locale}.js",
     "Wp2WebPartStrings": "lib/webparts/wp2/loc/{locale}.js"
   }
 }
 

10. Instead of having two components, I have clubbed the components entrypoint and manifest as a single component called webpart-bundles.

11. By this way, the output will be as follows.

clip_image006

12. We will get a single JS file with 12 KB in size.

Both the webparts JSON properties will be bundled into a single JS file.

The purpose of this is,

When we have these two webparts in the same page, there will be two JS files downloaded in the earlier version of code. But, after a proper bundling a single JS file will be downloaded for the page which will serve the Purpose of both the webparts.

Happy Coding,

Sathish Nadarajan.

Category : Office 365, SharePoint, SPFx

Author Info

Sathish Nadarajan
 
Solution Architect
 
Rate this article
 
Sathish is a Microsoft MVP for SharePoint (Office Servers and Services) having 15+ years of experience in Microsoft Technologies. He holds a Masters Degree in Computer Aided Design and Business ...read more
 

How to validate the SPFx Web part through UI components before deploying the app into the site

Manimekalai
 
Technology Specialist
May 6, 2018
 
Rate this article
 
Views
2200

Yes, there is a way to apply external CSS on SharePoint workbench

Use the below set of code on your render method for react Element of “testwebpart.ts file” to apply external CSS to your workbench

 public render (): void {
 
 if (Environment.type === EnvironmentType.SharePoint) {//Modern SharePoint page
 
 SPComponentLoader.loadScript("/Style%20Library/SCRIPTS/jquery-1.12.2.min.js").then(() => {
 
 SPComponentLoader.loadScript("/Style%20Library/SCRIPTS/bootstrap.min.js").then(() => {
 
 this.test(); // Call your method here
 
 });
 
 });
 
 }
 
 else {
 
 console.log("Entering into the code ..")
 
 this.test();
 
 }
 
 }
 

Once you are applied the above code, run the gulp serve to test your web part.

Here you go!

You are ready to test UI of the web part on your local workbench.

Category : Office 365, SharePoint, SPFx

Author Info

Manimekalai
 
Technology Specialist
 
Rate this article
 
Having 6 years of experience in design and development of SharePoint applications, Mani has expertise in developing applications using Office 365, SharePoint 2013 & 2010, SPFX, SP Designer Workflows, Visual ...read more
 

Leave a comment