In the earlier article, we saw an introduction about the Dynamic Data. Now, let us see the step by step procure to implement the dynamic data with two webparts. (One source and one Consumer WebPart).
As usual, let us see by step by step procedure.
Objective:
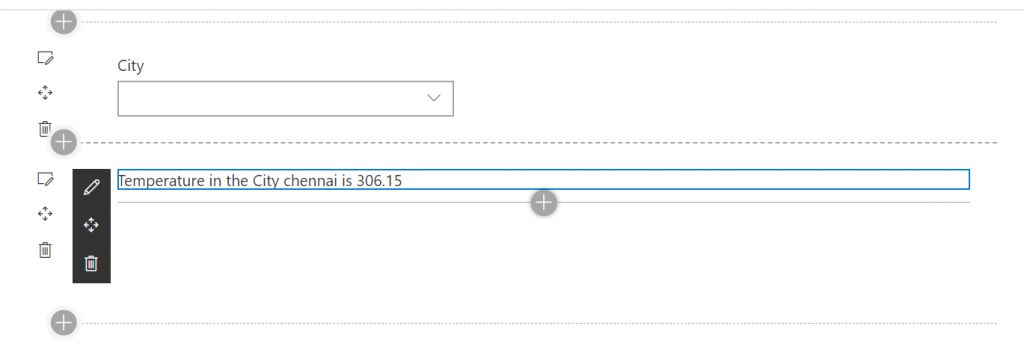
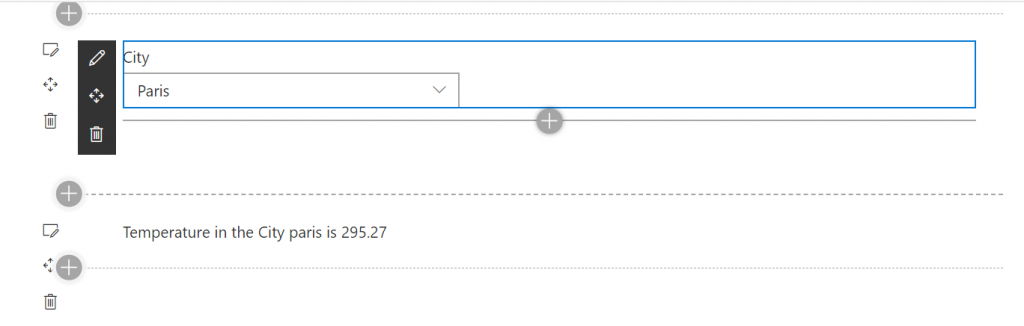
Before proceeding, let us understand what we are going to achieve. I have two webparts, one will have a list of city names in a dropdown. When the user selects a city, the source webpart will pass the selected city name to the consumer webpart and the consumer webpart will get the whether of the city by calling some API.
Steps:
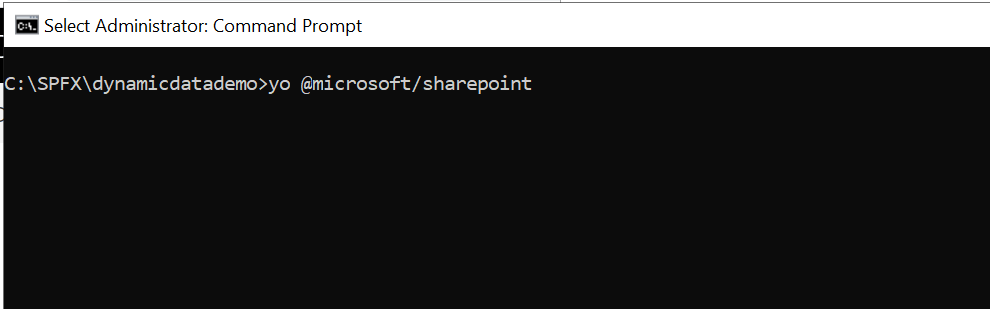
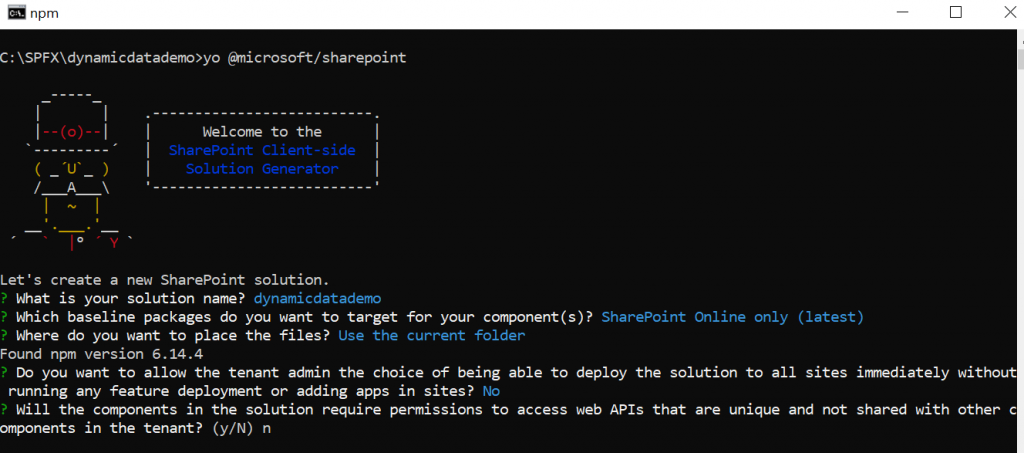
1. Create a Separate SPFx solution using the command yo @microsoft/sharepoint.
2. Create two webparts. Name the first one as “Source” and the Second one as “Consumer”.
The screen shots are as below.
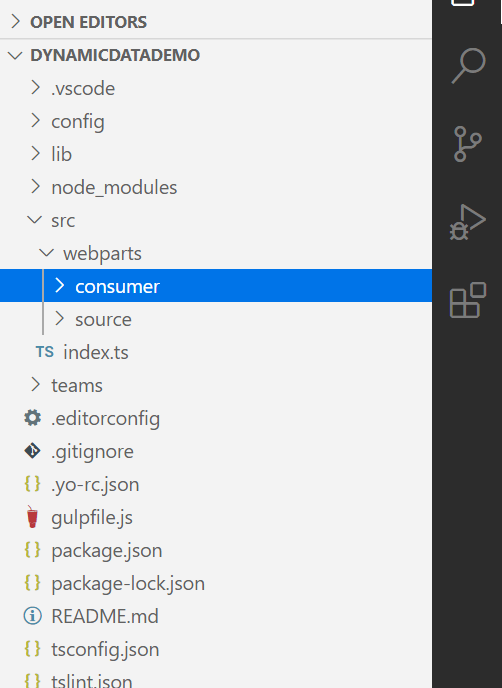
3. Now, I have two webparts. Source and Consumer. The solution looks as below.
4. Now, let us focus on the source webpart. Create a dropdown and bind few values on it. This, I am not going to explain in detail. Request you to download the source file at the end of this article.
5. The code for the component is as follows for our reference. I haven’t done much. Just created a state and assign the values in the componentdidmount and render the dropdown on the render method.
import * as React from 'react';
import styles from './Source.module.scss';
import { ISourceProps } from './ISourceProps';
import { ISourceState } from './ISourceState';
import { escape } from '@microsoft/sp-lodash-subset';
import { Dropdown, DropdownMenuItemType, IDropdownStyles, IDropdownOption } from 'office-ui-fabric-react/lib/Dropdown';

const dropdownStyles: Partial<IDropdownStyles> = {
  dropdown: { width: 300 },
};


export default class Source extends React.Component<ISourceProps, ISourceState> {

  constructor(props) {
    super(props);
    this.state = {
      cities: [],
      city: ""
    };
  }

  public componentDidMount(): void {
    this.setState({
      cities: [{ key: 'chennai', text: 'Chennai' },
      { key: 'mumbai', text: 'Mumbai' },
      { key: 'london', text: 'London' },
      { key: 'paris', text: 'Paris' }]
    });
  }

  public render(): React.ReactElement<ISourceProps> {
    return (
      <div className={styles.source}>
        <Dropdown
          label="City"
          options={this.state.cities}
          styles={dropdownStyles}

          onChanged={this.onCityChanged}
        />
      </div>
    );
  }

  private onCityChanged = (event, selectedCity) : void => {
    alert(this.state.cities[selectedCity].text);
  }

}
6. Now, let us create the second webpart. So far, we haven’t established the connection between the two. Let us focus on the webpart creation first, then the connection establishment is going to be very simple.
7. So, the second webpart (consumer) webpart expects a value (cityname) and it is going to pass the name to an API to get the weather.
8. Now, both the source and consumer webparts will looks above. The tsx file for the consumer is as below.
import * as React from 'react';
import styles from './Consumer.module.scss';
import { IConsumerProps } from './IConsumerProps';
import { IConsumerState } from './IConsumerState';
import { ICity } from '../../../data/ICity';
import { escape } from '@microsoft/sp-lodash-subset';
export default class Consumer extends React.Component<IConsumerProps, IConsumerState> {
constructor(props) {
super(props);
this.state = {
temperature: "",
city: ""
}
}
public async componentDidMount() {
let cityData = {key:"chennai"}
let temp = cityData ? await this.getTemperature(cityData.key) : await this.getTemperature("Chennai");
cityData ? this.setState({ city: cityData.key }) : this.setState({ city: "chennai" });
this.setState({
temperature: temp.main.temp
});
}
public getTemperature = async (cityName): Promise<any> => {
debugger;
return fetch(`https://api.openweathermap.org/data/2.5/weather?q=${cityName}&appid=<<<<your app id from the openweathermap site>>>>>`)
.then(res => res.json())
.then(res => {
return res;
})
}
public render(): React.ReactElement<IConsumerProps> {
return (
<div className={ styles.consumer }>
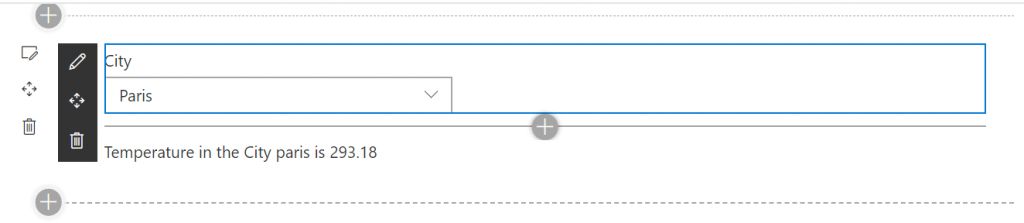
<div> Temperature in the City {this.state.city} is {this.state.temperature}</div>
</div>
);
}
}9. With this, we are done with the WebPart Creation. Now, let us focus on the connection establishment.
10. Now, let us start updating the Source webpart. The source webpart should import the IDynamicDataCallables, IDynamicDataPropertyDefinition from the @microsoft/sp-dynamic-data.
11. And the webpart should implement the IDynamicDataCallables.
12. Once, this implement the IDynamicDataCallables, we need to implement the methods getPropertyValue and getPropertyDefinition. These two should be implemented without fail. Otherwise, the solution itself will not build.
13. There are few things which we are doing in the Source WebPart. Let me explain in detail.
a. The onCityChange event is been handled in the Webpart.ts and not in the component.tsx. i.e., we are passing an extra parameter onCityChange to the Component and instead of the earlier handler, we are assigning the handler from the webpart.ts file.
public render(): void {
    const element: React.ReactElement<ISourceProps> = React.createElement(
      Source,
      {
        description: this.properties.description,
        onCityChanged: this.onCityChange
      }
    );

    ReactDom.render(element, this.domElement);
  }
b. Now, the component.tsx file updated as below.
public render(): React.ReactElement<ISourceProps> {
    return (
      <div className={styles.source}>
        <Dropdown
          label="City"
          options={this.state.cities}
          styles={dropdownStyles}
          onChanged={(e, selectedCity) => {
            this.props.onCityChanged(this.state.cities[selectedCity]);
          }}

        />
      </div>
    );
  }
c. Now, the event handler onCityChange is calling a method called notifyPropertyChanged. This is the method which is been used to notify the SPFx that the property or data has been changed in the source webpart.
private onCityChange = (city: ICity): void => {
    alert(city.key);
    debugger;
    this._selectedCity = city;
    this.context.dynamicDataSourceManager.notifyPropertyChanged('city');
  }
d. The SourceWebPart.ts file will looks as below.
import * as React from 'react';
import * as ReactDom from 'react-dom';
import { Version } from '@microsoft/sp-core-library';
import {
  IPropertyPaneConfiguration,
  PropertyPaneTextField
} from '@microsoft/sp-property-pane';
import { BaseClientSideWebPart } from '@microsoft/sp-webpart-base';

import * as strings from 'SourceWebPartStrings';
import Source from './components/Source';
import { ISourceProps } from './components/ISourceProps';
import { ICity } from '../../data/ICity';

import {
  IDynamicDataPropertyDefinition,
  IDynamicDataCallables
} from '@microsoft/sp-dynamic-data';

export interface ISourceWebPartProps {
  description: string;
}

export default class SourceWebPart extends BaseClientSideWebPart<ISourceWebPartProps> implements IDynamicDataCallables {

  private _selectedCity: ICity;

  private onCityChange = (city: ICity): void => {
    alert(city.key);
    debugger;
    this._selectedCity = city;
    this.context.dynamicDataSourceManager.notifyPropertyChanged('city');
  }

  protected onInit(): Promise<void> {

    // register this web part as dynamic data source
    this.context.dynamicDataSourceManager.initializeSource(this);

    return Promise.resolve();
  }

  public getPropertyDefinitions(): ReadonlyArray<IDynamicDataPropertyDefinition> {
    return [
      {
        id: 'city',
        title: 'City'
      }
    ];
  }

  /**
   * Return the current value of the specified dynamic data set
   * @param propertyId ID of the dynamic data set to retrieve the value for
   */
  public getPropertyValue(propertyId: string): ICity {
    if (propertyId == "city") {
      return this._selectedCity ? {key : this._selectedCity.key,text : this._selectedCity.text} : undefined;
    }

    throw new Error('Bad property id');
  }

  public render(): void {
    const element: React.ReactElement<ISourceProps> = React.createElement(
      Source,
      {
        description: this.properties.description,
        onCityChanged: this.onCityChange
      }
    );

    ReactDom.render(element, this.domElement);
  }

  protected onDispose(): void {
    ReactDom.unmountComponentAtNode(this.domElement);
  }

  protected get dataVersion(): Version {
    return Version.parse('1.0');
  }

  protected getPropertyPaneConfiguration(): IPropertyPaneConfiguration {
    return {
      pages: [
        {
          header: {
            description: strings.PropertyPaneDescription
          },
          groups: [
            {
              groupName: strings.BasicGroupName,
              groupFields: [
                PropertyPaneTextField('description', {
                  label: strings.DescriptionFieldLabel
                })
              ]
            }
          ]
        }
      ]
    };
  }
}
14. With this, the Source WebPart and the Component is completed. Now, let us focus on the Consumer WebPart and the Consumer Component.
15. In the Consumer Webpart, one important thing is the property pane configuration. We need to add a PropertyPaneDynamicFieldSet. The sample is as below.
protected getPropertyPaneConfiguration(): IPropertyPaneConfiguration {
    return {
      pages: [
        {
          header: {
            description: strings.PropertyPaneDescription
          },
          groups: [
            {
              groupFields: [
                PropertyPaneDynamicFieldSet({
                  label: 'Select event source',
                  fields: [
                    PropertyPaneDynamicField('city', {
                      label: 'Event source'
                    })
                  ]
                })
              ]
            }
          ]
        }
      ]
    };
  }
16. And the render method is passed with another property called city.
public render(): void {
    const element: React.ReactElement<IConsumerProps> = React.createElement(
      Consumer,
      {
        description: this.properties.description,
        city:this.properties.city
      }
    );

    ReactDom.render(element, this.domElement);
  }
17. On the Consumer tsx file, the only change is the introduction of ComponentDidUpdate method.
public async componentDidUpdate?(prevProps: IConsumerProps, prevState: IConsumerState, snapshot: any): Promise<void> {
    debugger;

    const { city } = this.props;
    const cityData: ICity | undefined = city.tryGetValue();
    console.log(cityData);
    debugger;
    if (prevState.city !== cityData.key) {
      let temp = await this.getTemperature(cityData.key);
      this.setState({
        temperature: temp.main.temp,
        city:cityData.key
      });
    }
  }
18. That is the method which got triggered after the render, componentdidmount etc., The lifecycle should be, render method and the componentdidmount and props are getting reflected when componentDidUpdate method is triggered.
19. With this all the source changes are done. The webpart in the screen will look like below.
20. The complete source code can be found in this link – DOWNLOAD CODE
Its very simple and useful.
Happy Coding
Sathish Nadarajan

Leave a comment