How to Remove/Delete Event Receivers to a Web in SharePoint Office 365 Programmatically using CSOM C#

Sathish Nadarajan
 
Solution Architect
January 24, 2017
 
Rate this article
 
Views
4907

In this article, we will be seeing how to Remove / Delete the Event Receiver to a Web in SharePoint Office 365 Programmatically using CSOM C#

 namespace Console.Office365
 {
     using Microsoft.SharePoint.Client;
     using Microsoft.SharePoint.Client.Taxonomy;
     using Newtonsoft.Json.Linq;
     using System;
     using System.Collections.Generic;
     using System.IO;
     using System.Linq;
     using System.Threading.Tasks;
 
     class Program
     {
         static void Main(string[] args)
         {
             DeleteEventReceivers();
         }
 
 
         public static void DeleteEventReceivers()
         {
             OfficeDevPnP.Core.AuthenticationManager authMgr = new OfficeDevPnP.Core.AuthenticationManager();
 
             string siteUrl = "https://*********.sharepoint.com/sites/CommunitySite/";
             string userName = "Sathish@*****.onmicrosoft.com";
             string password = "*********";


             using (var ctx = authMgr.GetSharePointOnlineAuthenticatedContextTenant(siteUrl, userName, password))
             {
                 Web web = ctx.Web;
                 ctx.Load(web);
                 ctx.Load(web.EventReceivers);
                 ctx.ExecuteQueryRetry();
 
                 #region Remve / Delete Document List Created Event Receiver
 
                 foreach (var eventRecevier in web.EventReceivers)
                 {
                     if (eventRecevier.ReceiverName == "<<Receiver Name>>")
                     {
                         eventRecevier.DeleteObject();
                         ctx.Load(web);
                         ctx.ExecuteQueryRetry();
                         break;
                     }
                 }
 
                 #endregion
 
                 System.Console.ReadLine();
             }
         }
 
 
     }
 
 }


Happy Coding,

Sathish Nadarajan.

Author Info

Sathish Nadarajan
 
Solution Architect
 
Rate this article
 
Sathish is a Microsoft MVP for SharePoint (Office Servers and Services) having 15+ years of experience in Microsoft Technologies. He holds a Masters Degree in Computer Aided Design and Business ...read more
 

Introducing Ask SharePoint Pals, a New Forum and Discussion Board for the SharePoint Community

Ashok Raja
 
Solutions Architect
May 25, 2014
 
Rate this article
 
Views
19954

One more addition to SharePoint Pals Community. Today we are happy to introduce a Forum / Discussion Board for SharePoint Community named Ask SharePoint Pals.

As the name suggests, you can ask your pals at SharePoint Pals community on topics related to SharePoint 2013, SharePoint 2010, Books and Tutorials on SharePoint and related technologies

Why Ask @ SharePoint Pals?

Every day we used to get more number of questions, queries and help requests from users of SharePoint Pals. Monitoring these queries and replying back to the users are taking more time. To avoid the time delay and serve the community in a better way we have created this Forum to Ask directly to SharePoint Pals. Since it’s an open Forum everyone are free Register, Ask, Respond to Queries.

clip_image001

We believe that you will enjoy this Forum and we also request you to extend your support to Ask SharePoint Pals

Please provide your feedback on Ask SharePoint Pals this would help to evolve and serve you better

Thanks and Regards

Ashok Raja T

Category : SharePoint

Author Info

Ashok Raja
 
Solutions Architect
 
Rate this article
 
I am Ashok Raja, Share Point Consultant and Architect based out of Chennai, India. ...read more
 

Step by steps on how to display Most Visited Sites with number of view count in SharePoint 2013 Web Analytics

Senthil Kumaresan
 
SharePoint Consultant
March 31, 2014
 
Rate this article
 
Views
71400

It’s a backward step from Microsoft in terms of Web Analytics in SharePoint 2013 by removing the out of the box SharePoint Usage and Search Analytics reports that was provided with a more intuitive GUI in SharePoint 2010. This article shows you how to display most visited sites with view count in easy steps in SharePoint 2013

As you might have known by now that web Analytics is no more a Service Application and it is part of Search Service Application in SharePoint 2013.

Now there are few excel reports named as “Popularity reports” available in each list\library\Site and Site Collection in SharePoint 2013. It shows day/Month wise hit count of each document and list items in SharePoint 2013.But these reports in reality is not more effective and don’t present data needed to identify the effective usage of the SharePoint System. Also the SharePoint 2013 lacks the Web Analytics Web part that was available in SharePoint 2010.

You can now use the Content Search Web Part that is used to generate the Usage and Search Analytics. Content Search Web Part ships along with the Enterprise Edition of SharePoint 2013. When you activate the SharePoint Enterprise Site Features of a site collection you get the Content Search web Part available under the Content Rollup group in the Add Web Part section.

I will take a a examples of a report Most Visited Sites in SharePoint 2013 and explain how you can achieve using the Content Search Web Part which can be generated for a Site Collection, Web Application.

Note: You cannot generate any User Specific reports like “Top Visitors” or “Top Contributors” using the analytics component in SharePoint 2013 as it does not store any user specific data.

I will take a simple example of how to show “Most Visited Sites” in your Site Collection.

Most Visited Sites(With Content Search Web Part):

Make sure you have activated the “Cross Site Collection Publishing” feature activated in Site Collection Features for Content Roll Up section to appear in the Add Web Parts the To add a Content Search Web Part to your page.

Configure the content search web part using the below parameters

Edit the Content Search Web Part and Provide the below values for the properties of the Web part

1. Select “Change Query” Button. In the Basics Tab for Query window, Select the “Switch to Advanced Mode”.

Basics TabValue
QueryLocal SharePoint Results
QueryTextUse the below query text for Most Visited Sites:


(contentclass:STS_Web AND Path:www.contoso.com/sites/contoso*)


Use the below query for Most Visited Documents


(IsDocument:"True" AND path:http://www.contoso.com/sites/contoso*)


Note: The hit count of documents is recorded in Analytics component when the documents are opened using Office Web Apps in a Web Page.


Use the below query for Most Visited Pages:


(Path:http://www.contoso.com* AND (FileExtension:aspx or FileExtension:html)) (contentclass:STS_ListItem OR IsDocument:True)


Note: The above query only includes Pages content from libraries in the site and excludes any page that are available in the root folder of the site.

Sorting TabValue
Sort ByViewsRecent Descending (Orders the result set by ViewCount for last 14 days )

(Or)

ViewsLifeTime Descending (Orders the result set by ViewCount from the time the Analytics Component was enabled in the farm)

Click ok to Save the Query.

The above configuration will have the content search web part display the results for the Most Visited Sites, but it does not show you the no. of View Counts.

How do you display the total no. of Views for each Site ?


You can modify the Display Templates for Content Search Web Part to show the View Count. The total no. of Views will be stored in the Managed Properties ViewsRecent or ViewsLifeTime.

You can add managed properties to your item level display template and show the value of the managed property in the display templates which will show you the count in web part.

Note : Download the sample display template with ViewRecent managed property from the bottom of the post

Deploy the Item Template to _catalogs/MasterPages/Display Templates/Content Web Parts folder. A Corresponding JS file will be automatically created in the folder.

The new item level display template can then be used by configuring the web part settings to use it.

You don’t have an Enterprise Edition then how do you generate these reports without Content Search Web Part?

SharePoint 2013 exposes a set of methods via the Microsoft.Office.Server.Analytics Namespace that is used to generate reports programmatically using Server Side Object Model.

There is no programmatic way to query analytics data using Client Side Object Model as it requires RunWithElevatedPrivileges to read data from Analytics Database.

Below I have provided a Code snippet that can be used to generate the Most Visited Sites programmatically. I have used the method GetHitCountForMonth to generate hit count for the last 30 days. You can also query per day by using GetHitCountForDay method.

 Dictionary<string, int> viewCounts = new Dictionary<string, int>();
 SPSecurity.RunWithElevatedPrivileges(delegate
 {
     using (var site = new SPSite("http://www.contoso.com/Sites/Test"))
     {
         using (SPWeb oWebsite = new SPSite("http://www.contoso.com/Sites/Test").OpenWeb())
         {
             SPWebCollection collWebsite = oWebsite.Webs;
 
             foreach (SPWeb subSite in collWebsite)
             {
                 try
                 {
 
                     var context = SPServiceContext.GetContext(site);
                     var searchProxy = context.GetDefaultProxy(typeof(SearchServiceApplicationProxy)) as SearchServiceApplicationProxy;
                     var usageData = searchProxy.GetRollupAnalyticsItemData((int)StandardEventTypeId.View, Guid.Empty, site.ID, subSite.ID);//1 represents "View Count" Event Type
 
 
                     if (usageData.GetHitCountForMonth(DateTime.Now) != null)
                     {
                         viewCounts.Add(subSite.Title, usageData.GetHitCountForMonth(DateTime.Now));
                     }
                     else
                     {
                         viewCounts.Add(subSite.Title, 0);
                     }
                     subSite.Close();
                     return viewCounts;
                 }
                 catch (Exception er)
                 {
                     throw new Exception("An error has occurred. Please contact your farm administrator");
                 }
             }
         }
 
     }
 
 });

You can also use the Microsoft.Office.Server.Search.Analytics.UsageAnalytics Namespace that can be used to generate item level reports such as “Most Visited Documents”. Below I have provided a snippet that can be used to identify view count for each item in a Pages library

 Dictionary<string, int> viewCounts = new Dictionary<string, int>();
 SPSecurity.RunWithElevatedPrivileges(delegate
 {
     using (var site = new SPSite("http://www.contoso.com/sites/test"))
     {
         using (SPWeb oWebsite = new SPSite("http://www.contoso.com/sites/test").OpenWeb())
         {
 
             try
             {
                 var context = SPServiceContext.GetContext(site);
                 var searchProxy = context.GetDefaultProxy(typeof(SearchServiceApplicationProxy)) as SearchServiceApplicationProxy;
                 UsageAnalytics obj = new UsageAnalytics(site);
 
                 SPList list = oWebsite.Lists["Pages"];
                 SPQuery query = new SPQuery();
 
                 foreach (SPListItem item in list.Items)
                 {
                     var usageData = obj.GetAnalyticsItemData((int)StandardEventTypeId.View, item);
                     if (usageData.GetHitCountForMonth(DateTime.Now) != null)
                     {
                         viewCounts.Add(item["Title"].ToString(), usageData.GetHitCountForMonth(DateTime.Now));
                     }
                     else
                     {
                         viewCounts.Add(item["Title"].ToString(), 0);
                     }
                 }
                 return viewCounts;
             }
             catch (Exception er)
             {
                 throw new Exception("An error has occurred. Please contact your farm administrator");
             }
         }
     }
 
 });

Download display template with View Recent Property

Category : SharePoint

Author Info

Senthil Kumaresan
 
SharePoint Consultant
 
Rate this article
 
SharePoint Architect – Consulting on SharePoint Infrastructure, IT Governance and Apps Development. ...read more
 

What is a WebPart in SharePoint – Understanding the basics of an Out of the Box (OTB) WebPart in SharePoint 2013

Ashok Raja
 
Solutions Architect
January 13, 2014
 
Rate this article
 
Views
70574

This article on what is a SharePoint WebPart, is the first article on Out of the Box SharePoint 2013 WebPart series. This article explains in details about the key components of a SharePoint WebPart which would help the SharePoint newbies to understand the basics better.

So, what is a WebPart?

WebPart in SharePoint, from a developer perspective, is basically a user control, packaged and deployed at Site Collection level to be re used across all the sites under it.

From an End User perspective it’s a single unit of re-usable component that can be added to a SharePoint page to perform a specific task.

Dissecting a WebPart

Now let’s see what is there inside a SharePoint WebPart by adding an Out of the Box (OTB) SharePoint WebPart to a page.

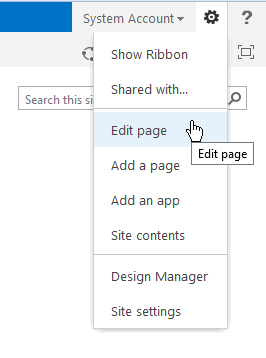
To begin with, create a new Publishing Site in SharePoint 2013 and edit the Home page (default.aspx) by clicking the Edit Page under the settings menu in the right hand side corner of the page.

clip_image001

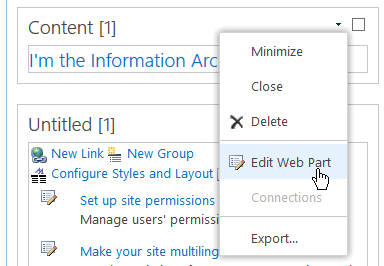
Scroll down the edited page and select the WebPart menu of one of the WebPart available in that page. Select the “Edit Web Part” to view the properties of WebPart. (Here I have selected the first WebPart in that page, which is a content editor WebPart)

clip_image002

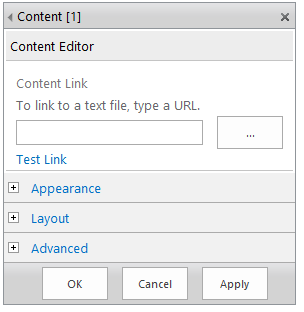
The properties window will be displayed in the right hand side of the page as shown below.

clip_image003

The properties of the Webparts are displayed in categories. The categories “Appearance”, “Layout” and “Advanced” are common to all Webparts irrespective of the type of WebPart.

Now let us see some of the basic properties available in these categories.

Appearance Category

clip_image004

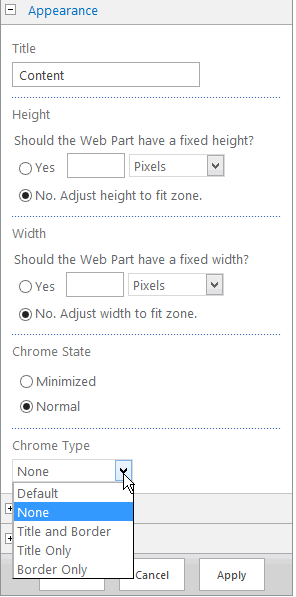
Chrome State

By default it would be set as Normal, the other option is Minimized. If it’s set to Minimized the WebPart content will be hidden from display.

Chrome Type

This property controls the display type of the WebPart. If this property is set as None , the WebPart displays the content without any border or title. If it is set to Default , then Title and Border will be displayed.

Layout Category

clip_image005

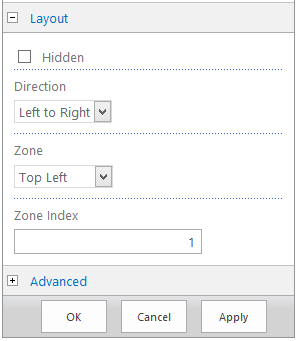
Hide

Selecting this will hides the web part from display

Direction

Changes the direction of text (content) alignment

Zone

Displays the list of Web Part Zones available in that page. Can be used to move Web Parts from one zone to another.

Zone Index

The order in which web part has to be displayed within the web part zone. Need not to be in the continuous numbers. Web Parts will be displayed in the ascending order of Zone Index

Advanced Category

clip_image006

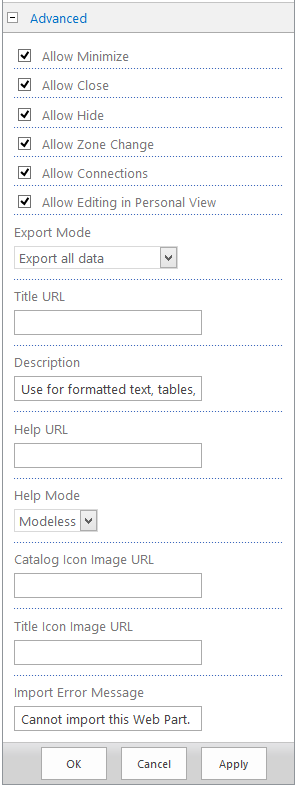
The Check Box items listed on top of Advanced Category are self-explanatory. This Items controls the behaviours of some of the properties that we have seen in previous category.

clip_image007

Export Mode

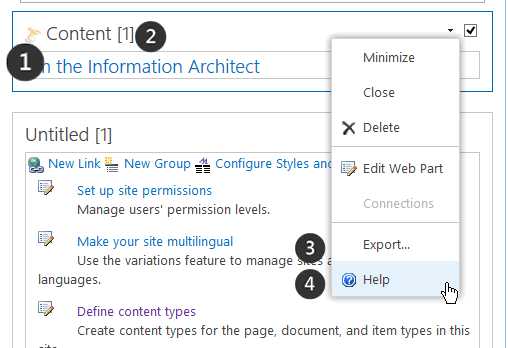
This property controls what has to be exported while selecting the Export Menu of Web part ( 3 in above Image)

Title URL

If title is enabled and value for this property is provided, the WebPart title behaves like a hyperlink and clicking that hyperlink will opens the URL that is provided in this property.

Help URL

The URL provided to this property acts a help document for this WebPart. Providing a value to this property enables Help menu in the Web Part. (Item 4 in the above Image)

Help Mode

This property controls the behaviour of opening the help page. Like, opening in same page, showing it as PopUp etc.

Catalogue Icon Image URL

This property would enable to provide a custom Image for WebPart in the WebPart Catalogue Listing (Can be seen while clicking the Add New WebPart Link). If you are developing a custom web part you can use this property to provide a custom image for your Web Part that has to be shown while selecting your WebPart to be added to the page.

Title Icon Image URL

Displays an image before the Web Part Title.

Hope, by this time you would have learned the key components of a SharePoint WebPart. In the subsequent articles we can see all of the Out of the Box (OTB) Webparts one by one in detail.

To Learn How To Create a new Custom WebPart in SharePoint 2013 with Visual Studio , Check out this article here

Category : SharePoint

Author Info

Ashok Raja
 
Solutions Architect
 
Rate this article
 
I am Ashok Raja, Share Point Consultant and Architect based out of Chennai, India. ...read more
 

Step by Step Procedure to enable mail forwarding in Office 365 to External domain Emails

Ashok Raja
 
Solutions Architect
November 28, 2013
 
Rate this article
 
Views
13354

In this article we can see how to enable mail forwarding in Office 365 and set an external domain email as the email id to which the mail has to be forwarded.

If your office 365 email id is different from your work mail id then this article is for you. Now we can see how to forward your Office 365 emails to your work email.

Steps

1. Open your office 365 site

2. In the top bar ( suite bar) , click the Out Look Link

clip_image001

3. You can also directly open Office 365 Outlook Web App by navigating to https://outlook.office365.com

clip_image002

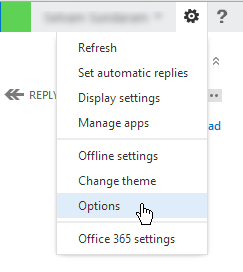
4. Once you are into Outlook WebApp , click Settings (Wheel ) image. Select Options from the menu to view the mail settings page

clip_image003

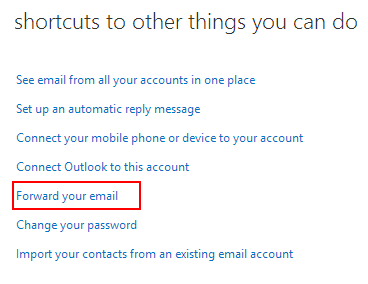
5. In the right hand side of the options select “Forward your email” link.

clip_image004

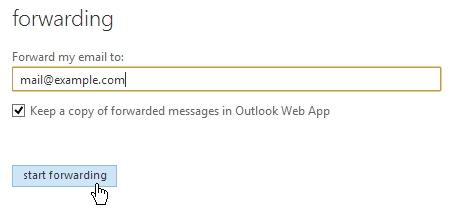
6. Navigate to “Forwarding” section of the page. Provide your email id to which the mail has to be forwarded and click “Start Forwarding” button. If you would like to keep a copy of mail in office 365 account then ensure that the check box with title “Keep a copy of forwarded messages in Outlook Web App” in checked state.

clip_image005

Note: Gmail classifies the mails from “onmicrosoft.com” mails as SPAM. So if you are not able to locate your mails in mail box, don’t forget to check your SPAM folder
Category : Office 365, SharePoint

Author Info

Ashok Raja
 
Solutions Architect
 
Rate this article
 
I am Ashok Raja, Share Point Consultant and Architect based out of Chennai, India. ...read more
 

How to Create a Page Layout (PageLayout) with ContentType in SharePoint 2013 using Design Manager – Part III

Sathish Nadarajan
 
Solution Architect
November 16, 2013
 
Rate this article
 
Views
41751

In this article, let us see how to create a PageLayout using Design Manager. In the previous article, we saw about the creating a page layout using Visual Studio, SharePoint Designer. Here let us utilize a new feature in SharePoint 2013, which is not available on SharePoint 2010 – Design manager.

Design Manager is a new feature which is available only in SharePoint 2013 (not in the previous flavors of SP), that allows us to easily create the branding artifacts like MasterPages, CSS, PageLayouts Etc.,

Design Manager will be available only in Publishing template and not in the Developer Site Template. Hence, we need to create a Publishing Site for this demo.

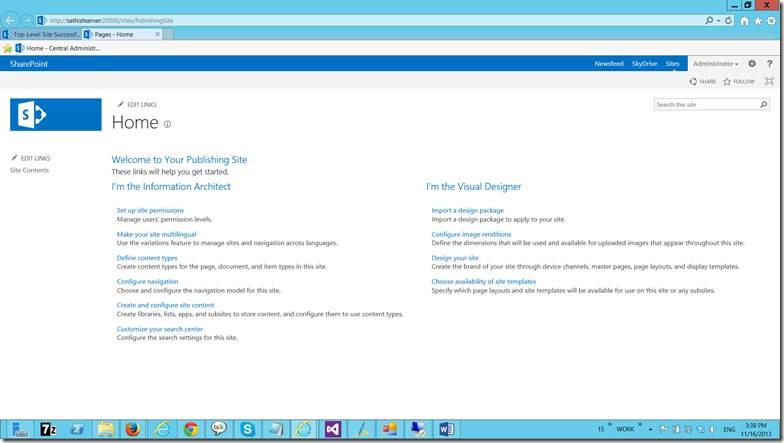
Let me create a publishing Site.

clip_image002

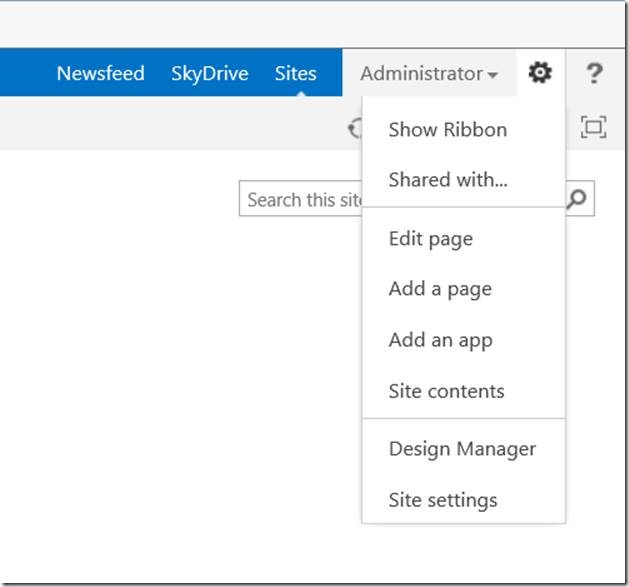
On the Settings Icon on the Right top corner, you can find a new link called Design Manager.

clip_image004

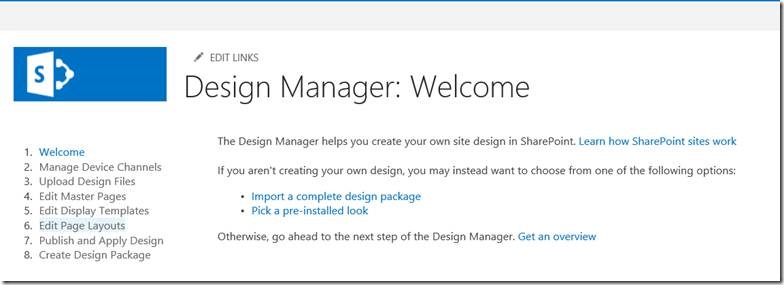
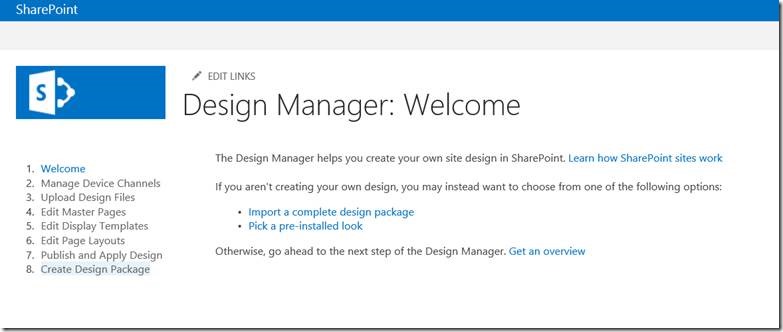
Design Manager will look like this.

clip_image006

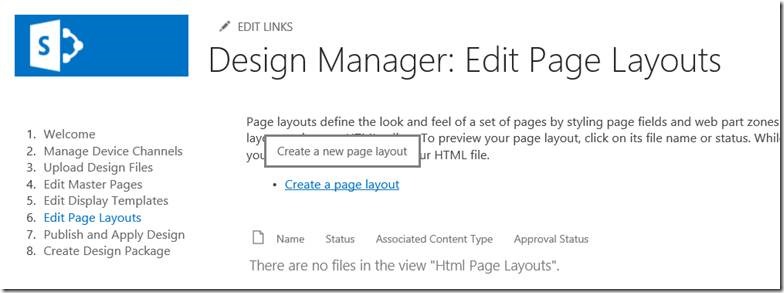
Click on the Edit page Layouts link.

clip_image008

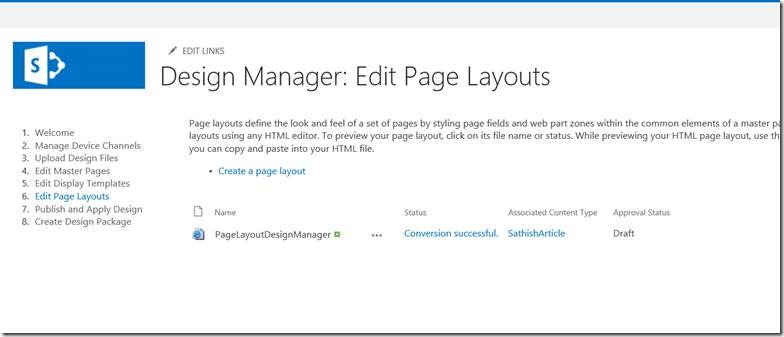
Click on the Create Page Layout.

clip_image010

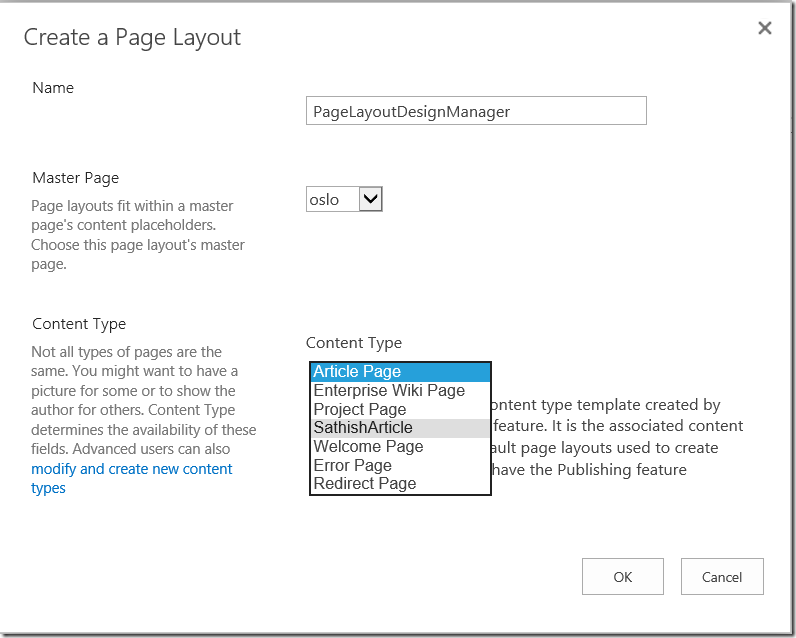
Enter the name for the pagelayout and select the Content Type which we created.

clip_image011

Keep the master page as it is as of now. Since, we are not focusing that.

Now, we got the html file inside the pagelayouts folder.

clip_image013

Let us, publish this. Then the “Approval Status” will become “Approved”

clip_image015

Now, let us go to the Pages document library.

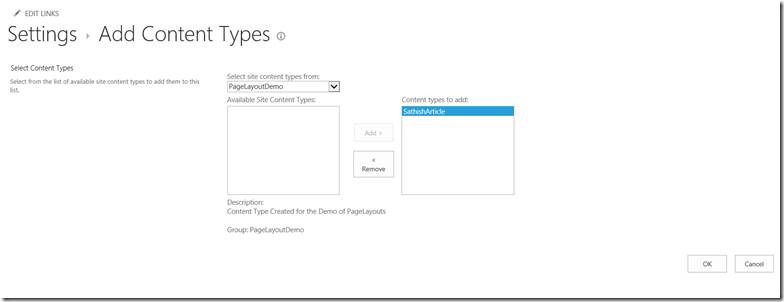
Associate this doc library into our Content Type which we created. To add our Content Type, follow the steps.

clip_image017

Go to Library Settings.

clip_image019

clip_image021clip_image023

That’s it. Now we added our Content Type.

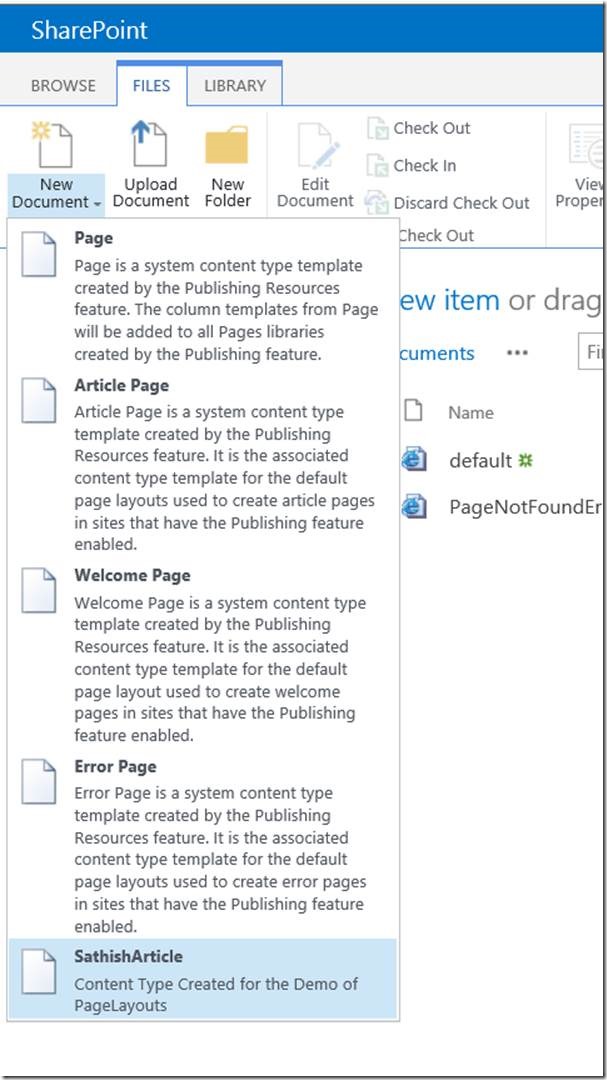
To confirm that, go to the Files-> New Document. Our newly added content type will be listed there.

clip_image025

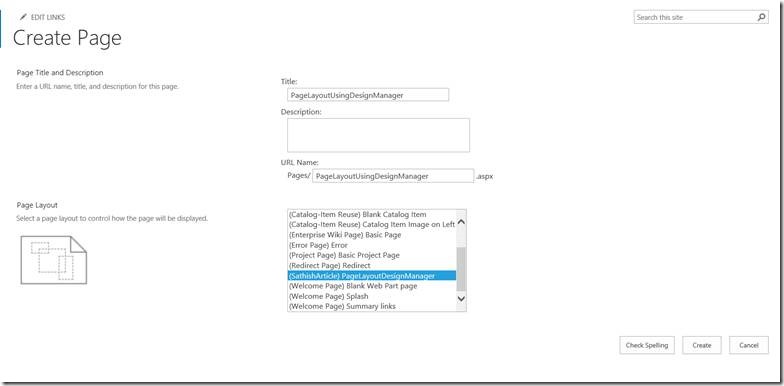
On the Create Page, you can find the Page Layout, which we created using the Design Manager.

clip_image027

Let me create a page based on the page layout we created.

After giving the mandatory fields, our page will look like the below.

clip_image029

Now, let us see, how to modify the layout of the Page Layout which we created. To see that, go to Master Page Gallery.

clip_image031

You can find the list of files, and the one which we created just now. For every PageLayout, created by the designer would be having 2 files. One aspx and one html. In our case, PageLayoutDesignmanager.aspx and PageLayoutDesignManager.html.

As far as concerning the Design manager approach, html file is very important. The aspx page will be overridden by html template when next time, sharepoint gets loaded. Hence, it is strongly recommended that not to modify the aspx. Modify only the html.

Being a developer/designer, we can use any tool to modify the html. To do that, we need to map the galleries into our local computer.

Open the Windows Explorer and Select Map Network Drive.

clip_image033

Enter the folder as the url of the masterpages gallery.

clip_image035

Now, the folder would be mapped to our local machine.

We can see the files, which we were talking about.

clip_image036

Now, open the html in your favourite editor and modify the layout. Let me open it using the visual studio itself.

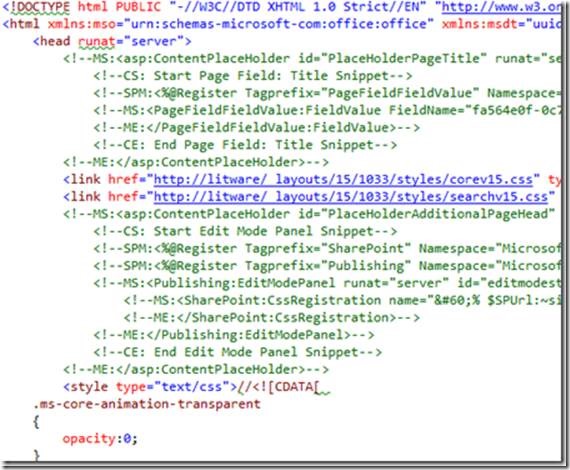
The page is a mixture of pure html code and commented aspx

clip_image038

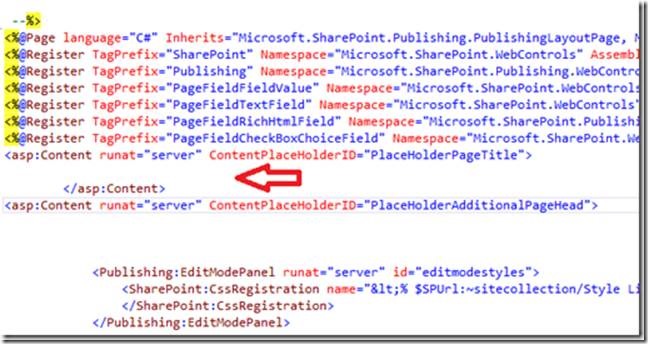
For instance in the html file, remove the following selection that displays the Title field in the Page Title:

clip_image040

As soon as you do it, the modification will be reflected in the associated aspx page:

clip_image042

Now, let’s create a new Page Content from our new JobPosting page and you will see that everything works as expected.

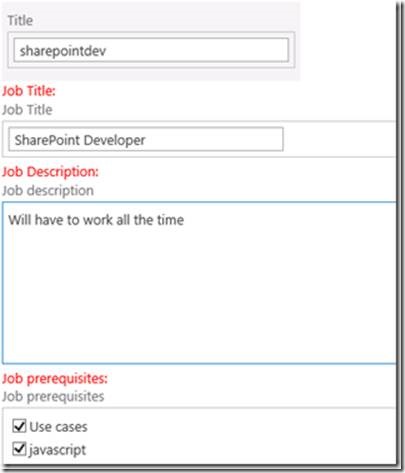
When saved, the page looks like this:

clip_image044

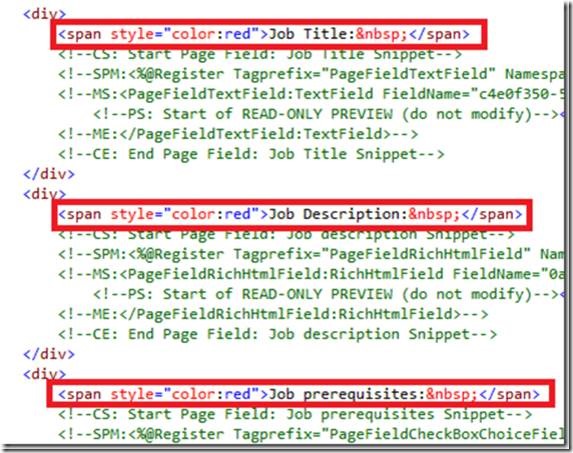
There are no fields labels.

So update the html file with the following spans :

clip_image046

When you make any modification to the html file, don’t forget to Publish a Major version of the file (in the Master Page and Page Layouts gallery).

clip_image048

Now, we are going to redeploy the package.

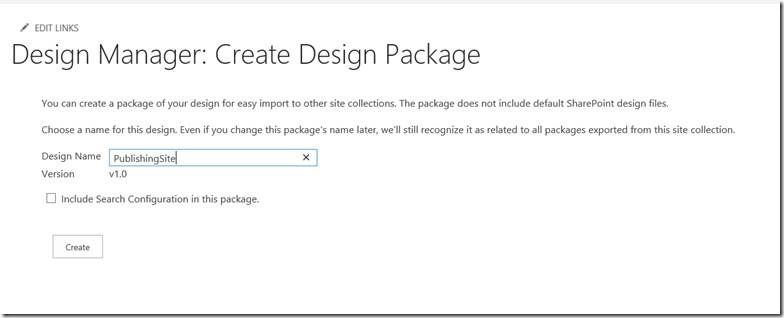
Go to Design manager and Select Create Design Package.

clip_image050

clip_image052

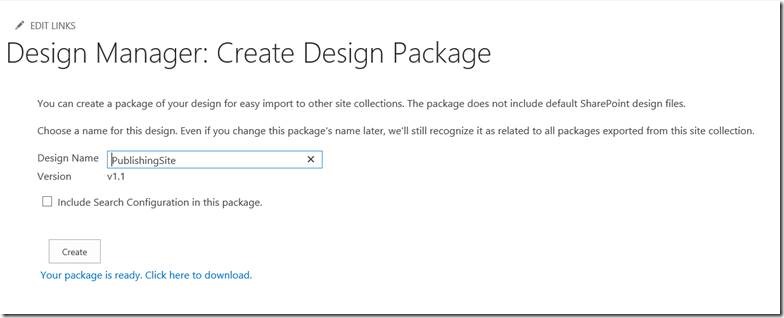
On clicking the Create,

clip_image054

By clicking the download, we can download our package.

The downloaded will be a WSP and we can open the WSP using visual studio and see, the artifacts. Then we need to copy those files and put in a separate visual studio solution to deliver the package alone.

Happy coding.

Sathish Nadarajan.

Author Info

Sathish Nadarajan
 
Solution Architect
 
Rate this article
 
Sathish is a Microsoft MVP for SharePoint (Office Servers and Services) having 15+ years of experience in Microsoft Technologies. He holds a Masters Degree in Computer Aided Design and Business ...read more
 

Adding the Self Signed Certificate in Manage trusted of SharePoint 2013

Sathish Nadarajan
 
Solution Architect
September 17, 2013
 
Rate this article
 
Views
30072

In the previous article, we saw how to create a Self-Signed Certificate from IIS. Now, let us see how to copy it into a file and make use of it in SharePoint 2013.

1. Go to IIS

clip_image002

1. Select “Server Certificates”.

2. We will see the list of already existing certificates.

clip_image004

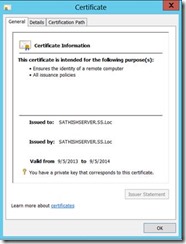
3. Double click the certificate

4. We will be prompted with the below popup.

clip_image006

5. On the Details Tab, there will be a link to “Copy to File…”

6. Click that one.

clip_image008

7. We will be prompted with the wizard.

clip_image010

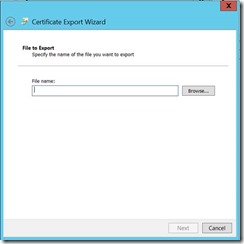
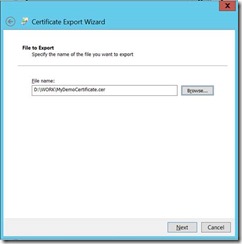
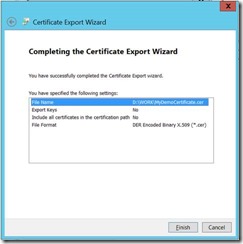
8. Follow the below screen shots to complete the wizard. As they are self explanatory.

clip_image012

clip_image014

clip_image016

clip_image018

clip_image020

clip_image022


Once the export is successful, we will be able to see the Cert on the given path with an extension of *.cer.


Now let us have a look at how to add this certificate in to SharePoint 2013 Central Administration.


1. Let us go to the Central Administration

clip_image024

2. Go to the Security.

clip_image026

3. Click on the Manage Trust.

clip_image028

4. You will be able to see the existing trusted certificates.

5. Click on new.

clip_image030

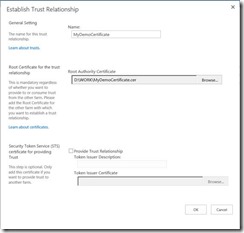
6. On the Popup, enter the necessary information.

clip_image032

7. We will be able to see the certificate on the list.

clip_image034

8. Now, this certificate can be access through out your sharepoint 2013 farm.


With this, we came to know, how to export the file into cer and how to use that in SharePoint 2013. Let us see the exact usage of these steps in following articles.


Happy SharePointing…

Category : IIS, SharePoint

Author Info

Sathish Nadarajan
 
Solution Architect
 
Rate this article
 
Sathish is a Microsoft MVP for SharePoint (Office Servers and Services) having 15+ years of experience in Microsoft Technologies. He holds a Masters Degree in Computer Aided Design and Business ...read more
 

Creating Various types of Web Application in SharePoint 2013

Sathish Nadarajan
 
Solution Architect
September 14, 2013
 
Rate this article
 
Views
21396

In this article, let us see how to create a various types of web applications in SharePoint 2013. For example, let us see the various example URLs.


I. http://sathishserver:3000/Sites/Sitecollection

II. https://sathishserver:3001/Sites/Sitecollection

III. https://sathishserver:3002/Sites/SiteCollection – This is going to be the same site as that of 3000 and by using the Alternate Access mapping, creating one more URL for the same site with https.

IV. Changing the Default port from 3000 to 3002.

V. https://sathishserver.ss.loc/ – This itself is a site collection. i.e., with a HostHeader other. It is very tough to remember the url with the port number. In some scenario, the url needs to be without a port number. But actually, this is running on a port. In our example, it is going to be 3003. In the production environment, for sure, the url is not going to be with port number. To replicate the same scenario, we are using this approach.

VI. https://sathishserver.ss.loc:3004/Sites/SiteCollection – This is required, to reproduce the same scenario as that of cloud share environment. In cloudshare, the default domain would be dc07.loc. Hence, some of the web applications created would be with that extension.

VII. http://sathishserver.ss.loc:3005/Sites/SiteCollection

It is not mandatory to use the HTTPS. But even then, on the production environment, definitely the sites will be HTTPS enabled. Hence we should also keep our development site as HTTPS enabled. It is not a very big deal. But we should know the procedure to create one. That is the objective of this Article. In this article, we will see the power shell scripts also.


Let us see the basic Web Application Creation. We will take this as a benchmark and the other web applications, we may not be seeing in depth.


I. http://ServerName:3000/Sites/SiteCollection

For this, my server name is SathishServer and let us use that. Hence our Site Collection URL would be http://SathishServer:3000/Sites/SiteCollection

As usual, let us start with step by step procedures.

1. Before doing that, we need to create a Self-Signed Certificate on our SharePoint machine. Am planning to document those steps in a separate Article. As of now, there are many resources available on the net to create that. Let us assume that, we created a self-signed certificate.

2. Go to Central Administration.
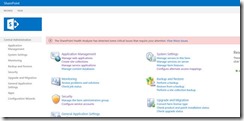
clip_image002

3. Click on Manage Web Applications.

4. We will see the List of available Web Applications.

clip_image004

5. Click “New” in the top ribbon.

clip_image006

6. We will get the above screen for input.

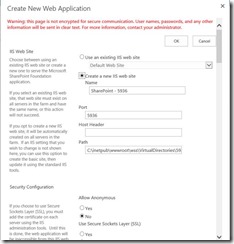
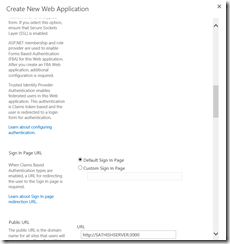
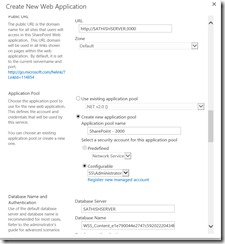
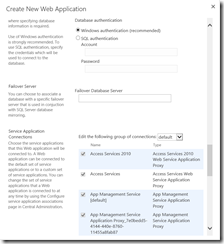
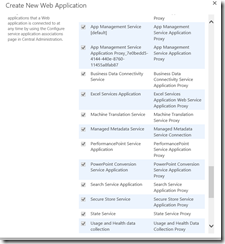
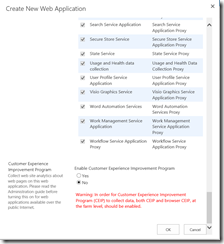
7. Give the necessary information. The information I gave are as follows. The values which I am giving are the one going to decide how my web application is going to behave. Instead of explaining each and every field, let me fill the screen and press OK. Let us see the results.
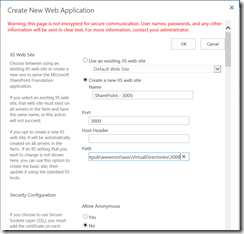
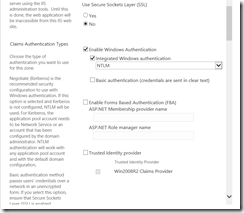
clip_image007

clip_image008

clip_image009

clip_image010

clip_image011

clip_image012

clip_image013

8. Since, this is going to be treated as a benchmark for the other types, I am taking all the screen shots. Though the steps are very simple, I am documenting them.

9. Click “OK”.

10. After a moment, we will get the below screen.
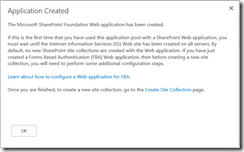
clip_image014

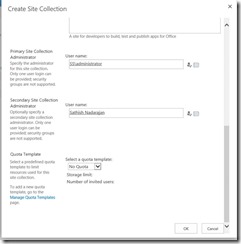
11. From here, let us create a site collection. Since, we would have created the site collection many times, I am not going to explain about them here. Let us follow the screen shots and create a site collection.
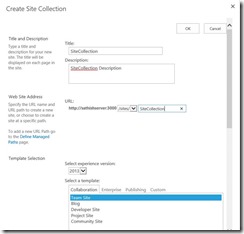
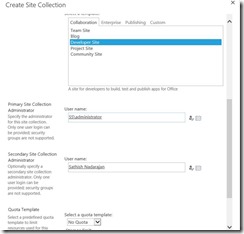
clip_image016

clip_image018

clip_image020

12. Let us click “OK”. We will get our Site Collection Created.

clip_image021

13. Now the WebApplication List will looks like this.

clip_image023

Now let us see, how to Create another Web Application with HTTPS.

II. https://SathishServer:3001/Sites/SiteCollection

1. It is same as that of the previous exercise. The key difference on the procedure are as follows.
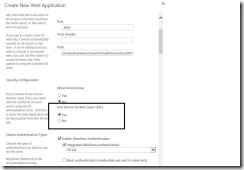
clip_image025

2. Let us create the web application.

3. As usual we will get the Create Site Collection screen and in that also, create a site collection.

4. Site Collection has been created.

clip_image027

5. Let us try opening the Site Collection.

6. We will get the below error.
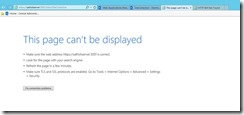
clip_image029

7. To make this site work, we should go and Bind the web application to the Certificate which we created on the IIS.

8. To do this, let us open the IIS by entering “inetmgr”.

9. Let us go to the IIS and we should be able to see the Web Application listed as below.
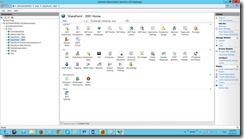
clip_image031

10. Select the “Bindings” on the right pane.

11. The below screen will be poped up.
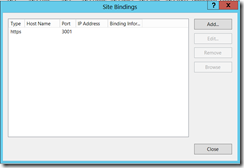
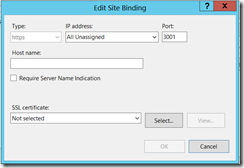
clip_image032

12. Edit the existing Binding.

clip_image033

13. Select the Certificate, which we already created. I guess, we created. J.
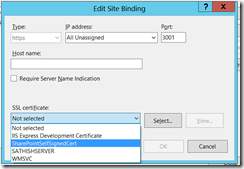
clip_image034

14. Do an IISRESET.

15. Refresh the Site, which we created.

16. OOPS, We got our Site Collection working.
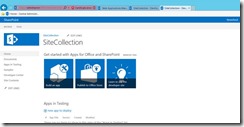
clip_image036

III. With this, let us talk about the 3 requirement. I want to convert my existing http (3000) Site collection into a https Site Collection. Say for example, I want both the URLs needs to be presented. i.e.,

http://sathishserver:3000/Sites/SiteCollection as well as https://sathishserver:3002/Sites/SiteCollection.

Let us see, how to achieve this. To achieve this, we are going to use the Alternate Access Mapping. Probably, it can be explained in a separate article. But as of now, the important things, which is required to convert (not exactly) but add another URL for the existing site.

1. Let us go back to our Central Administration and Click “Configure Alternate Access Mappings”
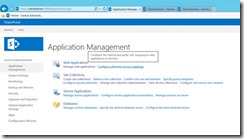
clip_image038

2. Click on Change “Alternate Access Mapping Collection”

clip_image040

3. Select the 3000 Site, which we created.
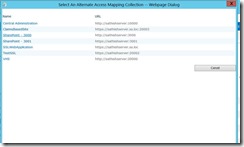
clip_image042

4. The screen will be like this.

clip_image044

5. Click on “Add Internal URLs”

clip_image046

6. Enter the Details and Select Save.

clip_image048

7. We can see 2 URLS for that Web Application.

clip_image050

8. Now coming back to IIS

9. Select the web Application and click Bindings.

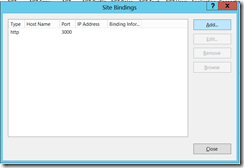
clip_image052

10. Click “Add”

clip_image053

11. Select https on the drop down.

12. Enter the port number as 3002.

13. Select the certificate which we created already.

14. Hence the screen would be as follows.
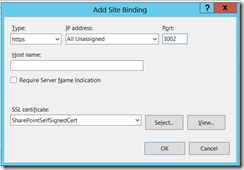
clip_image054

15. Click OK.

16. Now, go back to the browser and enter the url as https://sathishserver:3002/Sites/SiteCollection

17. That’s it. The site got loaded on the screen.
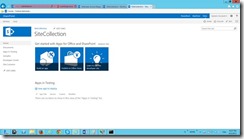
clip_image056

18. Now we have both the URLs, 3000 for http and 3002 for https. Both the urls will redirect to the same site.

IV. Now, the next thing, converting the default port to 3002. Now, the default port would be 3000.

1. To verify that, let us go the Manage Web Applications Page.

clip_image058

2. The default url would be 3000 and the Port is also pointing to 3000. Now we want to change this into our newly created url.

3. To do that, let us go back to the Alternate Access Mapping.

4. This time, click “Edit Public URLs”.

clip_image060

5. You will be prompted with the following screen.
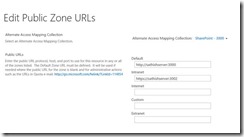
clip_image062

6. Here, swap the url. That’s it. If we go back to Manage Web Applications, we can see the default port as 3002.

V. Now, let us see how to create the HostHeader for our WebApplication.

1. Go to Central Administration.

2. Go to New Web Application Page.

3. Enter the details as follows. The key difference is, enter some value on the HostHeader.
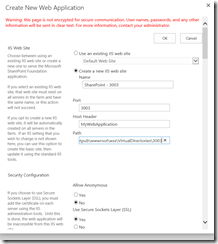
clip_image063

4. On the URL, remove the Port number. Give an appropriate name on the Application Pool.
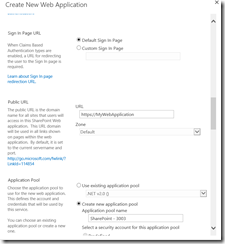
clip_image064

5. The rest of the things going to be remaining the same.

6. Now the url https://mywebapplication/ is ready. The point to be noted here is, by default, the port would be taken as 443, as we are specifying SSL enabled.

Now, as a last option, Let us try creating with PowerShell scripts.

New-SPWebApplication -Name "ClaimsBasedSite" -ApplicationPool "SharePoint-20003" -ApplicationPoolAccount "SS\Sathish" -URL "https://SathishServer.ss.loc:20003" -AuthenticationProvider $ap -SecureSocketsLayer

Now, this will do the magic for us.

Happy SharePointing…

Category : SharePoint

Author Info

Sathish Nadarajan
 
Solution Architect
 
Rate this article
 
Sathish is a Microsoft MVP for SharePoint (Office Servers and Services) having 15+ years of experience in Microsoft Technologies. He holds a Masters Degree in Computer Aided Design and Business ...read more
 

PowerShell Script to Install SharePoint 2013 Provider Hosted Application

Sathish Nadarajan
 
Solution Architect
July 29, 2013
 
Rate this article
 
Views
20584

We had seen many articles regarding the development of Provider Hosted Application, as well as how to deploy them using the visual studio. In this article I’ll explain how to use PowerShell script to install an App.

Now let us assume that we need to move the app from environment to environment. i.e., from the Development box, we are planning to move the app to staging. At that time, you can’t expect visual studio on the Staging machine. We need to install the app through the GUI. But even that also a time consuming process and there will always be an equivalent power shell script for everything on the SharePoint.

To pack the app, always the best practice will be using the power shell script. For the installation of app, the power shell script would be as follows.

 param
 (
 [string]$Web = "https://MySiteCollection",
 
 [string]$Source = "DeveloperSite"
 )
 
 
 Write-Host -ForegroundColor White "-------------------"
 
 Write-Host -ForegroundColor White "| App Installer |"
 
 Write-Host -ForegroundColor White "-------------------"
 
 Write-Host -ForegroundColor White "- "
 
 #Global vars
 $AppPackageName = "MYSAmpleApp.app";
 
 #Loads powershell settings
 Write-Host -ForegroundColor White "- Load Powershell context.."
 
 $0 = $myInvocation.MyCommand.Definition
 
 $dp0 = [System.IO.Path]::GetDirectoryName($0)
 
 #Loads the SharePoint snapin
 
 Write-Host -ForegroundColor White "- Load SharePoint context.."
 
 $ver = $host | select version
 
 if ($ver.Version.Major -gt 1) {$host.Runspace.ThreadOptions = "ReuseThread"} 
 
 if ((Get-PSSnapin "Microsoft.SharePoint.PowerShell" -ErrorAction SilentlyContinue) -eq $null) 
 {
     Add-PSSnapin "Microsoft.SharePoint.PowerShell";
 }
 [void][System.Reflection.Assembly]::Load("Microsoft.SharePoint, Version=15.0.0.0, Culture=neutral, PublicKeyToken=71e9bce111e9429c") 
 
 #Imports the App package
 
 Write-Host -ForegroundColor White "- Import app package '$AppPackageName'..."
 
 $appPath = $dp0 + "" + $AppPackageName;
 
 if ($Source.Equals("ObjectModel", [System.StringComparison]::InvariantCultureIgnoreCase)) 
 {
     $sourceApp = ([microsoft.sharepoint.administration.spappsource]::ObjectModel);
 }
 elseif ($Source.Equals("Marketplace", [System.StringComparison]::InvariantCultureIgnoreCase))
  {
     $sourceApp = ([microsoft.sharepoint.administration.spappsource]::Marketplace);
 }
 elseif ($Source.Equals("CorporateCatalog", [System.StringComparison]::InvariantCultureIgnoreCase))
 {
     $sourceApp = ([microsoft.sharepoint.administration.spappsource]::CorporateCatalog);
 }
 elseif ($Source.Equals("DeveloperSite", [System.StringComparison]::InvariantCultureIgnoreCase))
 {
     
     $sourceApp = ([microsoft.sharepoint.administration.spappsource]::DeveloperSite);
 }
 elseif ($Source.Equals("RemoteObjectModel", [System.StringComparison]::InvariantCultureIgnoreCase))
 {
     Write-Host -ForegroundColor White "- SharePoint Developer Site.."
 
     $sourceApp = ([microsoft.sharepoint.administration.spappsource]::RemoteObjectModel);
 }
 
 $spapp = Import-SPAppPackage -Path "$appPath" -Site $Web -Source $sourceApp -Confirm:$false -ErrorAction SilentlyContinue -ErrorVariable err;
 
 
 if ($err -or ($spapp -eq $null)) 
 {
     Write-Host -ForegroundColor Yellow "- An error occured during app import !"
     throw $err;
 }
 Write-Host -ForegroundColor White "- Package imported with success."
 
 #Installs the App
 Write-Host -ForegroundColor White "- Install the APP in web site..."
 
 $app = Install-SPApp -Web $Web -Identity $spapp -Confirm:$false -ErrorAction SilentlyContinue -ErrorVariable err;
 
 if ($err -or ($app -eq $null)) 
 {
 
     Write-Host -ForegroundColor Yellow "- An error occured during app installation !"
     throw $err;
 }
 $AppName = $app.Title;
 
 Write-Host -ForegroundColor White "- App '$AppName' registered, please wait during installation..."
 
 $appInstance = Get-SPAppInstance -Web $Web | where-object {$_.Title -eq $AppName};
 
 $counter = 1;
 
 $maximum = 150;
 
 $sleeptime = 2;
 
 Write-Host -ForegroundColor White "- Please wait..." -NoNewline;
 
 while (($appInstance.Status -eq ([Microsoft.SharePoint.Administration.SPAppInstanceStatus]::Installing)) -and ($counter -lt $maximum))
 {
     Write-Host -ForegroundColor White "." -NoNewline;
     sleep $sleeptime;
     $counter++;
     $appInstance = Get-SPAppInstance -Web $Web | where-object {$_.Title -eq $AppName} 
 }
 Write-Host -ForegroundColor White ".";
 
 if ($appInstance.Status -eq [Microsoft.SharePoint.Administration.SPAppInstanceStatus]::Installed) 
 {
     Write-Host -ForegroundColor White "- The App was successfully installed.";
     Write-Host -ForegroundColor White $appInstance
     $appUrl = $appInstance.AppWebFullUrl;
     Write-Host -ForegroundColor White "- The App is now available at '$appUrl'.";
     Write-Host -ForegroundColor White  "- (Don't forget to add app host name in your host file if necessary...).";
     Write-Host -ForegroundColor White "- "
 }
 else
 {
     Write-Host -ForegroundColor Yellow "- An unknown error has occured during app installation. Read SharePoint log for more information.";
 }
 

Author Info

Sathish Nadarajan
 
Solution Architect
 
Rate this article
 
Sathish is a Microsoft MVP for SharePoint (Office Servers and Services) having 15+ years of experience in Microsoft Technologies. He holds a Masters Degree in Computer Aided Design and Business ...read more
 

Step by Step procedure to Programmatically Implement LogAnalytics against a SharePoint 2013 ListItem

Sathish Nadarajan
 
Solution Architect
July 23, 2013
 
Rate this article
 
Views
21440

Let us have a look into the SharePoint 2013 Analytics namespace in the Microsoft.SharePoint.Client.dll, which will be used to LogAnalytics against any list item programmatically. There are certain steps needs to be followed to do the LogAnalytics. Let us dive into them.

In SharePoint 2013, by going to the Central Administration->Monitoring->Reporting, we can identify the number of hits to a site, number of users etc. But as far as concerning a product catalog list or any custom list, if we want to see how many times, the item has been viewed, modified kind of information, then there is no possibility by default.

The practical scenario for this would be as follows. I have a List which contains the information about the Products. The search should be optimized in such a way that, if a particular product is been viewed by most of the viewers, then that product should be listed on top of the Search. This is obvious that the site should behave like this only.

To make this work, Microsoft has given a separate namespace called Microsoft.SharePoint.Client.Analytics, which is internally works with Search index and there are many articles to explain about them. In this article, we are going to see the procedure to Implement LogAnalytics from a Provider Hosted Application. First of all, we should be clear about the problem statement. Hence the problem statement would be

“From the Provider Hosted Application(PHA), I will be viewing the products(List Item in the ProductCatalog List). The products which were viewed highest number of times, should be listed on the top of the Search Results.”

This is the one line problem statement. To achieve this programatically, MSFT has given certain API’s. Since we are going to log everything from the PHA. Basically, what we are going to do is, log certain events. Viewing is an event, which needs to be logged, every time the event occurred. Hence the Search service will take the count (Number of times the event occurred), and list it on the top of the Results page.

To achieve this, we need to register the event to the SharePoint first. For that, I am going to use the following PowerShell Script.

 cls
 Add-PSSnapin "Microsoft.SharePoint.PowerShell"
 
 $Site = Get-SPSite "My Site Collection URL"
 
 $SSP = Get-SPEnterpriseSearchServiceApplicationProxy
 $EventGuid = [Guid]::NewGuid();
 $EventName = "View the Item";
 $tenantConfig = $SSP.GetAnalyticsTenantConfiguration([Guid]::Empty);#
 $newEventType = $tenantConfig.RegisterEventType($EventGuid, $EventName, "TestValue")
 $tenantConfig.Update($SSP)
 
 Write-Host $EventGuid 


On the Successful registration, the output would be a GUID on the PowerShell window. Copy the GUID. That needs to be passed from the Provider Hosted Application.

Now, our event got registered and we got the GUID corresponding to the event. We need to verify whether any event has been registered on the SharePoint or not right. There is a way to find this on the Physical files of SharePoint Farm.

Navigate to the path “C:\Program Files\Microsoft Office Servers\15.0\Data\Office Server\Analytics_******”. There you will be able to find some txt files which will contains the information about the event which we registered.

Now we are ready to register the Event from our Provider Hosted Application. Now, let us go back to our .Net (PHA). There let us assume that we have a button to register the event. Hence on the Button Click, the code will be

 protected void btnLogAnalytics_OnClick(object sender, EventArgs e)
 {
     try
     {
         CsomHelper csomHelper = new CsomHelper();
         ClientContext clientContext = csomHelper.GetClientContext("MySiteCollection URL", HttpContext.Current.User);
         Guid guid = new Guid("4f09fbec-180a-430d-a77c-241566853926"); -> The copied URL from the SharePoint Farm.
         AnalyticsUsageEntry.LogAnalyticsAppEvent(clientContext, guid, GetItemURLByNumber("MySiteCollection URL", "Value", "ListName"));
         clientContext.ExecuteQuery();
 
         clientContext.Dispose();
 
 
     }
     catch (Exception ex)
     {
         string strException = ex.Message;
     }
 }

//GetItemURLByNumber – Method will return a string in the form of URL of the List Item. Basically on the method, we are trying to get the URL of the List Item based on the Number in a particular column and the List name.

The URL of the List Item should be as follows. https://c4968397007.dc07.loc:9470/sites/ADFSTest/Lists/ProductCatalog/1_.000

 private string GetItemURLBySKUNumber(string SPHostUrl, string Number, string ListName)
 {
     string ItemUrl = string.Empty;
     Helper csomHelper = new Helper();
 
     //How to get the ClientContext has been discussed early in this blog.  (https://www.sharepointpals.com/post/Getting-the-Client-Context-from-Claims-Aware-Provider-Hosted-Application-in-SharePoint-2013. )
     ClientContext clientContext = csomHelper.GetClientContext(SPHostUrl, HttpContext.Current.User);
              
     Web web = clientContext.Web;
             
     var oList = web.Lists.GetByTitle(ListName);
 
     CamlQuery camlQuery = new CamlQuery();
     camlQuery.ViewXml = "<View><Query><Where><Eq><FieldRef Name='" + "Number" + "'/><Value Type='Text'>" + Number + "</Value></Eq></Where></Query></View>";
     Microsoft.SharePoint.Client.ListItemCollection collListItem = oList.GetItems(camlQuery);
 
     clientContext.Load(collListItem);
     clientContext.ExecuteQuery();
 
     Microsoft.SharePoint.Client.ListItem oListItem = collListItem.First();
 
     char[] delimiters = new char[] { '/' };
     string[] temp = Convert.ToString(oListItem.FieldValues["FileRef"]).Split(delimiters);
 
     ItemUrl = string.Format("{0}Lists/{1}/{2}", Convert.ToString(clientContext.Url), ListName, temp[temp.Count() - 1]);
 
     clientContext.Dispose();
 
     return ItemUrl;
 }

With this, we are successfully able to call the LogAnalyticsAppEvent method. Even to verify this also, the go to the same location on the SharePoint Farm and you can find an entry with the same entry.

Author Info

Sathish Nadarajan
 
Solution Architect
 
Rate this article
 
Sathish is a Microsoft MVP for SharePoint (Office Servers and Services) having 15+ years of experience in Microsoft Technologies. He holds a Masters Degree in Computer Aided Design and Business ...read more
 

Leave a comment