Install SSL certificate to the Server and Binding of SSL certificate to IIS Website

Ahamed Fazil Buhari
 
Senior Developer
January 20, 2018
 
Rate this article
 
Views
4044

Hi everyone, this is continuation of my previous article “Generate CSR in Windows Server for SSL Certificate”. In this article we will see how to install SSL certificate to your website.

Install SSL Certificate

In my case I have the certificate ready, so I go ahead with how to install SSL certificate in your server.

Step 1: Go to IIS -> Server Certificates -> Complete Certificate Request.

clip_image002

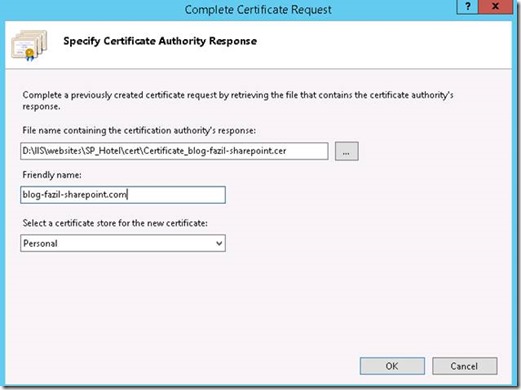
Step 2: Browse for the certificate with .cer extention which you received from SSL certificate provider

clip_image004

Step 3: Click on OK.

clip_image006

Binding Certificate to a Web Site

The final step to add certificate to your website is to bind the certificate for your site in IIS.

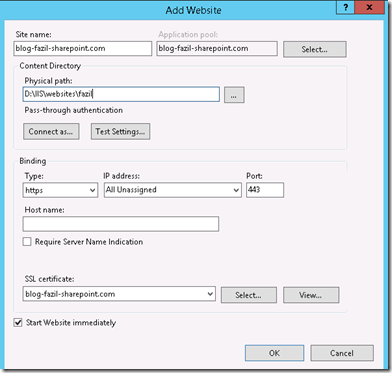
Step 1: Go to IIS Manager and if you are creating new site with https then straight away you can select certificate as shown below,

clip_image007

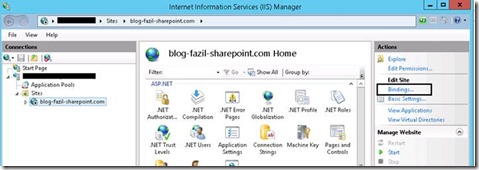
Step 2: To add certificate for existing site. Click on the site name and in right panel under Actions select Bindings…

clip_image009

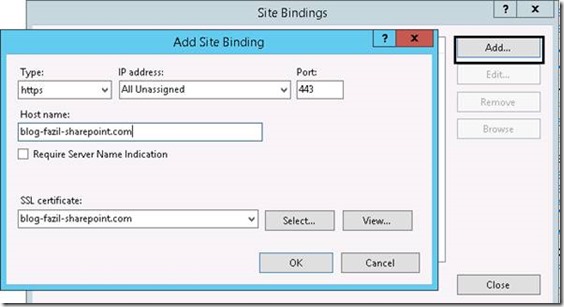
Step 3: In Site Bindings window, click on Add button and create https site by choosing the certificate which we installed in previous steps.

Enter binding details:

· Type: https

· IP address: leave blank (internal)

· Port: 443

· Host name: same as common name in certificate

· Require SNI: check

· SSL certificate: pick corresponding certificate from the list (name matching)

clip_image011

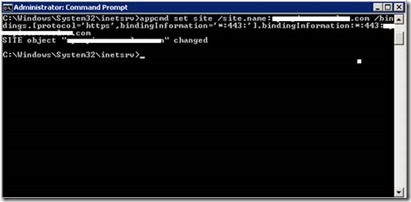
In some cases, host name could be disabled. In that case – Use the below command to update the host name in your https binding (open the cmd as Administrator and navigate to the following path – OR we can add https site through UI (Please refer the document ‘Ordering SSL for IIS’ inserted under ‘Request for Certificate’ topic for adding https through UI)

o C:\Windows\System32\inetsrv and run the below command


o appcmd set site /site.name:YourSiteName /bindings.[protocol=’https’,bindingInformation=’*:443:’].bindingInformation:*:443: YourSiteName

clip_image013

I hope you will find this article useful. Thank you J

Happy Coding

Ahamed

Category : IIS, Windows

Author Info

Ahamed Fazil Buhari
 
Senior Developer
 
Rate this article
 
Ahamed is a Senior Developer and he has very good experience in the field of Microsoft Technologies, especially SharePoint, Azure, M365, SPFx, .NET and client side scripting - JavaScript, TypeScript, ...read more
 

Step by Step procedure to Deploy Web API in IIS

Ahamed Fazil Buhari
 
Senior Developer
January 9, 2018
 
Rate this article
 
Views
7345

Hello everyone,

In this article we will look into step by step procedure to deploy you Web API. Here we have used IIS 7.


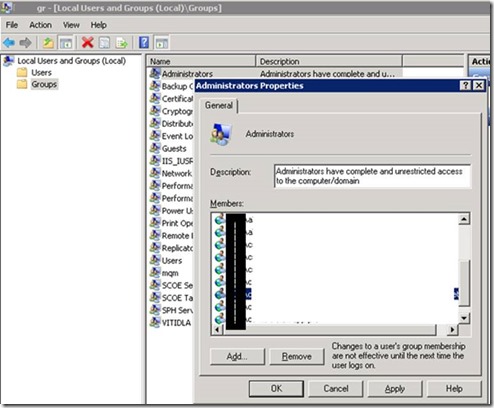
1. It is good to use service account for Web API especially in your Production environment. Add service account to Administrator group in the server:

clip_image002


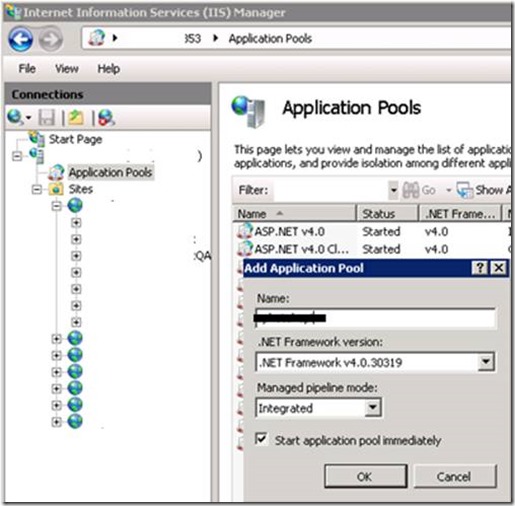
2. Create a separate application pool in IIS (good practice to have separate app pool for your website).

clip_image004


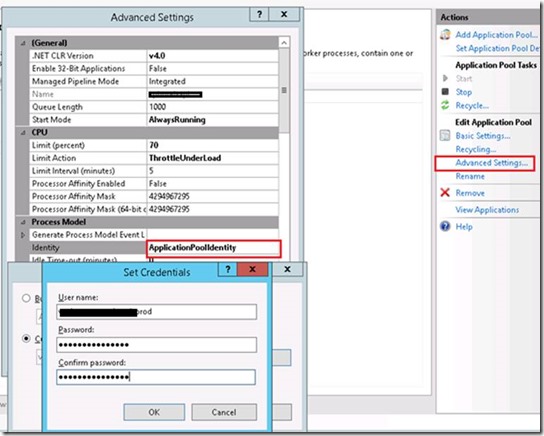
3. Set the application pool Identity as the service account which we used in step 1.

clip_image006


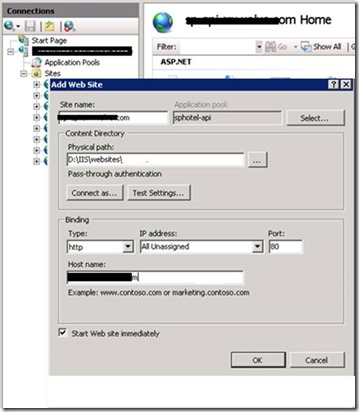
4. In IIS, right click on Site -> Add Web Site. Make sure the application pool is selected which is created in the previous step.

clip_image008


5. If you need to create https site, then we need to have proper certificate which can support the host name we created.

Happy Coding

Ahamed
Category : IIS, SharePoint, WebAPI

Author Info

Ahamed Fazil Buhari
 
Senior Developer
 
Rate this article
 
Ahamed is a Senior Developer and he has very good experience in the field of Microsoft Technologies, especially SharePoint, Azure, M365, SPFx, .NET and client side scripting - JavaScript, TypeScript, ...read more
 

Steps to perform WCF IIS hosting

Tarun Kumar Chatterjee
 
Net – Technology Specialist
May 31, 2016
 
Rate this article
 
Views
6090

The main advantage of IIS hosting service is that, it will automatically launch the host process when it gets the first client request. It uses the features of IIS such as process recycling, idle shutdown, process health monitoring and message based activation. The main disadvantage of using IIS is that, it will support only HTTP protocol.

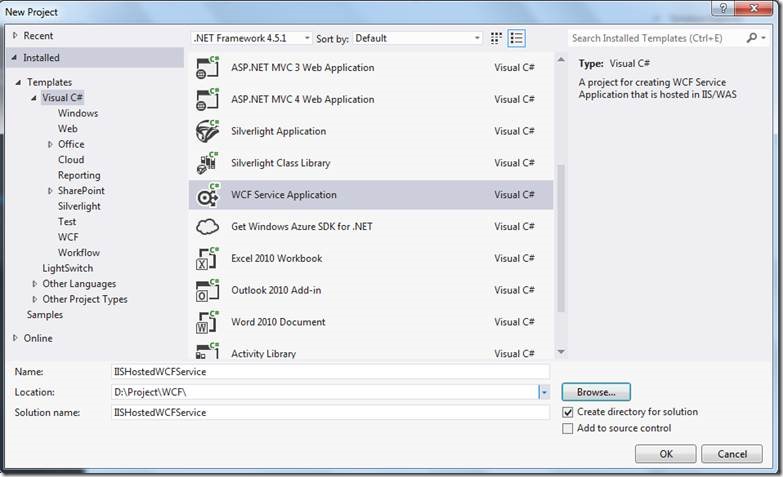
Start the Visual Studio and click File — >New — >Web Site. Select the ‘WCF Service Application’ click OK.

clip_image002

I have created a service named as MyService, which will accept value as input and return as “You entered: value”. Interface and implementation of the Service is shown below.
Add a WCF service with the following codes

clip_image004

Below is the IISHostedWCFService interface code:

 using System;
 using System.Collections.Generic;
 using System.Linq;
 using System.Runtime.Serialization;
 using System.ServiceModel;
 using System.Text;
 
 namespace IISHostedWCFService
 {
     [ServiceContract]
     public interface IMyService
     {
         [OperationContract]
         string GetData(int value);
 
         [OperationContract]
         CompositeType GetDataUsingDataContract(CompositeType composite);
     }
     [DataContract]
     public class CompositeType
     {
         bool boolValue = true;
         string stringValue = "Hello ";
 
         [DataMember]
         public bool BoolValue
         {
             get { return boolValue; }
             set { boolValue = value; }
         }
 
         [DataMember]
         public string StringValue
         {
             get { return stringValue; }
             set { stringValue = value; }
         }
     }
 }
 
 Below is the interface implement code: 
 using System;
 using System.Collections.Generic;
 using System.Linq;
 using System.Runtime.Serialization;
 using System.ServiceModel;
 using System.Text;
 
 namespace IISHostedWCFService
 {    
     public class MyService : IMyService
     {
         public string GetData(int value)
         {
             return string.Format("You entered: {0}", value);
         }
 
         public CompositeType GetDataUsingDataContract(CompositeType composite)
         {
             if (composite == null)
             {
                 throw new ArgumentNullException("composite");
             }
             if (composite.BoolValue)
             {
                 composite.StringValue += "Suffix";
             }
             return composite;
         }
     }
 }


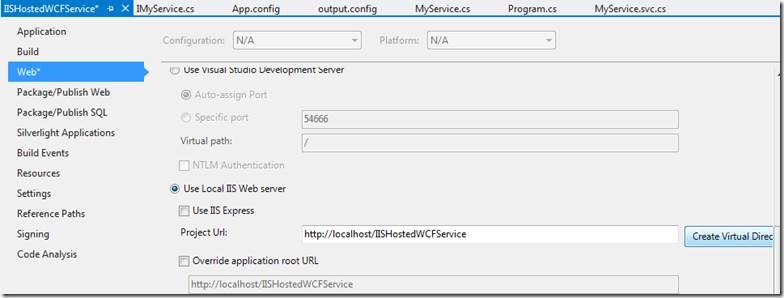
Right click on IISHostedWCFService and go to Properties. Go to Web, Select “Use Local IIS Web Server”, set the project URL properly and then click on Create Virtual Directory. It will be successfully created the virtual directory in IIS.

clip_image006

Here is my web.config code

 <?xml version="1.0"?>
 <configuration>
   <appSettings>
     <add key="aspnet:UseTaskFriendlySynchronizationContext" value="true" />
   </appSettings>
   <system.web>
     <compilation debug="true" targetFramework="4.5.1" />
     <httpRuntime targetFramework="4.5.1"/>
   </system.web>
   <system.serviceModel>    
     <services>
       <service name="IISHostedWCFService.MyService">
 	    <endpoint address="http://localhost/IISHostedWCFService/MyService.svc" binding="wsHttpBinding" contract="IISHostedWCFService.IMyService">
 	    <identity>
 	    <dns value="localhost"/>
 	    </identity>
 	    </endpoint>
 	    <endpoint address="mex" binding="mexHttpBinding" contract="IMetadataExchange"/>
    </service>
     </services>
     <behaviors>
       <serviceBehaviors>
         <behavior>          
           <serviceMetadata httpGetEnabled="true" httpsGetEnabled="true" />          
           <serviceDebug includeExceptionDetailInFaults="false"/>
         </behavior>
       </serviceBehaviors>
     </behaviors>    
   </system.serviceModel>
   <system.webServer>
     <modules runAllManagedModulesForAllRequests="true"/>    
     <directoryBrowse enabled="true"/>
   </system.webServer>
 </configuration>


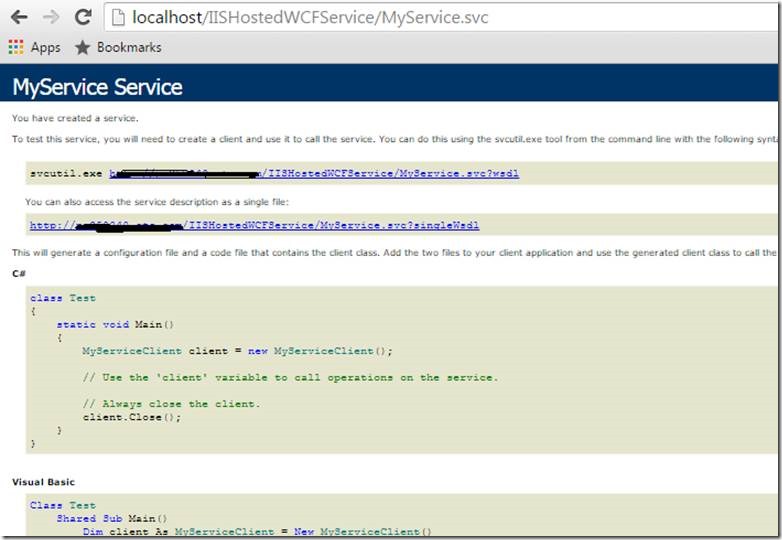
Now my service is ready, build it and browse

clip_image008

If we open the WSDL link it will show you the WSDL xml content properly.

To host the service, let’s add another client console application within the solution named as “IISHostedWCFClient”
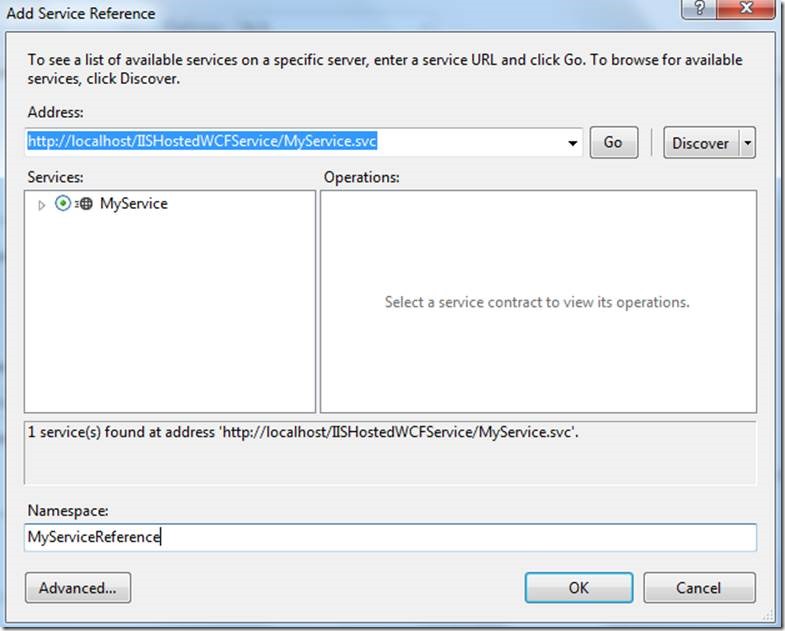
Within the console application add service reference named as “MyServiceReference” and using the Address http://localhost/IISHostedWCFService/MyService.svc

clip_image010

Within the Program.cs add the following code:

 static void Main(string[] args)
         {
              MyServiceReference.MyServiceClient client = new MyServiceReference.MyServiceClient();
              Console.WriteLine("Client calling the service...");             
              Console.WriteLine(client.GetData(5));
              Console.ReadLine();
 
         }  


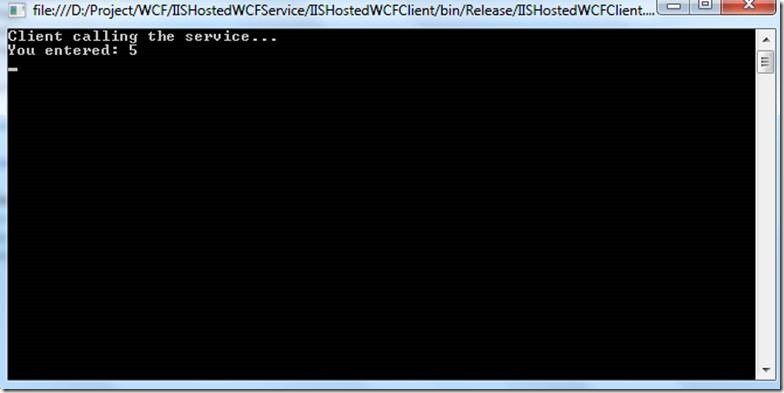
Now run the console application, it will pass the value 5 to service and display the result as:

clip_image012

Happy Coding

Tarun Kumar Chatterjee

Category : .Net

Author Info

Tarun Kumar Chatterjee
 
Net – Technology Specialist
 
Rate this article
 
Tarun has been working in IT Industry for over 12+ years. He holds a B-tech degree. He is passionate about learning and sharing the tricks and tips in Azure, .Net ...read more
 

Creating a Domain Certificate from Certificate Authority through IIS Server

Sathish Nadarajan
 
Solution Architect
January 3, 2014
 
Rate this article
 
Views
49307

In the previous article, we saw how to install ADCS and convert our Windows Server 2008 R2 into a Certification Authority Server. In this post, let us see, how to use that CA to issue certificate for us.

There are 2 ways to create the certificate using CA. In this article, let us see one through IIS Server.

Approach I – Through IIS:

In this Approach, the same as that of creating a Self-Signed Certificate, we can also create a Domain Certificate as well. Only thing is, Active Directory Certificate services should be installed on the Domain. If it is not properly installed, then we cannot create a Domain Certificate. Though we are able to see the link to Create Domain Certificate from the IIS, we cannot create. Let us see, how we cannot Create first.

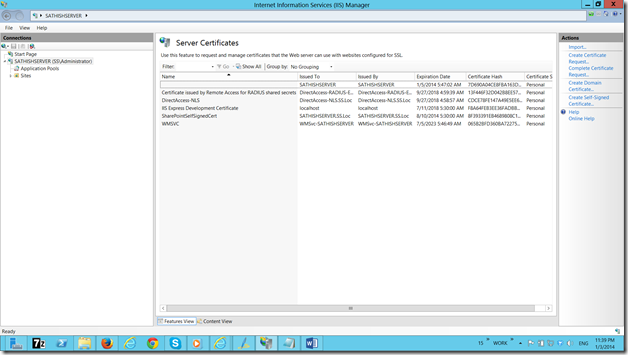
Let us go to the IIS Server.

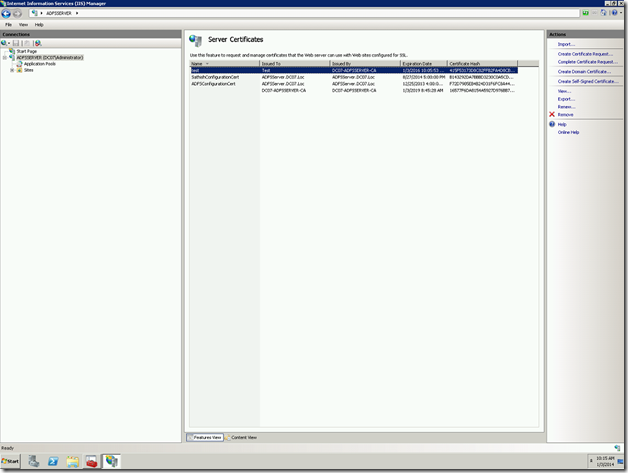
image

On the Right Pane, we can see the option to Create Domain Certificate. Click that one.

image

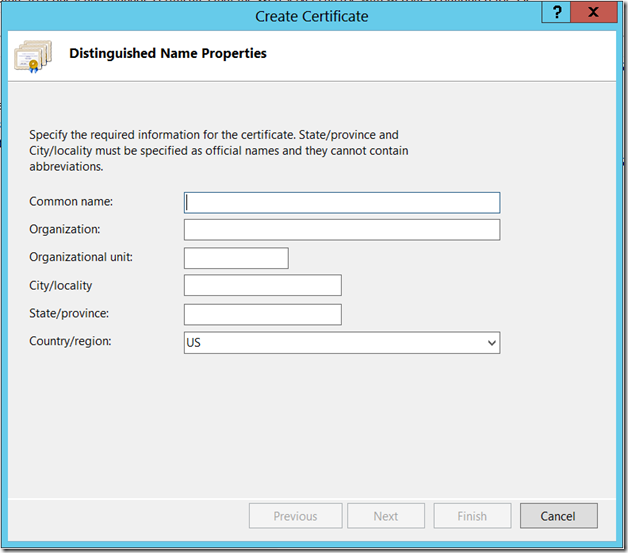
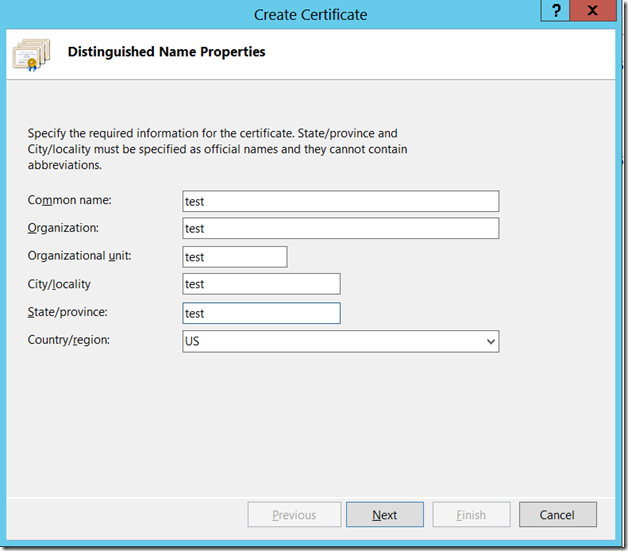
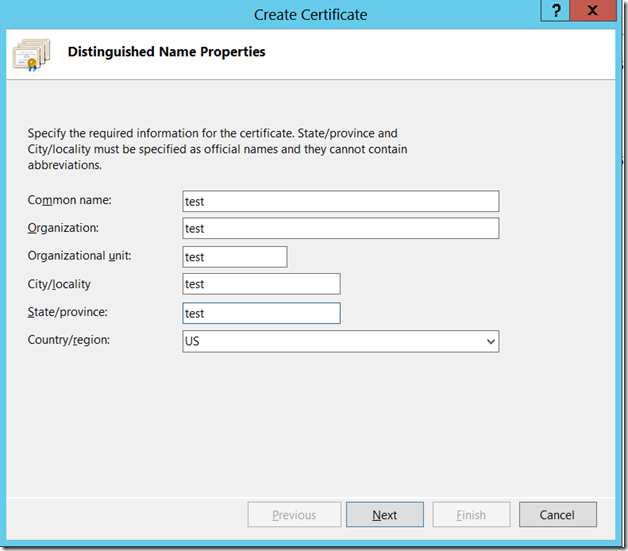
We need to give all the necessary information. Then only Next Button will get enabled.

For documentation purpose, am giving test in all the fields.

image

When I press Next, the next screen would be


image

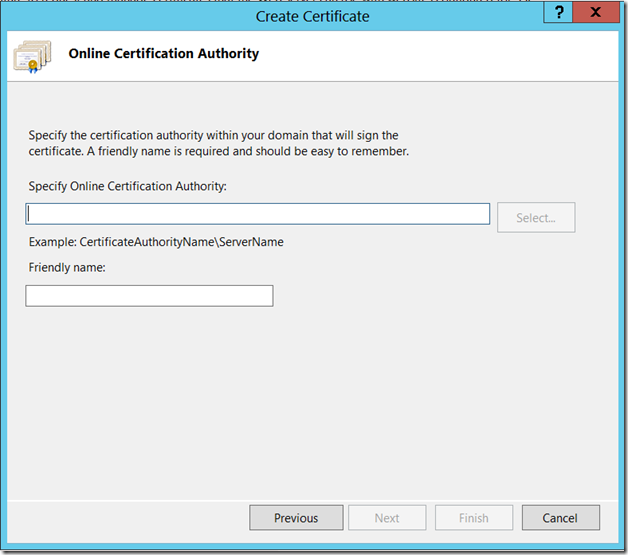
Since, there is no CA installed, we cannot proceed further.

Let us see, if the CA is installed, (the screen shots were taken from a different environment. Hence the name of the servers will not match with the previous ones)

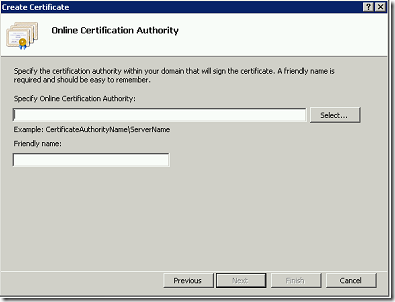
Now, the Certification Authority Selection Button will be enabled.

image

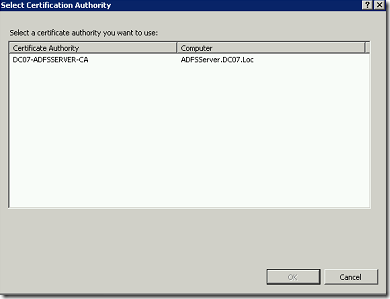
Select the CA which we installed already.

image

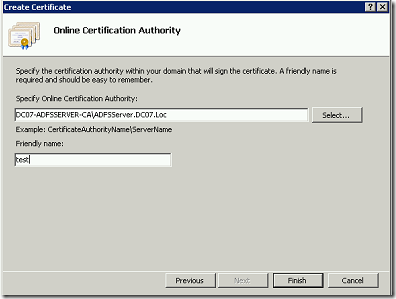
Give a Friendly Name and click Finish

image

The certificate got Created.

image

The major difference, which I thought of explaining is, the “Issued To” field. This field is coming from the Common Name which we gave on the First Screen. For reference, the same is pasted here.

image

Hence, if we want a certificate against any specific machine, then we need to give the machine name or the full name of the machine (along with the domain) on the Common Name Field. The other fields, doesn’t have much impact.

And much more important difference is renewal.

On the below screen shot,

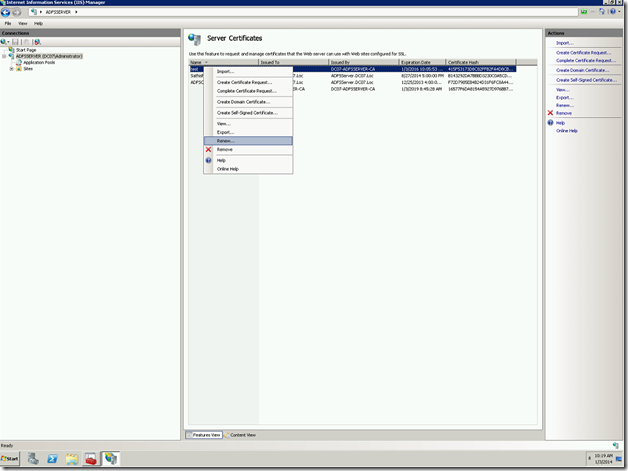
image

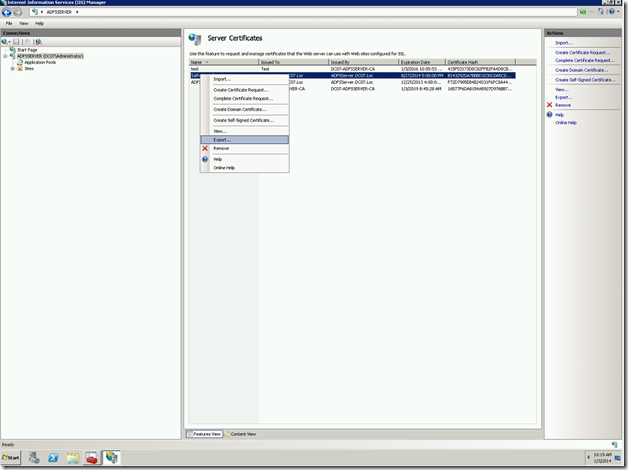
Only the “Test” is domain Certificate. The remaining 2 are Self-Signed Certificate. To identify them, select and Right click on the Certificate. You cannot find an option for renew. Only Domain Certificates can be renewed. Self-Signed Certificates cannot be renewed.

image

image

As I mentioned, there are 2 ways to Create a domain Certificate. In this post, we saw one of the approach. The second approach, we will see in the upcoming posts. Thanks.

Happy Coding.

Sathish Nadarajan.

Category : Configuration, IIS, Windows

Author Info

Sathish Nadarajan
 
Solution Architect
 
Rate this article
 
Sathish is a Microsoft MVP for SharePoint (Office Servers and Services) having 15+ years of experience in Microsoft Technologies. He holds a Masters Degree in Computer Aided Design and Business ...read more
 

Access Denied To Recycle Application Pool While Deploying SharePoint 2013 WSP from Visual Studio 2012

Sathish Nadarajan
 
Solution Architect
December 2, 2013
 
Rate this article
 
Views
18676

I was working with a Claims Aware WebApplication and trying to deploy a simple solution using Visual Studio 2012. Though I am able to login to the Site, being a Site Collection Administrator etc., I faced an exception like, Error occurred in deployment step 'Recycle IIS Application Pool': 0x80070005Access denied.

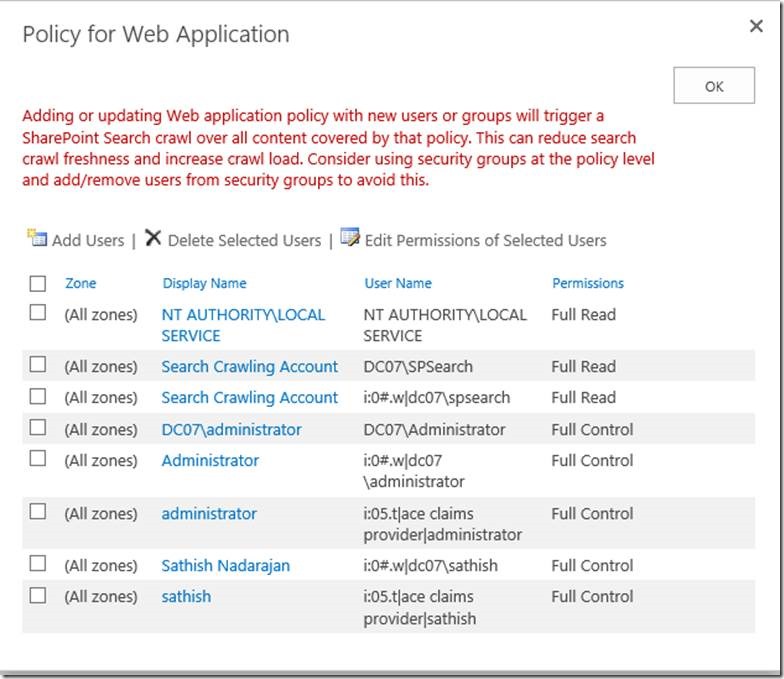
To overcome, I made sure that the Visual Studio is opened with Administrator privilege. Do that user is having all the necessary permission etc., Nothing helped. At last found that, there is a relation on the User Policy. Let us see them step by step.

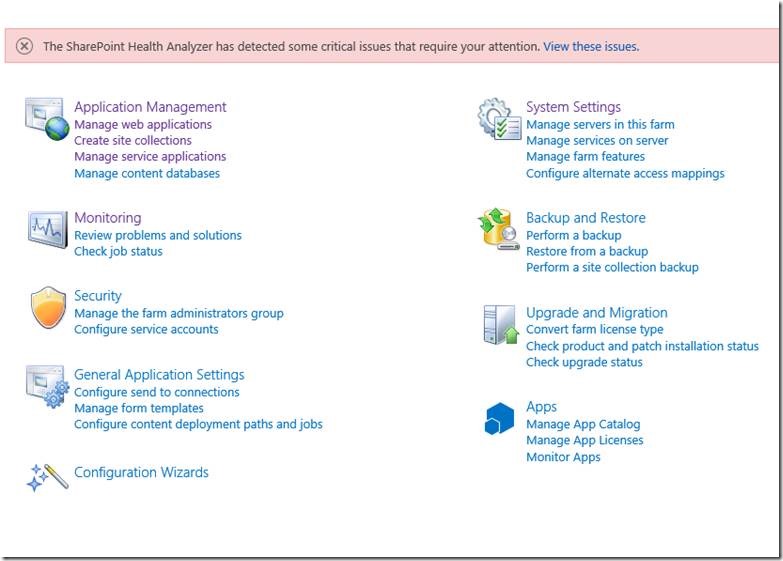
Go to the Central Administration.

clip_image002

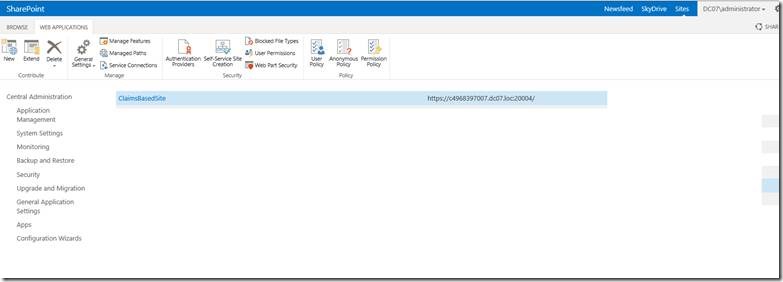
Manage WebApplication

clip_image004

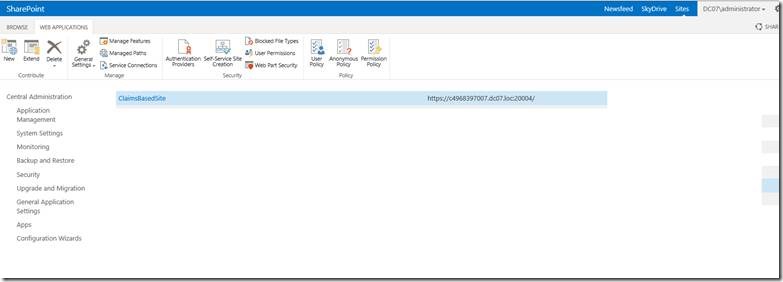
Select the WebApplication

clip_image005

clip_image007

Add your name. That’s it. Now, we are able to deploy from Visual Studio.

Happy Coding.

Sathish Nadarajan.

Author Info

Sathish Nadarajan
 
Solution Architect
 
Rate this article
 
Sathish is a Microsoft MVP for SharePoint (Office Servers and Services) having 15+ years of experience in Microsoft Technologies. He holds a Masters Degree in Computer Aided Design and Business ...read more
 

How to Create a Self-Signed Certificate on IIS Server

Sathish Nadarajan
 
Solution Architect
September 16, 2013
 
Rate this article
 
Views
30852


In SharePoint 2013, most of the cases, you will be in a situation to use a certificate (either to create a https site, ADFS Configuration etc.). This certificate will be purchased from various vendors on the production environment. But on the development environment, as a developer, we should be in a position to use a self-signed certificate. Let us see, how to create a self-signed certificate on the IIS of the development machine step by step.

1. Go to IIS

clip_image002

2. Select “Server Certificates”.

3. You will see the list of already existing certificates.

4. Select the “Create Self-Signed Certificate” link on the right pane.

clip_image004

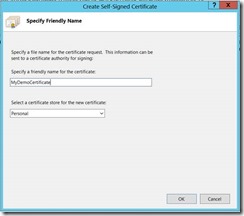
5. Enter the details as shown below.

clip_image006

6. That’s it. Our certificate will be listed on the Server Certificates.

7. Do an IISRESET.

8. Now, our certificate is ready to bind with any web application on the Bindings link.

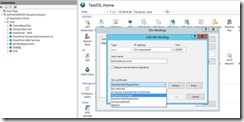
9. To verify that, let us go to any of the web application and edit the existing binding.

10. Our newly created certificate will be listed on the drop down.

clip_image008

In the next article, let us see how to export this and make a relationship with sharepoint Central Administration.

Category : IIS, SharePoint, Windows

Author Info

Sathish Nadarajan
 
Solution Architect
 
Rate this article
 
Sathish is a Microsoft MVP for SharePoint (Office Servers and Services) having 15+ years of experience in Microsoft Technologies. He holds a Masters Degree in Computer Aided Design and Business ...read more
 

Leave a comment