ElectronJS – Step by Step Procedure to Setup and Create a Hello World App using Electron JS

Sathish Nadarajan
 
Solution Architect
September 14, 2021
 
Rate this article
 
Views
1485

In this article, let us see the step by step procedure to create my first hello world app using Electron JS

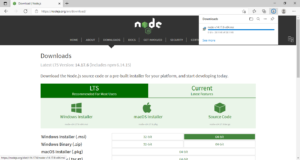
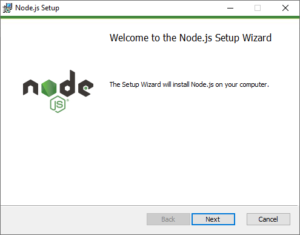
1. Install Node LTS from the below path.
https://nodejs.org/en/download/


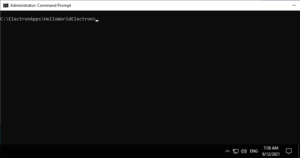
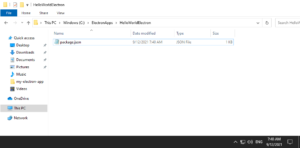
2. Create a folder with the app name – C:\ElectronApps\HelloWorldElectron
3. Open the command prompt.


4. Create a solution using “npm init”.


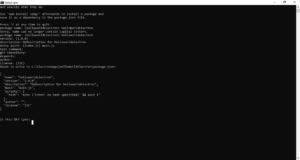
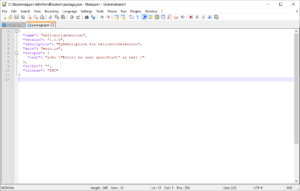
5. The command will create the package.json file.


6. Install Electron JS using the command

npm install –save-dev electron


7. Try starting the application.
Npm start


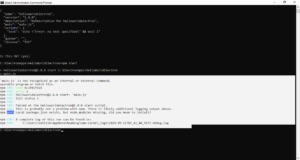
We may get the above exception. This means, we haven’t created the main.js file. Let us create the main.js.

And the Preload.js and the index.js

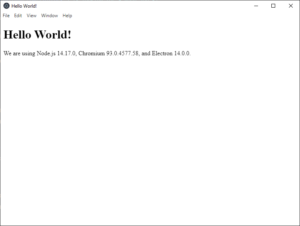
Then again “npm start”. The output will be as shown below.

8. The finished code of different files are as below.
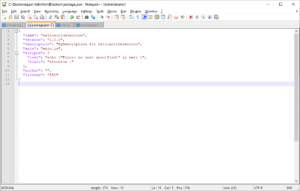
Package.json

{
"name": "helloworldelectron",
"version": "1.0.0",
"description": "MyDescription for helloworldelectron",
"main": "main.js",
"scripts": {
"test": "echo "Error: no test specified" && exit 1",
"start": "electron ."
},
"author": "",
"license": "ISC",
"devDependencies": {
"electron": "^14.0.0"
}
}

Main.js

// main.js

// Modules to control application life and create native browser window
const { app, BrowserWindow } = require('electron')
const path = require('path')

function createWindow () {
// Create the browser window.
const mainWindow = new BrowserWindow({
width: 800,
height: 600,
webPreferences: {
preload: path.join(__dirname, 'preload.js')
}
})

// and load the index.html of the app.
mainWindow.loadFile('index.html')

// Open the DevTools.
// mainWindow.webContents.openDevTools()
}

// This method will be called when Electron has finished
// initialization and is ready to create browser windows.
// Some APIs can only be used after this event occurs.
app.whenReady().then(() => {
createWindow()

app.on('activate', function () {
// On macOS it's common to re-create a window in the app when the
// dock icon is clicked and there are no other windows open.
if (BrowserWindow.getAllWindows().length === 0) createWindow()
})
})

// Quit when all windows are closed, except on macOS. There, it's common
// for applications and their menu bar to stay active until the user quits
// explicitly with Cmd + Q.
app.on('window-all-closed', function () {
if (process.platform !== 'darwin') app.quit()
})

// In this file you can include the rest of your app's specific main process
// code. You can also put them in separate files and require them here.

Preload.js

// preload.js

// All of the Node.js APIs are available in the preload process.
// It has the same sandbox as a Chrome extension.
window.addEventListener('DOMContentLoaded', () => {
const replaceText = (selector, text) => {
const element = document.getElementById(selector)
if (element) element.innerText = text
}

for (const dependency of ['chrome', 'node', 'electron']) {
replaceText(`${dependency}-version`, process.versions[dependency])
}
})

Index.html

<!--index.html-->

<!DOCTYPE html>
<html>
  <head>
    <meta charset="UTF-8">
    <!-- https://developer.mozilla.org/en-US/docs/Web/HTTP/CSP -->
    <meta http-equiv="Content-Security-Policy" content="default-src 'self'; script-src 'self'">
    <meta http-equiv="X-Content-Security-Policy" content="default-src 'self'; script-src 'self'">
    <title>Hello World!</title>
  </head>
  <body>
    <h1>Hello World!</h1>
    We are using Node.js <span id="node-version"></span>,
    Chromium <span id="chrome-version"></span>,
    and Electron <span id="electron-version"></span>.

    <!-- You can also require other files to run in this process -->
    <script src="./renderer.js"></script>
  </body>
</html>


Happy Coding
Sathish Nadarajan

Author Info

Sathish Nadarajan
 
Solution Architect
 
Rate this article
 
Sathish is a Microsoft MVP for SharePoint (Office Servers and Services) having 15+ years of experience in Microsoft Technologies. He holds a Masters Degree in Computer Aided Design and Business ...read more
 

Refreshing JavaScript – Reduce Method – Detailed Explanation

Sathish Nadarajan
 
Solution Architect
May 2, 2019
 
Rate this article
 
Views
503

Definition:

.reduce() – A method which iterates through an array or collection and returns a reduced object.  The speciality is, the object which returns will be given as input for the next iteration.  To be more detailed, the reduce method can have a callback function, for which, the previous object in the array will become the input.  If it is not clear, let us have a look on the Example, so that we can understand much.

Example:

I have an Array of Employees.

 employees = [
             {
                 id:10,
                 Age:30
             },
             {
                 id:11,
                 Age:27
             },
             {
                 id:13,
                 Age:40
             }
         ];
 

In this array, I want to identify, which employee is the aged one.  For that, the output, I am expecting is a single object from the array.  I don’t want to do a for loop to identify this.  Instead, we can use the Reduce method.

 var agedEmployee = employees.reduce(function(oldest,employee){
             return (oldest.Age || 0) > employee.Age ? oldest : employee
         });
 
         console.log(agedEmployee); 
 

The same with the arrow operator is as below.

 var agedEmployee = employees.reduce((oldest,employee) => {return (oldest.Age || 0) > employee.Age ? oldest : employee  ;});
 console.log(agedEmployee); 
 

Here, the reduce method gets two parameters.

  • Oldest – A null value argument which is passed by me.
  • Employee – The object in the array.


  • During the first iteration, Oldest will be null, hence we are returning employee. This object, will become the first parameter (oldest) for the second iteration.
  • By that way, during the second iteration, the parameter ‘oldest’ will have {id:10, Age:30} and the parameter ‘employee’ will have {id:11, Age:27}


In case, If I want to add all the employees age, then the below will do that.

 var totalAge = employees.reduce((age,employee) => {
             return age + employee.Age; 
         },0);
 
         console.log(totalAge);
 

Here, the iteration will looks like,

IterationAgeEmployee.Age
1030
23027
35740


And the total would be 97.

Hope that helps and in the upcoming articles, we will see some other method.

Happy Coding,

Sathish Nadarajan.

Author Info

Sathish Nadarajan
 
Solution Architect
 
Rate this article
 
Sathish is a Microsoft MVP for SharePoint (Office Servers and Services) having 15+ years of experience in Microsoft Technologies. He holds a Masters Degree in Computer Aided Design and Business ...read more
 

Redirect URL to different page in SharePoint before rendering using jQuery

Ahamed Fazil Buhari
 
Senior Developer
May 30, 2018
 
Rate this article
 
Views
6246

Hello everyone,

In this article we will see how to redirect to different URL from SharePoint. Here we are going to redirect to different URL before anything renders on the page. In this scenario we need to redirect to different page if the user clicks or provide URL of specific SharePoint list, also we have added queryString functionality which helps admin to stay on the same page without navigation.

Consider we have list named Test in SharePoint – https://fazilbuhari.sharepoint.com/sites/demo/Lists/Test/ and if I provide this link in the browser then it should navigate to https://outlook.com without rending anything from SharePoint. And if the URL is provided as https://fazilbuhari.sharepoint.com/sites/demo/Lists/Test?admin then it will not redirect instead it will renders the actual page.

To achieve this, we updated the master page since we need to load this script before anything renders on the page. (Make sure to have backup of master page for safety J). My SharePoint site is using seattle master page.

Open the SharePoint Designer, go to Master Pages and right click on seattle.html and select ‘Edit File in Advanced Mode’

clip_image002


 <script src="https://ajax.googleapis.com/ajax/libs/jquery/3.3.1/jquery.min.js">
 </script>
 <script>
 //<![CDATA[
 var relativeURL = document.location.href.split("?")[0];
 var targetURL = "https://outlook.com";
 if (
   relativeURL &&
   relativeURL.search("NewForm.aspx") === -1 &&
   relativeURL.search("DispForm.aspx") === -1 &&
   relativeURL.search("EditForm.aspx") === -1
 ) {
   var listName = relativeURL.toLowerCase().split("/lists/")[1];
   if (listName) {
     listName = listName.split("/")[0];
     if (listName === "Test") {
       var queryString = document.location.href.split("?")[1];
       if (queryString) {
         var params = queryString.split("&");
         var isRedirect = true;
         for (var i = 0; i < params.length; ++i) {
           var keyValue = params[i].split("=");
           if (keyValue[0] === "admin") {
             isRedirect = false;
           }
         }
         if (isRedirect) {
           window.location.replace(targetURL);
         }
       } else {
         window.location.replace(targetURL);
       }
     }
   }
 }
 //]]>
 </script>


Also we are not redirecting for NewForm, EditForm and DispForm. You can update the script as per your requirement.

clip_image004

Happy Coding

Ahamed

Author Info

Ahamed Fazil Buhari
 
Senior Developer
 
Rate this article
 
Ahamed is a Senior Developer and he has very good experience in the field of Microsoft Technologies, especially SharePoint, Azure, M365, SPFx, .NET and client side scripting - JavaScript, TypeScript, ...read more
 

Redirect to custom page from SharePoint OOTB Form button click using jQuery

Ahamed Fazil Buhari
 
Senior Developer
 
Rate this article
 
Views
6377

Hello everyone,

In this article we will see how to redirect to different page after click on Save or Cancel or Close OOTB button available in default Forms for SharePoint lists. By default after you click on those button available in New, Edit or Display form it will be redirected to the corresponding SharePoint list. If you do not want this to happen then please follow below steps,

Open NewForm or EditForm or DispForm where you would like to change the default functionality of button click. And add the below script in Script Editor Webpart.

clip_image002

In Edit page of your form, add the script editor web part

clip_image004


 <script src="https://ajax.googleapis.com/ajax/libs/jquery/3.2.1/jquery.min.js"></script>
 <script>
 $(document).ready(function() {
   var targetURL =
     "https://fazilbuhari.sharepoint.com/sites/Demo/custompage.aspx";
   $("input[value='Cancel']").attr(
     "onclick",
     "location.href='" + targetURL + "';"
   );
 
   var saveButton = $("input[value='Save']");
   // change redirection behavior
   saveButton.removeAttr("onclick");
   saveButton.click(function() {
     if (!PreSaveItem()) return false;
     if (SPClientForms.ClientFormManager.SubmitClientForm("WPQ2")) return false;
 
     var oldActionUrl = $("#aspnetForm").attr("action");
     var oldSource = GetUrlKeyValue("Source", true, oldActionUrl);
     var newActionUrl = oldActionUrl.replace(
       oldSource,
       encodeURIComponent(targetURL)
     );
     var elementName = $(this).attr("name");
     WebForm_DoPostBackWithOptions(
       new WebForm_PostBackOptions(
         elementName,
         "",
         true,
         "",
         newActionUrl,
         false,
         true
       )
     );
   });
 });
 </script>


Copy and paste the above script and click on Insert, then save the page. Do not forgot to change the targetURL value in the script.

clip_image006

Now if the user clicks on Save or Cancel button, then it will be redirected to the Target URL which we provided in the script.

clip_image007

If you want to implement this only for Close button in DispForm.aspx, then use the below script.


 <script src="https://ajax.googleapis.com/ajax/libs/jquery/3.2.1/jquery.min.js"></script>
 <script>
 $(document).ready(function() {
   var targetURL =
     "https://fazilbuhari.sharepoint.com/sites/Demo/custompage.aspx";
   $("input[value='Close']").attr(
     "onclick",
     "location.href='" + targetURL + "';"
   );
 });
 </script>


Happy Coding

Ahamed

Author Info

Ahamed Fazil Buhari
 
Senior Developer
 
Rate this article
 
Ahamed is a Senior Developer and he has very good experience in the field of Microsoft Technologies, especially SharePoint, Azure, M365, SPFx, .NET and client side scripting - JavaScript, TypeScript, ...read more
 

Custom Alert Message on SharePoint Page using Content Editor Web Part and JQuery

Ahamed Fazil Buhari
 
Senior Developer
February 28, 2018
 
Rate this article
 
Views
5129


Hi,

I just came across with the simple requirement and I thought to share this to everyone so some get benefit from this. The requirement was, we need to show an alert kind of message at the top of the page and this alert message should be visible for few seconds based on user need. This requirement can be done easily using JQuery, so I do not want to make complex things J

We maintained the information about this alert message (like Message itself, time to disappear and visibility for specific days) in a SharePoint list and added the following columns.

clip_image002

So the form looks like below, you can modify the form as per you requirement.

clip_image003

It is simple OOTB form it contains, Body where user can enter the message which he/she wants to show that on the page. This message appears only if the current date falls within StartDate and EndDate. SecondsToDisappear is the number field which is used to disappear the message after given seconds (leave empty if you want to show the message regardless of time), Level field applied CSS to the message which gives better look.

Below is the javascript code which implements the above mentioned requirement.

 'use strict';
 var CustomAlertLabel = CustomAlertLabel || {};
 
 CustomAlertLabel.MyMessage = (function () {
     return {
         init: init
     };
     function init() {
       //SP.SOD.executeFunc('sp.js', 'SP.ClientContext', generateLinks);     
         ExecuteOrDelayUntilScriptLoaded(generateLinks, "sp.js");        
     
         function generateLinks() {   
             //List name where we saved the message and other properties
             var announcementList = 'Announcements';
             var siteAbsoluteUrl = _spPageContextInfo.siteAbsoluteUrl;    
             //Get current date with 00:00:00 as time 
             //so that the message will be displayed even if the End Date is Today                
             var today = new Date();   
             var d = today.toISOString().substring(0,10) + "T00:00:00";
                        
             var endpoint = siteAbsoluteUrl + "/_api/web/lists/GetByTitle('" + announcementList + "')/items?$filter=StartDate le datetime'" + d + "' and Expires ge datetime'" + d + "'";
             //AJAX call to get List Items and filter applied in URL
             $.ajax({
                 url: endpoint,
                 type: "GET",
                 dataType: "json",
                 beforeSend: function (xhr) {
                     xhr.setRequestHeader("accept", "application/json; odata=verbose");
                 }
                 }).then(function (data) {
                     var results = data.d.results;               
                     for (var i = 0; i < results.length; ++i) {   
                       var messageContent = results[i].Body; 
                       var status = results[i].Level;
                       
                       var newDiv = "";
                       //applying css based on the Level of message
                       if(status.match("^Red")) {
                         newDiv = "<div id=messageDiv"+ i +" class='message-red'>";
                       }
                       else if(status.match("^Yellow")) {
                         newDiv = "<div id=messageDiv"+ i +" class='message-yellow'>";       
                       }
                       else if(status.match("^Green")){
                         newDiv = "<div id=messageDiv"+ i +" class='message-green'>";       
                       }
                       else {
                         newDiv = "<div id=messageDiv"+ i +">";           
                       }
                         
                       $("#mymessage").append(newDiv + messageContent + '</div>');                                                        
                       var disappearTime = results[i].SecondsToDisappear;
                       //Disappear the message based on number of seconds
                       if(disappearTime != null && disappearTime != 0) {
                         disappearTime = disappearTime*1000;
                         $('#messageDiv'+i).delay(disappearTime).fadeOut('slow');                          
                       }
                     }                   
                 });
             }    
         }
 })();
 $.ready(CustomAlertLabel.MyMessage.init());
 

We created simple html page in Site Assets and referred this JavaScript file and CSS as shown below,

clip_image004

Now go to the SharePoint Page where you would like to show the message. Add a Content Editor web part and refer the html created in the above step and set Chrome Type to None to avoid title from Content Editor webpart. Save the page

clip_image006

clip_image008

I created the below item on Feb 23rd

clip_image010

And the output will be,

clip_image012

Thank you for reading. J

Happy Coding

Ahamed

Author Info

Ahamed Fazil Buhari
 
Senior Developer
 
Rate this article
 
Ahamed is a Senior Developer and he has very good experience in the field of Microsoft Technologies, especially SharePoint, Azure, M365, SPFx, .NET and client side scripting - JavaScript, TypeScript, ...read more
 

Retrieving Various Field Types in SharePoint Custom Form using jQuery and SPServices

Ahamed Fazil Buhari
 
Senior Developer
July 5, 2016
 
Rate this article
 
Views
19093

Usage of having the custom form is that, we can do whatever we want i.e all the controls would be in our hand and we can easily modify the form, apply any conditions, and change the look and feel and many more.

First and foremost we need to know how to retrieve, populate and handle various field types available in the SharePoint list,

· Single Line of Text

· Multiple Line of Text

· Date

· People Picker

· Choice (Dropdown, Radio button, Checkbox)

· Lookup (Single and Multiple)

Let’s consider a List having all the types of columns which we mentioned above and the OOTB – New Form will be available as shown below,

clip_image002

To create a custom form using jQuery and SPServices, we need to have an empty aspx page (Pages -> aspx) or Web Part Page. Here, I’ve created an empty web part page as shown below using SharePoint Designer,

clip_image004

After the page creation, all the contents should be applied inside the ‘PlaceHolderMain’

<asp:Content ID="Content1" ContentPlaceHolderId="PlaceHolderMain" runat="server">

All your content goes here…

</asp:Content>

For ‘Single line of Text’ we can make use of,

<input type="text" ID="txtSingleLine" />

And for ‘Multiple line of text’,

<textarea id="txtMulti" placeholder="Enter Description…">

The rest of the operations on ‘Single line of Text’ and ‘Multiple line of Text’, I am leaving to the readers.

Let’s look into the other field types.

Date Column:

· In aspx page –

<input id="txtDate" type="text" />

· In JS file.

$(document).ready(function () {

$("#txtDate").datepicker({

dateFormat: ‘dd-M-yy’,

showOn: "button",

beforeShowDay: $.datepicker.noWeekends,

buttonImage: "../SiteAssets/images/calendar_icon.png",

});

});

Output:

clip_image006

Here, I’ve used the calendar_icon.png for icon and removed the weekends ($.datepicker.noWeekends).

For various operations on Date field, please refer jQuery User Interface

· To get the Date field value and changing the date format to ISOString format, so that it can be saved in SharePoint.

var date = $("#txtDate").datepicker("getDate") || ”;

//Converting Date format from dd-MMM-yyyy to ISOString format save in list

if (date != ”) {

var inputDate = new Date(date).toDateString();

var getCurrentTime = new Date().toLocaleTimeString();

var newDateTime = inputDate + " " + getCurrentTime;

date = new Date(newDateTime).toISOString();

}

People Picker Column:

· In aspx page use the below tag,

<SharePoint:PeopleEditor ID="ppVal" runat="server" MultiSelect="False" __MarkupType="xmlmarkup" WebPart="true"></SharePoint:PeopleEditor>

Output:

clip_image008

· To get the people picker value, use the below script.

var peoplePicker = $("[id$=’ppVal_upLevelDiv’]>span>div").attr("key") || ”;

if (peoplePicker != ”)

peoplePicker = PPLvalue(peoplePicker);

function PPLvalue(ppName) {

var userID = ”;

$().SPServices({

operation: "GetUserInfo",

async: false,

userLoginName: ppName,

completefunc: function (xData, Status) {

$(xData.responseXML).find("User").each(function () {

userID = $(this).attr("ID");

});

}

});

return userID;

}

Choice Column – Dropdown, Radio Button, Check-Box

· In aspx page –

<select id="ddlDropDown" title="Drop Down"></select>

<div id="divRadio" title="Radio Button"></div>

<div id="divCheckBox" title="Check Box"></div>

· In JS file and the function BindData(xData, Status) should be defined outside the document.ready

$(document).ready(function () {

$().SPServices({

operation: "GetList",

listName: "<<List Name where these columns are available>>",

completefunc: function(xData, Status) {

BindData(xData, Status);

},

async: false

});

});


function BindData(xData, Status) {

if (Status == ‘success’) {

//Append the value for Drop Down

appendField = $("#ddlDropDown");

$(xData.responseXML).find("Field[DisplayName=’Drop-Down Column’] CHOICE").each(function () {

$(appendField).append("<option value=’" + $(this).text() + "’>" + $(this).text() + "</option>");

});

//Append value for Radio Button

var activeField = "";

$(xData.responseXML).find("Field[DisplayName=’Radio-Button Column’] CHOICE").each(function () {

activeField += "<input name=’RadioBtn’ type=’radio’ value=’" + $(this).text() + "’><label>" + $(this).text() + "</label>";

});

$("#divRadio").html(activeField);

//Append value for Check Box

appendField = $("#divCheckBox");

$(xData.responseXML).find("Field[DisplayName=’Check-Box Column’] CHOICE").each(function () {

$(appendField).append("<input type=’checkbox’ name=’CheckBox’ value=’" + $(this).text() + "’/>" + $(this).text() + "<br/>");

});

}

}


Lookup Column – Single, Multiple

· For Lookup Single, in aspx page –

<select id="ddlLookupSingle" title="Look up single"></select>

· For Lookup Multiple, in aspx page –

<select id="LookupMul" multiple="multiple" ondblclick="GetSelectValues();" style="overflow:auto; width:150px !important; min-height:120px"></select>

<input type="button" id="btnAdd" onclick="GetSelectValues();" title="Add" value="Add &gt;" name="Add" />

<br />

<input type="button" id="btnRemo" onclick="RemoveSelectValues();" title="Remove" value="Remove &lt;" name="Remove" />

<select id="LookupMulSelected" multiple="multiple" ondblclick="RemoveSelectValues();" style="overflow:auto; width:150px !important; min-height:120px"></select>

· Lookup Single, in JS file–

$(document).ready(function () {

$().SPServices({

operation: "GetListItems",

async: false,

listName: "<<Lookup list name>>",

CAMLViewFields: "<ViewFields><FieldRef Name=’Title’ /><FieldRef Name=’ID’ /></ViewFields>",

completefunc: function (xData, Status) {

if (Status == ‘success’) {

$(xData.responseXML).SPFilterNode("z:row").each(function () {

var title = $(this).attr("ows_Title");

var ID = $(this).attr("ows_ID"); $(‘#ddlLookupSingle’).append($(‘<option></option>’).val(ID).html(title));

})

}

}

});

});

· Lookup Multiple, in JS file and the function GetSelectValues() & RemoveSelectValues() should be defined outside the document.ready –

$(document).ready(function () {

$().SPServices({

operation: "GetListItems",

async: false,

listName: "<<Lookup list name>>",

CAMLViewFields: "<ViewFields><FieldRef Name=’Title’/><FieldRef Name=’ID’ /></ViewFields>",

completefunc: function (xData, Status) {

if (Status == ‘success’) {

$(xData.responseXML).SPFilterNode("z:row").each(function () {

var title = $(this).attr("ows_Title");

var ID = $(this).attr("ows_ID"); $(‘#LookupMul’).append($(‘<option></option>’).val(ID).html(title));

})

}

}

});

});

function GetSelectValues() {

$("#LookupMul option:selected").each(function () {

var $this = $(this);

if ($this.length) {

var selText = $this.text();

var selVal = $this.val();

$(‘#LookupMulSelected’).append($(‘<option></option>’).val(selVal).html(selText));

$("#LookupMul option[value=" + selVal + "]").remove();

}

});

}

function RemoveSelectValues() {

$("#LookupMulSelected option:selected").each(function () {

var $this = $(this);

if ($this.length) {

var selText = $this.text();

var selVal = $this.val();

$(‘#LookupMul’).append($(‘<option></option>’).val(selVal).html(selText));

$("#LookupMulSelected option[value=" + selVal + "]").remove();

}

});

}

Though this is very straight forward, this will save a lot of development effort for sure. To save the retrieved values into a SharePoint list using SPServices, please refer to my another article on CRUD Operation on various field Types in SharePoint List using SPServices


Happy Coding

Ahamed Buhari

Author Info

Ahamed Fazil Buhari
 
Senior Developer
 
Rate this article
 
Ahamed is a Senior Developer and he has very good experience in the field of Microsoft Technologies, especially SharePoint, Azure, M365, SPFx, .NET and client side scripting - JavaScript, TypeScript, ...read more
 

Floating panel for angular js

Krishna KV
 
Team Leader, Aspire Systems
April 16, 2016
 
Rate this article
 
Views
17547

JSPanel is one of the popular jQuery plugin for creating dynamic re-sizeable panels. In this article we can see how to create a Angualr Js directive for Js Panel so that it can be used in an application in Angular way.

Intro to jsPanel

JSPanel can be used as floating panel, model window or as tooltip. The content can be loaded using static or ajax content.  JsPanel comes with a set of in-built icons but we are free to use Bootstrap or font awesome icons and override the default ones. As this is a jQuery plugin, jQuery 1.9 or above and jQuery UI 1.9 or above is a pre-requisite for this plugin.

Angular Directive

 app.directive('floatingPanel', function () {
     return {
         restrict: 'A',
         scope: {
             parentTag: '@',
             title: '@',
             content: '@',
             htmlTag:'@',
             theme: '@',         
         },
         link: function (scope, elem, attrs) {
             var config =
             {
                 title: scope.title == undefined ? '' : scope.title,
                 position: "center",
                 size: { width: 450, height: 250 },
                 content: scope.htmlTag == undefined ? scope.content : $('#'+ scope.htmlTag),
                 theme: scope.theme == undefined ? 'success' : scope.theme,
 
             };
             
             var size, position;
 
             if (scope.parentTag != undefined) {
                 var element = $('#' + scope.parentTag);
                 var pos = element.offset();
                 config.size = { width: element.width(), height: element.height() };
                 config.position = { top: pos.top, left: pos.left }
                 
             }


             var panel1 = $.jsPanel({
 
                 config
             });
 
         }
     };
 })

parentTag – to set the height, width position based on the html tag

title – to add the title for the panel

content – string parameter, which can be html or plain text.  Or htmlTag – to load the html content  from the page (id as the value).

theme -  to add the theme for the panel.


Controller

 var app = angular.module('appModule', []);
 
 (function () {
 
 
     app.controller('mainController', ['$scope', function ($scope) {
         $scope.title = "Title";
         $scope.date = new Date().toUTCString();
         $scope.onclick = function () {
             $scope.date = new Date().toUTCString();
         };
     }]);
 
 })();

HTML Page

 <!DOCTYPE html>
 <html ng-app="appModule">
 <head>
     <title></title>
 	<meta charset="utf-8" />
     <link href="Content/jquery-ui.complete.min.css" rel="stylesheet" />
     <link href="Content/jquery.jspanel.css" rel="stylesheet" />
     <link href="Content/bootstrap.css" rel="stylesheet" />
     <link href="Content/app.css" rel="stylesheet" />
 </head>
 <style type="text/css">
     .border{
         border:1px solid gray;
     }
 </style>
 <body>
 
     <div>
         <div ng-controller="mainController" style="width:100%;height:550px">
 
             <div style="width:38%;height:100%;float:left" class="border" id="leftDiv">
 
                 <div id="hcontent">
                     <h1>{{title}}</h1>
 
                     <p style="margin-right:20px;font-size:20px;color:blue">
                       
                         {{date}}
                         <button type="button" class="btn btn-default" ng-click="onclick()">Click</button>
 
                     </p>
                 </div>
                 <div floating-panel title="Left" parent-tag="leftDiv" html-tag="hcontent"></div>
             </div>
 
             <div floating-panel title="Right" parent-tag="rightDiv" content="<h1>Test</h1><p>This is paragraph</p>"></div>
 
             <div style="width:60%;height:100%;float:right" class="border" id="rightDiv">
 
             </div>
 
 
         </div>
     </div>
 
     <script src="Scripts/jquery-2.1.4.min.js"></script>
     <script src="Scripts/jquery-ui-complete.min.js"></script>
     <script src="Scripts/vendor/jquery-ui-touch-punch/jquery.ui.touch-punch.js"></script>
     <script src="Scripts/jquery.jspanel.js"></script>
     <script src="Scripts/angular.js"></script>
 
     <script src="app/app.js"></script>
     <script src="app/app.directive.js"></script>
 
 </body>
 </html>

Output

jsPanel


References

http://jspanel.de/

https://github.com/Flyer53/jsPanel

Author Info

Krishna KV
 
Team Leader, Aspire Systems
 
Rate this article
 
Krishna K.V has been working in IT Industry for over 7+ years. He holds a Master Degree in Information Technology. He is more interested to learn and share new technologies, ...read more
 

How to remove some elements within the Div using JQuery

Sathish Nadarajan
 
Solution Architect
August 17, 2015
 
Rate this article
 
Views
13328

In the previous article, we saw how to export the data into Excel using Javascript. At that time, I faced some issues like, while exporting, the HTML contains some unwanted Image Tags, Anchor Tags etc., So before writing them on the Excel, I need to remove all those elements.

This can be done in two ways. Either we can manipulate the HTML string and using some regex, we can remove the unwanted elements. Or else, we can go with JQuery to get the corresponding Elements and using the remove() method.

The syntax is very straight forward.

 $(‘#MyDiv img’).map(function(){
 $(this).remove();
 });
 

The above syntax will remove all the images within the Div “MyDiv”. In the same manner, we can remove all the unwanted Elements.

Though it looks very small, this will definitely save at least an hour of effort.


Happy Coding,

Sathish Nadarajan.

Author Info

Sathish Nadarajan
 
Solution Architect
 
Rate this article
 
Sathish is a Microsoft MVP for SharePoint (Office Servers and Services) having 15+ years of experience in Microsoft Technologies. He holds a Masters Degree in Computer Aided Design and Business ...read more
 

How to read the User Profile Property in SharePoint 2013 using JQuery Ajax.

Sathish Nadarajan
 
Solution Architect
March 16, 2015
 
Rate this article
 
Views
13199

I met with an interesting requirement like, on the EditForm.aspx, we need to update some of the values based on the User Profile Property. As all of us know that the EditForm.aspx is a SitePage, from which we need to retrieve the value using the Javascript alone. Hence, I added a script editor webpart on the page and kept the below code over there.

 function GetProfileProperty() {
     $.ajax({
         url: "/_api/sp.userprofiles.peoplemanager/getmyproperties",
         type: "GET",
         headers: { "accept": "application/json;odata=verbose" },
         success: function (msg) {
             var x = msg.d.UserProfileProperties.results;
             for (var i = 0; i < x.length; i++) {
                          
                 if (x[i].Key == "SPS-School") {
                     alert(x[i].Value);
                     var inDesignMode = document.forms[MSOWebPartPageFormName].MSOLayout_InDesignMode.value;
                     if (x[i].Value == "TVS") {
                        if (inDesignMode == "1") {
                             // page is in edit mode
 
 // Do the Logics Here.
                         }
                         else {
                             // page is in browse mode
                         }
                     }
                     else {
                         if (inDesignMode == "1") {
                             // page is in edit mode
                             // Do the Logics here.
                         }
                         else {
                             // page is in browse mode
                         }
                     }
                 }
             }
         },
         error: function (msg) {
             alert(msg.responseText);
         } });
 }


In this example, I took the Property “SPS-School” and compared against the School “TVS” – The one where I studied..

Happy Coding.

Sathish Nadarajan.

Author Info

Sathish Nadarajan
 
Solution Architect
 
Rate this article
 
Sathish is a Microsoft MVP for SharePoint (Office Servers and Services) having 15+ years of experience in Microsoft Technologies. He holds a Masters Degree in Computer Aided Design and Business ...read more
 

How to do a KeywordQuery Search using Jquery in SharePoint 2013

Sathish Nadarajan
 
Solution Architect
January 13, 2015
 
Rate this article
 
Views
26326

In this article, let us see how to search the SharePoint content from the JS CSOM using sp.search.js in SharePoint 2013.

In many cases we may require to do a search from the Client Side. (Probably from the Apps). In that case, let us see how to use the various approaches like, Set the Query String, Set the Result Source ID, Set the Sorting Order, Retrieving custom Managed Properties etc.,

The script is self-explanatory. Hence, there nothing much to describe about this.

 function customSearch() 
 { 
 //Create the Context
     var context = SP.ClientContext.get_current(); 
 
 //Create the KeywordQuery Object
     var keywordQuery = new Microsoft.SharePoint.Client.Search.Query.KeywordQuery(context); 
 
 
 //Set the Query here
     keywordQuery.set_queryText("Managed Property :" + "<Value for the Managed Property>" + ""); 
 
 //Add the return columns - custom Managed Properties
     var properties = keywordQuery.get_selectProperties(); 
     properties.add('ContentType'); 
     properties.add('Any Managed Properties'); 
 
 //Set the Result Source ID if any	
     keywordQuery.set_sourceId("XXXXXXXX-XXXX-XXXX-XXXX-XXXXXXXXXXXX"); 
 
 // Set Row Limit
    keywordQuery.set_rowLimit(500);
 
 
 // Set Trim Duplicates to False
 keywordQuery.set_trimDuplicates(false);
 
 // Sorting (Ascending = 0, Descending = 1)
 keywordQuery.set_enableSorting(true);    
 var sortproperties = keywordQuery.get_sortList();
 sortproperties.add("Managed Property name", 0);
 
 //Create Search Executor Object
     var searchExecutor = new Microsoft.SharePoint.Client.Search.Query.SearchExecutor(context); 
 
 //Execute the Query
     this.results = searchExecutor.executeQuery(keywordQuery); 
 
 //Execute the Context
         context.executeQueryAsync(onQueryListSuccess, onQueryFail); 
 
 } 
 
 function onQueryListSuccess() { 
     for (i == 0; i < results.m_value.ResultTables[0].ResultRows.length; i++) { 
         alert(results.m_value.ResultTables[0].ResultRows[i].ContentType) 
     } 
 
 } 
 
 function onQueryFail()
 {
 	alert('Query failed. Error:' + args.get_message());
 }
 

Make sure that you have the reference of the following JQueries on your page.

1. JQuery.1.7.1.js (later versions can also be used)

2. SP.js

3. Sp.Runtime.JS

4. Sp.Search.JS

Happy Coding.

Sathish Nadarajan.

Author Info

Sathish Nadarajan
 
Solution Architect
 
Rate this article
 
Sathish is a Microsoft MVP for SharePoint (Office Servers and Services) having 15+ years of experience in Microsoft Technologies. He holds a Masters Degree in Computer Aided Design and Business ...read more
 

Leave a comment