Break List Item Permission Inheritance using Power Automate

Ahamed Fazil Buhari
 
Senior Developer
November 3, 2022
 
Rate this article
 
Views
2098

In this article we will see, how to easily break SharePoint list item permission with couple of Power Automate actions. Without further intro, as a first step we need to get SharePoint user Id for the user who we would like to give access,


And to handle the response data, we can parse the JSON (schema can be generated from sample response)


Now we can break the permission by providing list name, item ID in breakroleinheritance api call

Once the break role inheritance is done, then we can provide permission to specific user (user that we resolved in step 1) with any role you would like. In the below example I give full control and the roledefid for full control is 1073741829.

Below you can find different role ids and its definition.

Role identifier valueRole definition
1073741924View Only
1073741825Limited Access
1073741826Reader
1073741827Contributor
1073741830Edit
1073741828Designer
1073741829Full Control


With this simple for actions, we can easily break list permission and give unique access.


Happy Coding

Fazil


Author Info

Ahamed Fazil Buhari
 
Senior Developer
 
Rate this article
 
Ahamed is a Senior Developer and he has very good experience in the field of Microsoft Technologies, especially SharePoint, Azure, M365, SPFx, .NET and client side scripting - JavaScript, TypeScript, ...read more
 

How to allow targeted users to add custom apps in Microsoft Teams

Ahamed Fazil Buhari
 
Senior Developer
November 3, 2020
 
Rate this article
 
Views
2035

Teams app development is growing in drastic speed, as a admin who controls Microsoft Teams in your organization should carefully handle which apps the user should add, which app should be blocked and who has access to add custom apps in your Microsoft Teams.

PnP Generator for Microsoft Teams is an awesome toolkit for Teams app development. One of the prerequisite to build Teams app is to enable sideloading. In short sideloading means “Uploading our custom app to Teams through store instead of App Studio.” Well, to have an in-depth knowledge on App Studio and Sideloading please refer this blog – App Studio & Sideloading.

In this article we will see how to enable sideloading for targeted users so that only those users can add custom apps to your Microsoft Teams. To implement below steps you must be an global admin or Teams service admin.

To add a custom app that we developed for Microsoft Teams, we need to upload the zipped manifest file of the app. To achieve that,

1.Open Teams (where you have access to manage the teams) and go to Manage teams section,

manage teams

2. Select Apps tab and at the bottom look for Upload a custom app, in my case I do not have access to upload custom apps and in the below steps how we can resolve this by giving access only to me,

noupload


3. Now we move to Teams admin center  considering you are Global admin or Teams service admin. And go to Teams app -> Setup policies

teams app policies


4. Click on Add in App setup policies section and provide name & description for the policy. Make sure to enable Upload custom apps (which will enable sideloading). Click on save at the bottom.

Developer policy


5. Select the recently created App setup policy and click on Manage users and give access to the targeted users who are assigned to this policy. In my case I am adding myself and click on apply.

add

6. Once above step is done, it would take few minutes to apply this changes in your Teams app. After that you can go to step 2 and at the bottom we can find Upload a custom app option will be available at the bottom.

bac

With this option enabled we can upload our custom app generated with yo teams generator.
If we want to enable this for all the users, then we can edit the Global (Org-wide default) policy (which we see in step 3) and enable Upload custom apps which will eventually let all users to Upload a custom app.

In addition to setup policy we can also set policy for app permissions under Permission policies section – to allow all, allow specific, block all, block specific apps by Microsoft apps, Third-party apps and Custom apps.

permissionpolicy

We hope this article helps you to understand policies and setup some prerequisite for Teams custom app development.


Happy Coding

Fazil

Author Info

Ahamed Fazil Buhari
 
Senior Developer
 
Rate this article
 
Ahamed is a Senior Developer and he has very good experience in the field of Microsoft Technologies, especially SharePoint, Azure, M365, SPFx, .NET and client side scripting - JavaScript, TypeScript, ...read more
 

App Permission and App Management in SharePoint Online Apps

Sriram Varadarajan
 
Solution Architect
April 23, 2017
 
Rate this article
 
Views
38075

In this article we can have a look at different options available in Office 365 to manage SharePoint Online APPS and 0365 APPS with different privileges.

Manage App Permission (Security & Compliance)

Microsoft newly added this module under security and compliance (which is in PROTECTION.OFFICE.COM), this feature help us to manage the APPs which consume/use information from Office 365.

App permissions help you decide which apps you allow your users access to, and which ones you want to ban.

Note: Business users can consume third party APPs in Office 365 only if the integrated APPS setting is turned on in your tenant.

clip_image002

We might end up seeing 2 different APP under Manager Permission Module

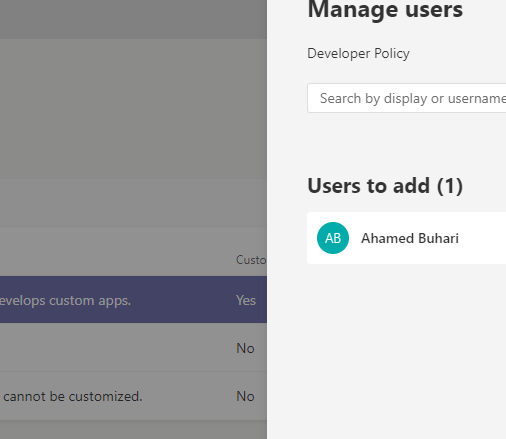
1. An organization’s Azure AD administrator configures the app and assigns it to individual users or to the entire organization, and these app will show up in the manager permission portal

2. Develop an app that registers in a user’s Azure AD without admin assignment, by allowing users to sign on with their Office 365 credentials.

Note: Not every APP is displayed under APP launcher, to know how Apps are displayed under the APP launcher for every user, please refer this link.

SharePoint App Permission (SharePoint Admin Center)

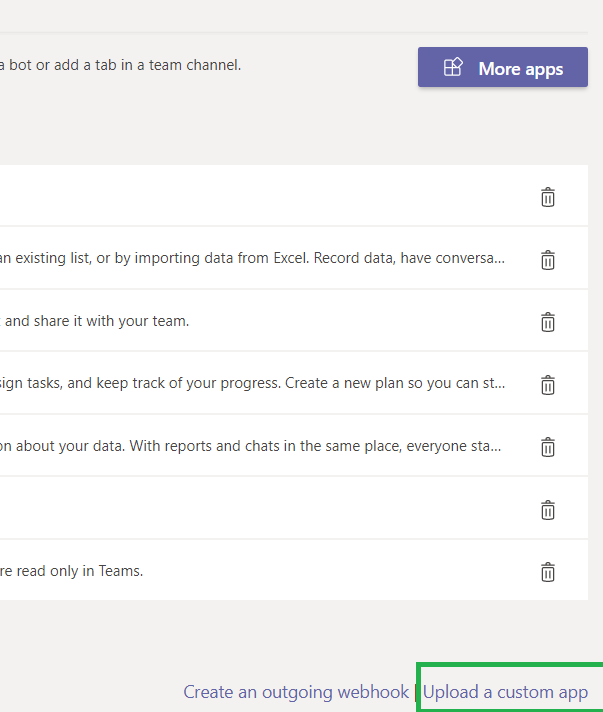
Users either from APP-catalog or from the office stores based on the configuration made, they can install custom apps and third party apps in their SharePoint tenant that depends on user requirement.

ADMIN will get to see all the SharePoint APPS which is installed with tenant scope and can still restrict the APP that can be consumed by the business user.

This module is under SharePoint Admin Center => Apps => App Permissions.

Note: Any app with site collection/web/list scope are listed under Site settings => Site app permission page.

Admin can remove app permissions from SharePoint app permission page. After removing the app from app permission page, we can see the app in site contents page because it’s just the app permission which is revoked.

Note: Whenever a user installs a tenant scoped app in SharePoint site collection, it will create a new entry in SharePoint app permission page. If the user installs the same app in multiple site collections, duplicate app entries can be seen in SharePoint tenant app permission page with different app ids.

App permission request scopes

tenancy

http://sharepoint/content/tenant

site collection

http://sharepoint/content/sitecollection

website

http://sharepoint/content/sitecollection/web

list

http://sharepoint/content/sitecollection/web/list

App Permissions Requests

1. Read-only

·         View Items

·         Open Items

·         View Versions

·         Create Alerts

·         Use Self-Service Site Creation

·         View Pages

2. Write

Read-Only permissions, plus:

·         Add Items

·         Edit Items

·         Delete Items

·         Delete Versions

·         Browse Directories

·         Edit Personal User Information

·         Manage Personal Views

·         Add/Remove Personal Web Parts

·         Update Personal Web Parts

3. Manage

Write permissions, plus:

·         Manage Lists

·         Add and Customize Pages

·         Apply Themes and Borders

·         Apply Style Sheets

4. Full control

All permissions

Author Info

Sriram Varadarajan
 
Solution Architect
 
Rate this article
 
Sriram is a Technology Evangelist with 15+ years experience in Microsoft Technologies. He is an enterprise architect working for large pharmaceutical organization which has presence globally with largest Microsoft implementation ...read more
 

Grant Access to ‘SharePoint Group’ on Item Level Permission using Client Side Scripting (JSOM) in SharePoint 2010 and 2013

Ahamed Fazil Buhari
 
Senior Developer
February 4, 2017
 
Rate this article
 
Views
5254

In my previous article we have seen ‘How to Break Inherit Permission and Grant Access to Specific User on SharePoint List Items or Folders (Multiple) using SPServices and JavaScript’ here in this article we can see how to grant access to SharePoint group.

For example, consider that we’ve a library named ‘Shared Document’ and we need to grant access to specific Items inside that library to a SharePoint Group called ‘Document Managers’. Initially we need to get all the Item ID’s or folder ID’s which would be accessible by a SharePoint Group called ‘Document Managers’

Using the below SPServices, we can get all the Item & Folder ID’s in a JSON object

 var folderID = {};
 // Use SPServices or REST API to get all the item ID's
 $().SPServices({
     operation: "GetListItems",
     async: false,
     listName: "Shared Document",
     CAMLQuery: "<< Query based on your req. >>",
     completefunc: function (xData, Status) {
         $(xData.responseXML).SPFilterNode("z:row").each(function () {
         var folderVal = $(this).attr("ows_ID"); || '';
         if (folderVal != '') {
             var folder_ID = {};
             folder_ID["folderID"] = folderVal;
             folderID[folderVal] = folder_ID;            
         }
     }
 });
 
 //SharePoint 2010, Group can be resolved using groupID not by groupName
 //you can get the groupID value in URL after navigating to that SharePoint Group
 var groupID = 25;
 GrantAccesstoGroup(folderID, groupID)

Use the below JSOM script to grant access to SharePoint group on a specific Items.

Please note that, SharePoint Group can be resolved using groupID in SharePoint 2010. In SharePoint 2013, group can be resolved using its name as well using getByName(‘groupName’).

 function GrantAccesstoGroup(folderID, groupID){
     SP.SOD.executeFunc("sp.js", 'SP.ClientContext', AccessToGroupOnSecurityInheritance(folderID, groupID));
 }
 
 function AccessToGroupOnSecurityInheritance(folderID, groupID) {
 	var context = SP.ClientContext.get_current();
     var oList = context.get_web().get_lists().getByTitle('Shared Document');   
 	
 	$.each(folderID, function (key, value) { 	   
 		  
 		var folderID_int = parseInt(value.folderID);         
 		var oListItem = oList.getItemById(folderID_int);
 		
 		//Break Role Inheritance if u need to,
               //oListItem.breakRoleInheritance(false);	    
 	    
 		var collGroup = context.get_web().get_siteGroups();	    
 	       var oGroup = collGroup.getById(groupID);	
            
              //In SharePoint 2013 group can be resolved using by its name as well
 	      //var oGroup = collGroup.getByName(groupName);
             	    
 	    
         //Defining the Role
 	    var collRoleDefinitionBinding = SP.RoleDefinitionBindingCollection.newObject(context);	
 	    collRoleDefinitionBinding.add(context.get_web().get_roleDefinitions().getByType(SP.RoleType.administrator));	    	
 	   
 	    oListItem.get_roleAssignments().add(oGroup, collRoleDefinitionBinding);
 	   
 	    context.load(oListItem);        	
 	    context.executeQueryAsync(onQuerySucceeded, onQueryFailed);
  	});     
 }
 function onQuerySucceeded() {
 
     console.log('Access Granted to SharePoint Group');
 }
 
 function onQueryFailed() {
 
     console.log('Request failed.');
 }

Happy Coding

Ahamed

Author Info

Ahamed Fazil Buhari
 
Senior Developer
 
Rate this article
 
Ahamed is a Senior Developer and he has very good experience in the field of Microsoft Technologies, especially SharePoint, Azure, M365, SPFx, .NET and client side scripting - JavaScript, TypeScript, ...read more
 

How to Break Inherit Permission and Grant Access to Specific User’s on SharePoint List/Library Items or Folders (Multiple) using SPServices and JavaScript

Ahamed Fazil Buhari
 
Senior Developer
 
Rate this article
 
Views
5888

When we want to grant access to folders or documents or simply for an item to a specific user, we go ahead and break the Inheritance and provide access to the specified user. If we want to achieve this by OOTB functionality then we can do it by Select an Item -> Document Permission (under Documents tab).

image

In permission window, Break the Inheritance and grant access to the specific user as per your requirement.

image

Same can be done in SharePoint 2013 environment, by selecting an Item and click on Shared With (under Files tab) and click on Advance in the permission popup.

image

Use the below script to give access to Multiple Folders or Library Documents to specific users and stop Inherit Permission

 var folderID = {};
 // Use SPServices or REST API to get all the item ID's
 $().SPServices({
     operation: "GetListItems",
     async: false,
     listName: "Shared Document",
     CAMLQuery: "<< Query based on your req. >>",
     completefunc: function (xData, Status) {
         $(xData.responseXML).SPFilterNode("z:row").each(function () {
         var folderVal = $(this).attr("ows_ID"); || '';
         if (folderVal != '') {
             var folder_ID = {};
             folder_ID["folderID"] = folderVal;
             folderID[folderVal] = folder_ID;            
         }
     }
 });
 

folderID, is a JSON object and it holds all the item ID’s which needs to break Inherit Permission and give access to specified users.

 ItemPermission(folderID, User1);
 ItemPermission(folderID, User2);
 
 function ItemPermission(folderID, userID) {
     SP.SOD.executeFunc("sp.js", 'SP.ClientContext', breakInheritanceChangeUser(folderID, userID));
 }
 
 function breakInheritanceChangeUser(folderID, userID, clearSubscops) {
     var context = SP.ClientContext.get_current();
     var oList = context.get_web().get_lists().getByTitle('Shared Document');
 
     $.each(folderID, function (key, value) {
 
         var folderID_int = parseInt(value.folderID);
         var oListItem = oList.getItemById(folderID_int);
 
         if (clearSubscops)
             oListItem.breakRoleInheritance(false, clearSubscops);
         else
             oListItem.breakRoleInheritance(false);
 
         var oUser = context.get_web().ensureUser(userID);
 
         var collRoleDefinitionBinding = SP.RoleDefinitionBindingCollection.newObject(context);
         collRoleDefinitionBinding.add(context.get_web().get_roleDefinitions().getByType(SP.RoleType.administrator));
         oListItem.get_roleAssignments().add(oUser, collRoleDefinitionBinding);
 
         context.load(oUser);
         context.load(oListItem);
 
         context.executeQueryAsync(onQuerySucceeded, onQueryFailed);
     });
 }
 
 function onQuerySucceeded(sender, args) {
 
 console.log('Role inheritance broken and given access to specific users');
 }
 
 function onQueryFailed(sender, args) {
 
 console.log('Request failed.');
 }

The below script can be used to remove the user from Item Permission list. We can use the same method to get the folder or item ID’s and store that in a JSON object

 ItemPermissionBreak(folderID, user1);
 ItemPermissionBreak(folderID, user2);
 
 
 function ItemPermissionBreak(folderID, userID){
     SP.SOD.executeFunc("sp.js", 'SP.ClientContext', breakUserPermission(folderID, userID));
 }
 
 function breakUserPermission(folderID, userID) {
     var context = SP.ClientContext.get_current();
     var oList = context.get_web().get_lists().getByTitle('Shared Document');
 
     $.each(folderID, function (key, value) {
 
         var folderID_int = parseInt(value.folderID);
         var oListItem = oList.getItemById(folderID_int);
 
         var oUser = context.get_web().ensureUser(userID);
 
         oListItem.get_roleAssignments().getByPrincipal(oUser).deleteObject();
 
         context.load(oUser);
         context.load(oListItem);
 
         context.executeQueryAsync(onQuerySucceeded, onQueryFailed);
     });
 
 }
 function onQuerySucceeded(sender, args) {
 
 console.log('User Permission has been removed');
 }
 
 function onQueryFailed(sender, args) {
 
 console.log('Request failed.');
 }
 

To know more about, BreakRoleInheritance please click here to refer in msdn site.

Happy Coding

Ahamed

Author Info

Ahamed Fazil Buhari
 
Senior Developer
 
Rate this article
 
Ahamed is a Senior Developer and he has very good experience in the field of Microsoft Technologies, especially SharePoint, Azure, M365, SPFx, .NET and client side scripting - JavaScript, TypeScript, ...read more
 

How to Enable Auto Approval For Permission Requests in Community Site Template – SharePoint Office 2013 Programmatically using Client Side Object Model (CSOM) C#

Sathish Nadarajan
 
Solution Architect
November 18, 2016
 
Rate this article
 
Views
10994

Recently, I was working with the Community Site Template, which has very interesting Social Collaboration features. For an Organization, there will be so many community sites, created by some individuals like project managers, program managers. The team members wish to join the community. By default, everyone will be Visitor for the communities within an organization. i.e., everyone can login to the community site within the organization. But they may not be post any comments or contribute to the community site until they become the member.

To become a member, on the community site itself, there is an option called “Join Community”.

clip_image002

By Clicking this Join Community, an email will be triggering to the community admin and on the approval, of the admin, the member will be added to the Members Group.

But, every time, the admin may not want to approve the joining requests. Like in migration projects, the sites will be auto generated. In that case, we need to enable the auto approval also.

There is an option in the UI itself to do this. First let us see that and then we will go to the CSOM code to do the same functionality.

1. Go to Members Page. (as shown in the above image)

2. Click on Community Settings.

clip_image004

3. Select the Option “Enable auto-approval”

clip_image006

4. Click OK.

This will enable the auto approval of the members to join the community. Now, if any team members, click on the Join Community, they will be added to the community without any approval.

I met with a requirement to do this process through Code. As I told you, in case of auto creating the community sites at that time, we need to have a exe or scheduled jobs or any kind of triggering mechanism to change this settings.

After some analysis, I found that the value is being stored in a property bag. A very straight forward approach.

Updating the Property Bag Value of the Key “vti_CommunityEnableAutoApproval” Will do the magic for us.

The code is as follows.

 namespace Console.Office365
 {
     using Microsoft.SharePoint.Client;
     using Newtonsoft.Json.Linq;
     using System;
     using System.Collections.Generic;
     using System.IO;
     using System.Linq;
 
     class Program
     {
         static void Main(string[] args)
         {
             EnableAutoApprovalForPermissions();
         }
 
 
         public static void EnableAutoApprovalForPermissions()
         {
             OfficeDevPnP.Core.AuthenticationManager authMgr = new OfficeDevPnP.Core.AuthenticationManager();
 
             string siteUrl = "https://*****.sharepoint.com/sites/communitysite";
             string userName = "Sathish@****.onmicrosoft.com";
             string password = "********";
 
             using (var ctx = authMgr.GetSharePointOnlineAuthenticatedContextTenant(siteUrl, userName, password))
             {
                 Web web = ctx.Web;
                 PropertyValues properties = ctx.Web.AllProperties;
                 ctx.Load(web);
                 ctx.Load(properties);
                 ctx.ExecuteQueryRetry();
 
                 properties["vti_CommunityEnableAutoApproval"] = "True";
 
                 web.Update();
                 ctx.Load(web.AllProperties);
                 ctx.ExecuteQueryRetry();
 
             }
         }


     }
 
 }
 

Hope this helps.

Happy Coding,

Sathish Nadarajan.

Author Info

Sathish Nadarajan
 
Solution Architect
 
Rate this article
 
Sathish is a Microsoft MVP for SharePoint (Office Servers and Services) having 15+ years of experience in Microsoft Technologies. He holds a Masters Degree in Computer Aided Design and Business ...read more
 

Is it practically possible to disable EVERYONE permission group from people picker in SharePoint Online ?

Sriram Varadarajan
 
Solution Architect
July 4, 2016
 
Rate this article
 
Views
12962

EVERYONE permission group from the people picker controls throughout the O365 SPO tenant can be hidden with the PowerShell command Set-SPOTenant -ShowEveryoneClaim $false . This change hides the Everyone group but it does not disables it from using it from anywhere.

clip_image002

The Everyone permission allows all accounts from the Active Directory as well as any external account that has been invited from anywhere in the tenant.

A site collection owner could choose not to have the invite external accounts option enabled for their site collection, but by adding the Everyone group, they would invite external participants from across the organisation to have access to their content.

For those who wish to have an open permission for their content, the “Everyone except external users” group can be applied

In addition, individual external accounts can be added to the site, which requires that a more controlled and considered approach is taken when sharing content.

Here is our caveat; this just hides EVERYONE doesn’t disable it, Let’s see where and all we can see EVERYONE group.

From SharePoint admin (tenant), you could still see EVERYONE group getting displayed when you’re trying to add owners/edit the owners from the ribbon.

Assume I would like to change an owner for one my site collection, here is what I would do from the tenant; select the site collection click the owner tab in the ribbon

clip_image004

Select manage administrators underneath it;

Under ALL USERS I could still see Everyone:

clip_image006

2. Next place to see Every One is in our One Drive;

a. Go to One drive site and go to site content

clip_image008

Check the permission of the Document folder that gets created by default by clicking the 3 dots

clip_image010

Click permissions for this document library

clip_image012

Selected the second link; “There are limited access users on this site. Users may have limited access if an item or document under the site has been shared with them”

You will see everyone with limited access;

clip_image014

Conclusion:

After of search and research here is what MS says

This behaviour seen is Intended. The ShowEveryoneClaim setting is meant to be a visibility setting, not a security one.

More details on this can be found here. A bit more investigation revealed that; as we all know SharePoint has got lot of hidden list and libraries and for those to function properly MS still keeps this Everyone group visible in some cases.

Category : SharePoint

Author Info

Sriram Varadarajan
 
Solution Architect
 
Rate this article
 
Sriram is a Technology Evangelist with 15+ years experience in Microsoft Technologies. He is an enterprise architect working for large pharmaceutical organization which has presence globally with largest Microsoft implementation ...read more
 

Powershell Tips Series Part 1 : Script to get Sile collection details and sites with unique permission in SharePoint Online

Sriram Varadarajan
 
Solution Architect
October 3, 2015
 
Rate this article
 
Views
9088

As of now, I am more and more involved into automation of regular SharePoint activities into PowerShell scripts. Not all things are that easy to find out in MSDN and technet. I would be sharing scripts to the community through this series that would make the life easier to keep track of the scripts that would be essential for SharePoint development and administration activities


Script to fetch all the site collection details in SharePoint online

 Import-Module Microsoft.Online.SharePoint.PowerShell -DisableNameChecking -ErrorAction SilentlyContinue
 
 Connect-SPOService -Url "https://XXXX-admin.sharepoint.com" -Credential userid@example.com
 
 Get-SPOSite –Detailed | Export-CSV –LiteralPath “Path/filename.csv” –NoTypeInformation


Script to get all the site and sub site which are having unique permission in sharepoint online

 ############################################################################################################################################ 
 #Script that gets all the property Bags  
 # Required Parameters: 
 #  -> $sUserName: User Name to connect to the SharePoint Online Site Collection. 
 #  -> $sPassword: Password for the user. 
 #  -> $sSiteUrl: SharePoint Online Site Url 
 ############################################################################################################################################ 
  
 $host.Runspace.ThreadOptions = "ReuseThread" 
  
 function Invoke-LoadMethod() {
 param(
    [Microsoft.SharePoint.Client.ClientObject]$Object = $(throw "Please provide a Client Object"),
    [string]$PropertyName
 ) 
    $ctx = $Object.Context
    $load = [Microsoft.SharePoint.Client.ClientContext].GetMethod("Load") 
    $type = $Object.GetType()
    $clientLoad = $load.MakeGenericMethod($type) 
 
 
    $Parameter = [System.Linq.Expressions.Expression]::Parameter(($type), $type.Name)
    $Expression = [System.Linq.Expressions.Expression]::Lambda(
             [System.Linq.Expressions.Expression]::Convert(
                 [System.Linq.Expressions.Expression]::PropertyOrField($Parameter,$PropertyName),
                 [System.Object]
             ),
             $($Parameter)
    )
    $ExpressionArray = [System.Array]::CreateInstance($Expression.GetType(), 1)
    $ExpressionArray.SetValue($Expression, 0)
    $clientLoad.Invoke($ctx,@($Object,$ExpressionArray))
 }
  
 function getSubWebs
      {          
 	 param ($spoCtx, $path)
          try
          {
              $oWebsite = $spoCtx.Web;
              #$spoCtx.Load($oWebsite, $website => $website.Webs, $website => $website.Title);
              $spoCtx.Load($oWebsite);
 			 Write-Host "----------------------------B4------------------------------------------------"  -foregroundcolor Green
 			 $spoCtx.ExecuteQuery();
 			 Write-Host "-----------------------------A4-----------------------------------------------"  -foregroundcolor Green
              foreach ($orWebsite in $oWebsite.Webs) {
                  $newpath = $mainpath + $orWebsite.ServerRelativeUrl
                  getSubWebs -spoCtx $spoCtx -path $newpath
                  Write-Host $newpath + " - " + $orWebsite.Title
              }
          }
         catch [System.Exception] 
 		{ 
         write-host -f red $_.Exception.ToString()    
 		}	           
      }
  
 #Definition of the function that allows to read property bags in SharePoint Online 
 function ReadSPO-PropertyBags 
 { 
     param ($sSiteUrl,$sUserName,$sPassword) 
     try 
     {     
         #Adding the Client OM Assemblies         
         #Add-Type –Path "C:Program FilesCommon Filesmicrosoft sharedWeb Server Extensions16ISAPIMicrosoft.SharePoint.Client.dll" 
 		#Add-Type –Path "C:Program FilesCommon Filesmicrosoft sharedWeb Server Extensions16ISAPIMicrosoft.SharePoint.Client.Runtime.dll" 
  
         #SPO Client Object Model Context 
         $spoCtx = New-Object Microsoft.SharePoint.Client.ClientContext($sSiteUrl) 
         $spoCredentials = New-Object Microsoft.SharePoint.Client.SharePointOnlineCredentials($sUserName, $sPassword)   
         $spoCtx.Credentials = $spoCredentials       
  
         Write-Host "----------------------------------------------------------------------------"  -foregroundcolor Green 
         Write-Host "Reading PropertyBags values for $sSiteUrl !!" -ForegroundColor Green 
         Write-Host "----------------------------------------------------------------------------"  -foregroundcolor Green 
         
 		$web = $spoCtx.Web 
 		$spoCtx.Load($web.Webs)
 		$spoCtx.ExecuteQuery()
 		
 		
 		foreach($web1 in $web.Webs){
 		Write-Host "----------------------------------------------------------------------------"  -foregroundcolor Green
 		Write-Host $web1.Title " - " $web1.Url " - " $web1.HasUniqueRoleAssignments -ForegroundColor Green 
 		Write-Host "----------------------------------------------------------------------------"  -foregroundcolor Green
 			$prop = $web1.AllProperties
 			$spoCtx.Load($prop)
 			$spoCtx.ExecuteQuery()
 			$keys=$prop.FieldValues.Keys 
         #$spoPropertyBagKeys 
 			foreach($key in $keys){ 
 				Write-Host $key "-" $prop[$key] -ForegroundColor Green 
 			}
 			Invoke-LoadMethod -Object $web1 -PropertyName "HasUniqueRoleAssignments"
 			
 			$spoCtx.ExecuteQuery()
             Write-Host  "HasUniqueRoleAssignments-" $web1.HasUniqueRoleAssignments -ForegroundColor Green
         } 
 		
 		#getSubWebs -spoCtx $spoCtx -path $sSiteUrl
 		      
         $spoCtx.Dispose() 
     } 
     catch [System.Exception] 
     { 
         write-host -f red $_.Exception.ToString()    
     }     
 } 
  
 #required parameters 
 $ssiteurl = "https://XXXX.sharepoint.com/sites/Dev018"
 $susername = "XXXX@example.com" 
 $spassword=convertto-securestring "MySecretPassword" -asplaintext -force
 $mainpath =  "https://XXXX.sharepoint.com/sites/Dev018"
 
 ReadSPO-PropertyBags -sSiteUrl $sSiteUrl -sUserName $sUserName -sPassword $sPassword
 

Author Info

Sriram Varadarajan
 
Solution Architect
 
Rate this article
 
Sriram is a Technology Evangelist with 15+ years experience in Microsoft Technologies. He is an enterprise architect working for large pharmaceutical organization which has presence globally with largest Microsoft implementation ...read more
 

Crawling a New WebApplication – Exception in the Crawl Log

Sathish Nadarajan
 
Solution Architect
November 3, 2014
 
Rate this article
 
Views
13036

I faced a problem like, when I search for some content, the result is not bringing me the content from one specific web application. The result fetches from all other web applications. But not from one web application. On the process of debugging, I found some interesting stuff. Thought of sharing with the sharepoint community.

First thing, verify the Crawl Log. On the crawl Log, I found some exception like, there is no access for the SPSearch Service Account to the Web Application.

At that time, we need to give access to the SPSearch Service Account on the Web Application.

Go to Central Administration

clip_image002

Click on the Manage Web Applications

Select the web application and Click on User Policy.

clip_image004

The below screen will be appearing.

clip_image006

On that, Add Users. Select the Zone as Default.

Add the user SPSearch with full Control.

clip_image008

That’s it. Now we gave permission for the SPSearch Account to the WebApplication.

Then come back to the Registry. There we need to do a small modification.

1. Once opened the registry editor, just navigate to "HKEY_LOCAL_MACHINE\SYSTEM\CurrentControlSet\Control\Lsa"

2. Right click on "Lsa" and create a new 32bit DWORD value

3. Rename it as "DisableLoopbackCheck" (Note: you cannot rename it actually. so, once created the DWORD value, directly paste/type as "DisableLoopbackCheck".

4. Then again modify the value of "DisableLoopbackCheck" as "1"

Close the registry editor.

Do an IISRESET.

Now start to crawl the content.

Now, the content from that WebApplication should appear on your Search Results. This will be really helpful, when trying to implement the Cross Site Publishing Concept in SharePoint 2013.

Happy Coding.

Sathish Nadarajan.

Author Info

Sathish Nadarajan
 
Solution Architect
 
Rate this article
 
Sathish is a Microsoft MVP for SharePoint (Office Servers and Services) having 15+ years of experience in Microsoft Technologies. He holds a Masters Degree in Computer Aided Design and Business ...read more
 

Leave a comment