Microsoft Graph Data Connect – Introduction & Configuration

Sathish Nadarajan
 
Solution Architect
October 30, 2018
 
Rate this article
 
Views
2917

In this article, let us see what is Graph Data Connect and how to configure the Graph Data Connect in our tenant.

Graph Data Connect – Is nothing but, pull the entire office 365 tenant information and keep it in a separate data storage, from where we can do any sort of Application insights.

For example, I am going to Pull the entire organizations mail box metadata and keep it in a Azure Blob Storage, from where I can utilize those data to do any sort of BI application.

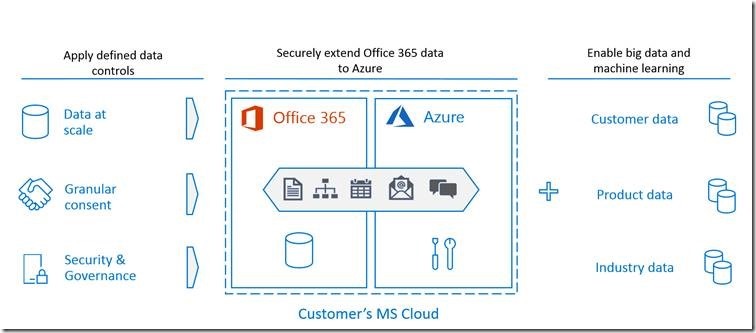
clip_image002

In the above diagram, it is clearly explained that, the data from the Office 365 can be extracted and kept in the Azure. With this, since the data of the customer resides inside their Azure tenant itself, the security of the data has been taken care of.

From Azure, we can utilize the data for any kind of BI applications.

In simple words, Graph Data Connect is

1. Creating a new model, which will extract the Users Centric data from Office 365 and push it to Azure with in their tenant.

2. Allows the developers to build intelligent applications using the Office 365 and Azure Resources.

3. When we try to pull the customers data, we are seeking an approval from the customer.

Comparing the Graph API and Graph Data Connect

Graph APIsGraph data connect
Access scopeSingle use / entire tenantMany users / groups
Access patternReal timeRecurrent schedule
Data operationsOperates on data masterOperates on cache of the data
Data protectionData is protected while in Microsoft 365Data protection is extended to the cache of data in your Azure subscription
User consentSelf; resource typesNone
Admin consentEntire organization; resource typesSelect groups of users; resource types & properties; excludes users
Access toolsRESTful web queriesAzure Data Factory

What we are going to do?

a. Data Resides inside Office 365.

b. Create a Pipeline, which will extract the data from O365.

c. Keeps the data on the Azure Blob Storage.

d. From there, the Developers can build intelligent applications.

How to configure Graph Data Connect for our Tenant?

It is a very simple step, which we need to enable at the tenant level.

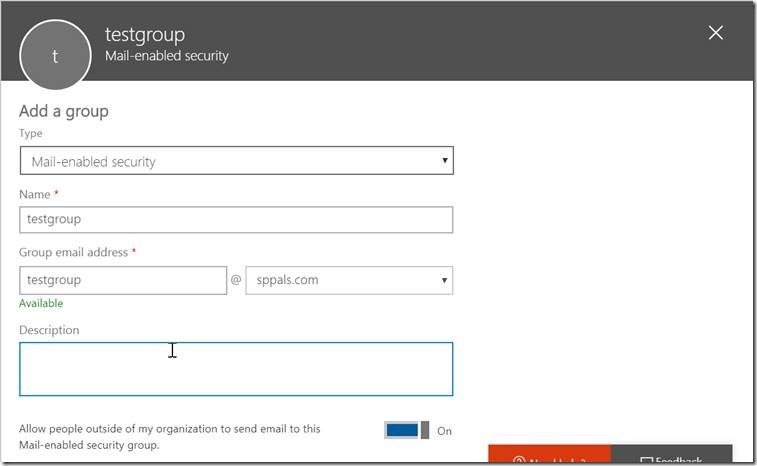
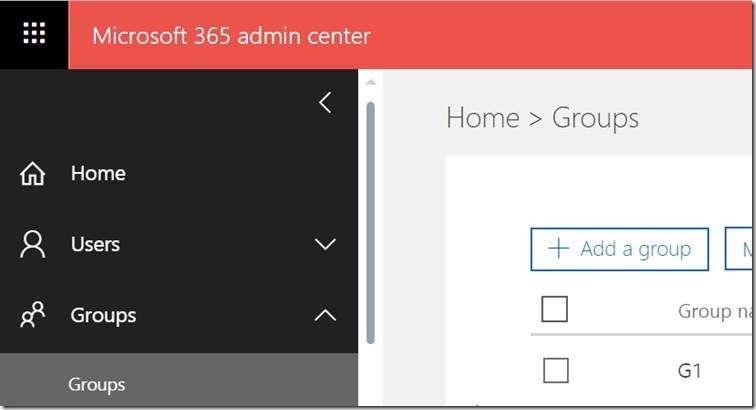
1. Create a Group by landing in https://admin.microsoft.com/AdminPortal/Home#/groups

clip_image004

The Group should be “Main Enabled Security Group”

clip_image006

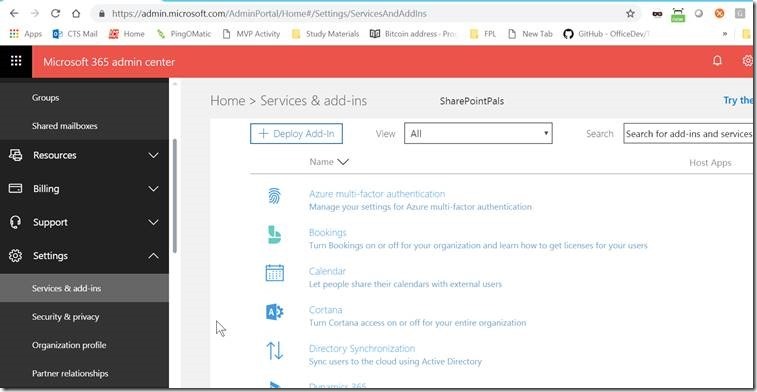
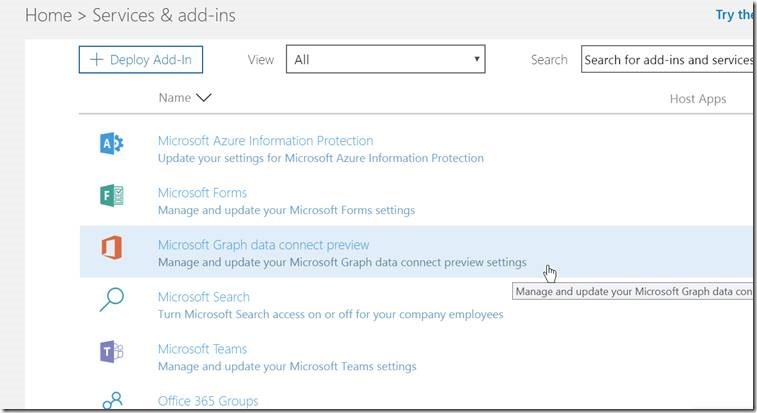
2. Go to the Services & Add Ins.

clip_image008

Select the Graph Data Connect

clip_image010

Enable it and select the Mailer security group which we created.

Ensure that, we need at least two users with admin privilege on that user group. Let us discuss further about this on the upcoming articles.

Happy Coding,

Sathish Nadarajan.

Author Info

Sathish Nadarajan
 
Solution Architect
 
Rate this article
 
Sathish is a Microsoft MVP for SharePoint (Office Servers and Services) having 15+ years of experience in Microsoft Technologies. He holds a Masters Degree in Computer Aided Design and Business ...read more
 

Record Centre in SharePoint Office 365 – An Introduction

Sathish Nadarajan
 
Solution Architect
March 1, 2017
 
Rate this article
 
Views
3194

I hope all of us were using many site templates in SharePoint. But, the Record Centre will be used by very few only. Recently I was working on the Record Centres and thought of sharing the experience with the community.

· The Record Centre Site is similar to other site templates like team site, publishing site. But, it has few preconfigured items to manage the records.

· The Record Centre Site Templates takes care of entire record management process like, Record Collection, Record Management, Record Disposition etc.,

· It has preconfigured retention programs which can be customized.

· Record Centre has the built in features like Versioning, Auditing, Metadata management, eDiscovery, record routing.

Record Management Plan

The record management plan differs from organization to organization. But in general, before implementing any Record Centre, we need to consider the below items.

· File Plan

· Content Type

· Retention Rules

· Record Libraries

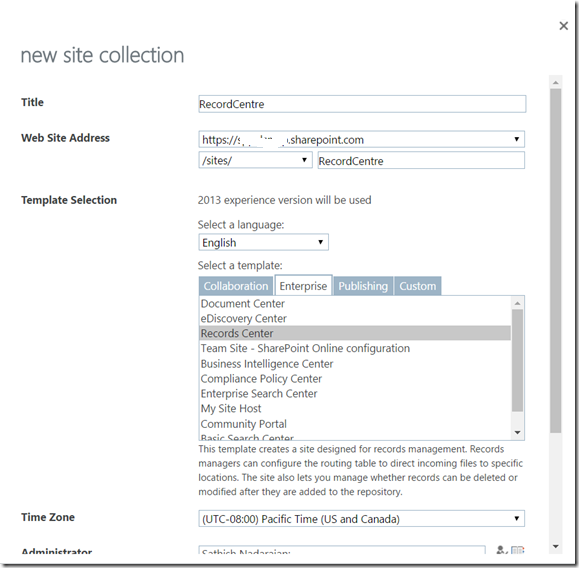
The Record Centre can be created using the below Template.

clip_image001

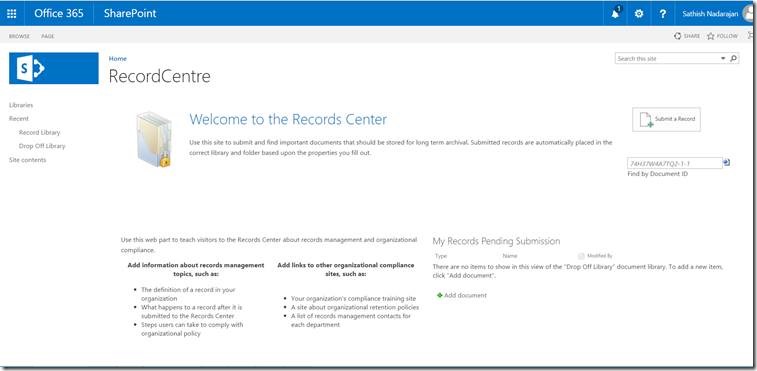
Once, we create our record centre, it will be as below.

clip_image003

Let us see the in-depth record centre configuration in the upcoming articles.

Happy Coding,

Sathish Nadarajan.

Author Info

Sathish Nadarajan
 
Solution Architect
 
Rate this article
 
Sathish is a Microsoft MVP for SharePoint (Office Servers and Services) having 15+ years of experience in Microsoft Technologies. He holds a Masters Degree in Computer Aided Design and Business ...read more
 

Introduction to Angular JS

Tarun Kumar Chatterjee
 
Net – Technology Specialist
April 19, 2016
 
Rate this article
 
Views
7514

AngularJS is a JavaScript framework which simplifies binding JavaScript objects with HTML UI elements.

To download the angular package into your project you can run the following command: Install-Package angularjs

Let us try to understand some of the basics implementations on Angular JS.

Two way data binding:

We have a two way data binding when a model variable is bound to a HTML element that can both change and display the value of the variable. In general, we could have more than one HTML element bound to the same variable. We use the ng-model directive to bind a model variable to the HTML element that can not only display its value, but also change it.

In the example, we bind the name model variables to a HTML input element. When the page is loaded, the value of the input element is initialized to the respective model variable and whenever the user types something in an input, the value of the model variable is modified as well (two ways).

 <!DOCTYPE html>
 <html>
 <head>
  <title>AngularJS Demo</title>
  
 <link href="~/Content/bootstrap.css" rel="stylesheet" />
 <link href="~/Content/bootstrap-theme.css" rel="stylesheet" />
 <script src="~/Scripts/angular.js"></script>
 <script >
     //defining module
     var myapp = angular.module('myapp', []);
     myapp.controller('testContoller', testController);
 
     function testController($scope){
         var vm = this;
         vm.name = "Tarun Chatterjee";        
     }
 </script>
 </head>
 <body ng-app="myapp">
     <div  ng-controller="testContoller">
         <p>Name: {{name}}</p>
         <input type="text" ng-model="name">
     </div> 
 </body>
 </html>
 

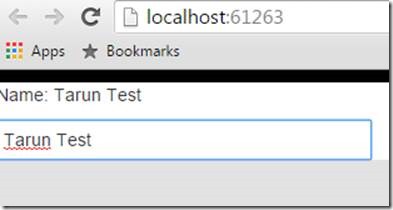
Output: Typing in the text field will automatically reflect the value on “name” place holder
clip_image002

Custom directive:

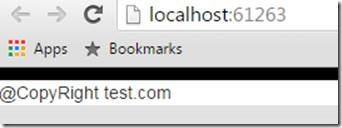
In angular custom directive the best practice is to follow camel casing and that also with at least two letter’s. In camel case naming convention we start with a small letter, followed by a capital letter for every word.

If you are making a one letter prefix like “copyright” it’s very much possible that tomorrow if HTML team creates a tag with the same name, it will clash with your custom directive. That’s why angular team recommends camel case which inserts a “-“ in between to avoid further collision with future HTML tag’s.

In angular if it is like: copyRight then in html we will have to write as copy-right

 <!DOCTYPE html>
 <html>
 <head>
  <title>AngularJS Demo</title>
  
 <link href="~/Content/bootstrap.css" rel="stylesheet" />
 <link href="~/Content/bootstrap-theme.css" rel="stylesheet" />
 <script src="~/Scripts/angular.js"></script>
     
 <script  type="text/javascript">
 
     //defining module
     var myapp = angular.module('myapp', []);
     
     myapp.directive('copyRight', function () {
         var directive = {};
         directive.template = '@@CopyRight test.com';
         return directive;
                
     });        
     
    
 </script>
 </head>
 
 <body ng-app="myapp">    
 <div copy-right></div>     
 
 </body>
 </html>


clip_image004

 <!DOCTYPE html>
 <html>
 <head>
     <title>AngularJS Demo</title>
 
     <link href="~/Content/bootstrap.css" rel="stylesheet" />
     <link href="~/Content/bootstrap-theme.css" rel="stylesheet" />
     <script src="~/Scripts/angular.js"></script>
 
     <script type="text/javascript">
 
         //defining module
         var myapp = angular.module('myapp', []);
 
         myapp.controller('MyController', ['$scope', function($scope) {
             $scope.customer = {
                 name: 'Tarun Chatterjee',
                 address: 'Kolkata'
             };
         }])
         .directive('myDirective', function () {
             var directive = {};
             directive.restrict = 'A';
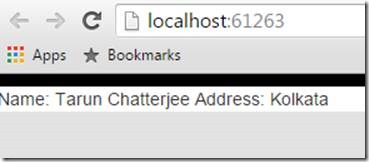
             directive.template = 'Name: {{customer.name}} Address: {{customer.address}}'; // we need use templateUrl instead of template if we want to refer a html file  
             return directive;
         });
 
     </script>
 </head>
 
 <body ng-app="myapp">
     <div ng-controller="MyController">
         <div my-directive></div>
     </div>
 
 </body>
 </html>


clip_image006

Best Practice: Unless your template is very small, it’s typically better to break it apart into its own HTML file and load it with the templateUrl option.

· The “restrict” property is set to “E” which means that this directive can only be used at element level as shown in the code snippet below.

<userinfo></userinfo>

· If you try to use it at an attribute level as shown in the below code it will not work.

<div userinfo></div>

So “E” for element, “A” for attribute & “C” for CSS.

I want custom directives to be applied on element as well as attributes directive.restrict = ‘EA’;

AEC – is for either attribute or element or class name

Directive that Manipulates the DOM

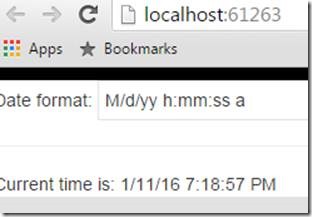
Directives that want to modify the DOM typically use the link option to register DOM listeners as well as update the DOM. It is executed after the template has been cloned and is where directive logic will be put.

 <!DOCTYPE html>
 <html>
 <head>
     <title>AngularJS Demo</title>
 
     <link href="~/Content/bootstrap.css" rel="stylesheet" />
     <link href="~/Content/bootstrap-theme.css" rel="stylesheet" />
     <script src="~/Scripts/angular.js"></script>
 
     <script type="text/javascript">
 
         //defining module
         var myapp = angular.module('myapp', []);
 
         myapp.controller('MyController', ['$scope', function($scope) {
             $scope.format = 'M/d/yy h:mm:ss a';
         }])
        .directive('myCurrentTime', ['$interval', 'dateFilter', function ($interval, dateFilter) {
 
            function link(scope, element, attrs) {
                var format,
                    timeoutId;
 
                function updateTime() {
                    element.text(dateFilter(new Date(), format));
                }
 
                scope.$watch(attrs.myCurrentTime, function (value) {
                    format = value;
                    updateTime();
                });
 
               
                // start the UI update process; save the timeoutId for canceling
                timeoutId = $interval(function () {
                    updateTime(); // update DOM
                }, 1000);
            }
 
            return {
                link: link
            };
        }]);
 
     </script>
 </head>
 
 <body ng-app="myapp">
    
     <div ng-controller="MyController">
         Date format: <input type="text" ng-model="format"> <hr/>
         Current time is: <span my-current-time="format"></span>
     </div>
 
 </body>
 </html>


clip_image008

Link can make a directive that reacts to events on its elements. That we will look into the form validation section.

$watch():

The $scope.watch() function creates a watch of some variable. When you register a watch you pass two functions as parameters to the $watch() function:

  • A value function
  • A listener function

This example value function returns the $scope variable scope.data.myVar. If the value of this variable changes, a different value will be returned & AngularJS will call the listener function.

 $scope.$watch(function (scope) { return scope.data.myVar },
               function (newValue, oldValue) {
                   document.getElementById("").innerHTML =
                       "" + newValue + "";
               }
              );


$digest():

The $scope.$digest() function iterates through all the watches in the $scope object, and its child $scope objects (if it has any). When $digest() iterates over the watches, it calls the value function for each watch. If the value returned by the value function is different than the value it returned the last time it was called, the listener function for that watch is called.

You may encounter some corner cases where AngularJS does not call the $digest() function for you. You will usually detect that by noticing that the data bindings do not update the displayed values. In that case, call $scope.$digest() and it should work. Or, you can perhaps use $scope.$apply() instead which I will explain in the next section.

$apply():

The $scope.$apply() function takes a function as parameter which is executed, and after that $scope.$digest() is called internally. That makes it easier for you to make sure that all watches are checked, and thus all data bindings refreshed. Here is an $apply() example:

 $scope.$apply(function () {
 $scope.data.myVar = "Another value";
 });
 

Form Validation:

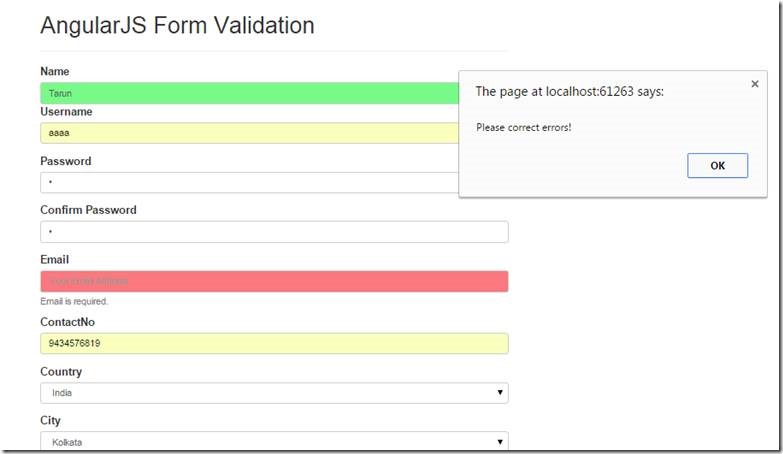
It should be noted that while client-side validation plays an important role in providing good user experience, it can easily be bypassed and thus cannot be trusted. Server-side validation is still necessary for a secure application.

To allow styling of form as well as controls, ngModel adds the following CSS classes:

  • ng-valid: the model is valid
  • ng-invalid: the model is invalid
  • ng-valid-[key]: for each valid key added by $setValidity
  • ng-invalid-[key]: for each invalid key added by $setValidity
  • ng-pristine: the control hasn’t been interacted with yet
  • ng-dirty: the control has been interacted with
  • ng-touched: the control has been blurred
  • ng-untouched: the control hasn’t been blurred
  • ng-pending: any $asyncValidators are unfulfilled

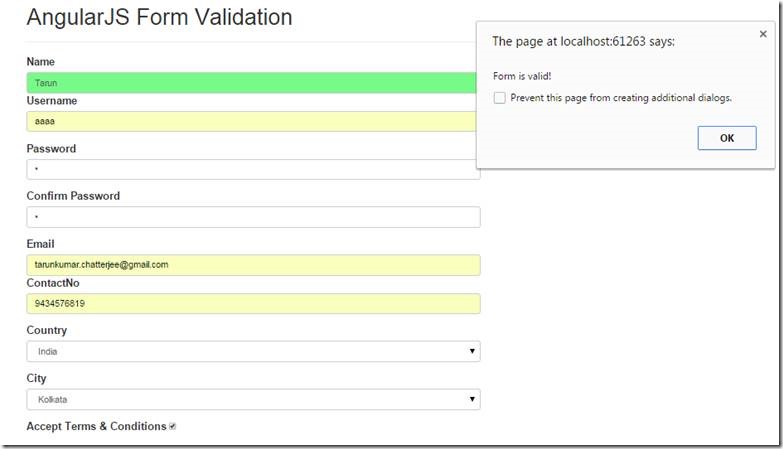
In the example both user.name and user.email are required, but are rendered with red background only after the input is blurred (loses focus). This ensures that the user is not distracted with an error until after interacting with the control & failing to satisfy its validity.

 <!DOCTYPE html>
 <html>
 <head>
     <title>AngularJS & Bootstrap Form Validation</title>
 
     <link href="~/Content/bootstrap.css" rel="stylesheet" />
     <link href="~/Content/bootstrap-theme.css" rel="stylesheet" />
     <script src="~/Scripts/angular.js"></script>
     <script src="~/Scripts/angular.min.js"></script>
     <script src="~/Scripts/jquery-1.9.1.min.js"></script>
     <style type="text/css">
         .css-form input.ng-invalid.ng-touched {
             background-color: #FA787E;
         }
 
         .css-form input.ng-valid.ng-touched {
             background-color: #78FA89;
         }
     </style>
     <script>
 
         //defining module
         var myapp = angular.module('myapp', []);
 
 
         //creating custom directive
         myapp.directive('ngCompare', function () {
             return {
                 require: 'ngModel',
                 link: function (scope, currentEl, attrs, ctrl) {
                     var comparefield = $('[name="password"]'); //getting first element
                     compareEl = angular.element(comparefield);
 
                     //current field key up
                     currentEl.on('keyup', function () {
                         if (compareEl.val() != "") {
                             var isMatch = currentEl.val() === compareEl.val();
                             ctrl.$setValidity('compare', isMatch);
                             scope.$digest();
                         }
                     });
 
                     //Element to compare field key up
                     compareEl.on('keyup', function () {
                         if (currentEl.val() != "") {
                             var isMatch = currentEl.val() === compareEl.val();
                             ctrl.$setValidity('compare', isMatch);
                             scope.$digest();
                         }
                     });
                 }
             }
         });
 
         // create angular controller
         myapp.controller('mainController', function ($scope) {
             // Set the 'submitted' flag to true
             $scope.submitted = true;
 
             $scope.countryList = [
             { CountryId: 1, Name: 'India' },
             { CountryId: 2, Name: 'USA' }
             ];
 
             $scope.cityList = [];
 
             $scope.$watch('user.country', function (newVal, oldVal) {
 
                 if (newVal == 1)
                     $scope.cityList = [
                     { CountryId: 1, CityId: 1, Name: 'Kolkata' },
                     { CountryId: 1, CityId: 2, Name: 'Delhi' }];
                 else if (newVal == 2)
                     $scope.cityList = [
                     { CountryId: 2, CityId: 3, Name: 'Denver' },
                     { CountryId: 2, CityId: 4, Name: 'NewYork' }];
                 else
                     $scope.cityList = [];
             });
 
             // function to submit the form after all validation has occurred 
             $scope.submitForm = function () {
 
 
                 if ($scope.userForm.$valid) {
                     alert("Form is valid!");
                 }
                 else {
                     alert("Please correct errors!");
                 }
             };
         });
 
     </script>
 </head>
 <body ng-app="myapp">
 
 
     <div class="container" ng-controller="mainController">
         <div class="col-sm-8 col-sm-offset-2">
 
             <!-- PAGE HEADER -->
             <div class="page-header">
                 <h1>AngularJS Form Validation</h1>
             </div>
 
             <!-- FORM : YOU CAN DISABLE, HTML5 VALIDATION BY USING "novalidate" ATTRIBUTE-->
             <form name="userForm" ng-submit="submitForm()" novalidate>
 
                 <div novalidate class="css-form" class="form-group">
                     <label>Name</label>
                     <input type="text" name="name" class="form-control" ng-model="user.name" placeholder="Your Name" ng-required="true">
                     <p ng-show="userForm.username.$error.required && (userForm.username.$dirty || submitted)" class="help-block">Name is required.</p>
                 </div>
 
 
                 <!-- USERNAME -->
                 <div class="form-group" ng-class="{ 'has-error' : userForm.username.$invalid && (userForm.username.$dirty || submitted)}">
                     <label>Username</label>
                     <input type="text" name="username" class="form-control" ng-model="user.username" placeholder="Your Username" ng-minlength="3" ng-maxlength="8" ng-required="true">
                     <p ng-show="userForm.username.$error.required && (userForm.username.$dirty || submitted)" class="help-block">You username is required.</p>
                     <p ng-show="userForm.username.$error.minlength && (userForm.username.$dirty || submitted)" class="help-block">Username is too short.</p>
                     <p ng-show="userForm.username.$error.maxlength && (userForm.username.$dirty || submitted)" class="help-block">Username is too long.</p>
                 </div>
 
                 <!-- PASSWORD -->
                 <div class="form-group" ng-class="{ 'has-error' : userForm.password.$invalid && (userForm.password.$dirty || submitted)}">
                     <label>Password</label>
                     <input type="Password" name="password" class="form-control" ng-model="user.password" placeholder="Your Password" ng-required="true">
                     <p ng-show="userForm.password.$error.required && (userForm.password.$dirty || submitted)" class="help-block">Your password is required.</p>
                 </div>
 
                 <!-- CONFIRM PASSWORD -->
                 <div class="form-group" ng-class="{ 'has-error' : userForm.confirmPassword.$invalid && (userForm.confirmPassword.$dirty || submitted)}">
                     <label>Confirm Password</label>
                     <input type="Password" name="confirmPassword" class="form-control" ng-model="user.confirmPassword" placeholder="Confirm Your Password" ng-compare="password" ng-required="true">
                     <p ng-show="userForm.confirmPassword.$error.required && (userForm.confirmPassword.$dirty || submitted)" class="help-block">Your confirm password is required.</p>
                     <p ng-show="userForm.confirmPassword.$error.compare && (userForm.confirmPassword.$dirty || submitted)" class="help-block">Confirm password doesnot match.</p>
                 </div>
 
                 <!-- EMAIL -->
                 <div novalidate class="css-form" class="form-group">
                     <label>Email</label>
                     <input type="email" name="email" class="form-control" ng-model="user.email" placeholder="Your Email Address" ng-required="true">
                     <p ng-show="userForm.email.$error.required && (userForm.email.$dirty || submitted)" class="help-block">Email is required.</p>
                     <p ng-show="userForm.email.$error.email && (userForm.email.$dirty || submitted)" class="help-block">Enter a valid email.</p>
                 </div>
 
                 <!-- CONTACTNO -->
                 <div class="form-group" ng-class="{ 'has-error' : userForm.contactno.$invalid && (userForm.contactno.$dirty || submitted) }">
                     <label>ContactNo</label>
                     <input type="text" name="contactno" class="form-control" ng-model="user.contactno" placeholder="Your Contact No" ng-pattern="/^[789]d{9}$/" maxlength="10">
                     <p ng-show="userForm.contactno.$error.pattern && (userForm.contactno.$dirty || submitted)" class="help-block">Enter a valid contactno.</p>
                 </div>
 
                 <!-- COUNTRY -->
                 <div class="form-group" ng-class="{ 'has-error' : userForm.country.$invalid && (userForm.country.$dirty || submitted)}">
                     <label>Country</label>
                     <select name="country" class="form-control"
                         ng-model="user.country"
                         ng-options="country.CountryId as country.Name for country in countryList"
                         ng-required="true">
                         <option value=''>Select</option>
                     </select>
                     <p ng-show="userForm.country.$error.required && (userForm.country.$dirty || submitted)" class="help-block">Select country.</p>
                 </div>
 
                 <!-- CITY -->
                 <div class="form-group" ng-class="{ 'has-error' : userForm.city.$invalid && (userForm.city.$dirty || submitted)}">
                     <label>City</label>
                     <select name="city" class="form-control"
                         ng-model="user.city"
                         ng-options="city.CityId as city.Name for city in cityList"
                         ng-required="true">
                         <option value=''>Select</option>
                     </select>
                     <p ng-show="userForm.city.$error.required && (userForm.city.$dirty || submitted)" class="help-block">Select city.</p>
                 </div>
 
                 <!-- TERMS & CONDITIONS -->
                 <div class="form-group" ng-class="{ 'has-error' : userForm.terms.$invalid && (userForm.terms.$dirty || submitted)}">
                     <label>Accept Terms & Conditions</label>
                     <input type="checkbox" value="" name="terms" ng-model="user.terms" ng-required="true" />
                     <p ng-show="userForm.terms.$error.required && (userForm.terms.$dirty || submitted)" class="help-block">Accept terms & conditions.</p>
                 </div>
 
                 <!-- ng-disabled FOR ENABLING AND DISABLING SUBMIT BUTTON -->
                 <!--<button type="submit" class="btn btn-primary" ng-disabled="userForm.$invalid">Register</button>-->
                 <button type="submit" class="btn btn-primary">Register</button>
             </form>
         </div>
     </div>
     <br />
 </body>
 </html>
 

clip_image010

clip_image012

Happy Coding

Tarun Kumar Chatterjee
Author Info

Tarun Kumar Chatterjee
 
Net – Technology Specialist
 
Rate this article
 
Tarun has been working in IT Industry for over 12+ years. He holds a B-tech degree. He is passionate about learning and sharing the tricks and tips in Azure, .Net ...read more
 

SharePoint 2016 – Hardware and Software Requirements.

Sathish Nadarajan
 
Solution Architect
March 15, 2016
 
Rate this article
 
Views
29296

The much awaited SharePoint 2016 Release to Manufacturing (RTM) has been released Yesterday (14 March 2016). With that, let us start exploring SharePoint 2016. But, I feel there will be a lot of configurations/prerequisites might be required to install SharePoint 2016 on our Developer Boxes. But, watch out in this space for more information, as let me try to install, explore and share the experience with the readers here as a series of articles.

For the time being, let me share some of the information which I got regarding the SharePoint 2016 from the technet, Microsoft Blogs etc., here, as a detailed all in one place kind of stuff. I have not tried, experienced the new features of SP2016 at this point. Treat this post as a consolidation of various technet articles, blogs etc., and as a beginning to SP2016.

Before digging into the new features, capabilities of SP2016, let us start with how to install on our Developer Boxes.

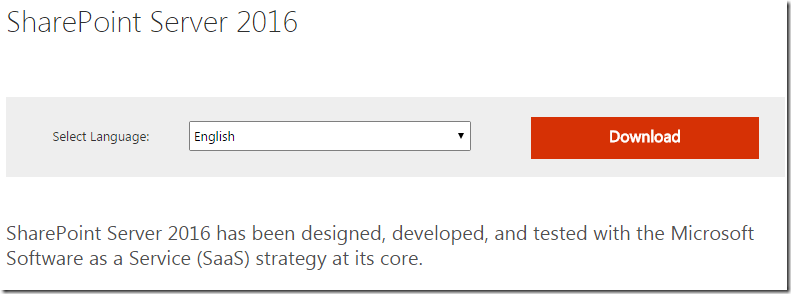
First of all, the link to download the SP2016 Trial Version is SP2016 Trial Download

On the page, we can see the download link.

clip_image001

And the Installation instructions are

To start the download:
       1. Select the desired installation language from Select Language.
       2. Click the Download button.
       3. Click Save to copy the disc image file to your computer.
To install SharePoint Server 2016:
       1. Double click the disc image file to mount it as a drive on your computer.
       2. Navigate to the mounted drive.
       3. Run prerequisiteinstaller.exe to launch the Microsoft SharePoint 2016 Products Preparation Tool.
       4. Run setup.exe to launch Microsoft SharePoint Server 2016 Setup.
       5. When prompted, use the following 180-day trial product key: NQGJR-63HC8-XCRQH-MYVCH-3J3QR
Review Install SharePoint Server 2016 for detailed setup instructions.

Minimum Hardware Requirements

Installation scenarioDeployment type and scaleRAMProcessorHard disk space
Single server role that uses SQL ServerDevelopment or evaluation installation of SharePoint Server 2016 with the minimum recommended services for development environments. For information, see Minimum recommended services for development environments.16 GB64-bit, 4 cores80 GB for system drive

100 GB for second drive

Single server role that uses SQL ServerPilot or user acceptance test installation of SharePoint Server 2016 running all available services for development environments.24 GB64-bit, 4 cores80 GB for system drive

100 GB for second drive and additional drives

Web server or application server in a three-tier farmDevelopment or evaluation installation of SharePoint Server 2016 with a minimum number of services.12 GB64-bit, 4 cores80 GB for system drive

80 GB for second drive

Web server or application server in a three-tier farmPilot, user acceptance test, or production deployment of SharePoint Server 2016 running all available services.16 GB64-bit, 4 cores80 GB for system drive

80 GB for second drive and additional drives

Minimum Software Requirements

Minimum requirements for a database server in a farm:

·

    • The 64-bit edition of Microsoft SQL Server 2014 Service Pack 1 (SP1)
clip_image002Note:
SQL Server Express is not supported.
  • The 64-bit edition of Windows Server 2012 R2 Standard or Datacenter

Minimum requirements for SharePoint servers in a farm:

  • The 64-bit edition of Windows Server 2012 R2 Standard or Datacenter
  • The Microsoft SharePoint Products Preparation Tool installs the following prerequisites for front-end web servers and application servers in a farm:
    • Web Server (IIS) role
    • Application Server role
    • Microsoft .NET Framework version 4.6
    • Microsoft SQL Server 2012 Native Client
    • Microsoft WCF Data Services 5.6
    • Microsoft Information Protection and Control Client (MSIPC)
    • Microsoft Sync Framework Runtime v1.0 SP1 (x64)
    • Windows Server AppFabric 1.1
    • Cumulative Update Package 7 for Microsoft AppFabric 1.1 for Windows Server (KB 3092423)
    • Microsoft ODBC Driver 11 for SQL Server
    • Visual C++ Redistributable Package for Visual Studio 2012
    • Visual C++ Redistributable Package for Visual Studio 2015

Prerequisites download Links

The prerequisites can be downloaded from the below links.

· Windows Server 2012 R2

· Office 365 Enterprise

· Microsoft SQL Server 2014 Service Pack 1 (SP1)

· Microsoft .NET Framework version 4.6

· Microsoft WCF Data Services 5.6

· Microsoft Information Protection and Control Client (MSIPC)

· Microsoft SQL Server 2012 Native Client (installs with Microsoft SQL Server 2012 Feature Pack)

· Microsoft ODBC Driver 11 for SQL Server

· Microsoft Sync Framework Runtime v1.0 SP1 (x64)

· Windows Server AppFabric 1.1

· Cumulative Update Package 7 for AppFabric 1.1 for Windows Server

· Visual C++ Redistributable Package for Visual Studio 2012

· Visual C++ Redistributable Package for Visual Studio 2015

· Microsoft Silverlight 3

· Exchange Web Services Managed API, version 1.2

At this Point, this may not be very clear. But, I just wanted to make sure that links are available to everyone. Let us be more precise on the upcoming articles, once start installation.

For More detailed information, have a look on this.

Happy Coding,

Sathish Nadarajan.

Category : SharePoint

Author Info

Sathish Nadarajan
 
Solution Architect
 
Rate this article
 
Sathish is a Microsoft MVP for SharePoint (Office Servers and Services) having 15+ years of experience in Microsoft Technologies. He holds a Masters Degree in Computer Aided Design and Business ...read more
 

Cross Site Publishing – End to End Implementation with Steps – Part 0

Sathish Nadarajan
 
Solution Architect
February 21, 2015
 
Rate this article
 
Views
9578

Cross Site Publishing – an important effective feature introduced by Microsoft in SharePoint 2013. I thought of sharing some interesting procedures to implement this in our business requirements. But explaining them all in a single article, it is not practically feasible. Hence, I am planning to write this as a series. The overall steps are as follows.

1. Introduction to Cross Site Publishing

2. Site Structures

3. Managed Metadata Service Application Creation

4. Content Type Hub Creation

5. Managed Property and Crawled Property

6. Authoring Site – Enable Library as a Catalog

7. Publishing Site – Navigation Settings

8. Publishing Site – Connect to a Catalog

9. Custom WebParts Creation – Object Model


To create this series, I took a blank environment. That’s the reason, I am documenting each and every step for a better understanding. Though many of us would have come across, many of these steps during our development phase, I am explaining these things once again for a better understanding.

Let us proceed with the Part1

Happy Coding.

Sathish Nadarajan.

Author Info

Sathish Nadarajan
 
Solution Architect
 
Rate this article
 
Sathish is a Microsoft MVP for SharePoint (Office Servers and Services) having 15+ years of experience in Microsoft Technologies. He holds a Masters Degree in Computer Aided Design and Business ...read more
 

Cross Site Publishing – Introduction – Part 1

Sathish Nadarajan
 
Solution Architect
 
Rate this article
 
Views
9603

Introduction

In this series, let us try to understand the end-to-end process/implementation involved in Cross Site Publishing (CSP) in SharePoint 2013. CSP is a feature which is newly introduced in SharePoint 2013 which has a strong impact in the SharePoint 2013 Web Content Management Portals Implementation. Its becoming Mandatory for every organisation/developer to know about this in detail as many of the customers now a days are looking for segregating the Contents from the Publishing Site. Let me try to cover this topic with a detailed information.

Cross Site Publishing (CSP)

Before diving into the implementation, let us see what exactly CSP is. Cross Site Publishing is nothing but the content is going to reside on a separate web application and the publishing site is going to reside on a separate web application. This relationship between the Authoring(Content) and the Publishing site are Many to Many. i.e., A single content source can be utilized by more than one publishing site and in vice versa.

Scenarios where CSP can be used

There are many scenarios in which CSP can be used. Let us see two of them. This will give the readers an idea about this technique before moving technically.

1. The customer wants to have a Central Repository, where a set of Authors will write their content periodically. There are many publishing sites, which has a different branding (User Interfaces) based on their publishing frequency. For e.g., a Monthly Updating Site which will consolidate all the contents which were published every month and a Weekly updating site which will consolidate all the contents in a weekly manner. For both the sites, the Source of Content is going to be the Same Content Site.

2. The other scenario could be, the customer is having a set of Authors who will be writing in a specific areas. E.g., Products, Legislative Issues etc., By that time, if customer wants to keep these two set of authors separately, we can keep 2 authoring sites. One for the Products and the second is for the Legislative Issues. The publishing site can consume the content from both these Content Site.

Note:In this entire content, both the words ‘Content’ and ‘Authoring’, I am referring are meant to same. In some places, I might use ‘Content’ and in some places ‘Authoring’.

Advantages of CSP

1. Many publishing site can be kept with minimal effort, as the content is going to be consumed from a different site collection.

2. No duplication of the Content. As the Content is in a different site collection, many site collections can consume the content from the single source itself.

3. Maintaining the User Permissions. Even the Authors will not have edit access to the Publishing Site directly.

4. Publishing Site – Secured. As the authors were not directly given the write/edit permission on the publishing site, the publishing site will be more secured. No one apart from the Admin can publish the content. The admin can review the content from the Authoring Site itself and then once he feel good, then he can publish that.

5. Preview – The content will not be published to the Published site directly. It can be reviewed on the Authoring site and then, it will get published to Publishing site.

With this basic introduction, let us proceed to the implementation. Part 2

Happy Coding.

Sathish Nadarajan.

Author Info

Sathish Nadarajan
 
Solution Architect
 
Rate this article
 
Sathish is a Microsoft MVP for SharePoint (Office Servers and Services) having 15+ years of experience in Microsoft Technologies. He holds a Masters Degree in Computer Aided Design and Business ...read more
 

Leave a comment